
![CLOUDY BAY [6 Pack] 6inch Smart WiFi LED Recessed Lights,RGBCW Color Changing Recessed Lighting,Compatible with Alexa and Google Home Assistant,No Hub Required,15W 2700K-6500K,CRI90+ Wet Location](https://m.media-amazon.com/images/I/41H5465vC2L.jpg)

Introduction
Mini barns attract attention beyond their traditional agricultural purpose. Many property owners and designers convert these compact structures into cozy homes or living spaces. Their simple design and sturdy framework make them ideal candidates for transformation. Understanding how to adapt these structures can give you creative options for extra space, guest houses, or even primary dwellings.
The process involves careful planning, respecting the barn’s original architecture, and making the most of its limited area. This article guides you through practical steps to convert mini barns effectively. You will discover the benefits, design considerations, and key challenges to tackle. Whether you want ideas for your property or are curious about barn conversions, you will find useful insights here.
Understanding Mini Barns and Their Potential

Mini barns are small-scale versions of traditional barns originally built for storing tools, feed, and sheltering livestock on farms. Their design is simple yet sturdy, focusing on functionality over size. Typically, these barns range from 8 to 16 feet in width and 12 to 20 feet in length. Their compact size makes them easier to maintain compared to larger barns.
The strong wooden frameworks and solid roofing are features that have allowed mini barns to last many years, even in harsh weather. This durability makes them good candidates for conversion into living spaces. Their rustic, timeless look adds a natural charm that many homeowners and designers find appealing.
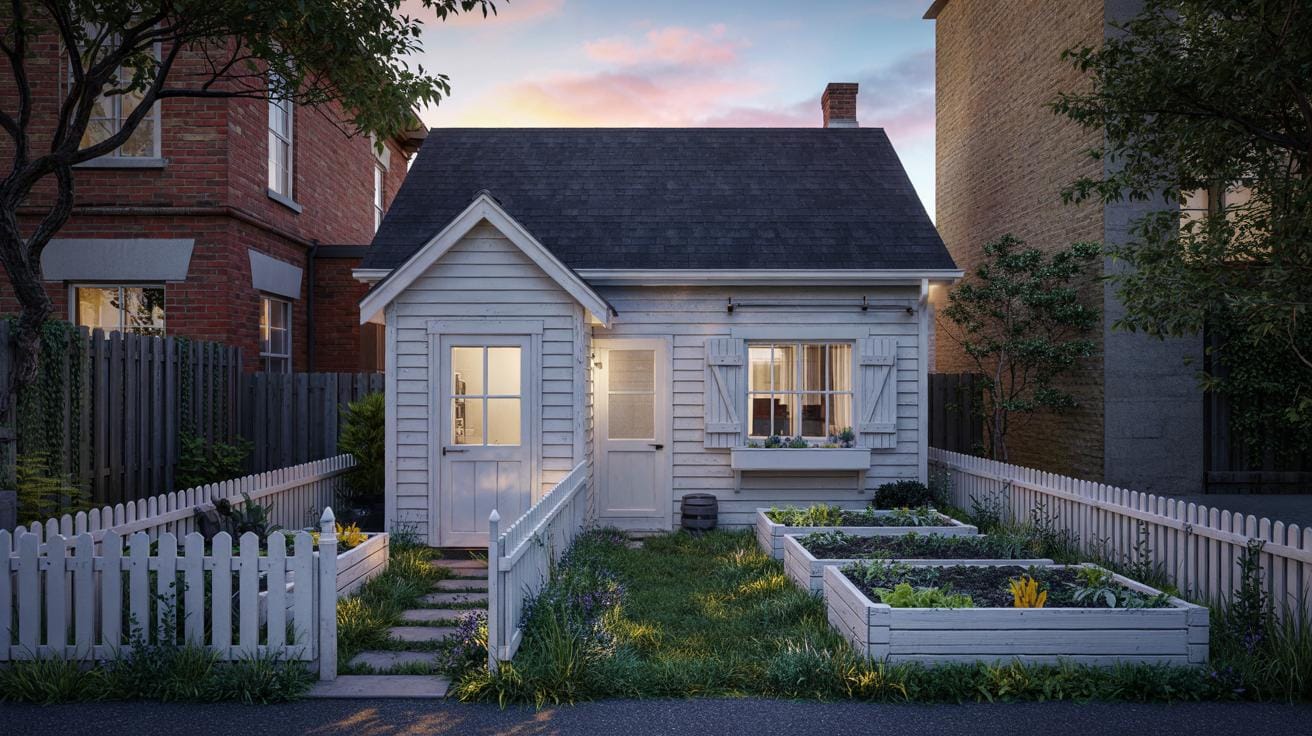
People have begun rethinking these structures not just as farm tools but as practical homes or retreats. Could your next cozy living space be hidden inside one of these compact barns? The idea of turning a mini barn into a home is gaining traction because it combines simplicity, cost savings, and style in a unique way.
What Defines a Mini Barn
A mini barn usually measures between 8 by 12 feet and 12 by 20 feet. The framework consists of solid timber beams, often made from pine or cedar. Walls are typically built from wood siding or sometimes metal panels. The roof is usually gabled, covered with shingles or metal sheets that withstand rain and snow well.
Compared to full-sized barns, which can stretch over 30 feet wide and 50 feet long, mini barns require less land and fewer materials. This smaller footprint makes them easier to place in a residential yard without overwhelming the space. Their construction focuses on strength and straightforward design rather than storage capacity.
If you look closely at a mini barn, you’ll notice how each part is designed to last and serve a purpose. This practicality is exactly what makes these structures so useful as a base for tiny homes or backyard studios.
Why Mini Barns are Ideal for Conversion
Mini barns offer several benefits that make conversion appealing. First, their existing wooden frames cut down on building costs since you don’t need to start from scratch. This can save thousands of dollars on materials and labor. The durable framework already supports the structure well, minimizing the work required to make it livable.
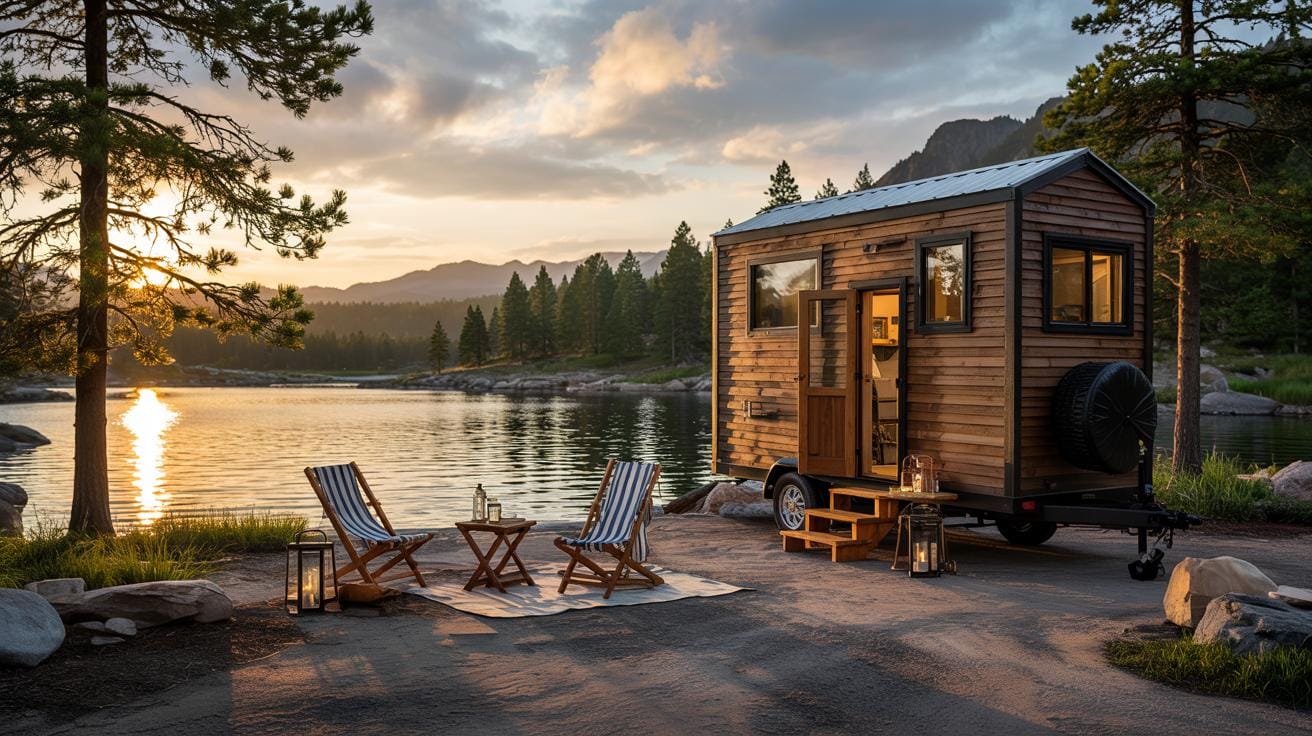
The compact size of mini barns also means less space to heat and cool, which lowers utility costs once converted. They often include unique features like exposed beams and large doors, which add character to a living space you won’t find in traditional houses.
Converting a mini barn challenges you to be creative with space. This can lead to clever layouts and multifunctional rooms. Have you thought about how using a mini barn might push your design ideas further while keeping costs manageable?
Planning Your Mini Barn Conversion Project

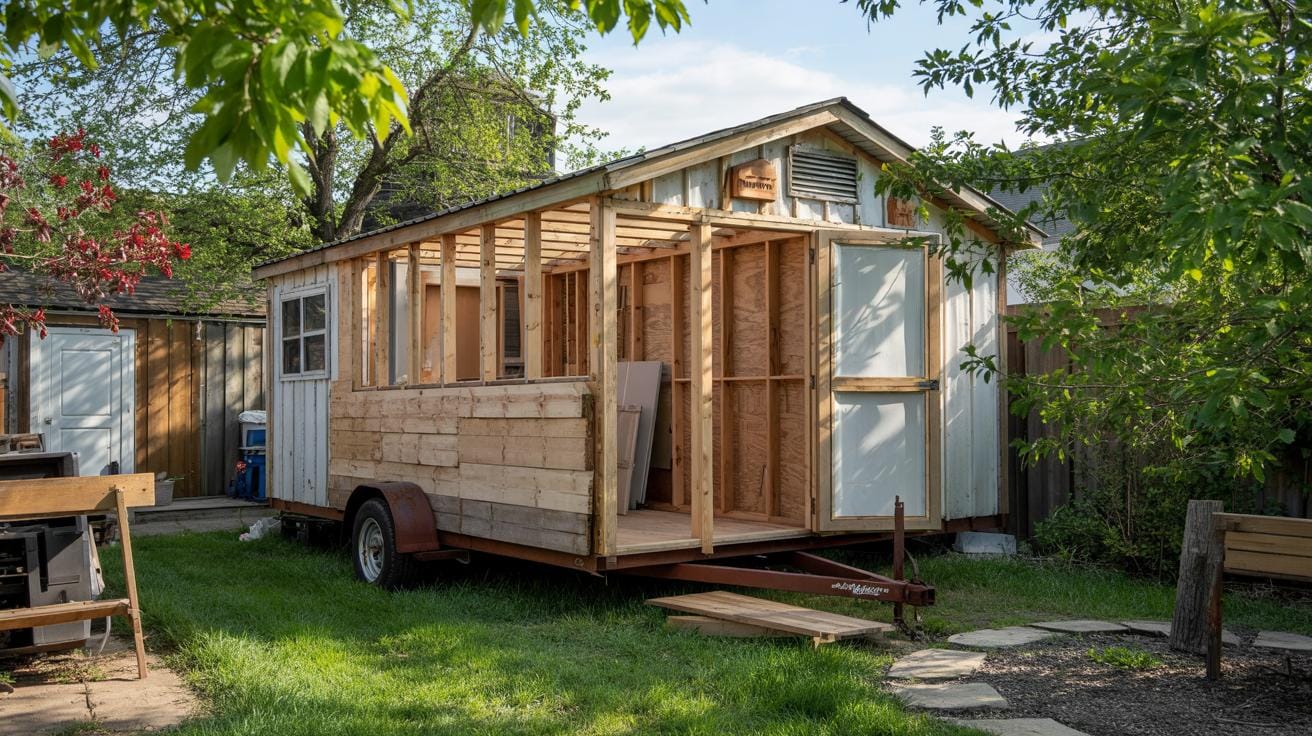
When planning to turn a mini barn into a living space, begin by checking its current state. Understanding the condition helps you avoid surprises, such as hidden damage or costly repairs. Think about what you want the new space to be—a guest house, studio, or a tiny home. Your purpose guides the layout and features you will need. Setting a clear budget early keeps your project realistic and manageable. Include costs for repairs, utilities, permits, and interior finishes. Are you aware of local zoning laws and building codes? Following these rules ensures your project is legal and safe. Do not underestimate the time and effort needed to get approvals and inspections. Careful planning at this stage builds a strong foundation for your barn transformation.
Evaluating the Existing Structure
Start by examining the barn’s foundation. Look for cracks, moisture damage, or signs of sinking. A weak foundation can cause serious problems later. Next, inspect the roof for leaks, missing shingles, or rot in the beams. The roof must protect the interior from weather. Check walls for structural damage and pests. Cracked or bowing walls may need reinforcement. You may not spot all issues yourself. Hiring a professional, such as a structural engineer or building inspector, ensures a thorough evaluation. What problems might go unnoticed without expert eyes? An early professional review saves money and stress down the road.
Legal and Regulatory Considerations
Every location has rules about converting a barn into a home. Local zoning laws might restrict how you use the space or the size of your new living area. Find out if your barn is in an agricultural or residential zone and what that means for your plans. Before starting, get all necessary permits from your city or county. These permits cover plumbing, electrical work, and construction changes. Ignoring them can lead to fines or forced removal of work done. Building codes set minimum standards for safety and comfort. They cover things like insulation, stair design, and fire safety. Understanding these regulations helps you design a safe and approved living space. How can you make sure your project fits legal requirements? Talking with local officials early makes a big difference.
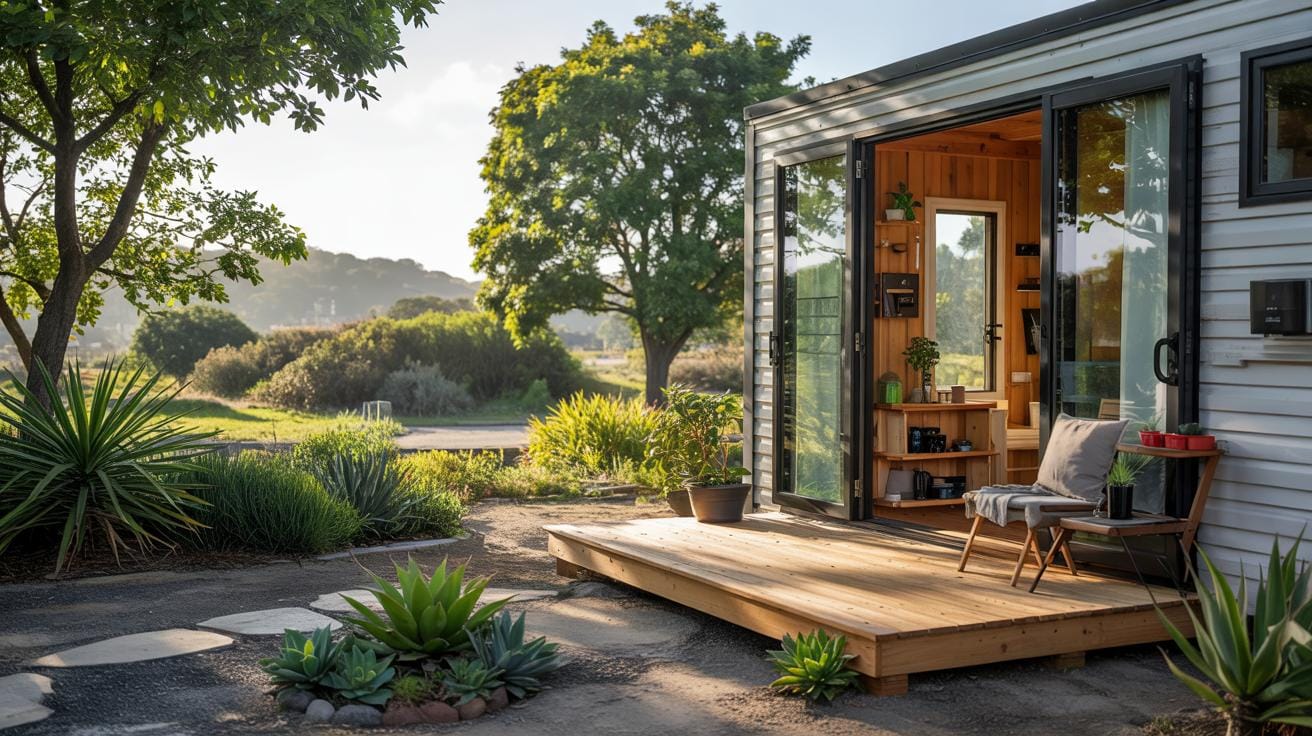
Designing Functional Interiors for Small Spaces

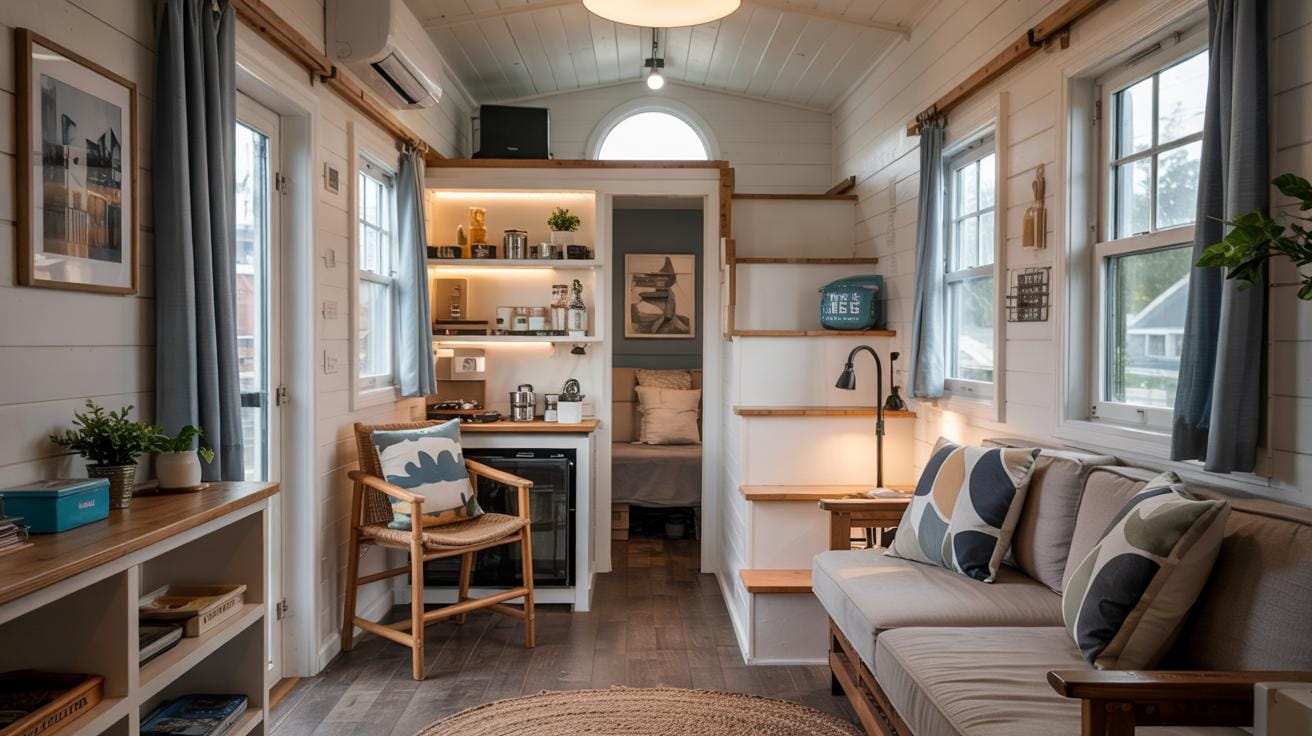
Working within the small footprint of a mini barn means every inch counts. Focus on furniture that serves more than one purpose. A fold-out table can become a workspace or dining area. Use wall-mounted shelves to free up floor space and keep essentials within reach. Think vertical: tall storage units and hooks keep belongings organized without crowding the room.
Good lighting changes how your space feels. Place windows or skylights to bring in natural light and reduce the need for harsh overhead lights. Select LED fixtures that provide bright, even light without heating the room. Ventilation is key too. A small fan or operable windows can keep air flowing and prevent stuffiness.
How can you improve flow? Arrange furniture to avoid blocking pathways. An open layout helps the space feel larger and gives room for movement. Using lighter colors for walls and furniture can also open up the interior visually, creating a comfortable home inside your mini barn.
Maximizing Usable Space
Smart storage helps your mini barn feel both larger and more organized. Choose furniture with built-in compartments, like beds with drawers or ottomans that double as storage boxes. Open floor plans avoid bulky partitions, making the living area feel spacious.
Keep clutter low by storing seasonal or rarely used items outside of primary spaces. Clear containers and labels keep things neat and easy to find. Wall-mounted racks and pegboards turn unused surfaces into handy storage spots. When every item has a place, your cozy home won’t feel cramped.
Choosing the Right Interior Features
Pick fixtures and finishes that match the rustic charm of mini barns while making the space inviting. Natural wood tones or reclaimed materials add warmth and character. Choose compact appliances designed for small spaces without sacrificing function.
Furniture should feel light and simple, not bulky. Think slim-profile chairs and tables with clean lines. Use fabric cushions and rugs to soften the look and add comfort. Consider durable, easy-to-clean surfaces that stand up to daily use in a small home.
How do these choices impact your daily living? Comfort and style can coexist in a mini barn when you select elements designed for both small spaces and rustic aesthetics.
Addressing Insulation and Energy Efficiency

Insulating your mini barn is a key step to keep it comfortable all year. Without proper insulation, your space can get too hot in summer and too cold in winter. You want materials that hold in warmth during winter and keep heat out during summer.
Rigid foam board and spray foam are good choices for mini barns. They fit snugly between wooden beams and provide strong thermal protection. Fiberglass batts also work if you carefully install them between studs. Always check for drafts around windows, doors, and corners. Use weatherstripping or caulking to seal those gaps. These steps keep your heating and cooling efforts from going to waste.
Energy-efficient windows and doors make a big difference too. Look for double-glazed options with low-emissivity coatings. These help maintain indoor temperatures by reducing heat transfer. Making these upgrades in your mini barn helps lower energy bills and creates a cozy home no matter the season.
Improving Thermal Comfort
Insulation in wooden mini barns traps air, creating a barrier against heat flow. This works by slowing down the movement of heat through walls and ceilings. When installing insulation, avoid removing original wood panels or beams if you want to keep the barn’s character. Instead, fit insulation behind or between existing structures.
For example, spray foam insulation expands to fill cracks and molds around beams without major changes to the barn’s look. Use vapor barriers to prevent moisture buildup, which could damage wood. Consider breathable insulation materials like mineral wool that handle moisture better.
Think about where heat loss happens most in your barn. Insulating the attic or roofline keeps heat from rising out. Applying insulation under floors can stop cold drafts too. Taking these steps improves your barn’s thermal comfort while preserving its original charm.
Making Energy-Saving Choices
Choose double-glazed windows to help your mini barn hold heat in the winter and keep it cool in summer. These windows reduce outside noise as well.
Look for heating systems designed for small spaces. A mini-split heat pump uses less energy than traditional heaters and can also cool your space. Electric radiant floor heating can be another efficient option, warming from the ground up.
Solar panels could reduce your energy costs further. Imagine powering your mini barn with sunlight. This choice works well if your roof faces the sun most of the day. Incorporate solar water heaters or small solar battery systems for a greener setup. Do you want to lower bills and reduce your footprint while staying comfortable?
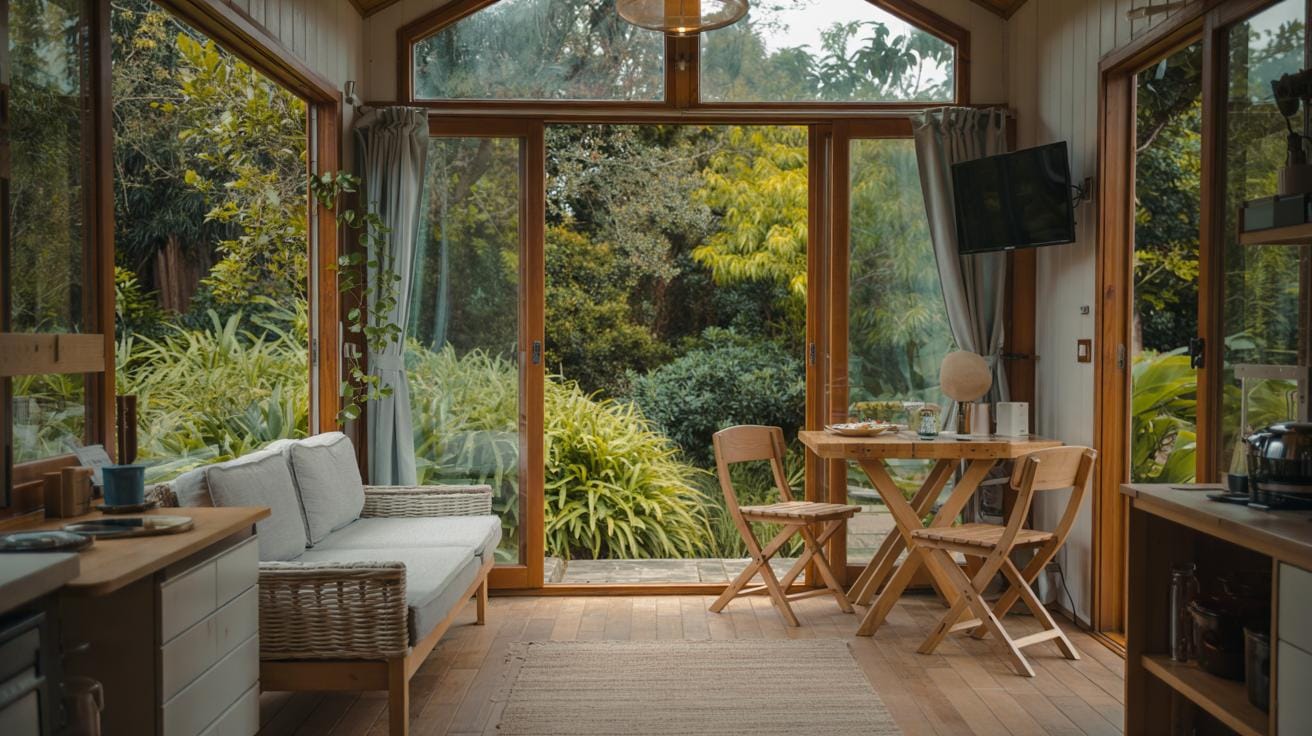
Incorporating Natural Light and Ventilation

Natural light and fresh air make a big difference inside mini barns transformed into homes. Adding windows lets sunlight brighten the space, which can improve mood and reduce the need for electric lights during the day. Vents bring in fresh air that keeps the space comfortable and prevents moisture buildup.
Choosing the right window styles matters. Casement windows open wide for better airflow, while double-hung windows offer flexibility for controlling ventilation. Placing windows opposite each other can create cross-ventilation, moving stale air out and pulling fresh air in. Skylights also add light from above and can help warm the interior on cool days.
Think about how natural light and air movement can improve your daily living. Where can you add a window or a vent that will enhance your mini barn’s comfort? Small changes can create a healthier, more inviting home.
Planning Window Locations
When deciding where to put windows, consider how sunlight moves through your property. South-facing windows catch consistent light, ideal for brightening interiors throughout the day. East-facing windows bring morning sun, which can help you wake up naturally.
Privacy matters, too. You don’t want windows facing neighbors or busy streets. Aim for views that feel relaxing—trees or open fields are better than close buildings. Also, think about the rooms you use most. Living spaces benefit most from larger windows, while bedrooms might need smaller or higher windows for privacy.
Ask yourself what kind of light you want and how much privacy you need. Planning this carefully will make your mini barn both pleasant and secure.
Ensuring Proper Airflow
Good ventilation keeps your mini barn healthy and comfortable. Installing vents near the roof helps hot air escape naturally. Low vents near the floor bring cooler air inside, creating a flow that refreshes the space without machinery.
Skylights that open provide both light and ventilation. In places where natural airflow is limited, consider using exhaust fans or ceiling fans to improve air circulation. Mechanical options are useful during summer or in humid climates to keep air fresh.
Think about how air moves in your mini barn throughout the day. Can you add vents or fans that will reduce humidity or odors? Proper airflow will help your mini barn feel fresher and cut down on energy use.
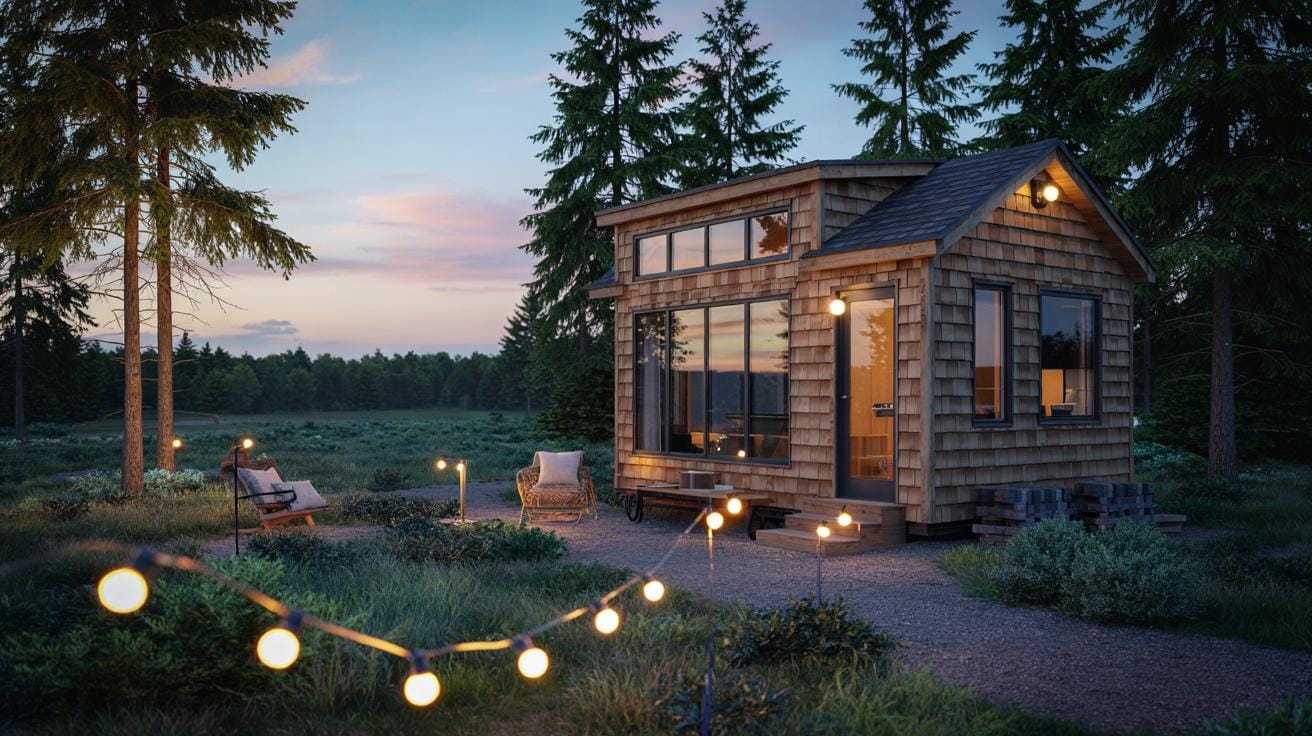
Maintaining the Barns Original Charm

Keeping the character of your mini barn starts with preserving its key architectural features. Focus on the wooden beams, doors, and walls that define the space. When restoring wood, work gently to avoid removing the natural textures and marks left by time. Consider using natural oils or light stains instead of harsh paints to bring out the grain while protecting the material.
For doors and hardware, look for original pieces that you can repair rather than replace. Old hinges, latches, and locks add authenticity and tell a story. If you must update hardware, select styles that match the barn’s traditional feel. Think about balancing repairs with fresh touches that keep the mini barn functional but true to its past.
Highlighting Rustic Features
Visible timber framing and weathered wood give a mini barn its distinct charm. To preserve these, clean the surfaces using soft brushes and mild cleaners that won’t damage the wood. Avoid removing the patina, which adds warmth and history. If frame pieces need reinforcement, use wood that matches the original in color and texture.
Original hardware such as iron nails, bolts, or door handles should stay visible inside the living space. They remind you of the barn’s past life. Think about showcasing these elements as design features, maybe near a cozy seating area or along a hallway. What story can your barn’s beams or weathered floor tell visitors?
Balancing Modern Comfort with Tradition
Introducing modern amenities does not mean losing the barn’s historic appeal. You can add heating, plumbing, or insulation while keeping the structure intact. Use hidden wiring and pipes inside walls or under floors where possible. Heating installations like radiant floor systems keep warmth without bulky radiators.
Choose fixtures that blend with the barn style, such as vintage-look lamps or faucets. Space-saving appliances help maintain open areas where the original wood and beams stand out. Ask yourself: how can you enjoy modern conveniences without covering up your barn’s natural beauty? This balance keeps your living space cozy and connected to its roots.
Selecting Utilities and Facilities

Installing utilities in mini barns demands careful planning due to limited space. Begin by determining which utilities your living space requires. Basic needs include plumbing for water and waste, electrical wiring for power, and heating to keep it comfortable. If your mini barn stands near existing systems, connecting to local water and power lines often makes the process easier and less costly.
For plumbing, ensure pipes fit compactly without sacrificing function. Use flexible piping where possible to accommodate tight corners. When connecting electricity, install a breaker panel designed for the barn’s smaller size to maintain safety and control. Heating options like electric baseboards or small propane units suit small spaces well.
Ask yourself: Can your mini barn handle standard connections, or should you consider off-grid alternatives? Planning this early avoids expensive changes later and aligns with your lifestyle needs.
Utility Connections and Installations
Begin electrical installation by hiring a qualified electrician to map out wiring routes. Use conduit pipes to protect cables and follow local building codes. Keep wiring compact to avoid clutter and reduce fire risk. Install outlets and switches at practical heights for daily use.
Plumbing installation starts with positioning a water source and designing drainage paths. Include vents to prevent sewer gases from entering your living space. Use water-efficient fixtures to save space and reduce costs. Test all plumbing parts carefully before wall finishes go up.
Consider safety at every step. Ground fault circuit interrupters (GFCIs) and moisture-proof materials prevent accidents in damp mini barns. Clear labeling of breaker panels and shutoffs improves emergency response.
Considering Alternative Energy and Water Solutions
You might want to choose sustainable options like solar panels to power your mini barn. Solar setups often come with battery storage, so you have electricity day and night. Combine solar with energy-efficient LED lights and appliances to reduce your consumption.
Rainwater harvesting systems gather water when it rains, providing a supplemental supply for non-drinking uses like gardening or flushing toilets. Composting toilets remove the need for complex plumbing and lower water use, making them ideal in remote areas.
Think about your location and lifestyle. Could off-grid systems make your living more independent and eco-friendly? These alternatives often reduce bills and lessen environmental impact. How might your daily routine change with these choices?
Landscaping and Exterior Enhancements

Your mini barn can become even more inviting with thoughtful landscaping. Consider creating defined pathways using gravel, stone, or wood chips to guide visitors to your entrance while preventing mud and dirt. Planting gardens around the barn adds color and texture. Choose low-maintenance plants like lavender or ornamental grasses that complement the rustic look.
Outdoor lighting plays a major role after dark. Solar-powered pathway lights are easy to install and save energy. String lights on the porch or around trees highlight the space without harsh glare. A small seating area with benches or Adirondack chairs gives you a spot to enjoy your garden and fresh air. These features help connect your mini barn to its surroundings and make your property welcoming day and night.
Creating Functional Outdoor Areas
Design outdoor spaces where you can relax or entertain. Building a compact deck or patio near your mini barn offers room for chairs, a table, or a fire pit. Use durable materials such as composite boards or natural stone that withstand weather and require little upkeep. If space is tight, install foldable furniture or benches with storage to maximize use.
Adding a small yard or lawn can open room for activities like reading, gardening, or yoga. Consider planting shade trees or adding a retractable awning to provide shelter from sun and rain. Think about what you want to do outside—would you like to grow vegetables or host friends? Tailoring your space to your lifestyle helps you get the most from your mini barn’s outdoor area.
Improving Curb Appeal
Simple upgrades can brighten your mini barn’s look and lift its curb appeal. A fresh coat of paint or wood stain revives weathered siding. Choose colors that complement the natural setting or traditional barn tones. Planting shrubs or flowering bushes along the foundation softens edges and adds natural beauty. Select varieties suited to your climate and soil type for easier care.
Replacing or adding exterior fixtures like door handles, shutters, or outdoor mailboxes can have a big impact. Look for affordable options in classic styles to keep charm and character intact. Installing window boxes filled with seasonal flowers adds a welcoming touch. These small projects refresh your barn’s appearance without large costs or lengthy work.
Overcoming Challenges in Mini Barn Conversions

Converting a mini barn into a living space comes with its own set of challenges. Space is limited, making it tough to fit everything you need in a small area. Insulating the structure properly can also be tricky, especially if the barn wasn’t built to keep heat in or cold out. You might face local rules on building permits and land use that could affect your plans too.
You can handle space limits by choosing the essentials and using clever designs like built-in storage and multi-purpose furniture. To tackle insulation, good-quality materials and professional installation are key. Check local building codes early to avoid surprises and work with experienced builders who know the rules. This saves time and money while assuring your mini barn is safe and comfortable.
Dealing with Limited Space
Maximizing every inch matters when space is tight. Start by listing what you really need versus wants. Focus on compact appliances, foldable furniture, and vertical storage options to keep floors clear. Open layouts help the space feel bigger by letting light flow freely. For example, mounting shelves high on walls provides room for decorations or supplies without crowding floors.
Think about areas that serve more than one purpose such as a sofa bed or a dining table that doubles as a workspace. Sliding doors save space compared to swinging ones. Ask yourself, “What items do I use daily, and what can wait?” This approach helps prioritize essentials and keeps your tiny home comfortable without feeling cramped.
Managing Costs and Compliance
Staying on budget starts with a clear plan. Research labor and material costs before starting your project so you can track expenses. Set aside extra funds for unexpected repairs or upgrades. Working with architects and contractors familiar with mini barn conversions ensures your plans meet local codes and zoning regulations.
Consider hiring a professional early to review your design and paperwork. Their input can prevent costly mistakes like needing to redo permits or failing inspections. Ask for quotes in writing and compare several before choosing. Have you thought about how much time and money might be wasted dealing with compliance issues if you don’t work with experts?
Following these steps helps you control spending and finish your mini barn home on schedule while keeping it safe and legal.
Conclusions
Mini barn conversions open possibilities for unique and efficient living spaces. They allow you to preserve character while meeting modern living needs. By embracing practical design principles, you can create spaces that are comfortable and functional. Choices in insulation, window placement, and interior layout all impact the success of your project.
Your mini barn can become a charming home or workspace with thoughtful updates. Attention to detail and respect for the barn’s heritage contribute to its appeal. As you consider such a conversion, evaluate your goals and local building requirements. In doing so, you will turn a simple structure into an inviting, valuable asset.