Why Toilet Paper Roll Crafts Help Organize
Toilet paper roll crafts can be a fun and useful way to organize your storage. These simple projects use empty toilet paper rolls, which are often discarded, turning them into practical tools for tidying up your home. By reusing these rolls, you not only reduce waste but also create affordable storage solutions that can keep your space neat and clutter-free.
This article explores a variety of crafts made from toilet paper rolls that you can use to organize your desk, drawers, and closets. You will find easy step-by-step prompts, tips for customization, and practical ideas that you can apply right away. Let’s dive into these inventive projects to organize your storage using toilet paper rolls.
Benefits of Using Toilet Paper Rolls for Organization
Toilet paper rolls might seem like such a simple, even trivial item, but when it comes to organizing your space, they actually offer quite a bit. First off, these rolls are everywhere. You finish a pack of toilet paper, and bam—you have a ready-made crafting resource right there. You don’t need to special order anything or make a trip to a craft store.
What I find especially appealing is the cost aspect. You’re not spending extra money, because these rolls are typically tossed in the trash. Instead, you’re reusing something that would otherwise be wasted. That feels sort of satisfying—kind of like getting a second life out of something ordinary.

From an environmental perspective, it’s also worth thinking how these cardboard tubes are biodegradable. So, by reusing them before they reach the landfill, you’re nudging your waste down a notch. Maybe it’s small in the grand scheme of things, but when lots of people do it, it could add up.
Now, about their shape and size—don’t underestimate these tubes. Their cylindrical form is surprisingly good at holding or sorting items. Whether it’s cords, small tools, or maybe even some office supplies, keeping things neatly contained inside these rolls makes sense. It’s like having a modular system you can stack, glue together, or cut up to fit whatever you need.
So, if you’ve ever found yourself staring at a pile of tangled cables or mismatched little things, recycling those empty toilet paper rolls might be a simple solution. Plus, there’s a quiet satisfaction in turning trash into a neat, useful household helper.
Sort Your Desk Supplies With Toilet Paper Rolls
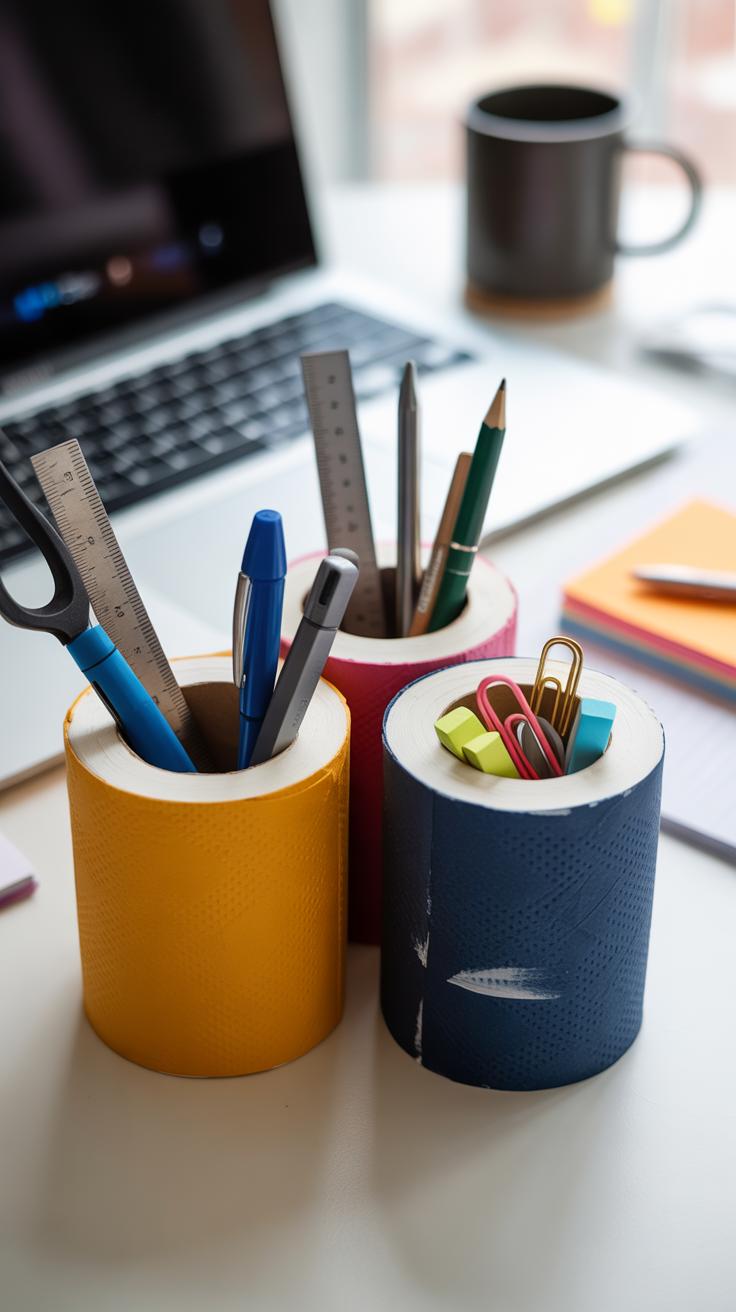
Toilet paper rolls can become surprisingly handy when you want to organize your desk. They fit pens, pencils, and even scissors perfectly, creating a simple but effective way to keep your workspace tidy. You might think it’s too basic, but grouping several rolls together instantly transforms them into a mini organizer. Just glue them side by side or tape them on a sturdy base. I tried this once and ended up with a neat, compact holder instead of scattered supplies all over my desk.
Creating Pen Holders

Start by collecting several toilet paper rolls. Then, cut them evenly if needed so they match in height. Arrange the rolls tightly in a cluster—three or four rolls often work well—and fasten them with glue or strong tape. You can decorate them with colored paper, washi tape, or even old magazine cutouts to give them a personal touch. Painting the rolls is another option, though it may take longer to dry. This simple assembly offers you multiple compartments for your writing tools, which means less time searching for that elusive pen later.
Organizing Small Items
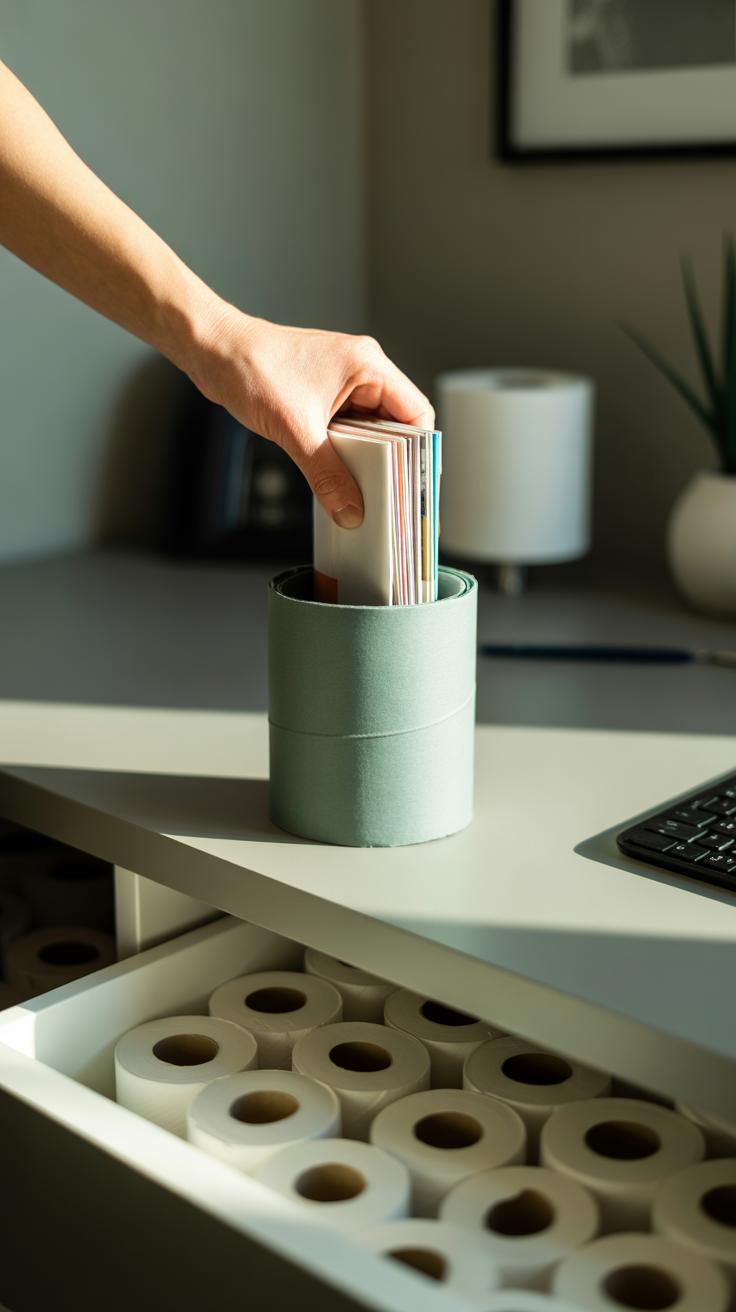
Besides bigger stationery, small items like paper clips, rubber bands, or push pins get lost easily on desks. Using individual rolls or smaller halves can create neat containers for these tiny essentials. Try labeling each roll with a sticky note or a marker so you know what’s inside without rummaging. You could even stack a few vertically inside a drawer for better visibility. I found this approach especially useful in my home office; it kept loose trinkets from turning into clutter without spending extra money on storage bins.
Organize Your Cables and Chargers Neatly
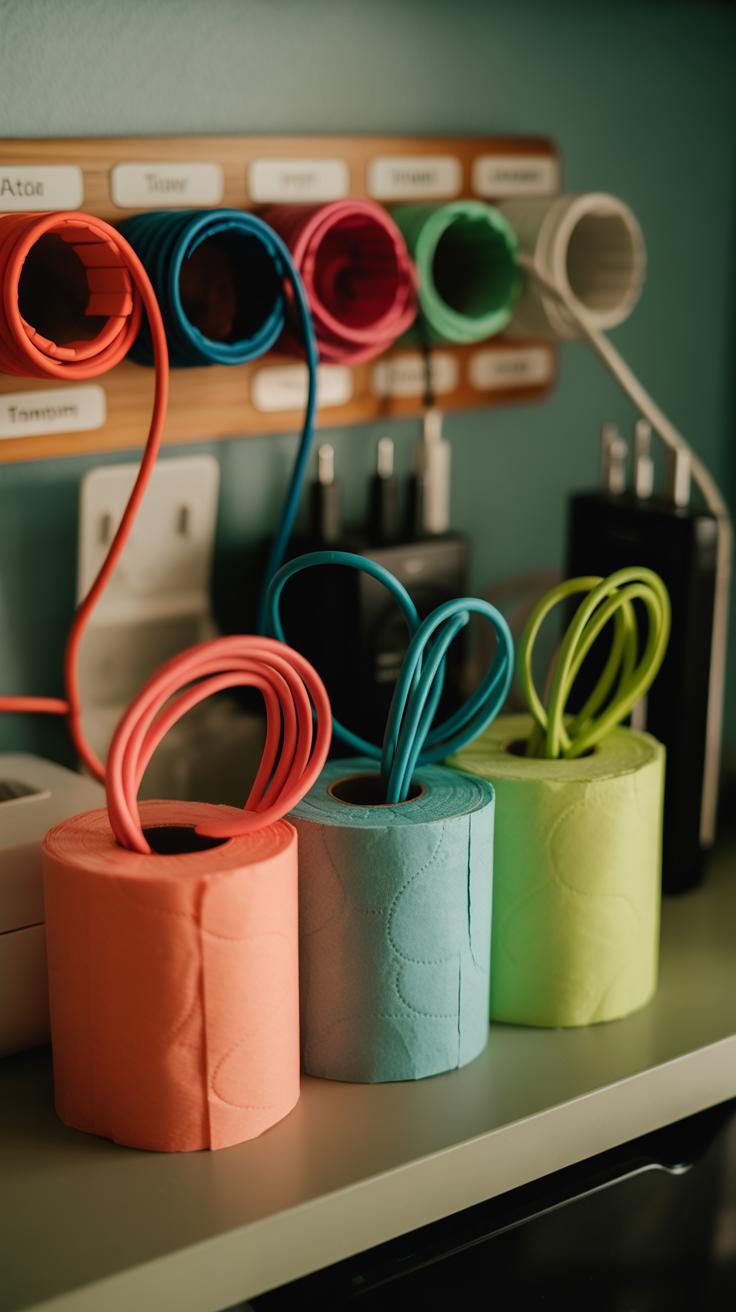
Toilet paper rolls are surprisingly handy for keeping your cables and chargers in order. Instead of letting those cords twist into a frustrating mess, you can take each cable, coil it gently, and slip it inside a roll. This stops the tangled chaos that probably happens all too often in your drawer or bag.
Try labeling each roll clearly. You could write the device name right on it—like “Phone Charger” or “Laptop Cable.” It’s a simple step, but finding the right cord quickly can save more time than you’d expect. I guess it makes you think, why haven’t we done this sooner?

Making identification easier doesn’t stop there. You might want to decorate the rolls with colored markers or attach little stickers that mean something to you—a red sticker for phone chargers, blue for headphones, for instance. It combines function with a bit of fun, and it’s easier on the eyes when you’re hunting through a pile of cables. Plus, you might be surprised how much this small step reduces that annoying morning scramble for your charger.
When wrapping cables inside, keep them loose enough to avoid damage. If the cord feels too tight, just unwind a little before rolling it into the tube. You might also cut the roll’s side open slightly, which helps pull cables out without untangling the whole bundle each time. Yes, these little things can really change how you approach cable management.
Jewelry Organizers Made From Rolls
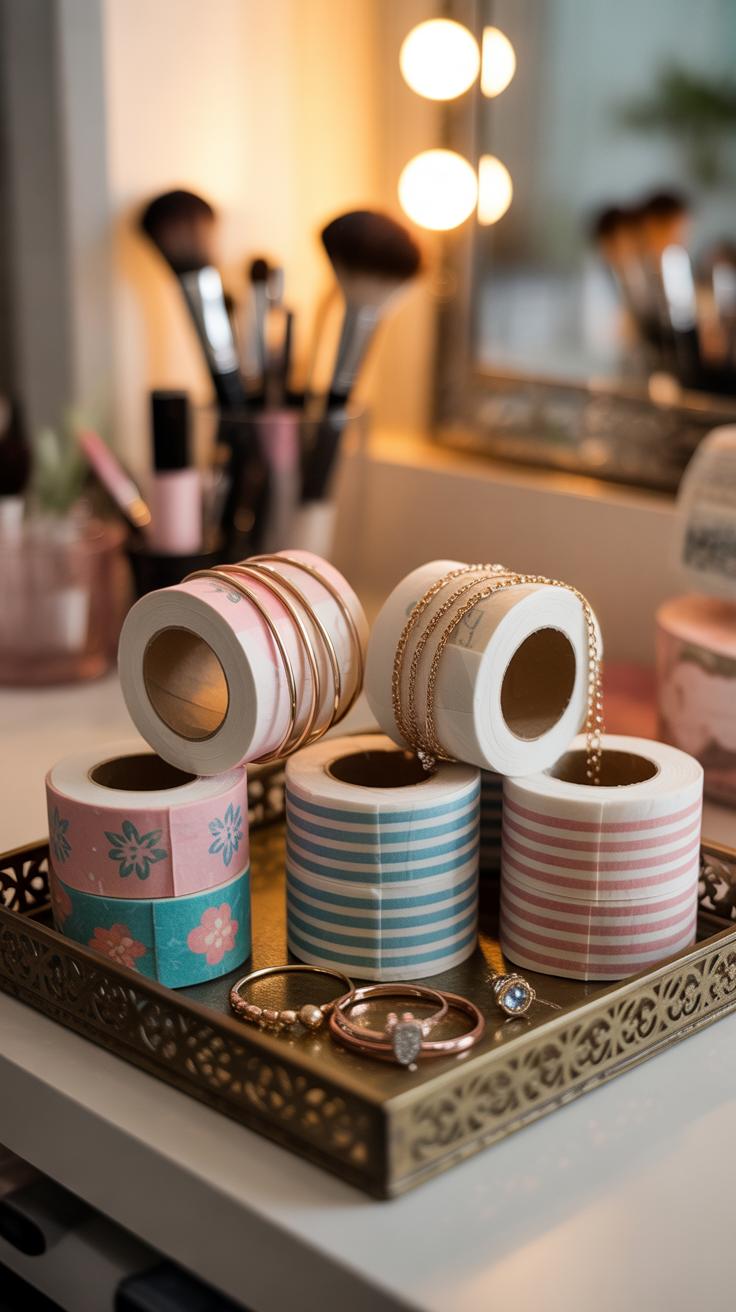
Toilet paper rolls can be surprisingly handy when it comes to organizing jewelry. Think about all those bracelets, necklaces, and earrings scattered around your dresser or tangled in a drawer. Using toilet paper rolls, you can separate and hang these items in a way that saves space and makes them easier to find.
For necklaces, the rolls act as simple holders. You just need to attach the roll horizontally on a board or wall. Then drape your necklaces over the rolls to prevent tangles. It’s straightforward but effective—you can even cover the roll with fabric or paper to match your style.

Storing smaller pieces like rings or earrings inside the rolls is another option. Cutting the rolls lengthwise or into shorter sections makes them fit neatly into drawers or trays. Decorating the outside with washi tape, paint, or wrapping paper adds a personal touch and helps tell which roll holds what.
Jewelry organization doesn’t have to be fancy or expensive. Sometimes the simplest tricks—like reusing a toilet paper roll—work pretty well. It may not be perfect for giant statement necklaces, but for everyday pieces, it’s worth a try.
Making Necklace Holders
To create holders for your necklaces, start by gathering a few empty toilet paper rolls. You’ll want to secure them side by side on a flat surface, like a wooden board or inside a shallow box. Use glue or tape, but make sure they’re firmly attached because necklaces can be heavy or prone to slipping.
Next, you could cover the rolls with fabric or decorative paper to prevent scratching your jewelry and add an aesthetic element. Once dry, hang the whole piece vertically on a wall or place it on a vanity. Drape necklaces over the rolls so each one hangs neatly without overlapping.
If you want, add small hooks or pins at the ends of the rolls to keep chains from sliding off. It helps, especially with delicate or light jewelry. The simplicity of the design means you could customize it easily—maybe add labels or paint each roll a different color.
Storing Small Jewelry Inside Rolls
Small rings and earrings can get lost or tangled easily. Cutting toilet paper rolls into smaller sections works well for storing these bits. Cut the roll into halves or thirds depending on your drawer size or the pieces you own.

Once cut, you can line up several sections inside a drawer or box. Decorating each piece helps you identify what’s inside without rummaging around. Wrapping paper, colorful tape, or even fabric scraps all work fine.
For studs or small hoops, place them inside the rolls carefully. You can also add a bit of cotton or soft paper inside the roll for extra padding. This keeps your jewelry safe and prevents it from scratching. It might feel a bit fiddly to prepare, but once done, you’ll appreciate not losing your favorite earrings.
DIY Drawer Dividers Using Toilet Paper Rolls
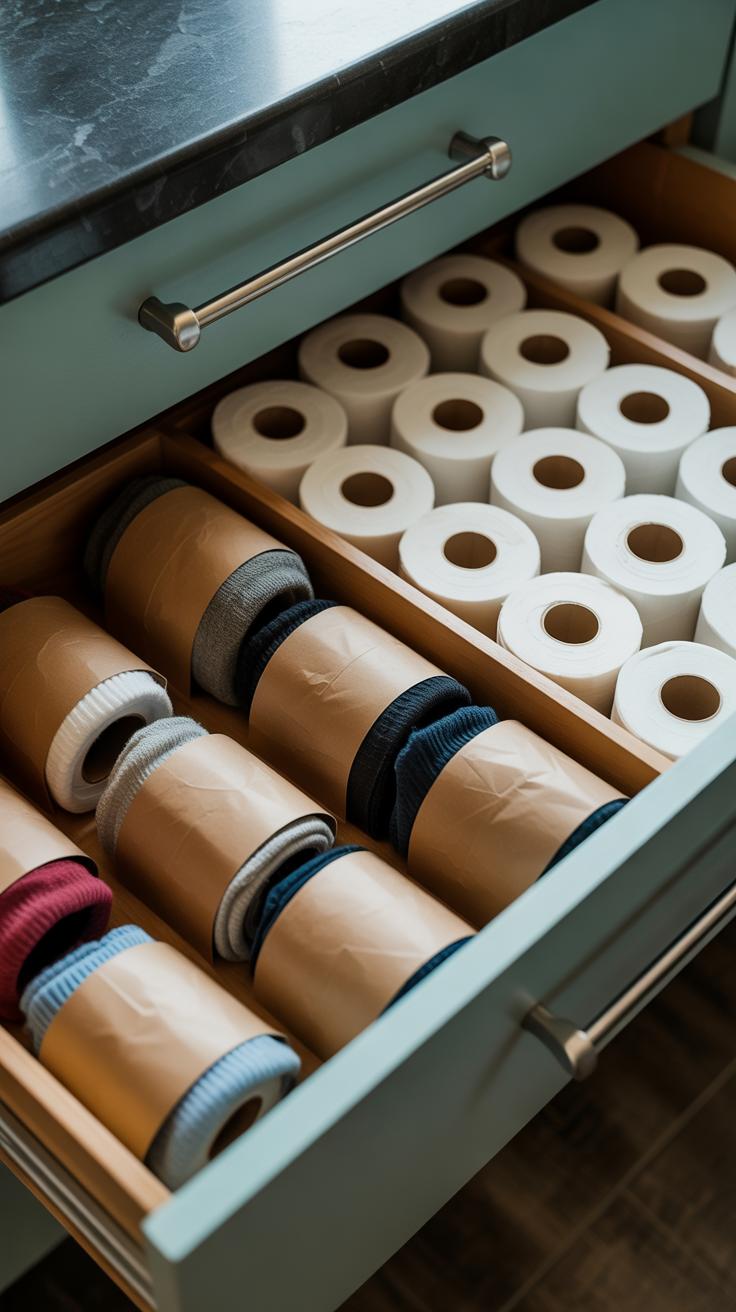
To create simple drawer compartments, start by measuring the inside of your drawer. Take a ruler or tape measure and jot down the length, width, and height. This step lets you know how many rolls you’ll need and how to adjust their sizes for a snug fit.
Next, take your toilet paper rolls and trim them to match those dimensions. You might find that cutting some rolls in half or even thirds works better for tighter spaces. Sometimes the edges won’t be perfectly even, but that’s okay — a little roughness here won’t affect functionality.

Once your rolls are cut, it’s time to arrange them inside the drawer. You can cluster them side by side to create custom boxes or stack shorter tubes for deeper compartments. Play around a bit. Are you storing pens? Makeup brushes? The way you divide space depends on what you want to keep orderly.
To keep the rolls in place, glue can be your friend. A hot glue gun works well, but if you’re uneasy with the mess, double-sided tape might do. Press each roll firmly down and let the glue dry completely before filling your new compartments.
Decoration isn’t required, but it can make your drawer look less like a craft project. Wrapping rolls in washi tape, plain paper, or even fabric adds a cleaner, personalized touch. I once decorated mine with simple newspaper print, and it instantly made the inside feel tidier.
Give this a try and see if your drawers suddenly become less chaotic. Would you use this method for office supplies or perhaps kitchen utensils? The options are surprisingly flexible. It’s a low-cost way to bring order without buying expensive inserts.
Creative Wall Storage Ideas With Toilet Paper Rolls
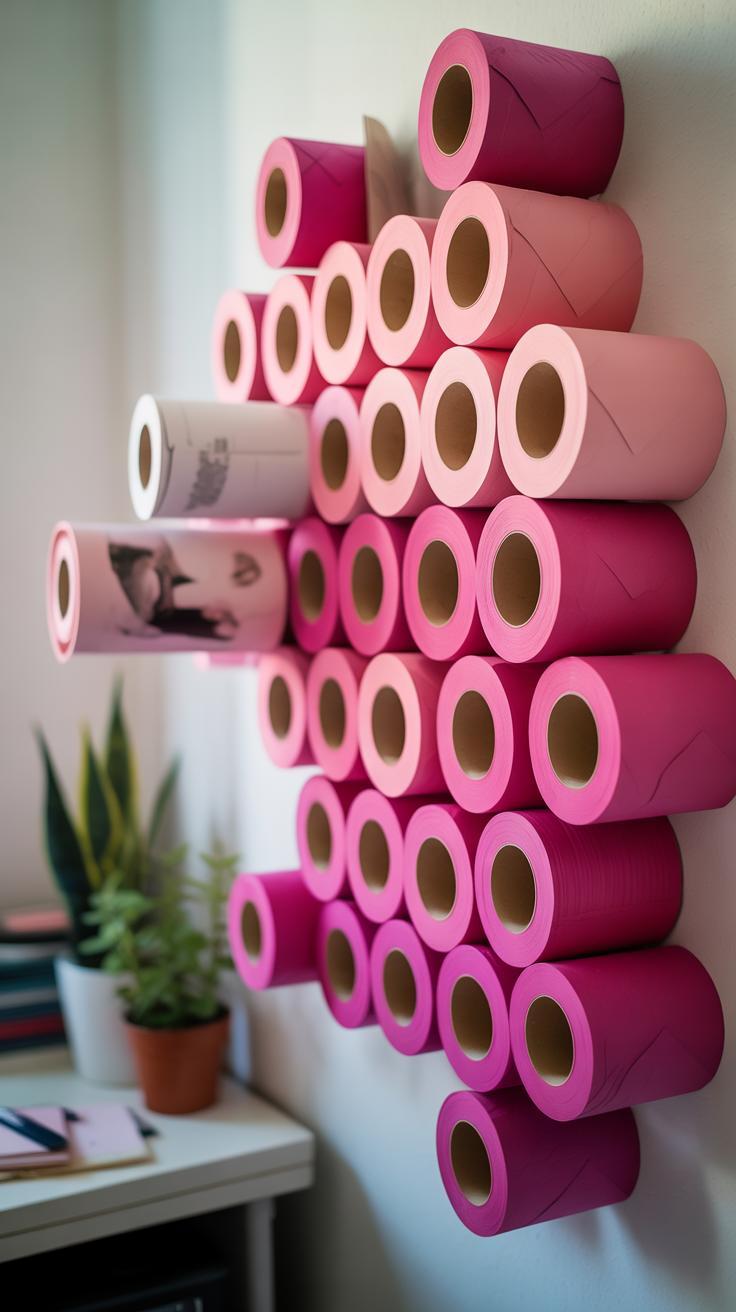

Using toilet paper rolls on walls or boards to sort your craft materials is surprisingly practical—and yes, a bit fun too. You can arrange several rolls vertically or horizontally, depending on the space and what you want to keep. Imagine a cluster of rolls mounted side by side, each holding different items like paintbrushes, pencils, or scissors. It’s almost like a mini wall organizer that’s easy to customize.
When it comes to mounting, I found that hot glue works well on wooden boards, but if you want something more secure on walls, Command strips or small nails do the trick without damaging surfaces too much. Just be sure the rolls don’t get overloaded—empty rolls might not hold heavy tools. Attaching them firmly keeps everything in place and prevents those annoying falls.
Sorting your supplies this way can actually clear space on your desk or craft table. You could assign one roll for markers, another for different brush sizes, and maybe one for small scissors or even washi tapes. This setup encourages you to tidy up, although I flip-flop between neat and cluttered myself.
Would you try grouping the rolls by color or size? Sometimes, mixing it up can make finding what you need faster. The best part is how easy it is to swap things around or add more rolls as your collection grows. It feels flexible, yet structured—though, well, maybe not perfectly.
Decorating Toilet Paper Rolls for Stylish Storage
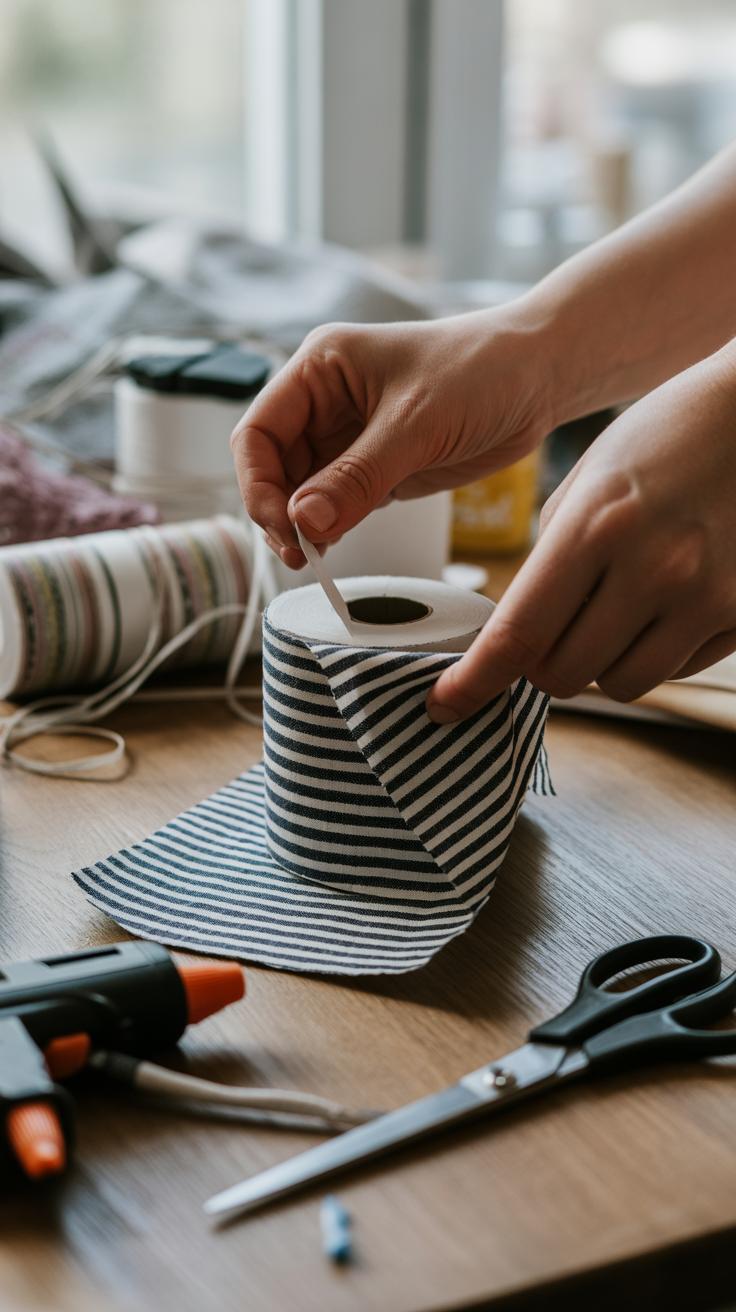
Toilet paper rolls are great as-is for organizing small items, but decorating them can turn simple storage into something that actually looks nice in your space. You might find that a bit of color or pattern on a roll makes it blend in better—or stand out in a good way. Using paint or markers is one of the easiest ways to quickly add a splash of style. You don’t have to be an artist; simple stripes, dots, or geometric shapes can do the trick. Acrylic paint works well because it dries fast, but markers give you more control if you want detailed patterns.
Sometimes, paint alone feels a bit flat, so wrapping the rolls with fabric or decorative paper can make a big difference. Choose a fabric that matches your room’s style or paper with a subtle pattern to avoid clashing with other decor. Glue sticks work fine for paper, but fabric might need a bit stronger adhesive, like craft glue. It’s a bit fiddly to get the fabric tight around the roll without wrinkles, but patience pays off. You can even mix and match—paint half the roll and wrap the other half—with neat effects.
What’s nice is that these simple steps don’t require fancy supplies or long hours, yet they refresh your storage in a way that’s surprisingly satisfying. Looking at your newly decorated rolls, storing things feels that much less like a chore. Have you ever tried this? Maybe you’ll find that combining simple patterns with natural textures sparks some ideas you didn’t expect.
Combining Rolls Into Larger Storage Units
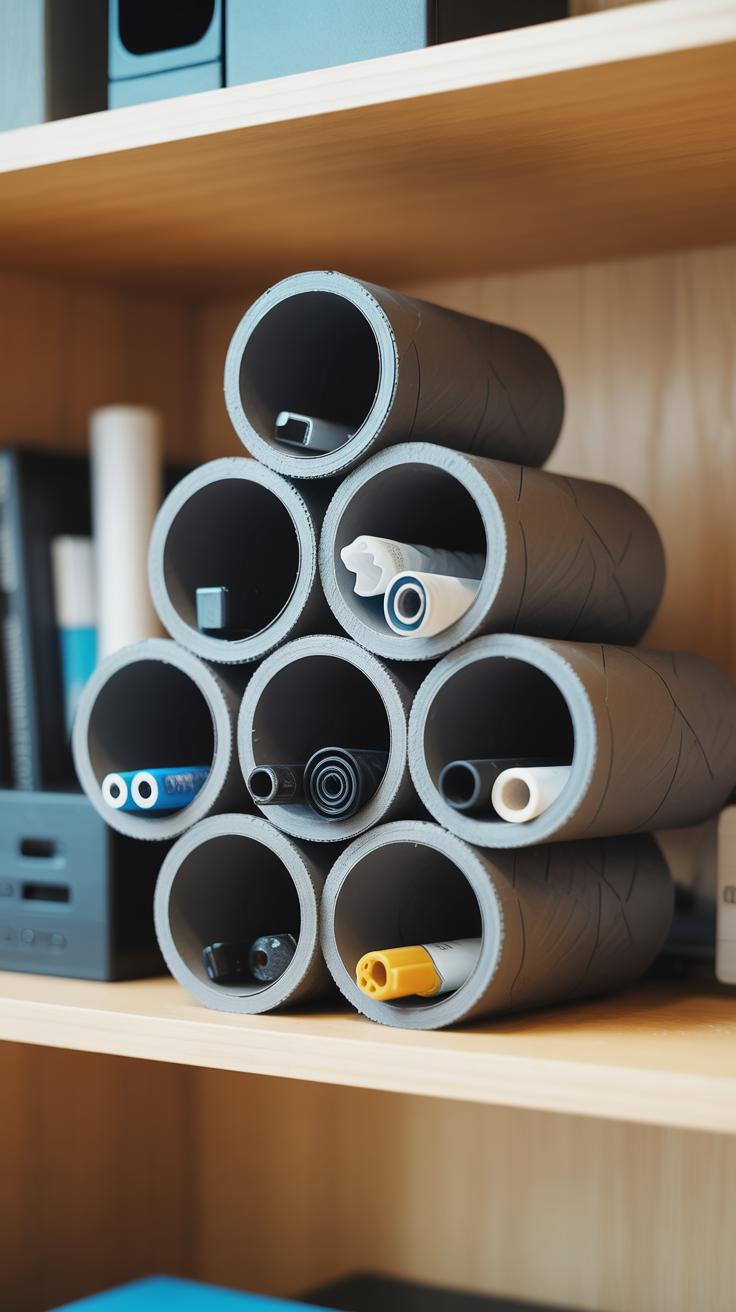
If you’ve ever looked at a few empty toilet paper rolls and thought, “Could these be more than just tiny organizers?”—you’re not alone. It’s surprising how a bunch of these simple tubes can come together to form larger storage pieces that hold more, fit better, or just look cooler in your space.
Start by grouping your rolls in a pattern. Stacking them like bricks or lining them up side by side creates different shapes—a rectangle for little compartments or a more open shelf-like unit. To keep everything in place, a strong glue is your friend. Craft glue or a hot glue gun works well, but watch out for the mess; applying glue on the edges evenly can be tricky and might take a few tries before it sticks without warping the rolls.
Building these modular systems depends a lot on how you want to use them. Think vertical or horizontal arrangements, and how the rolls’ shape interacts. Sometimes, adding some cardboard pieces between rows helps the whole thing stay rigid. Without it, the rolls might just squish or tilt, especially if you put anything heavy inside.
Adding features like lids or dividers makes these units more functional. A lid can turn a set of rolls into a box for loose things, while thin cardboard inserted inside a roll can turn it into multiple sections. You might need to experiment a bit—sometimes the rolls aren’t perfectly round or uniform, so fitting dividers snugly takes patience.
One thing I often wonder: How far can you push this? Could you build a full small shelf for craft supplies or stationery just from rolls? Maybe with careful gluing, some reinforcement, and a bit of creative arrangement, yes. So, don’t hesitate to try different designs. It’s not just about recycling; it’s about reimagining what those rolls can become in your home.
Tips for Maintaining and Refreshing Your Toilet Paper Roll Organizers
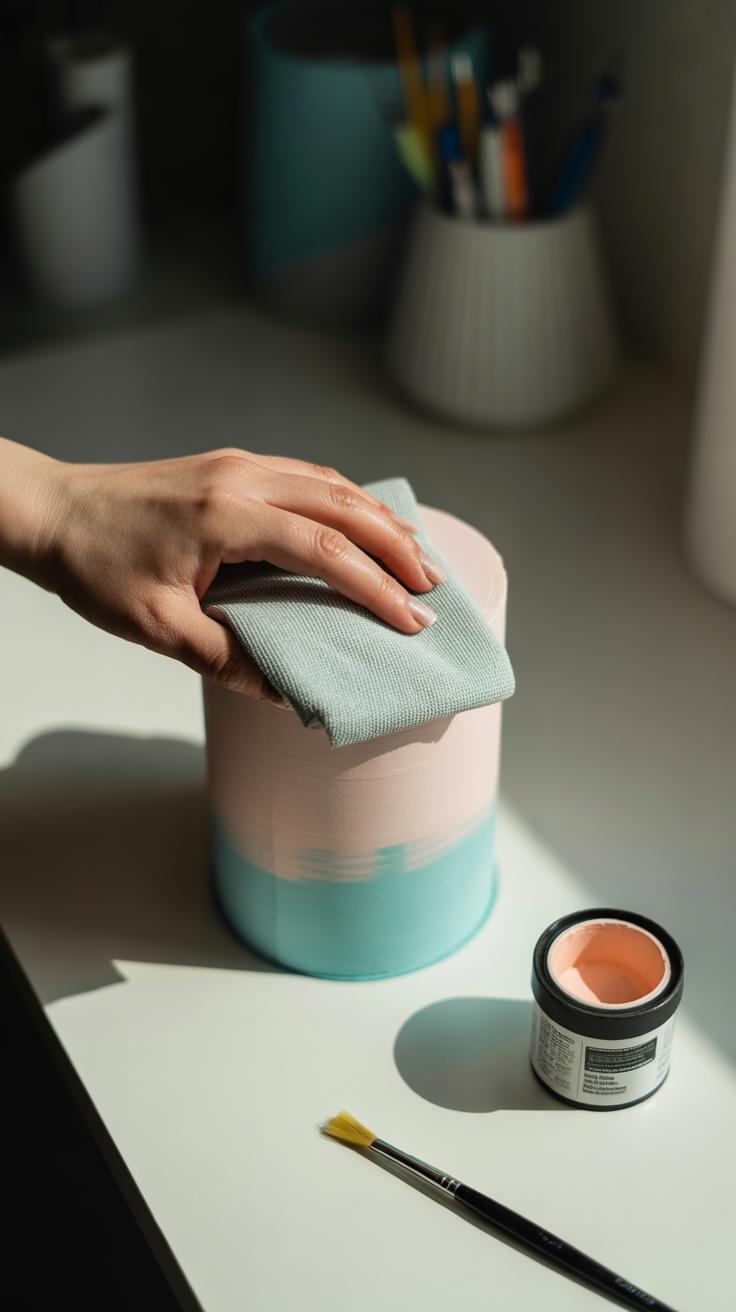
Keeping your toilet paper roll organizers clean can be easier than you might expect. Dust tends to settle quickly on these open structures, especially if you use them in spots that aren’t vacuumed regularly. A quick wipe with a damp cloth every week or so often does the trick. Sometimes, I find a soft brush, like a paintbrush or makeup brush, works better for getting into those tight corners and crevices.
If you notice any dust buildup or sticky spots, a mild soap solution can help restore their look without damaging the paper rolls. Just be careful not to soak them—too much moisture can weaken the cardboard. And maybe that’s obvious, but I’ve seen rolls get soggy and fall apart when people aren’t cautious.
When your organizers start looking worn or a bit dull, don’t hesitate to give them a fresh coat of paint. Spray paint is a quick option, but if you prefer more control, acrylic paint and a small brush can work well too. I once repainted a whole shelf of rolls in a soft pastel shade, and it changed the vibe of the room completely.
Besides repainting, you can swap out decorations to refresh the look: ribbons, washi tape, or patterned paper can be replaced seasonally or whenever you feel like it. Of course, sometimes repairs are needed—if a roll starts to crumble, cutting away the damaged part and reinforcing it with glue or tape can add a little life back without rebuilding everything.
Have you thought about mixing up the arrangement itself? Moving rolls around or rearranging clusters can give a fresh feel without spending anything. It might seem minor, but small changes like these make organizing less of a chore and more of a fun, ongoing project.
Conclusions
Toilet paper roll crafts offer a simple way to improve your home’s organization without spending much money. These projects are easy to make, customizable, and environmentally friendly since they reuse materials you would otherwise throw away. Whether you want to sort your desk supplies, hang jewelry, or organize cables, there’s a craft here that fits your needs.
By trying these crafts, you engage your creativity and make your storage more functional and visually appealing. Start with the easiest ideas and work your way up to more elaborate projects. Your organized space will feel more pleasant and easier to manage with these clever toilet paper roll crafts.