Why Origami Enhances Home Storage
Origami is the Japanese art of folding paper into shapes and figures. It offers not only artistic expression but also practical ways to enhance your home storage. By using origami techniques, you can create beautiful and functional storage solutions that help keep your home neat and tidy.
This article explores how origami can be used to improve your home storage aesthetics. You will discover simple folding techniques and projects to organize items in your home while adding an artistic touch. Let’s explore the ways origami can change your space for the better.
How Origami Can Improve Home Storage
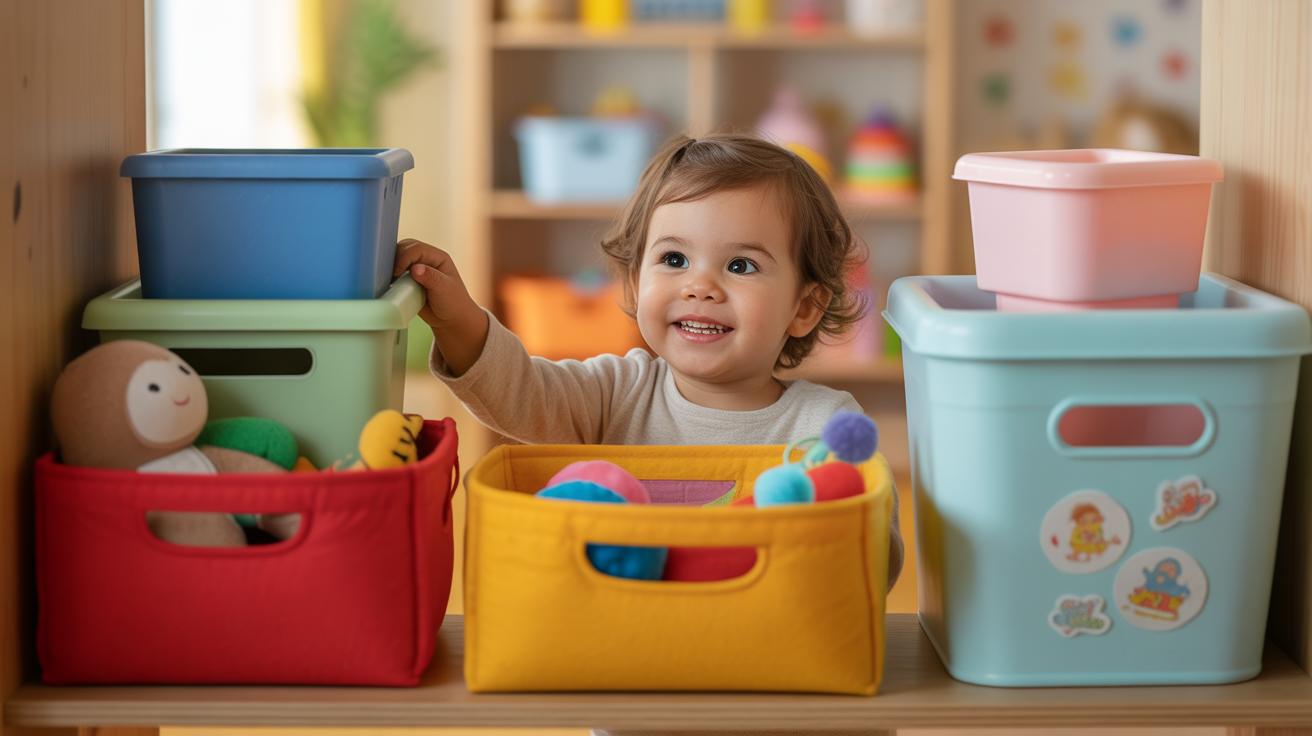
Origami offers a surprising way to rethink how you store and organize your belongings. By folding paper into shapes like boxes, trays, and compartments, you can create storage solutions that are both neat and visually appealing.
Think about the simple folded container—it can hold small items like jewelry, office supplies, or even snacks. These containers use shapes that naturally stack or nest, saving space without much effort.

Here are some practical benefits that might catch your attention:
- Custom sizing: You choose the dimensions based on what you want to store. Need a tiny box for paper clips or a larger tray for desk tools? Origami lets you decide.
- Easy to make: With just a few folds, you can turn a sheet of paper into a functional object. No glue, no tape, which means less mess and quick cleanup.
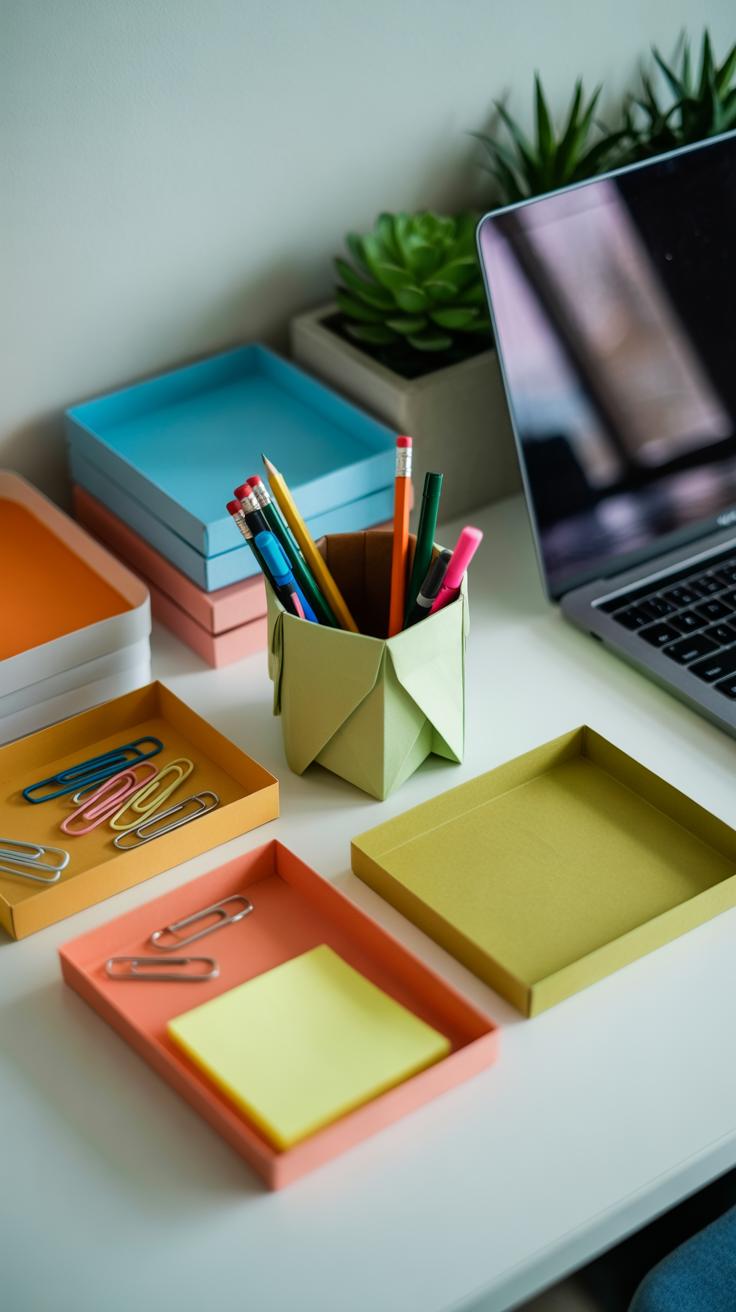
- Visual appeal: These folded shapes add texture and interest, helping the storage areas feel less cluttered and more like intentional designs.
- Portability: Since origami items are lightweight and can be flattened when not in use, you can store or carry extra organizers without extra bulk.
It’s interesting how something as simple as folding paper can create useful, space-saving organizers. Have you ever tried folding a drawer organizer or a desk caddy? It’s a small effort that can make your space feel more ordered and personal.
Also, you might find that folding your own storage containers encourages you to think differently about what you keep and how. That subtle shift in mindset—towards simplicity and order—can make a surprising difference in daily life. It’s almost like the act of folding helps you fold your environment into something more manageable, though that’s just a thought.
Improve Home Storage Through Oragami
You might not think paper folding could actually help with storage, but origami offers surprisingly practical benefits. Folded paper shapes can become containers, trays, or desk organizers that hold small items neatly. These aren’t just pretty to look at—they help you save space by replacing bulky, mismatched boxes with compact, custom-fit shapes.
Think about a simple origami box made from a square sheet of paper. It can hold jewelry, office supplies, or even keys without eating up much room. And since you control the size and shape, you tailor the storage to fit your space rather than forcing your items into whatever’s available. It’s almost like creating storage that fits you, your stuff, and your space perfectly.
Space-saving Designs

Origami containers often fold flat when not in use. This means they don’t take permanent space like traditional bins do. You can stash them away easily, pulling them out only when needed. Small apartments or rooms with limited surface areas benefit from this feature the most.
Plus, origami projects encourage creative thinking about how to use corners, shelves, or desk edges better. Curious shapes like hexagons or triangles stack snugly, unlike conventional rectangular bins. You might find yourself saving space simply by changing the shape of the container. Still, sometimes the creative experiment doesn’t quite work out, but it’s part of the fun.
Beautifying Storage with Art
There is something refreshing about turning dull storage into something visually engaging. Origami adds a touch of personality and calm to your home. Instead of standard plastic organizers, you get vibrant or patterned paper art pieces that enhance your décor.
Imagine a cluster of colorful origami bowls on your desk holding paperclips or a set of folded trays in natural tones lining a shelf for loose change. They catch your eye and can spark a moment of appreciation every day. This kind of beauty mixed with usefulness makes tidying less of a chore. It’s not always about perfection—some uneven folds or slight color fading actually make the pieces feel more alive, more real.
Basic Origami Folds for Storage Projects
When you start folding origami for home storage, getting comfortable with a few core folds really helps. Most storage containers, like small boxes or trays, rely on just a couple of basic techniques: the valley fold and the mountain fold. The valley fold creates a dip, folding the paper toward you, while the mountain fold is the opposite, folding the paper away from you, making a raised ridge. These two are like the backbone of origami, especially when shaping containers that need crisp edges and solid forms.

Once you grasp those, other folds expand what you can build. The squash fold, for example, lets you open a flap and press it flat, useful for making pockets or compartments inside a box. I remember struggling with this at first, but it’s surprisingly straightforward once you try a few times. The reverse fold changes the paper’s direction inside or outside, which comes in handy for creating flaps that hold a box’s lid, or for handles.
There’s also the petal fold, which can shape flaps into points—perfect if you want decorative yet functional lids or small dividers in your storage. These folds might sound tricky, but they become intuitive once you see how they help craft useful shapes. Have you thought about how just a few folds can turn a flat paper into a neat drawer or a tiny organizer? It’s kind of neat how these simple moves open up so many possibilities.
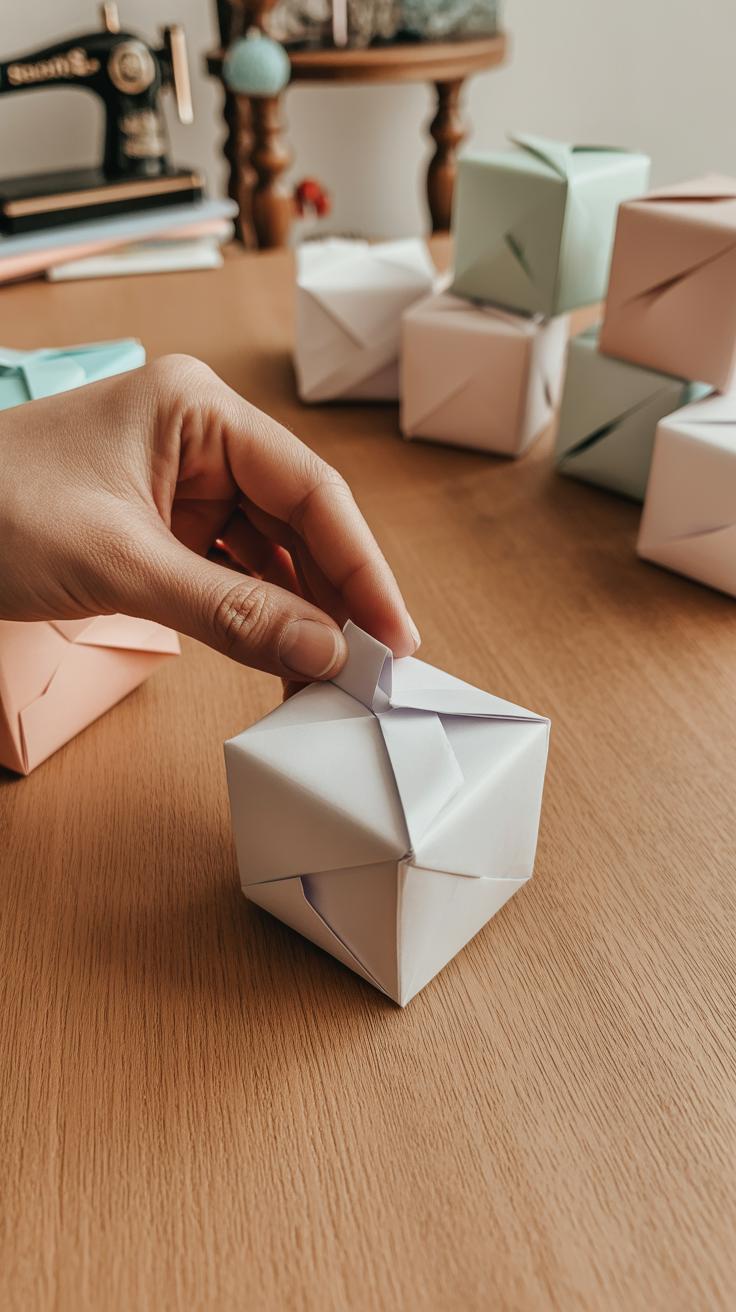
Creating Simple Origami Boxes for Storage
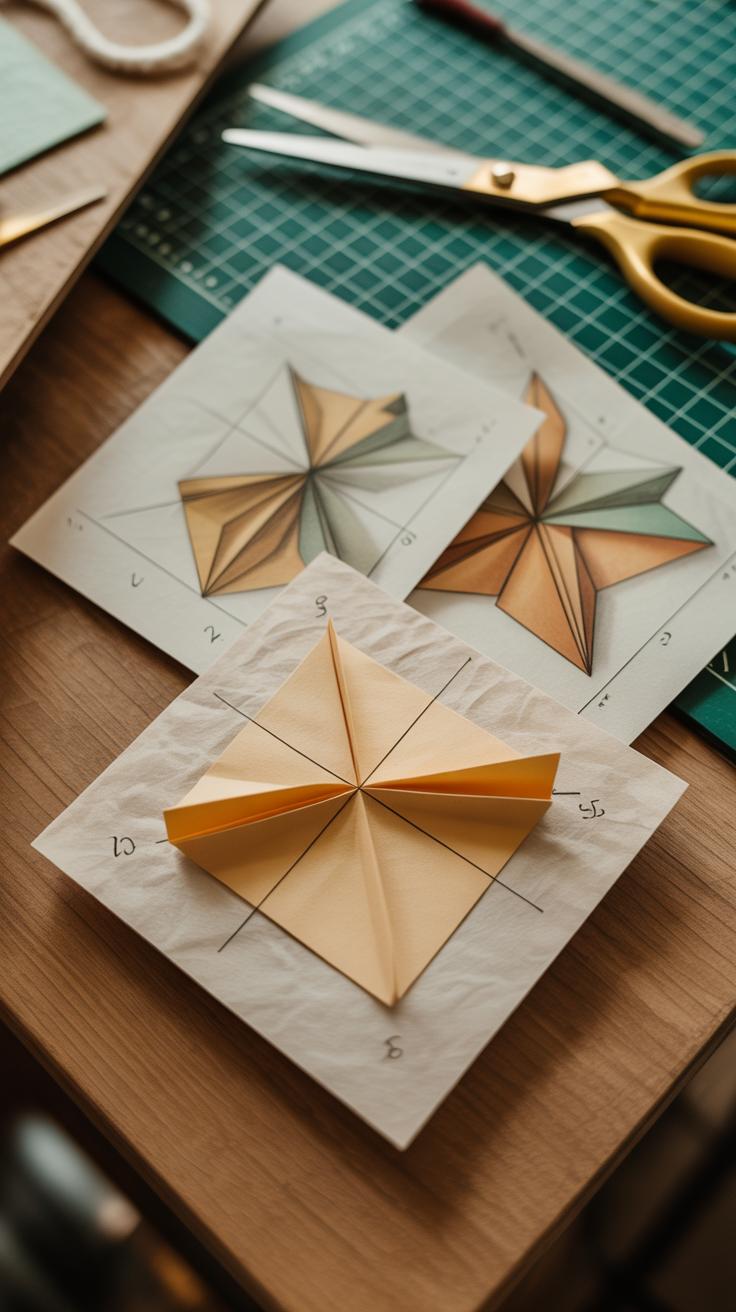
Choosing the Right Paper
When picking paper for your origami boxes, size and weight matter quite a bit. Usually, a square sheet around 15cm works well, but if your items are smaller or larger, adjust accordingly. Thicker paper tends to hold its shape better, yet if it’s too stiff, folding becomes tricky and corners may tear. I found that paper around 120-160 gsm strikes a decent balance—durable but still flexible enough.
Colors can change how your box looks and feels. Plain pastels often give a clean, minimalist vibe, while patterned paper adds interest but might clash with what you store inside. Sometimes, a shiny or textured finish adds subtle elegance, though I’ve experienced that these can make precise folds harder. You might want to experiment with a few types before settling down.
Step-by-Step Folding Instructions
Let’s keep things straightforward with the classic origami box. Start with your square paper, color side down.
- Fold the paper in half horizontally, then unfold.
- Fold in half vertically, then unfold again. You should have two crease lines crossing at the center.
- Fold each corner into the center point, making a smaller square.
- Fold the new edges to the center line but only halfway up on two opposite sides.
- Lift the flaps you just folded, open the corners slightly, and fold the sides up to form the walls of the box.
- Use the remaining flaps to fold inside and lock the box edges in place.

Folding sharply at each crease helps the box keep its shape. The trickiest part is the last step—locking those edges down. I sometimes need a couple tries before feeling the box is stable enough to hold small objects securely. Do you think it’s easier with thicker paper? Maybe, but it can depend on how precise your folds are.
Origami Drawer Dividers and Organizers
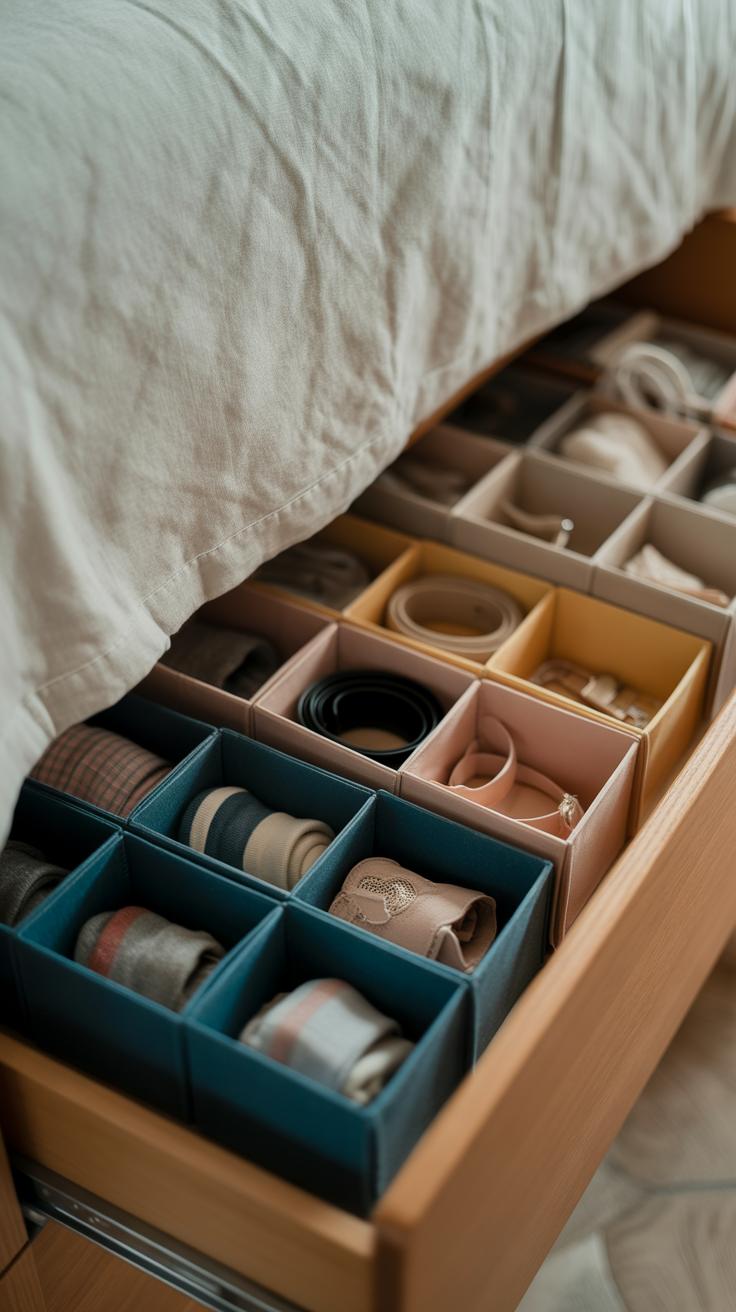
Designing Dividers to Fit Your Drawers
Start by measuring the inside of your drawer carefully—length, width, and even height if you plan on stacking. You want the origami dividers to snugly fit without forcing the drawer open or sliding around when you pull it out. Using a ruler or tape measure, jot down the dimensions on your craft paper. Folding to match those measurements can feel a bit tricky at first, especially if your drawer isn’t a perfect rectangle, but some small adjustments during the folding stage usually do the trick.
Pick thicker origami paper or lightweight cardstock for sturdiness. Then, fold simple panels or accordion folds that create barriers. If you want, fold segments with tabs that interlock—this way, your dividers stay put without glue or tape. It’s also okay if your dividers don’t come out perfectly straight. The point is to experiment until you find what fits your specific drawer, and frankly, that process can be part of the fun.
Using Origami to Categorize Items
Origami offers more than just straight dividers. You can fold organizers into various shapes—some work better for small loose items, others for longer utensils or pens. For example, try folding narrow triangular pockets to separate pens or makeup brushes. Or create tiny compartments shaped like envelopes for paper clips or rubber bands. The different shapes help you mentally sort items into categories, so picking up what you need becomes easier, almost automatic.
Once, I folded a series of square corrals sized perfectly for kitchen measuring spoons and small gadgets. Each origami section held one or two items. Not only did this cut down drawer clutter, but it also gave the whole drawer an oddly satisfying look. You might feel the same once you see everything neatly sectioned off with just folded paper. Have you ever wondered how something as simple as folding paper could shift your whole approach to organization?
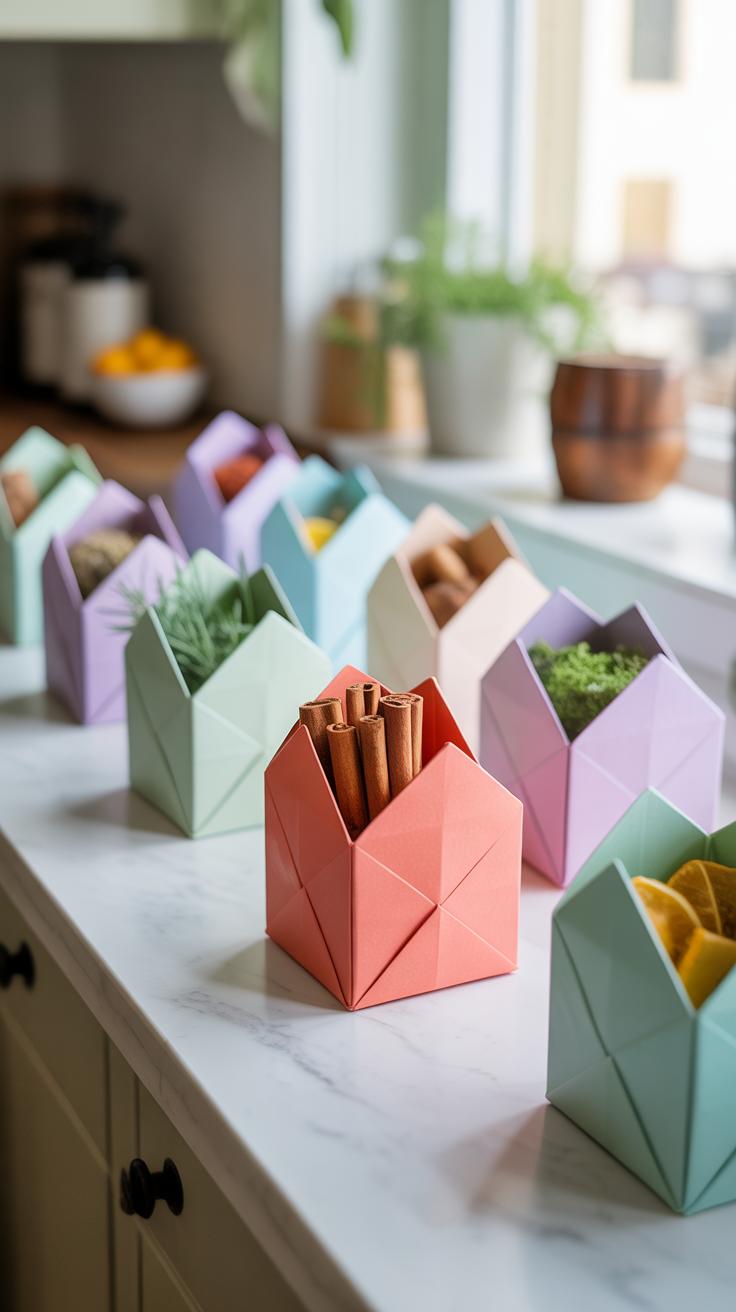
Decorative Origami Storage Solutions

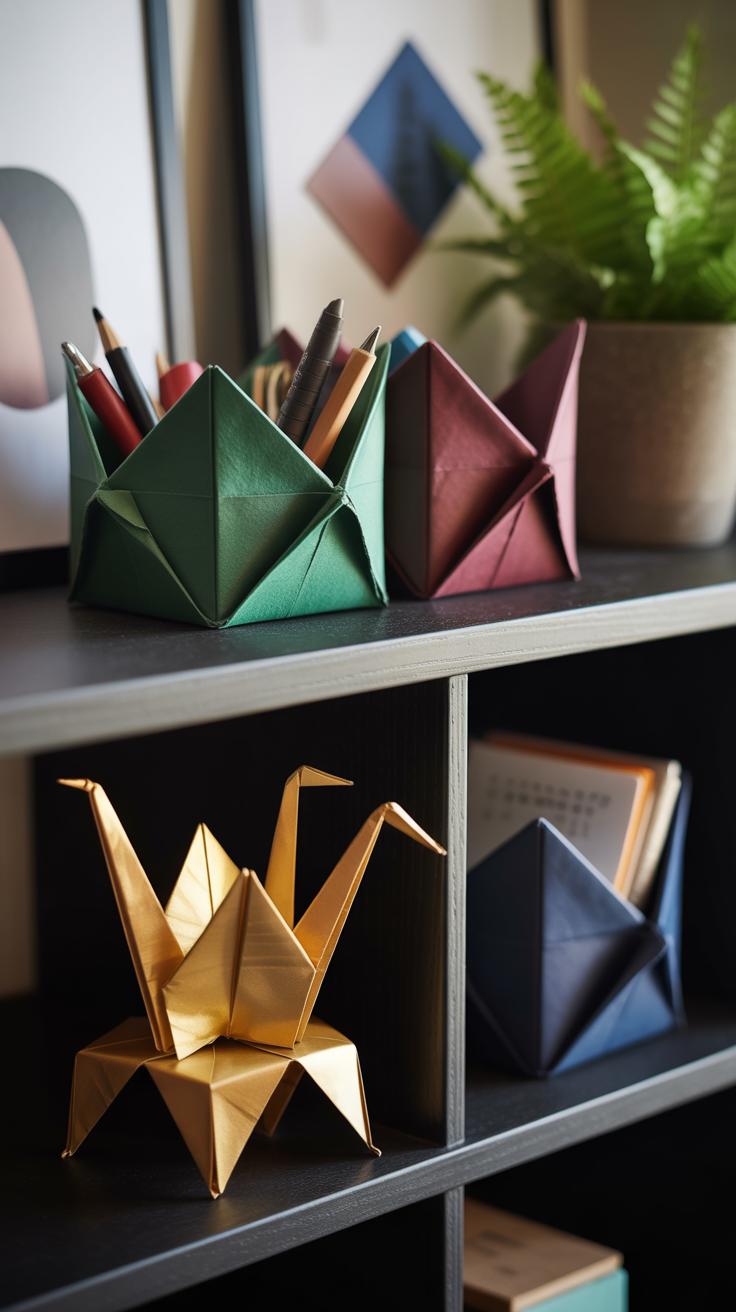
Origami can turn simple storage into something much more than practical—it can become a visual highlight in your home. When you fold paper into containers shaped like flowers or geometric forms, these pieces do double duty. They hold small items yet look interesting enough to display openly. I’ve often found that these containers invite curiosity, making everyday storage a bit more enjoyable.
Creativity amps up what would be ordinary boxes or trays. Instead of dull plastic bins, you get art that frames your essentials. This combination of form and function means your storage can pull double duty: neat and eye-catching. Sometimes, when I’ve made these, I catch myself organizing just to admire the shapes alongside the items inside.
Some origami shapes that work well are:
- Lotus or flower containers: Soft curves that hold jewelry or keys.
- Modular geometric bowls: Sharp edges that keep desk supplies tidy.
- Boxy cubes with lids: Small but sturdy for coins or paperclips.
- Nested baskets: Varying sizes stack nicely on shelves, providing flexible storage.
Each design can highlight a specific spot in your home, like a windowsill or bookshelf. You might wonder how far you can push the creativity—because your storage doesn’t just need to be useful; it can be something you actually want to look at all day.
Maintaining and Caring for Origami Storage

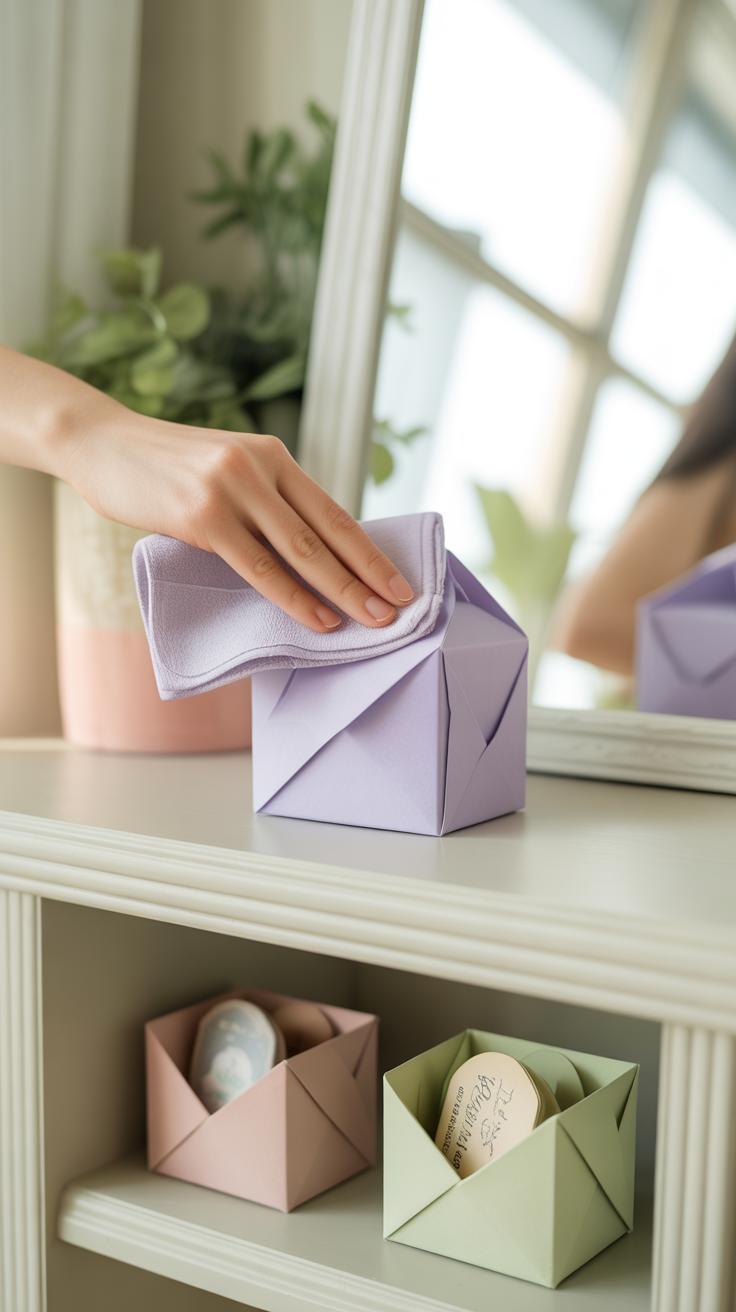
Keeping your origami storage looking sharp means paying attention to the kind of paper you choose. Thicker, acid-free paper often holds creases better over time, though sometimes a lighter, more flexible sheet works well if you want softer shapes. You might find yourself switching papers based on the item’s purpose—something for holding jewelry needs sturdier folds, while a decorative basket might be lighter.
Handling matters too. Avoid crumpling or roughly shifting your origami pieces. When moving them, carry them gently by their base or the strongest fold. I’ve noticed that even a slight bend can throw off a paper box’s shape, so care is key. Does this make you treat your origami like fragile art, or more like everyday objects? There’s a balance to strike, really.
Protecting your origami from moisture is another challenge. Paper and water don’t play well. Placing your pieces away from humid spaces like bathrooms or kitchens helps. If spills happen, blot carefully rather than rubbing. Some people seal their creations with a light spray of fixative or a thin layer of clear glue, but that changes feel and flexibility—so it’s personal preference.
If your origami gets bent or slightly torn, don’t toss it just yet. You can smooth out creases by gently refolding along the original lines. Using a bone folder or even the edge of a credit card makes the folds sharper again. Small tears might be fixed by slipping a tiny piece of matching paper inside and folding it in. It’s fiddly but worth a try before giving up on a favorite piece.
Getting Creative with Your Own Origami Storage

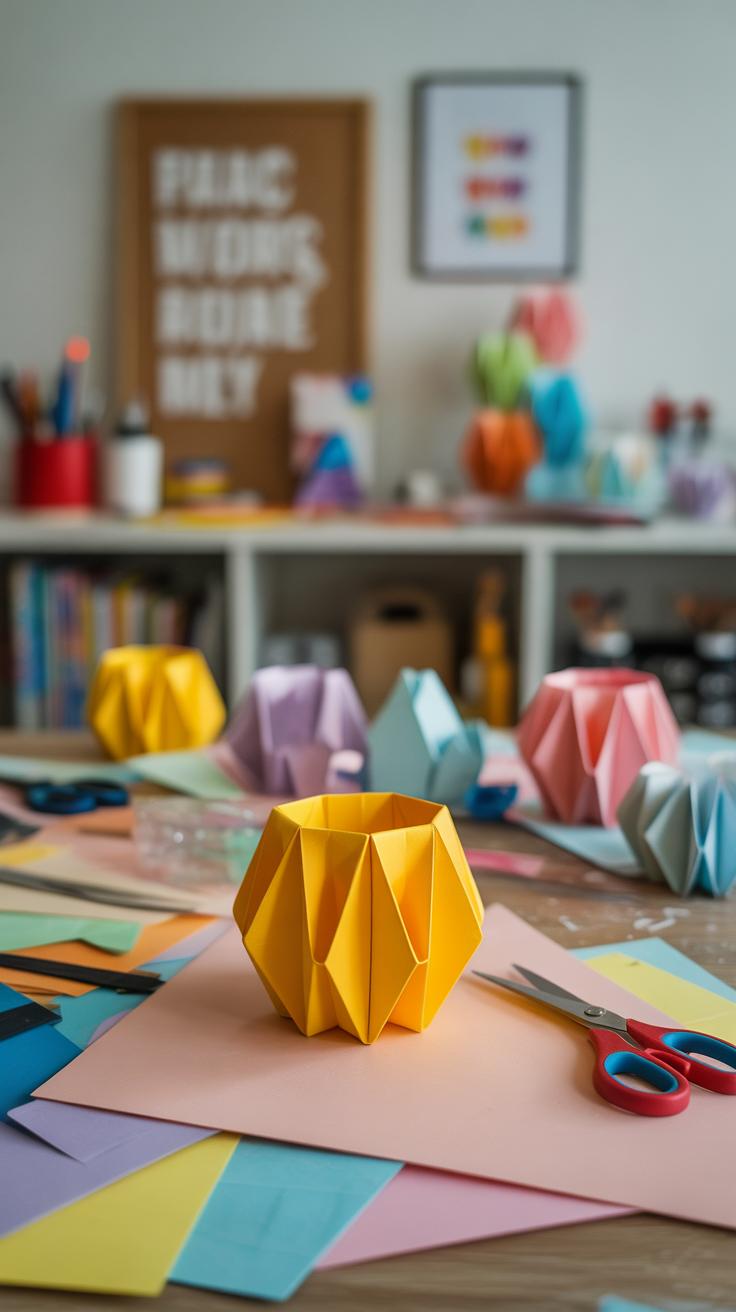
Trying out different paper types can change everything. Thicker paper holds shape better but might be harder to fold. Thin paper folds easily but can tear if you’re too rough. Maybe you’ve got some scrap wrapping paper or old magazines—those can add color and texture that regular origami paper doesn’t have. Don’t hesitate to play with sizes too. Big sheets can make larger bins or trays, while really small squares might be perfect for tiny organizers or drawer dividers.
When it comes to folding patterns, starting simple is fine, but don’t stop there. Tweak the angles, try combining folds from different models, or invent your own shapes that suit a particular niche—like a slot for keys or an unfolded flap to keep jewelry safe. Sometimes I sketch rough ideas before folding, but other times I just jump straight in, and that spontaneity can lead to unexpected designs.
Tips for Developing New Designs
Brainstorming new shapes can be as casual as noticing what you need around the house and imagining a paper container to fit that. Maybe an awkward corner needs a little catchall, or you have cables that tangle. Think about how the form should function, then fold prototypes to test hold and stability. Don’t get discouraged if the first few attempts fall apart or look odd—each try teaches you something. Keep notes or photos to track what works and what doesn’t, which might surprise you later when you revisit your collection.
Sharing Your Origami Creations
Once you have a few good pieces, sharing them can spark fresh ideas. Show your family or friends—it’s interesting to see how others interact with your work or suggest tweaks. Posting photos online or joining folding groups can expose you to different styles and get feedback you might not expect. Plus, it’s kind of nice to realize you’re inspiring someone else. Sometimes, sharing slows me down, making me see flaws or possibilities I missed before. So, sharing isn’t just about praise—it’s a part of the creative process.
Conclusions
Origami offers a unique and creative way to organize and decorate your home. Through simple folds, you can create storage items that are both useful and visually appealing. This blend of art and functionality makes origami a valuable skill for anyone looking to improve their living environment.
By applying the projects and ideas discussed, you can transform your home storage into a collection of artistic displays. Origami invites you to engage with your surroundings in a hands-on way, making your space more personalized and enjoyable. Start folding and see the difference origami can bring to your home.