Why Small Sewing Projects Aid Storage
Sewing small projects can help you create useful and functional storage solutions for your home. Instead of buying costly storage items, you can make your own with simple sewing skills. These projects help organize your space better and add a personal touch to your home decor.
In this article, you will discover different small sewing projects designed for home storage. You will learn how to make practical items, from storage bags to baskets, that help keep your things neat and easy to find. Follow along to find ideas you can start today.
Choosing the Right Fabric for Storage Projects
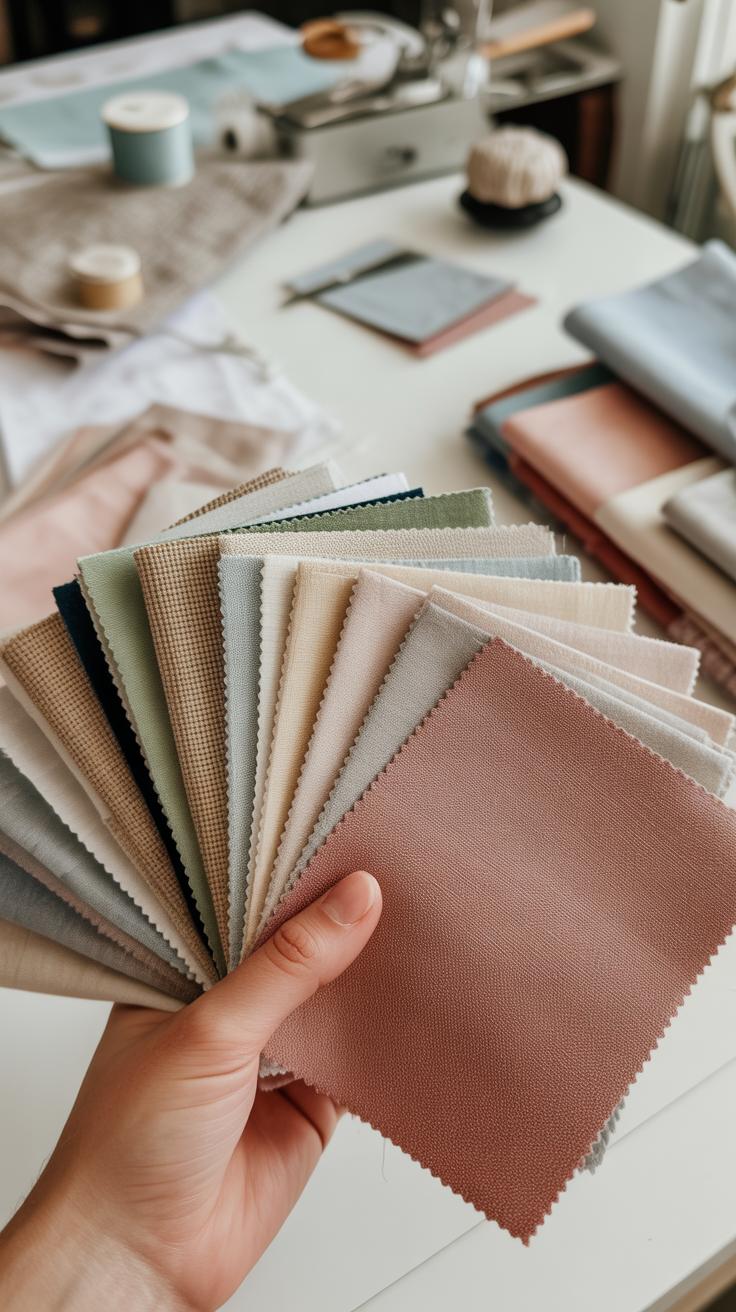
Picking the fabric for a storage project isn’t just about what looks nice. You want something that stands up to wear and tear, or it’ll be frustrating fast. Think about strength and texture—thickness matters, but so does how the fabric handles sunlight and washing. If your storage container is meant for daily use, it probably needs to be easy to clean.
Canvas and denim come to mind immediately—they’re tough and won’t sag under weight. Canvas works well for baskets or larger bins because it keeps form without being too stiff. Denim, on the other hand, can add a bit of style while still offering durability, great for things like tool pouches or kids’ toy bags.

Cotton is softer but varies widely. A heavyweight cotton can work for smaller bags or pouches holding lighter items, but if you pick something too thin, it might wear out quickly. Some cotton fabrics have finishes that repel stains or wrinkles, which can be handy around the house.
Really, think about what you’re storing. Bulky or rough items need sturdier fabric. If you’re crafting a basket for kitchen utensils, canvas or denim might be best. For a pouch to hold notebooks or sewing supplies, a strong cotton blend can do the trick. It makes a bit of difference whether you want the storage to keep shape rigid or be more flexible.
Choosing the wrong fabric can make the project less functional or less enjoyable to use. You might pick something pretty but fragile, and then it won’t last. So, it’s worth a bit of time figuring out the balance between durability, ease of cleaning, and feel before cutting fabric.
Simple Storage Bags You Can Sew Quickly
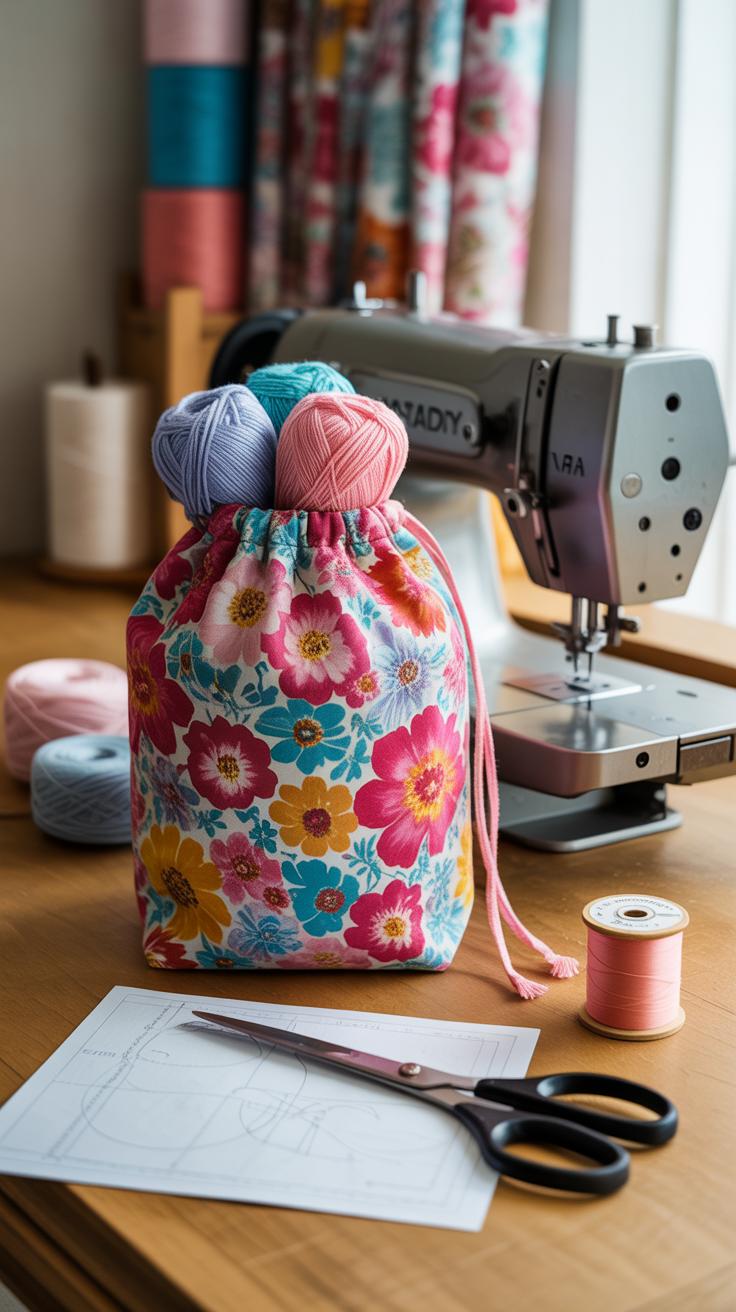
Small storage bags are surprisingly handy around the house. You can keep toys, craft supplies, or random small items neatly tucked away. The patterns don’t need to be fancy—just simple rectangles or squares with a zipper or drawstring closure. Often, these bags are the perfect way to avoid clutter without taking up much time or fabric.

Think of a basic pouch with a zipper. It’s fast to sew and very practical. Or a drawstring bag, which you can make even without a zipper and still keep things contained. Both options fold flat when not in use, saving space.
Here are some quick tips: use sturdy fabric like canvas or denim to hold heavier items. Reinforce seams if you plan to carry bulkier toys. When sewing, backstitch at the zipper ends so it doesn’t rip with frequent use. Also, pressing your fabric before stitching can make all the difference, especially if it’s a bit thick.
Materials and Tools Needed for Bags
Before you start, gather these materials:
- Durable fabric like canvas, denim, or cotton
- Thread matching the fabric color
- A zipper (length depends on bag size) or a drawstring cord
- Sewing needles suitable for your machine and hand sewing
- Fabric scissors for clean cuts
- Pins or clips to hold fabric layers together
- Measuring tape or a ruler
- Iron for pressing
You don’t need much, really. The thread and scissors are obvious. Just make sure your zipper is smooth to avoid snags, and pick a fabric that won’t fray too easily if you’re new to sewing.
Step-by-Step Guide to Sew a Basic Storage Bag
Here’s how to make a simple, zipper-closure storage bag:
- Cut two fabric rectangles of equal size. Add about half an inch to each edge for seams.
- Place the two pieces right sides together, aligning edges.
- Pin the zipper face down along the top edge of one piece.
- Sew the zipper in place carefully, then repeat with the other fabric edge, attaching zipper to both pieces.
- Open the zipper halfway. This is important so you can turn the bag inside out later.
- With right sides still together, sew around the other three edges of the fabric, leaving no gaps.
- Clip the corners to reduce bulk. Don’t cut too close to stitches.
- Turn the bag right side out through the open zipper.
- Press with an iron to shape the corners and smooth fabric.
And there it is. A straightforward pouch ready for your things. You can experiment with sizes or add lining if you want a tidier inside feel. This simple project might soon become your go-to for quick organizing, especially if you keep a few handy around the house.
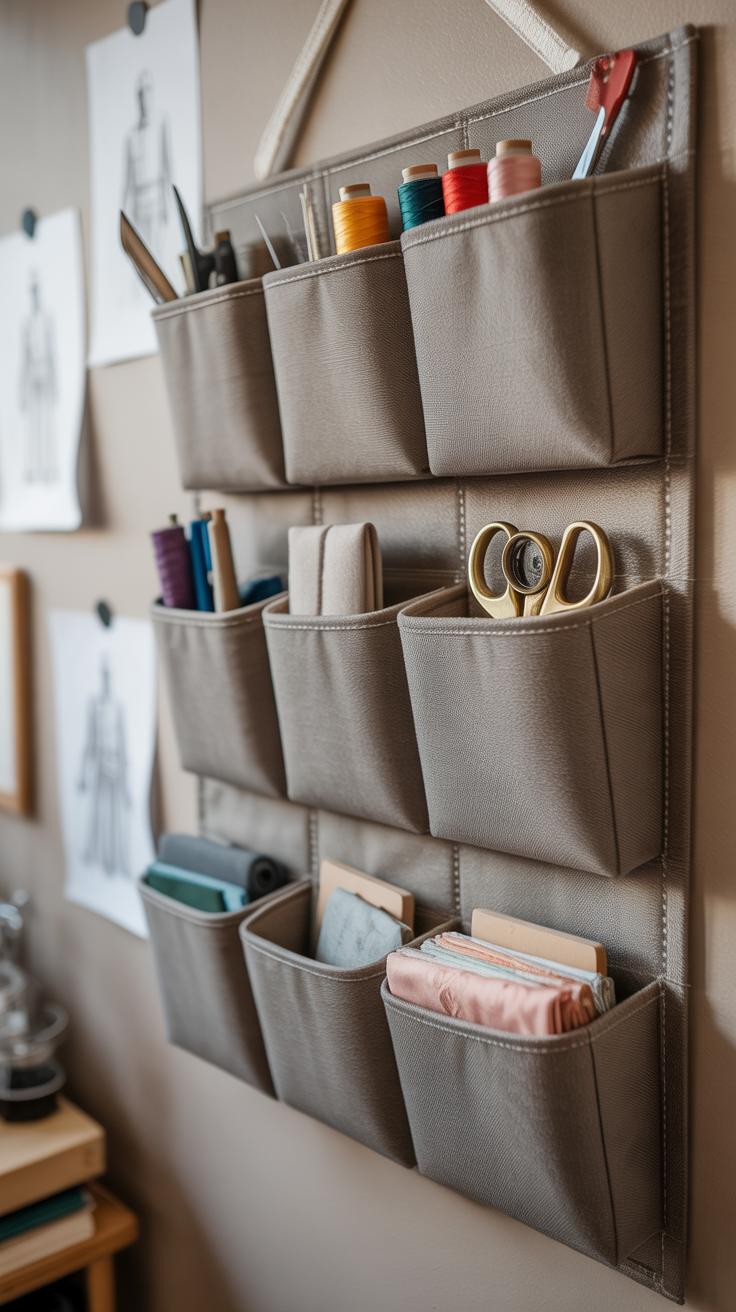
Creating Hanging Organizers for Wall Storage

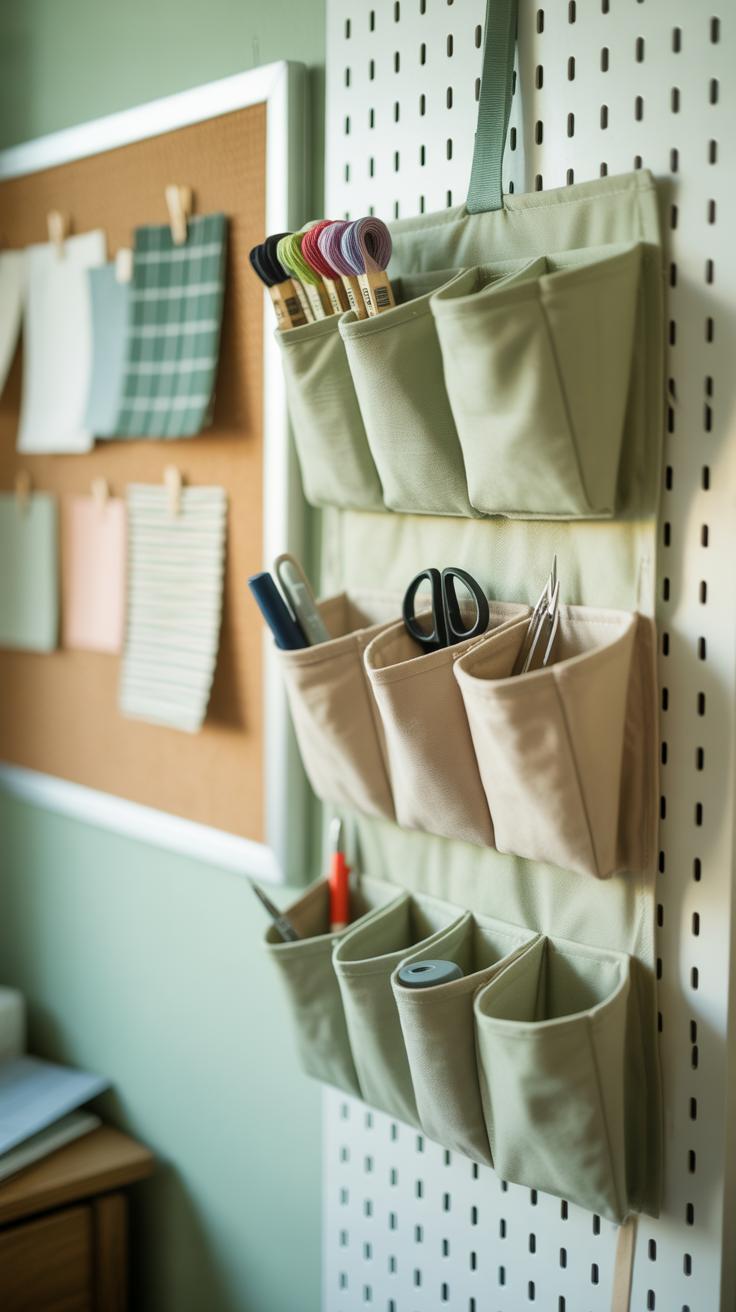
Hanging organizers with pockets offer a practical way to save space, especially when you have limited floor or drawer room. Vertical storage lets you use walls, doors, or even the back of cabinets—areas often overlooked. This way, you keep essentials within reach without cluttering surfaces.
To make one, start with sturdy fabric like canvas or denim. Cut a rectangle sized to your space, say 18 by 24 inches. Then, cut smaller pieces for pockets in various dimensions. Sew the pocket pieces onto the base fabric, stitching the bottom and sides but leaving the top open. Reinforce seams, especially at pocket edges, because those spots take the most stress.
Finally, add a loop or strap at the top, strong enough to hold weight without sagging. This can be sewn into the back or between the layers for neatness. Hang it on a hook, nail, or an over-the-door hanger—whatever fits your setup best. The process is straightforward, but the impact on organization is pretty noticeable.
Design Ideas for Hanging Organizers
Think beyond uniform pockets. Mix sizes to fit different needs—small ones for pens or keys, larger ones for mail or tablets. In the kitchen, try pockets to hold utensils and recipe cards. In a craft room, some deep pockets can stash rolls of tape or scissors, while tiny ones keep buttons or needles.

In bathrooms, narrow pockets fit toothbrushes or makeup brushes. Entryways might call for wider, shallow pockets to accommodate sunglasses or wallets. Experiment with clear or mesh fabrics for easy visibility—or keep it simple and fabric-only for a clean look. You might find yourself tweaking pocket sizes as you notice what items fit best. That’s part of the process.
How to Sew a Hanging Organizer
Begin with cutting your base fabric and pockets. Iron on interfacing to give the pockets some structure, especially if you expect heavier contents. Pin the pockets in place, considering spacing and accessibility.
- Sew the pocket bottoms and sides securely; backstitch at stress points to reinforce.
- Topstitch pocket edges if you want extra durability and a polished look.
- For the hanging loop, fold a strip of fabric in half lengthwise, stitch along the edge, turn inside out, then attach at the top center of the organizer’s back.
- Press all seams well to avoid bulk and help the organizer hang flat.
Notice if pockets bulge or sag—adding a second row of stitching can help. Don’t hesitate to add a thin lining for extra strength or a splash of color. Sewing these organizers is part design and part function. You might find this project becomes a staple in your home storage toolkit.
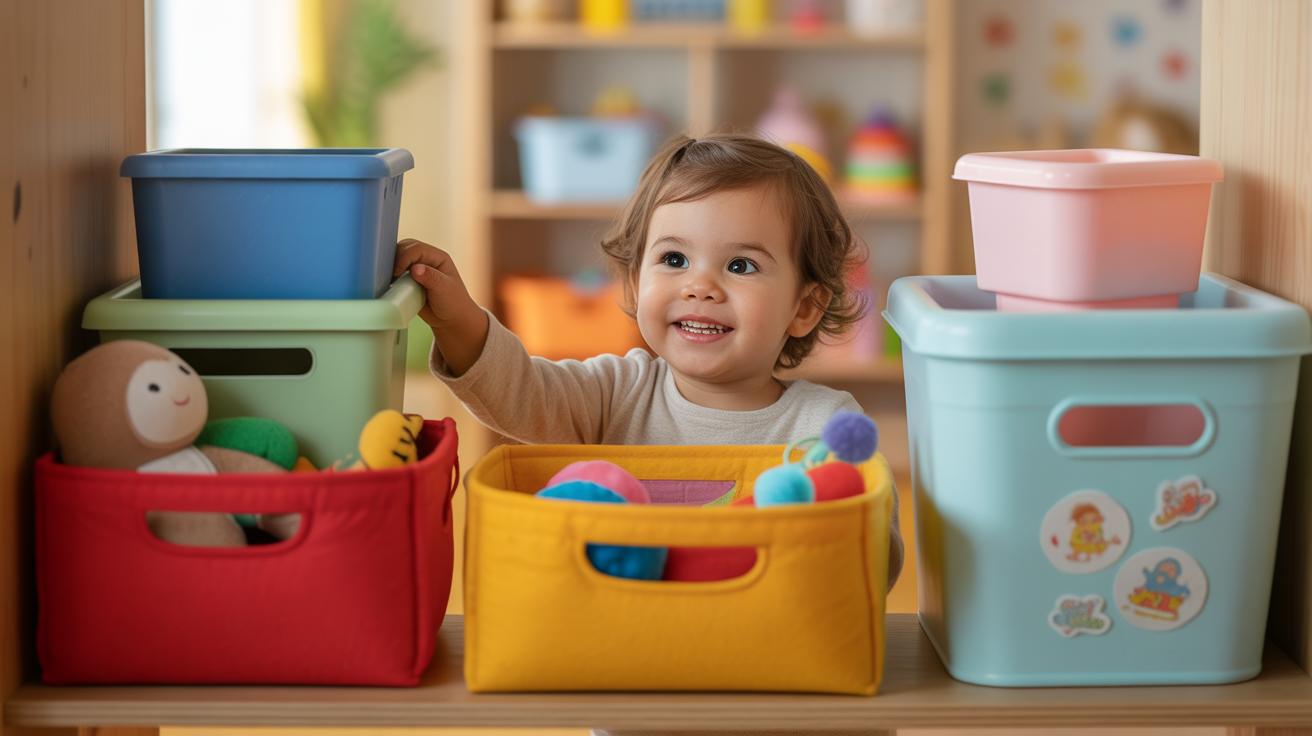
Making Fabric Baskets for Drawer Organization
Discuss sewing small fabric baskets to organize drawers
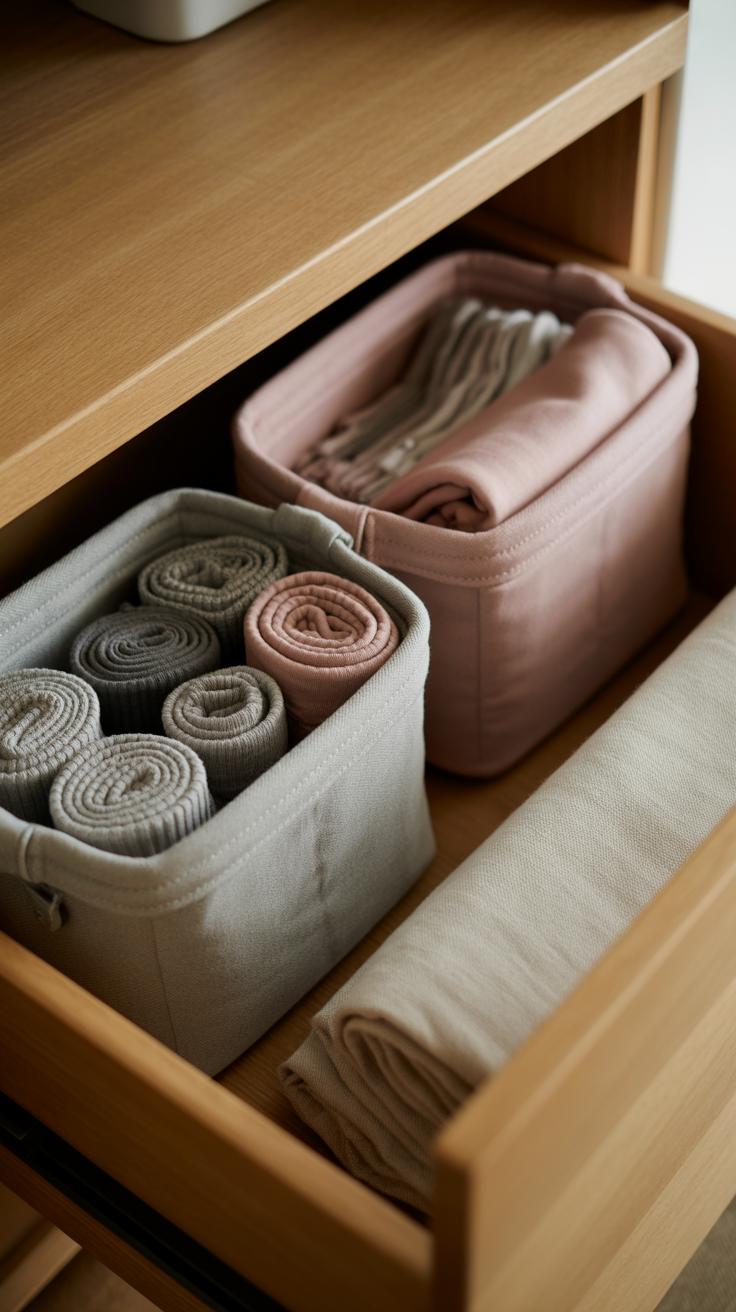
Small fabric baskets can really change how your drawers work. When you sew these little containers, you create specific spots for different items, which helps keep everything separated and less chaotic. Instead of digging through a jumble, you’ll have a neat place for socks, office supplies, or whatever else needs taming.
These baskets are flexible too. If you need to move things around or switch categories, just swap the baskets. It’s easier than rearranging the whole drawer. Now, fabric choices matter here—something medium-weight usually works best. Cotton or canvas are popular because they’re sturdy without being bulky. A softer fabric might collapse when empty; one too thick could feel clunky.
Choosing Structure for Fabric Baskets

Giving fabric baskets shape means adding some kind of interfacing or stabilizer. Without support, baskets flop over, which defeats their purpose. You could try fusible interfacing, which irons right onto your fabric. It’s handy and simple, but some types can get stiff or crispy, depending on the brand. Then there’s foam stabilizer, which adds bulk and softness but might be overkill for small baskets.
I’ve also heard about using heavy canvas or even thin plastic canvas inside walls for structure, though sewing through plastic can be tricky. Choosing support really depends on what you want from your basket—do you want it rigid or more flexible? There’s no perfect answer, just what fits your space and your use.
Sewing a Simple Fabric Basket
Start with two fabric squares for the outside and lining, both cut to the same size. Fuse interfacing to the outer piece if you want stiffness. Sew right sides together along three edges, leaving one edge open for turning. Turn the piece inside out, press it flat.
Next, create the basket shape by sewing the corners. Pinch each corner to form a triangle, then sew across the tip about an inch or two from the point. Trim the excess fabric. When you flip it right side out, the corner becomes a flat base. Fold in edges of the open side and sew across to close. That’s it—a simple, tidy fabric basket ready to hold your drawer’s contents.
Crafting Pouches for Small Item Storage
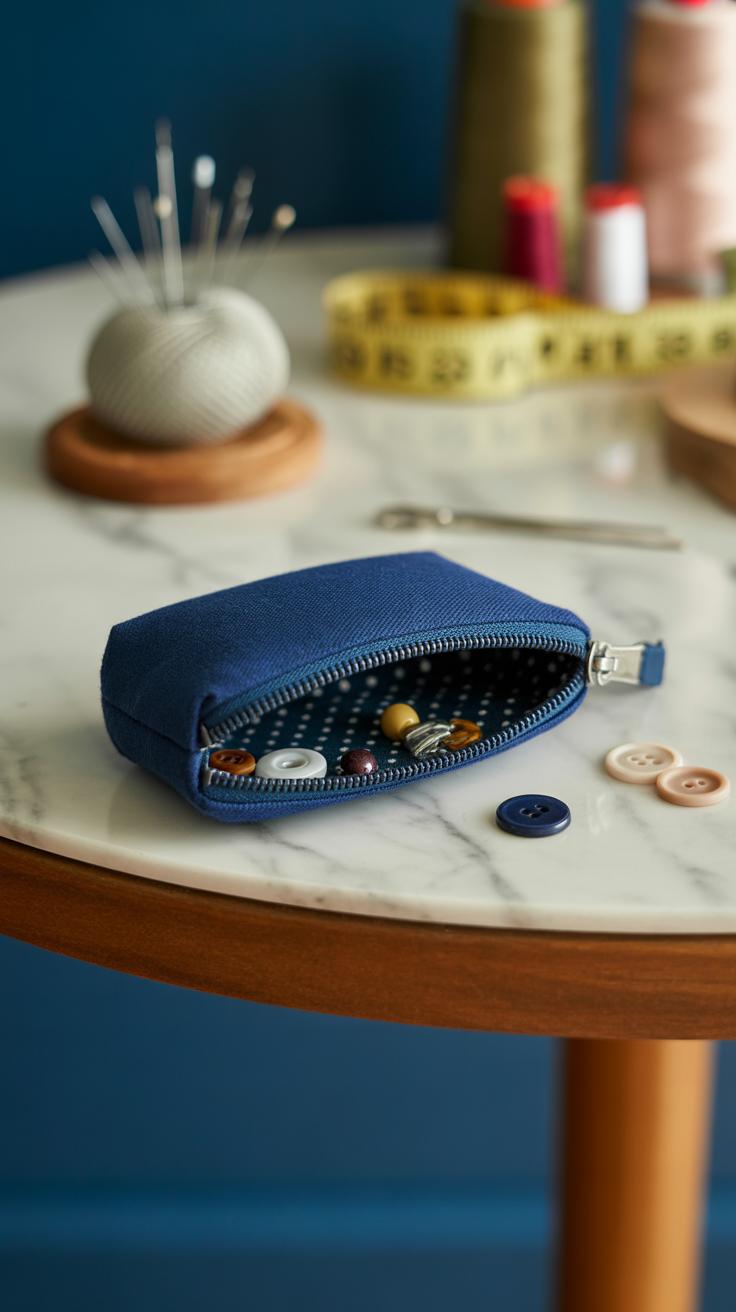
Small pouches offer a neat way to keep coins, jewelry, and even craft tools within easy reach and neatly contained. Making these pouches doesn’t require much fabric or complex skills—just a little patience and a couple of basic sewing techniques.

Start with simple shapes like rectangles or squares. Choose fabrics that suit your needs—something sturdy enough to hold heavier tools or soft for delicate jewelry. Lining the pouch is a good idea if you want extra durability or a cleaner finish inside.
Closures can vary. You might sew in a zipper for a tight seal, or go for buttons if you prefer a classic touch. Some even like using snaps for quick access. Each choice suits different pouch purposes. For instance, zippers keep tiny beads safe from spilling, while buttons or snaps work well when you want easier opening.
When stitching, consider using a straight stitch for seams and a backstitch at the start and end to secure. Topstitching along edges helps keep the shape crisp. These sewing basics help your pouch last, even if it sees daily use.
Selecting Closure Types for Pouches
Choosing the right closure depends a lot on what you’ll store and how you’ll use the pouch. Here’s a bit of a breakdown:
- Zippers: Great for secure closure—coins and small beads won’t escape. Slightly more tricky to sew but worth the effort for tight sealing.
- Buttons: Offer a classic look and are easy to apply by hand or machine. Best if you don’t mind slightly less security and want style.
- Snaps: Fast and functional. Easier to open one-handed, which is handy if your fingers aren’t in perfect shape or you’re on the go.
It’s tempting to stick with zippers for everything, but sometimes buttons or snaps can feel less fussy, especially when you’re after quick access or a vintage style.
Step-by-Step Pouch Sewing

Here’s a straightforward method for a basic pouch with a zipper:
- Cut two fabric rectangles, identical in size, plus two matching lining pieces if you want.
- Sew the zipper between the top edges of the outer fabric and lining separately.
- Put the outer fabrics right sides together, lining up the zipper edges, and sew the remaining three sides.
- Repeat the same for the lining pieces but leave a small gap for turning.
- Turn the pouch right side out through the gap, then hand sew the gap closed.
- Push the lining inside the outer pouch, press all edges flat, and topstitch along the zipper edge.
With just these few steps, you get a neat, functional pouch. It’s not complicated, but it feels satisfying. Sometimes the zipper isn’t perfectly aligned on your first try, and that’s okay. Each attempt gets better.
Designing MultiPocket Storage Solutions
Benefits of Multi-Pocket Designs
Multi-pocket storage items have this practical edge: they let you sort things neatly, instead of dumping everything together. When you have a ton of small stuff—buttons, sewing needles, craft beads—one big space can turn chaotic fast. But small pockets break that mess down, keeping things visible and easy to grab.
Think about your desk. A multi-pocket organizer can separate pens, clips, sticky notes, and chargers without mixing them up. Or in a sewing corner, organizing threads, scissors, and fabric scraps by pocket saves time hunting around.
Multiple pockets make it simple to create dedicated spots for odd sizes or fragile items. You might think one big pouch works fine, but once you try pockets, you realize it’s more about quick access than volume.
How to Sew Multi-Pocket Organizers
Start by deciding the size and number of pockets needed. Measure your base fabric and plan each pocket’s width and height carefully—uneven pockets can look sloppy and may reduce function. Using a ruler and chalk or a fabric pen helps keep pockets aligned.
Cut pocket pieces slightly larger than the intended size for seam allowance. Lay them on the base fabric, pinning their edges. Then sew straight lines along the sides and bottom of each pocket, leaving the top open. It helps to sew slowly here, ensuring stitches are straight and pockets don’t twist.
To create separate pockets side-by-side, sew vertical lines between them, starting at the base fabric up to the pocket opening. For more durability, backstitch at the seams’ start and end to avoid unraveling. And don’t skip reinforcing corners—they see most stress.
It might take some trial and error to figure out pocket sizes that fit your stuff well. But once you find a good setup, the organizer feels like it sorts itself out, even if it’s just fabric and stitches holding it all together.
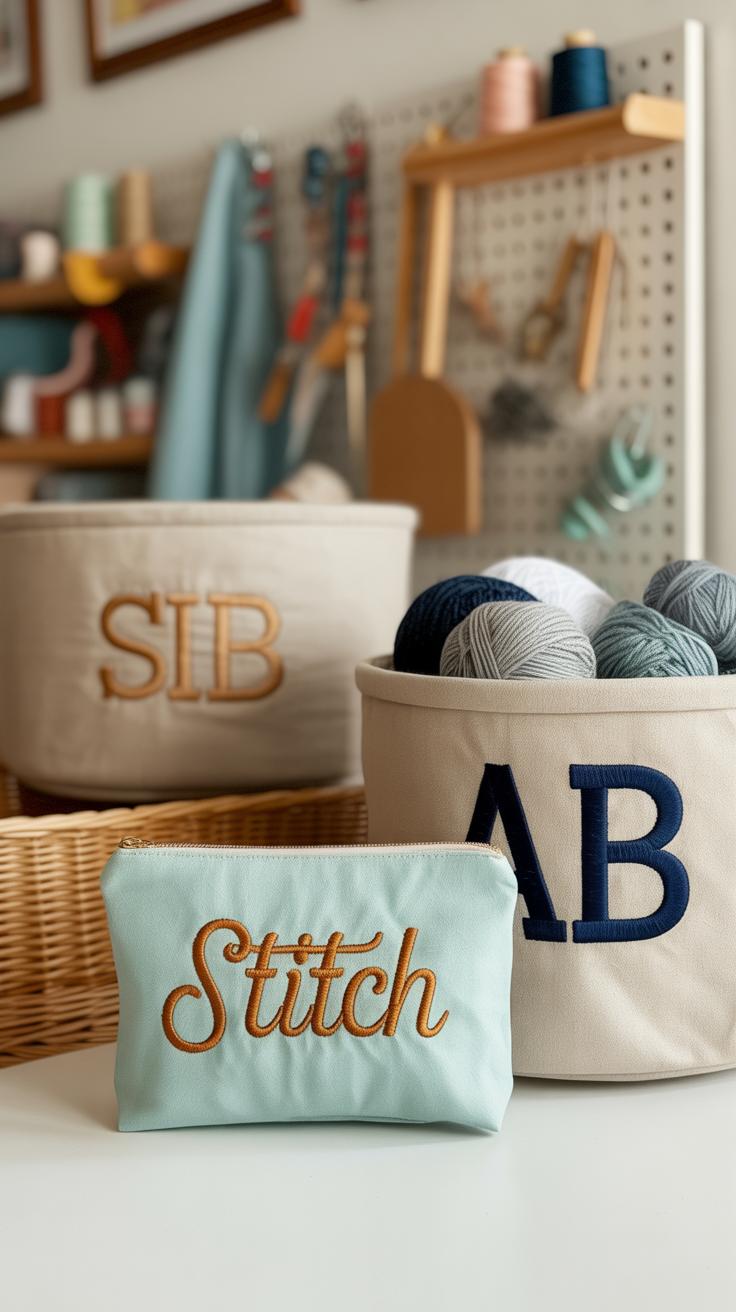
Using Labels and Tags for Easy Identification

Labels on homemade storage items aren’t just decorative—they really help you keep track of what’s inside, especially when you have multiple containers or pockets. You might think you’ll remember where everything goes, but often, small projects like fabric bins or pouches get mixed up or used for different things over time.
Adding fabric labels or tags is simpler than you’d expect. You can sew on small strips of fabric with the category name or item description or even use printed labels transferred onto fabric. Some even write directly on fabric with permanent markers designed for textiles. Each method helps keep things clear and quick to find.
Labels make the whole system feel less chaotic. When you peek into a box or pocket, you don’t have to dig around. Everything has a clear spot. Plus, when you grab something out, putting it back becomes straightforward. No more “where did I put that?” moments.
To make labels durable, try reinforcing edges with a few stitches or using a fabric stiffener spray. Larger labels can be pinned or clipped on if you want to change them later. Sewing labels directly onto storage items means they stay put, which is nice for things that get moved a lot.
Ask yourself: Would a handwritten label fade or get messy? If yes, try printable fabric tags or embroidered ones. It’s a bit more work but makes all the difference. Clarity is key, but so is durability—you want labels that survive gentle washing and regular handling.
Maintaining and Cleaning Your Sewing Storage Items
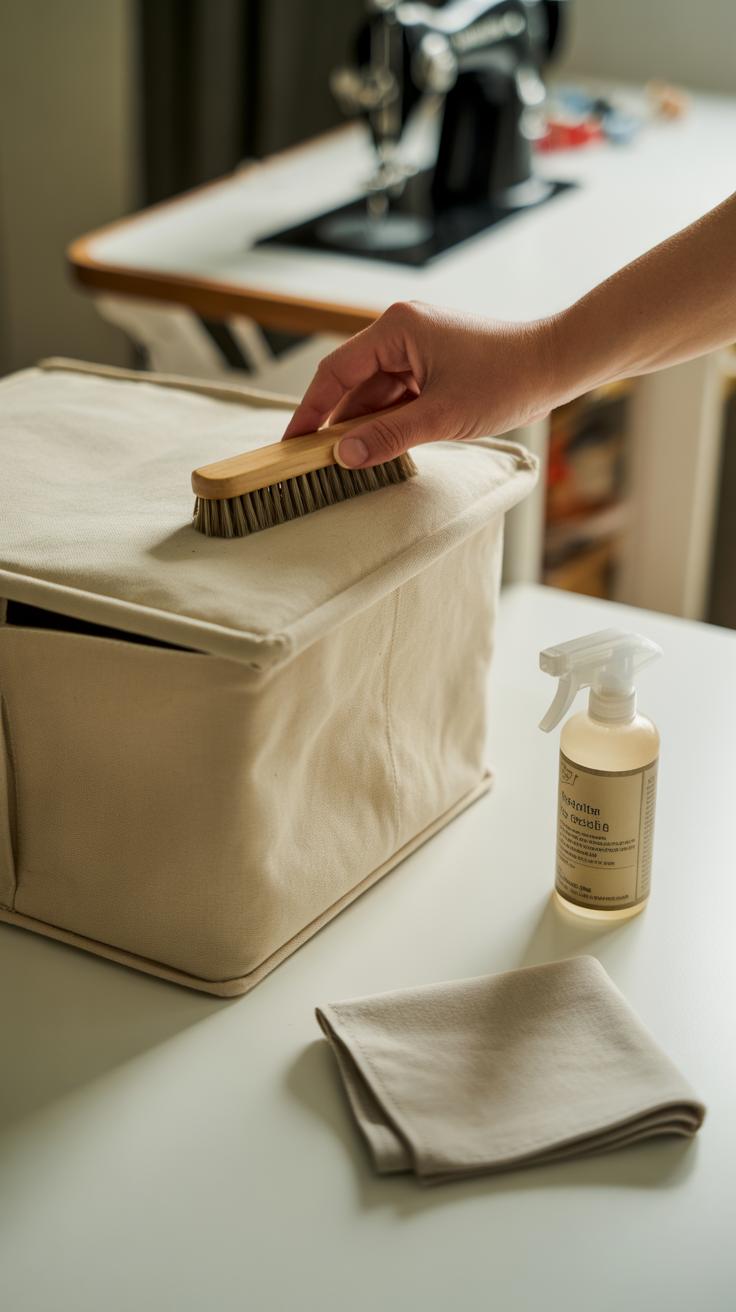
Regular Maintenance Tips
Keeping your fabric storage items looking and working well doesn’t have to be complicated. You might find that a quick routine helps more than you expect. For example, a gentle dusting every week or so keeps dirt from settling into the fabric. Sometimes, just taking things outside on a dry day to air them out can refresh and reduce any musty smells. I’ve noticed storing baskets in damp basements makes airing out even more necessary.
Try to spot-check for stains or damage regularly. Catching small issues early can save a lot of hassle later – like a tiny spot that can be wiped away before it sets in. It might feel tedious but treating your storage with this kind of care extends their life far beyond what you might think.
Cleaning Fabric Storage Projects
Washing instructions depend a lot on the fabric type. Lightweight cotton or canvas bags usually handle machine washing on a gentle cycle, but delicate fabrics—like linen or blends—might need hand washing or spot-cleaning. If you’re unsure, trying a small, hidden part first can prevent unwanted surprises.
When it comes to stains, a little patience helps. For oil-based marks, blotting gently with mild dish soap mixed with water works better than scrubbing. For ink or dye stains, rubbing alcohol applied carefully with a cotton swab might do the trick, but always test it. Also, avoid bleach unless you’re dealing with pure white cotton and don’t mind some fading.
Remember, drying flat is usually safer than tossing these items in the dryer. Heat can shrink or warp fabric storage you’ve sewn with care. Over time, minor wrinkling or fading is inevitable, but treating your storage pieces well can keep them useful and attractive much longer. So, would you try a morning fresh-air routine for your sewing baskets?
Personalizing Your Storage Projects for Your Home
Adding personal touches to your storage projects can make them more than just useful—they become little expressions of your style. You might try fabric paint for bright patterns, or maybe embroidery if you want something a bit more textured. Patches offer a quick way to add character too, especially if you’re not feeling very confident with paint or needlework.
Think about colors that speak to you or patterns that complement your room. Stripes, polka dots, or even small floral motifs can change a plain bin into something you actually look forward to seeing. I once painted a simple white canvas basket with bold geometric shapes, and it instantly lifted my workspace mood. This kind of personalization makes your storage feel like it belongs to you, rather than something generic.
When applying paint, choose fabric paints that don’t bleed and follow the drying time carefully—sometimes patience really pays off here. For embroidery, use stable fabrics and start with simple stitches such as running or backstitch to avoid frustration. Attach patches with iron-on adhesive or sew them on firmly, making sure edges won’t peel or catch on things. It’s these small details that keep your decoration safe and lasting.
You might wonder if too much decoration could get in the way of storage’s function. Sometimes it does—but then again, you also want your space to feel inspiring. What’s your balance?
Conclusions
Making small sewing projects for storage is a smart way to organize your home. You can tailor each project to your specific needs and style. These projects are simple to do and do not require advanced sewing skills. You can save money and reduce clutter while adding a creative touch to your living space.
By choosing the right fabric and following easy steps, you make storage pieces that last. Start with one project at a time and see how it improves your space. You will enjoy the feeling of a tidy, well-organized home that you made yourself.