Introduction
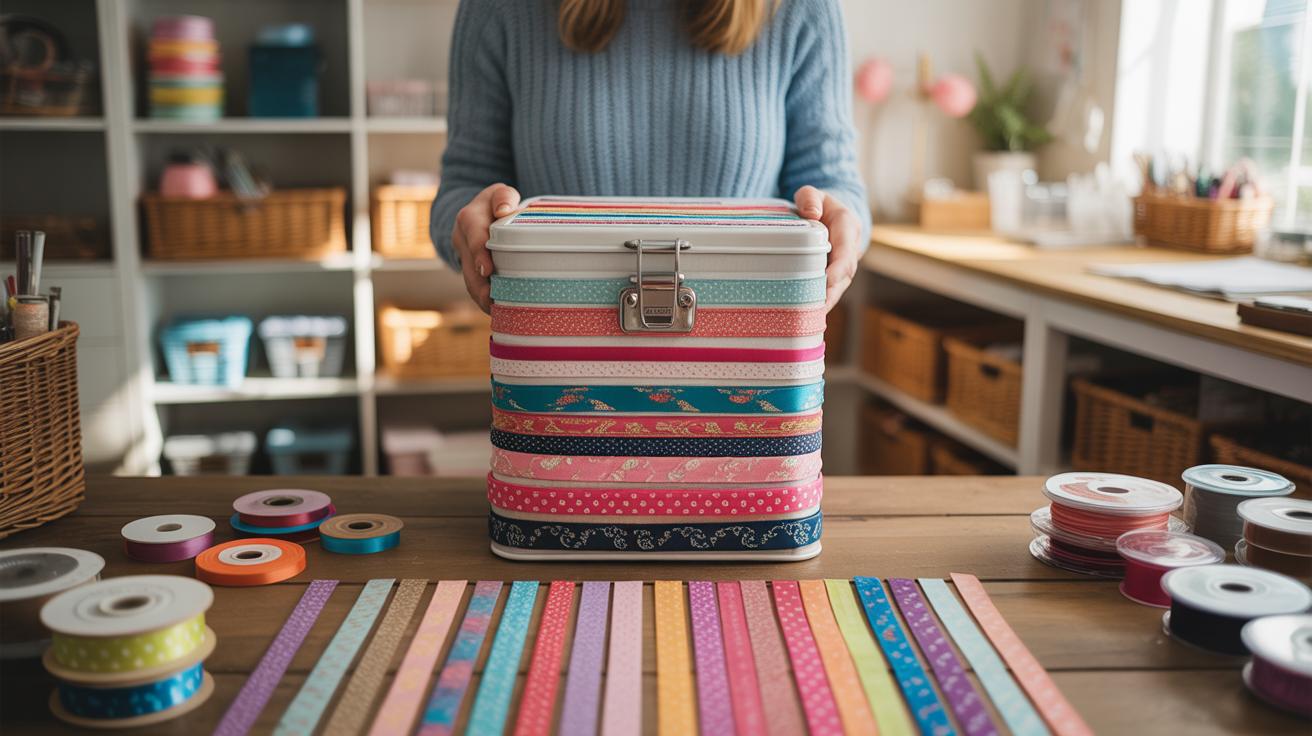
Ribbon crafts offer a fun and creative way to transform your home storage bins. With simple techniques and inexpensive materials, you can add style and personality to ordinary bins used for storing your belongings. Ribbon crafts let you customize storage containers to match your home décor or your personal taste.
This article explores different ribbon craft ideas tailored specifically for beautifying home storage bins. You will learn easy-to-follow projects and practical tips to make your storage bins look attractive while keeping your home organized and neat. Discover how ribbon crafts can bring a fresh look and feel to your storage solutions.
Choosing The Right Ribbons For Your Storage Bins
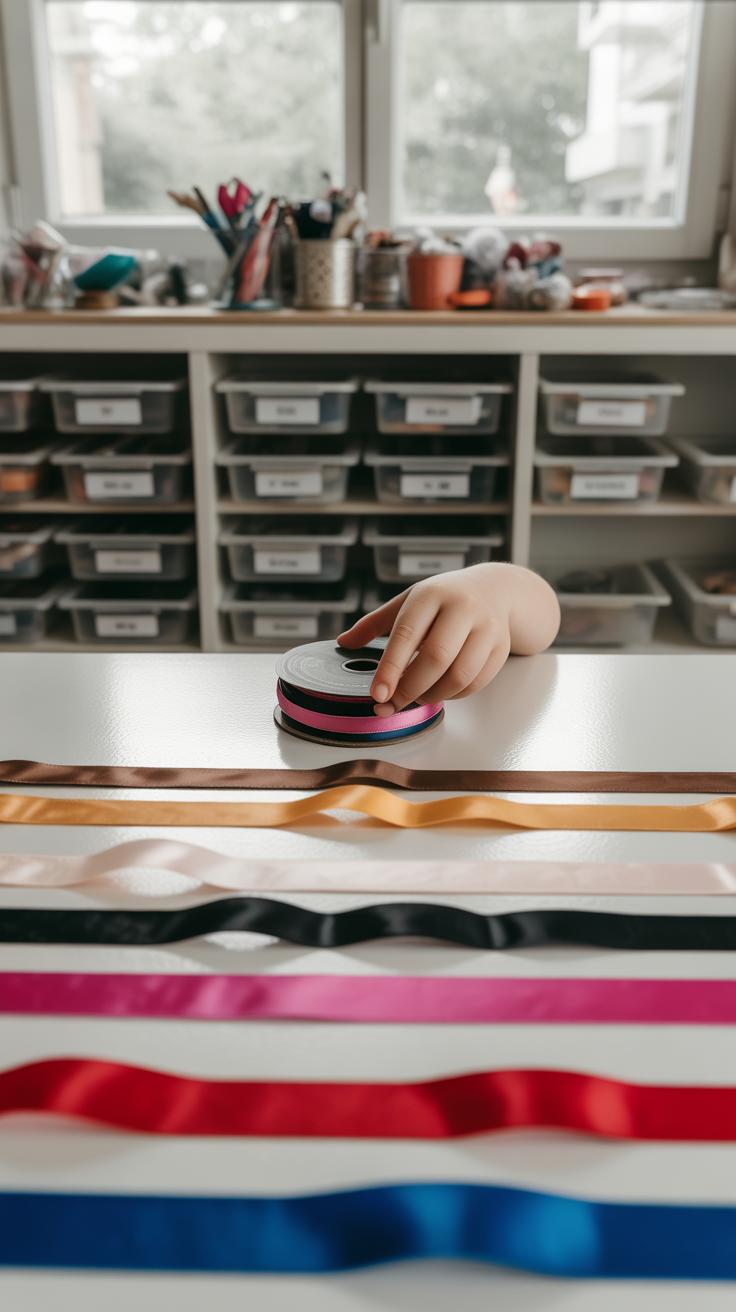
Picking ribbons for your storage bins isn’t as straightforward as just grabbing what looks nice. You want to think about the bin’s material—plastic, wicker, fabric, or wood—and how a ribbon will hold up or stand out. For smooth plastic bins, satin or grosgrain ribbons often work well because they stick and tie neatly without slipping. On wicker or fabric bins, you might try velvet or cotton ribbons, which have more texture and grip, making them less likely to unravel.
Room decor plays a big role too. If your room has a neutral palette, bold or patterned ribbons can add some charm. In contrast, for already colorful rooms, it may be better to keep ribbons toned down, subtle shades or soft pastels. I’ve sometimes mixed materials to balance out the look—like pairing a shiny satin ribbon with a matte wicker basket to create some contrast but maintain cohesion.

Popular choices include grosgrain for its sturdiness, satin when you want shine, and velvet for a cozy touch. Paper ribbons or burlap can also give a rustic vibe if that fits your style. Experiment a little; the texture and how the ribbon interacts visually and physically with your bins matter more than you’d expect.
Matching Ribbon Colors With Your Home Decor
Choosing ribbon colors isn’t just about liking a shade. It’s about whether your ribbons blend with or pop against your storage bins and the room itself. You could go with complementary colors—like navy ribbons on white bins in a coastal-themed room—to emphasize the style. Or try contrast: bright ribbons on neutral bins to add energy.
One trick I’ve found helpful is to pull colors directly from other decor elements in the room, like cushions or curtains, and match those on the ribbons. Sometimes, sticking to monochromatic shades—different tones of the same color—creates a subtle but polished look. But really, don’t shy away from clashing colors if you want a bit of fun or personality. It’s your space, after all.
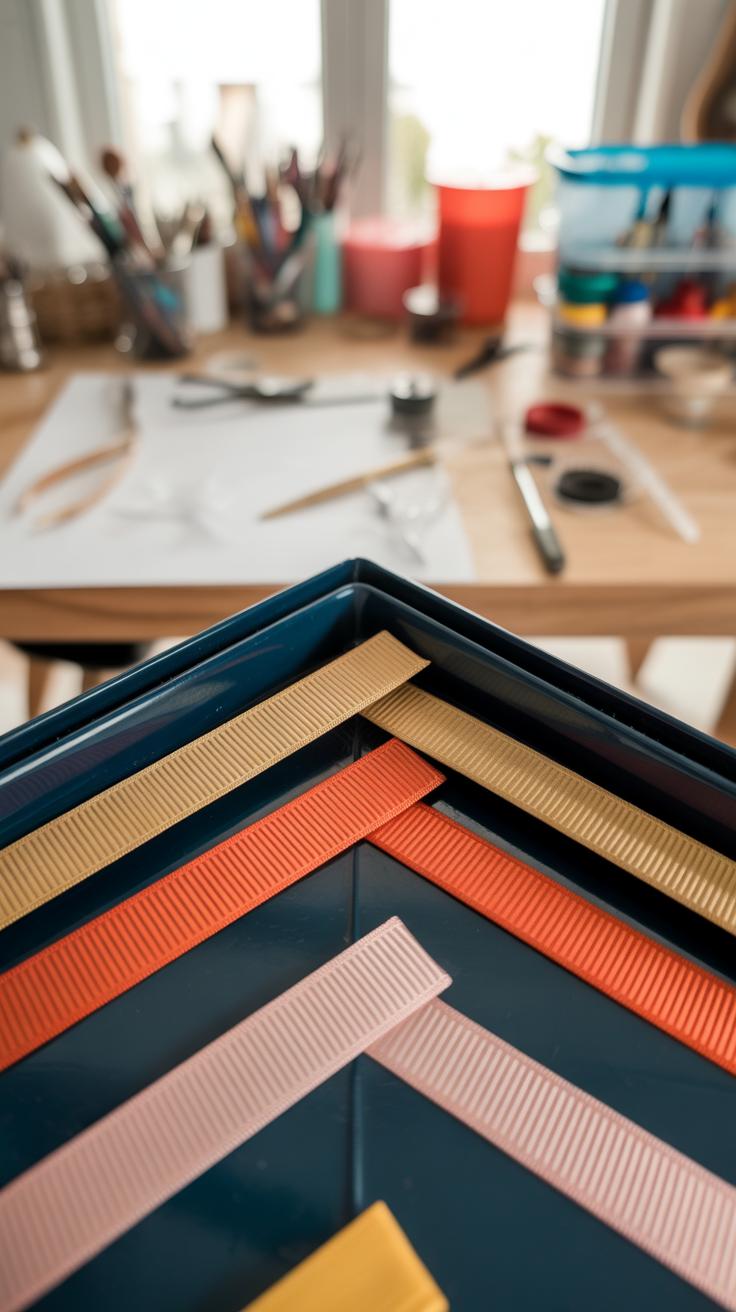
Selecting Ribbon Materials For Durability And Style
Ribbons come in many materials, each with quirks for decorating storage bins. Satin ribbons look smooth and elegant but can fray or slip, so they might not hold up if you handle the bins often. Grosgrain has a ribbed surface that gives grip and durability, making it great for everyday use. Velvet adds softness and warmth but can attract dust and may lose shape over time.
If your bins live in humid or high-traffic areas, synthetic ribbons like polyester or nylon versions tend to last longer. Cotton ribbons look natural and rustic but might wear out quicker, especially with frequent handling. Don’t overlook the ribbon’s weave or thickness either—a tightly woven ribbon usually stands up better to wear.

In my experience, mixing materials depending on usage can work well. For decor-only bins, velvet or satin ribbons add style, while grosgrain or burlap works better if you need something more practical. It might feel a bit like trial and error at first, but once you get the hang of matching material with your bin’s function, it becomes easier.
Basic Ribbon Craft Techniques For Beginners
When starting out with ribbon crafts for your storage bins, it helps to focus on a few simple skills that anyone can pick up. Tying bows is a great place to begin. You don’t need to be perfect—just start with short ribbons and experiment with loops and tails until something looks neat enough. Sometimes getting a balanced bow takes a few tries, which is perfectly okay.
Weaving ribbons is surprisingly easy and can add texture to plain bins. You can weave a thin ribbon through a fabric bin’s fibers or around handles on plastic bins. Wrapping ribbon tightly around handles or edges can also give your bins a cleaner, more personalized look.
Gluing ribbons works well for most bin materials. Craft glue holds light ribbons nicely but don’t rush—let each section dry well before moving on. Hot glue guns stick quickly and firmly but might leave a bump if you add too much at once. I found applying glue in small dabs rather than long lines helps keep the ribbon flat and neat.

These basic techniques—bow tying, weaving, wrapping, and gluing—form the foundation. Once you’re comfortable, adding patterns or layering ribbons becomes a lot less intimidating.
How To Tie Attractive Bows And Knots
Creating bows that look neat on storage bins isn’t just about pulling ribbon tight. The width of the ribbon changes everything. Narrow ribbons tend to make delicate, subtle bows, while wider ribbons bring more presence but can feel bulky if you overdo it.
Here’s a simple way to tie a good bow:
- Cut a ribbon length about 12-15 inches, depending on the desired size.
- Make two loops—one in each hand.
- Cross the loops, then tuck one under and pull gently to shape.
- Adjust the tails and loops evenly to avoid an awkward lopsided look.
If you want something simpler, a double knot or a classic knot with ribbon ends cut at an angle can also look stylish and tidy. I sometimes find knots easier when the bin is used regularly and you want the ribbon to stay put without fluffing up too often.
Using Glue And Adhesives For Ribbon Attachment
Attaching ribbon can feel tricky, especially on slick surfaces like plastic bins. Craft glue works great for fabric or cardboard bins but tends to struggle on glossy plastic. For those, a hot glue gun is your friend since it bonds quickly and won’t slip.

Try these steps for a reliable attachment:
- Clean the surface of the bin to remove dust or oils.
- Use small amounts of glue in spots rather than a continuous line to avoid wrinkling the ribbon.
- Press the ribbon firmly for a few seconds to secure the bond.
- Wait for the glue to dry fully before handling the bin to prevent lifting or shifting.
One trick I found helpful: adding glue under loops or bows works better than just gluing flat strips. It holds shapes in place without flattening the decorative parts.
Creating Pattern Designs With Ribbon Strips
Playing with ribbon strips to create patterns on your storage bins can be quite rewarding. You don’t need to be overly precise—sometimes a little imperfection adds charm. When you think about stripes or a checkerboard, the first step is measuring your bin’s surface carefully. I’ve found that marking where each ribbon will go with a pencil or light tape helps avoid guesswork. Then, simply glue or tape the ribbons down, keeping them parallel for stripes. The distance between strips can be whatever you like—tight, spaced out, varying widths even. It’s fun to mix colors or textures here.
For a checkerboard effect, cut ribbon strips at consistent widths and start by laying them vertically. Once they’re dry, weave horizontal strips over and under the vertical ones, then secure them. Sometimes these grids don’t line up perfectly, but honestly, that adds a bit of personality you wouldn’t get with machine-made precision.
Want to jazz things up? Try zigzag or wavy ribbons. Curl ribbon edges gently with scissors or your fingers to get soft waves, then glue them down in flowing or jagged lines. This kind of pattern can break the rigidity and bring movement to the bins. Just be patient—curling ribbons evenly takes a bit of practice. The results? Well, they can really brighten up a dull corner or shelf, making your storage stand out almost as a decor piece itself.
Enhancing Storage Bins With Ribbon Flowers And Embellishments

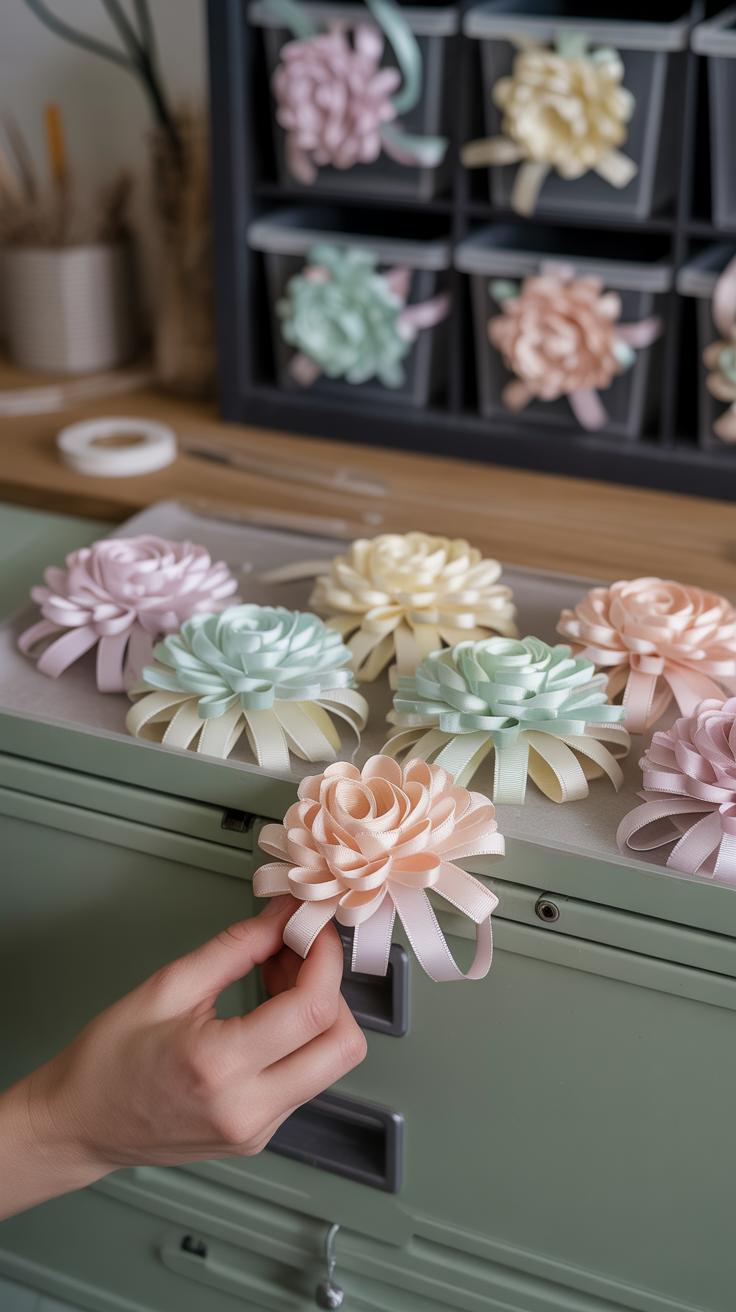
Ribbon flowers add a touch of charm to your storage bins without much fuss. You can make them using simple folds and twists, then attach them directly onto your bins. One easy technique is creating ribbon roses by folding the ribbon tightly in a spiral, twisting slightly with each loop to form that classic rose shape. Petal flowers work a bit differently: fold the ribbon back and forth in small loops, gather the center with a stitch or glue, and you get a delicate petal effect that looks surprisingly intricate.
Once you have your flowers, incorporate tiny embellishments like buttons or beads. Sewing a single button at the center of a ribbon flower can make it pop, or gluing a few clear beads around the edges adds a subtle sparkle. If you’re not into sewing, fabric glue works just fine, though I found stitching it on feels more secure—especially if your bins get bumped around.
Think about mixing different sizes and styles. Pair a ribbon rose with a small cluster of beads or scatter buttons along the edges of the bin’s ribbon trim. It’s a simple way to add texture and depth. You might wonder if this gets too busy; it can, so keep a few flowers spaced out for balance. Do you prefer neat and tidy or a bit more playful? Try both and see what fits your space.
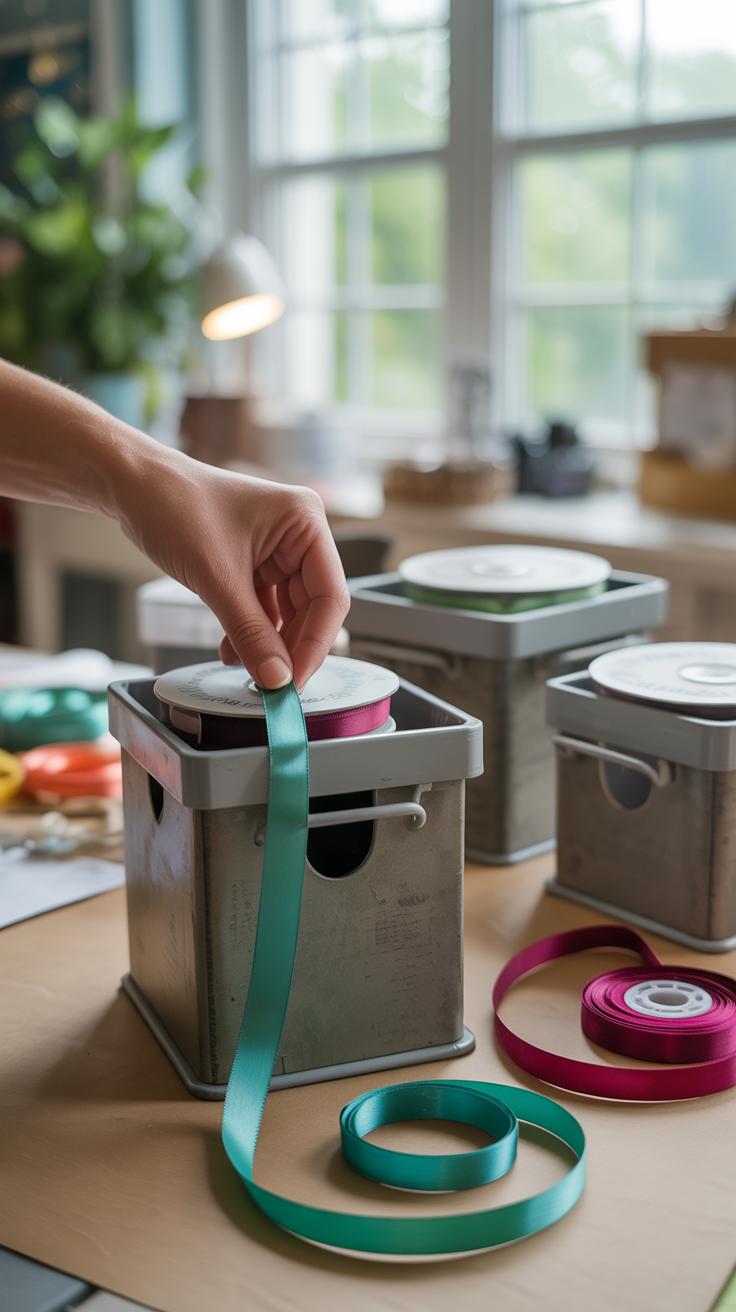
Upcycling Old Bins With Ribbon Wraps
Full Wrap Versus Partial Wrap Styles

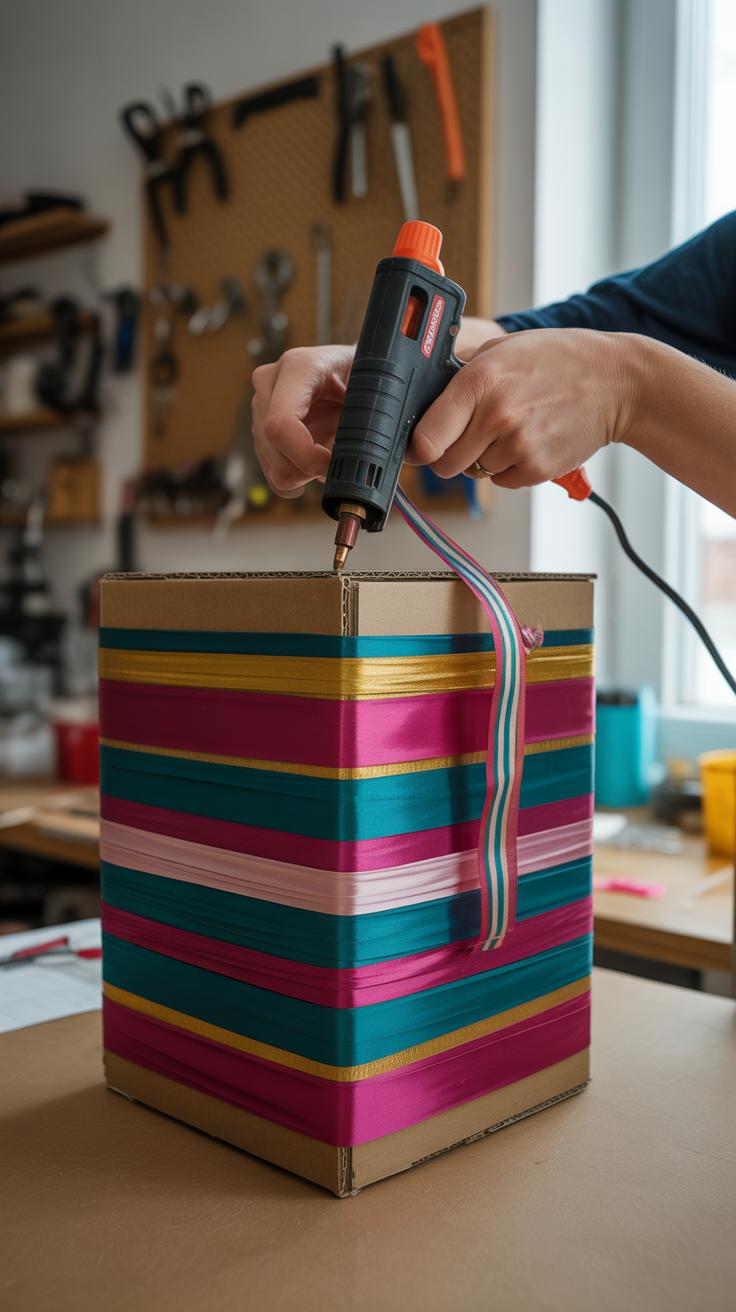
Wrapping old or plain storage bins with ribbon can give them a real fresh look. When you go for a full wrap, you cover the entire surface, which can completely mask any scratches or dull colors. This method works well if the bin is really unattractive or if you want a bold statement piece. It can feel a bit time-consuming, though, and sometimes, if not done neatly, the ribbons might show overlaps or wrinkles.
Partial wraps, like stripes or horizontal bands, are quicker and often look more modern. They add just enough color or pattern without overwhelming the bin. I find partial wraps useful when the bin’s original design is still decent but needs a little pep. You can play with contrasting colors or widths, giving you a subtle yet stylish upgrade. Plus, partial wraps leave some of the original bin visible, which can be nice if it has texture or an interesting shape.
Securing Ribbon Wraps For Daily Use
When wrapping bins you plan to handle often, securing the ribbons so they don’t come loose is key. Glue works, but not all glues hold up to frequent touching or shifting. Sewing the ends—if your bin has fabric or something soft underneath—adds durability, but that’s not always an option. A trick I use is double-sided tape combined with a small dab of hot glue at stress points. This way, the ribbon stays in place yet can tolerate some rough handling.
Also, consider tying ribbons with small, discreet knots or tucking ends under other ribbon layers rather than relying solely on adhesives. Sometimes layering ribbons slightly over each other creates tension that keeps everything tight. You might want to test your wrap by giving the bin a few shakes or lifts. If anything moves, reinforce weak spots—ribbons can slip surprisingly fast if not properly anchored.
Personalizing Bins With Ribbon Labels And Tags
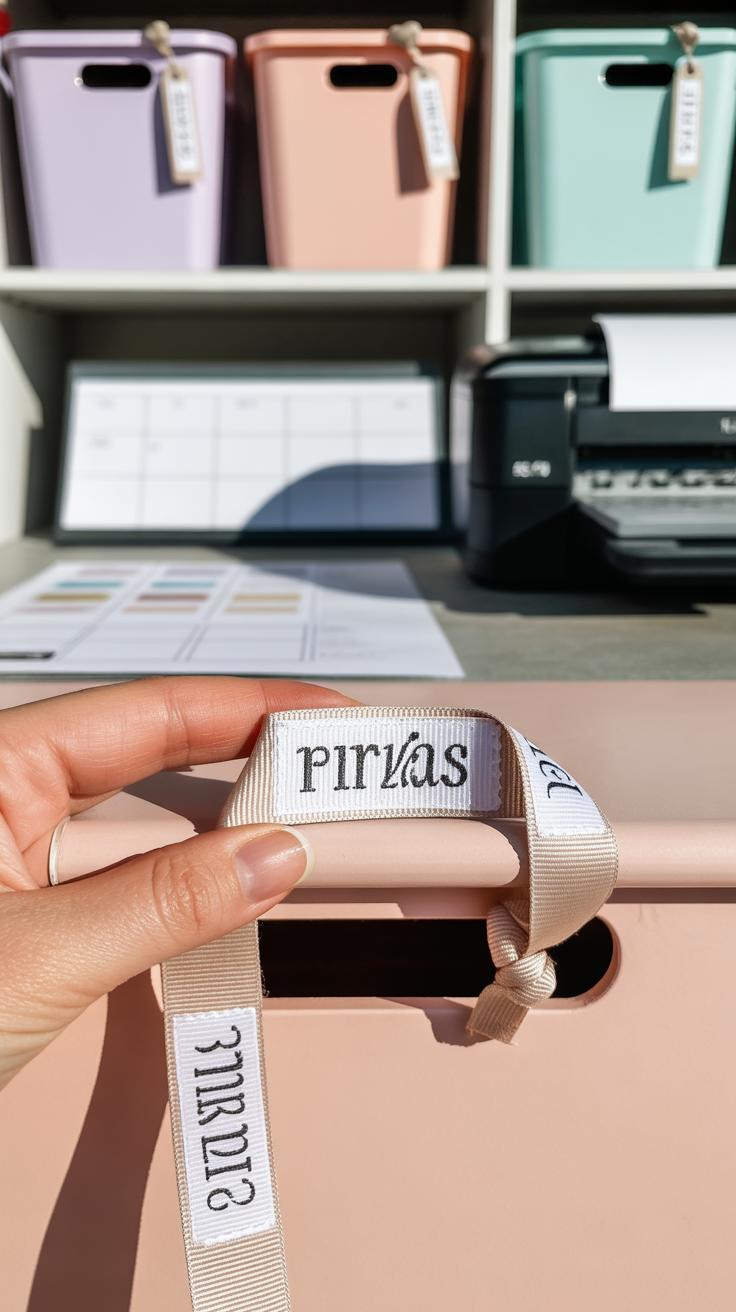

Adding ribbon labels to your storage bins doesn’t just help with organization; it also makes things look a bit friendlier, maybe even a little fun. The process is surprisingly simple, and you don’t need fancy tools to get started. You can either print directly onto the ribbons, write on them with permanent markers, or stitch the names of contents—each method has its own vibe and advantages.
Printing text on ribbon works well if you want crisp, uniform letters. You can use an inkjet printer and special printable fabric ribbons available online or at craft stores. Just feed the ribbon through the printer, and you’ll get consistent labels that look professional. This does require a bit of trial and error to align the text properly, so don’t expect perfection right away.
If printing isn’t an option, writing on the ribbon with a permanent marker is quick and personal. I’ve found that a fine-tip marker works best, especially on lighter-colored ribbons. The ink holds up well over time, but if you’re worried about smudging, testing a small scrap first is a good idea. Stitching names onto ribbons adds texture and charm, though it takes more patience and some basic sewing skills. You could even try embroidery stitches for a more decorative look.
Detachable ribbon tags are great when you want flexibility. Tie a simple knot or use a small metal ring to attach ribbons as tags to your bins. These can be swapped out whenever you change bin contents — no fuss, no permanent commitment. I like using soft ribbons for this, so they’re easy to manipulate and don’t scratch the bin surface.
If you want to group things further, consider layering tags—like a solid color ribbon with a narrower label ribbon on top. That helps in quickly identifying contents from a distance, which I sometimes appreciate when I’m in a hurry and digging through my craft supplies. What kinds of labels would you find most helpful? Sometimes, the simplest tagging method is all you need.
Organizing By Color Coding With Ribbon Crafts

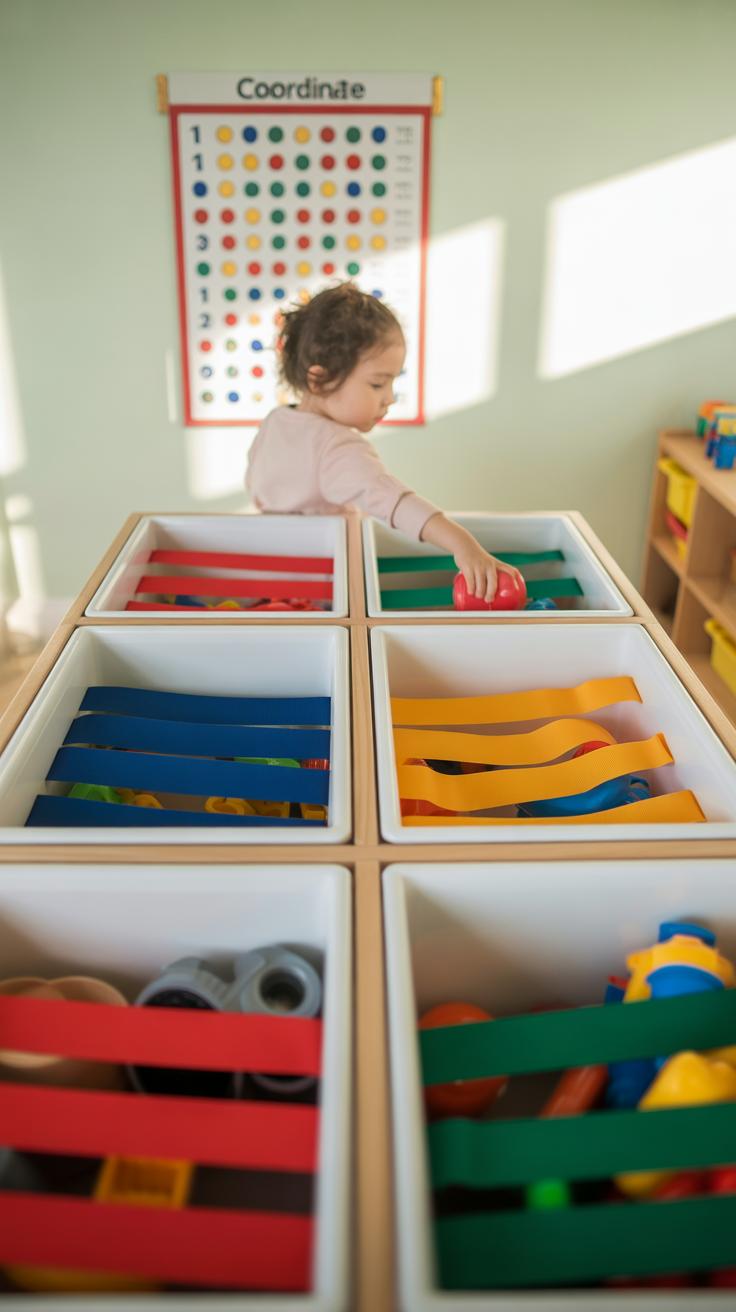
Using different colored ribbons to organize your storage bins can make a remarkable difference in how quickly you find what you need. It’s a simple trick—assigning specific colors to rooms or types of contents lets your eyes guide you, rather than reading tiny labels or opening every bin. Say, a red ribbon for kitchen containers, blue for kids’ toys, and green for tools. Just by spotting the color, you know right where to look.
When planning your color code, it helps to pick clear, distinct shades to avoid confusion. But you might find, over time, that you want to switch a color here or there—maybe the blue was too close to purple or you want a more vibrant tone for better visibility. That’s okay. Flexibility matters. Ribbon crafts allow you to easily remove and replace ribbons without fuss.
Keep track of your system by writing down which color means what. A quick photo or note on your phone can save you from guessing in the future, especially if someone else helps tidy up. Also, regularly check your ribbons—faded or fraying colors might send mixed signals. Replacing worn-out ribbons keeps the system clear and your bins looking sharp.
I once used green for seasonal clothes but changed to orange because green got confused with cleaning supplies. Being open to tweaking your colors can keep things useful, not just pretty.
Using Color To Sort Bin Contents
Choosing ribbon colors based on the type of contents can make sorting more intuitive. For example:
Bright yellow ribbons can mark toys and games, making it easy for kids to identify their bins.
Soft pastel shades like lavender or peach might suit clothes and linens, offering a calm, consistent look.
Bold colors such as navy blue or dark green can work well for tool storage, signaling a more utilitarian purpose.
Think about how much your family or household uses each category. Toys might need a high-visibility color so kids can find them fast. Meanwhile, less frequently accessed bins, like seasonal decor, could have subtler shades that blend better with your décor.
Maintaining Color Coding Over Time
Keeping your color coding consistent can be surprisingly tricky. Over time, colors fade, ribbons fray, or you might add new bins that don’t match the old scheme. A few practical ideas can save you headaches:
Buy enough ribbon of each color to last a while. This avoids unsettling color variations if you replace ribbons later.
Label the ribbons themselves with tiny tags or write on the ribbon’s edge if possible to remind yourself what each color represents.
Inspect ribbons every few months, especially those exposed to sunlight or frequent handling, and replace them before they become hard to distinguish.
It’s easy to think once you’re done, the system will hold forever, but the truth is you’ll have to refresh it now and then. That’s part of making the space work for you, not the other way around.
Tools And Supplies Needed For Ribbon Crafting
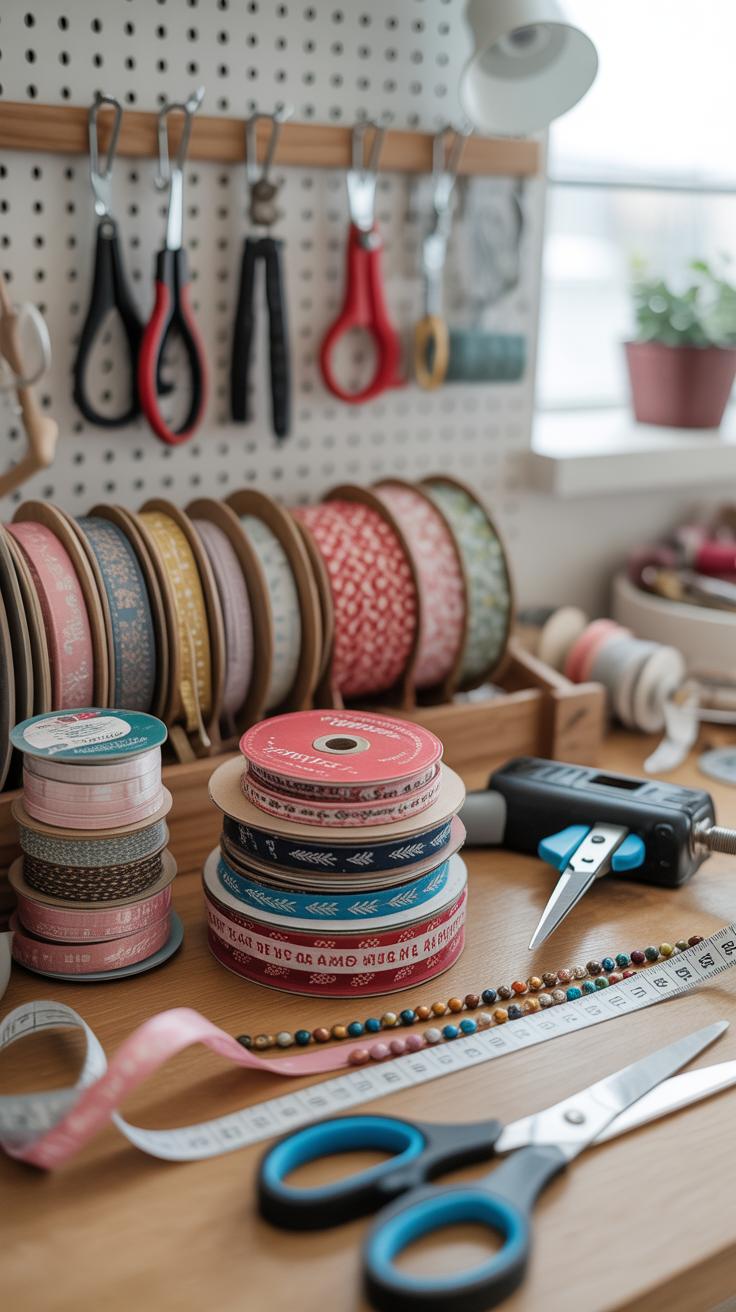
Basic Tool Kit For Ribbon Crafts
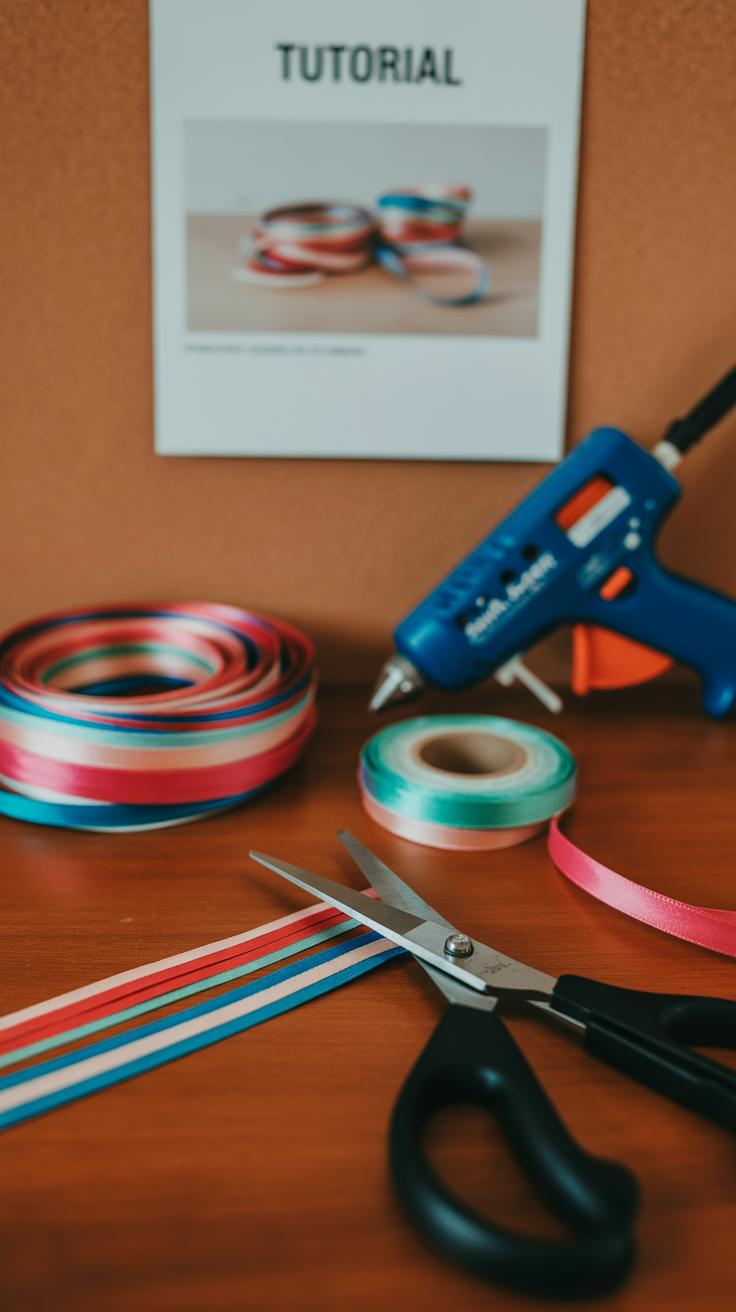
When starting ribbon crafts for your storage bins, you don’t need a mountain of gear. The essentials include a good pair of scissors—preferably sharp enough to cut ribbons cleanly without fraying the edges. You’ll also want some strong adhesive like glue sticks or a hot glue gun; the choice depends on how permanent you want the decoration to be. Ribbons themselves come in various widths and textures; having a few different types on hand lets you experiment a bit. Simple fabric, satin, or grosgrain ribbons work well.
You can find these tools easily in craft stores or even at discount retailers. Many online shops offer affordable sets if you prefer buying things all at once. I personally think grabbing a basic kit first saves money and avoids clutter—there’s no need to buy everything upfront when you’re just trying out ideas.
Optional Decorative Accessories
Once you have basics covered, adding a few extras can really personalize your ribbon projects. Think glitter for a touch of sparkle or small paint pens to add initials or patterns onto plain ribbons. Sometimes I even use rubber stamps to imprint simple designs before gluing the ribbon on. It’s not necessary for every bin, but these little details make the difference if you want your storage to look special.
Other items worth considering include small buttons, beads, or even thin wire to shape bows. These don’t have to be expensive, either—most craft stores sell small packets for a dollar or two. The key is to pick a few that inspire you and try them on a test ribbon first. Would you prefer minimal decoration or a bolder touch? That question helps narrow down what to add without feeling overwhelmed by choices.
Maintaining And Refreshing Ribbon Crafts On Storage Bins
Cleaning Tips For Ribbons On Storage Bins
Keeping your ribbon decorations looking nice doesn’t have to be complicated. Most ribbons on storage bins tend to collect dust or occasionally get small spots, especially if they’re in busy areas. The easiest way to clean them is by gently dusting with a soft brush or a microfiber cloth—nothing harsh that could pull the fibers. Sometimes, a barely damp cloth can help with spots, but be careful not to soak the ribbon or the glue underneath, since that might weaken the hold or cause discoloration.
If the ribbon is fabric-based and a little worn, spot cleaning with mild soap and water works well. Test a hidden corner first just to see if the color runs. I found that pressing gently with a cloth, rather than scrubbing, avoids fuzziness. Avoid any bleach or harsh chemical cleaners; they’ll probably do more harm than good.
Replacing And Updating Ribbon Designs
Ribbons don’t last forever. After a while, colors might fade or the style feels outdated. Fortunately, swapping ribbons is fairly simple, especially if you secure them with glue dots or pins instead of permanent glue. This makes seasonal or style changes easier—like switching from bright florals in spring to warm plaids in autumn.
Try mixing widths and textures for a fresh look. For example, replace a satin ribbon with burlap or grosgrain to add some warmth or rustic charm. If you want something quick and different, tie bows or attach little charms that you swap out now and then. Sometimes, just changing the tie style or layering multiple ribbons can refresh the whole appearance without even removing the base layer.
Have you noticed how a new ribbon can alter the mood of a whole storage area? It’s kind of fun to experiment. So maybe consider keeping a few different ribbons on hand—you might find yourself updating your bins more often than you expected. It keeps things interesting, really.
Conclusions
Ribbon crafts are an effective way to add charm and individuality to your home storage bins. By using simple ribbons and craft techniques, you can create stylish containers that lift up any space. These projects are both fun and practical, helping you organize while building creativity.
Take what you learned here and start your own ribbon crafts. Brighten and personalize your storage bins soon. Planning and hands-on effort will reward you with beautiful, useful storage that reflects your style.