Introduction
Paper plate crafts offer a fun and affordable way to add functional storage solutions to your home. With just a few materials and some creativity, you can transform simple paper plates into organizers that help you keep your space neat. This article explores multiple ideas for making paper plate crafts that serve as practical storage, from small desk accessories to clever kitchen organizers.
Using paper plates for storage crafts is easy and kid-friendly. You will learn how to create storage items that are both useful and decorative. Whether you want to organize your craft supplies, sort small toys, or declutter your kitchen, paper plate crafts can be a simple solution. Let’s dive into creative projects and tips that turn paper plates into practical storage tools for your home.
Creating Basic Paper Plate Storage Bowls
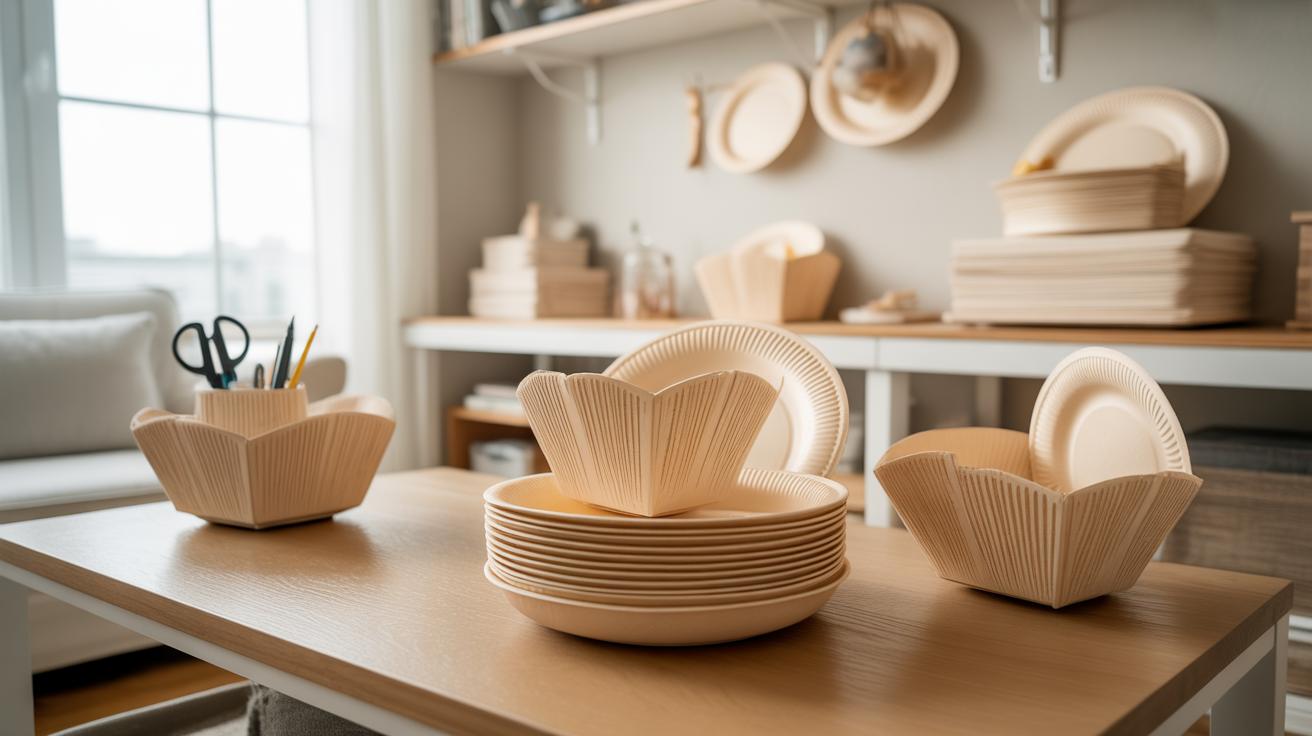
Turning paper plates into small storage bowls is surprisingly simple. You don’t have to be super precise, which is part of the charm. The first step is to get a paper plate and fold its edges upward gently to form a shallow bowl shape. Try folding in quarters or thirds, whatever feels right for the item you want to store.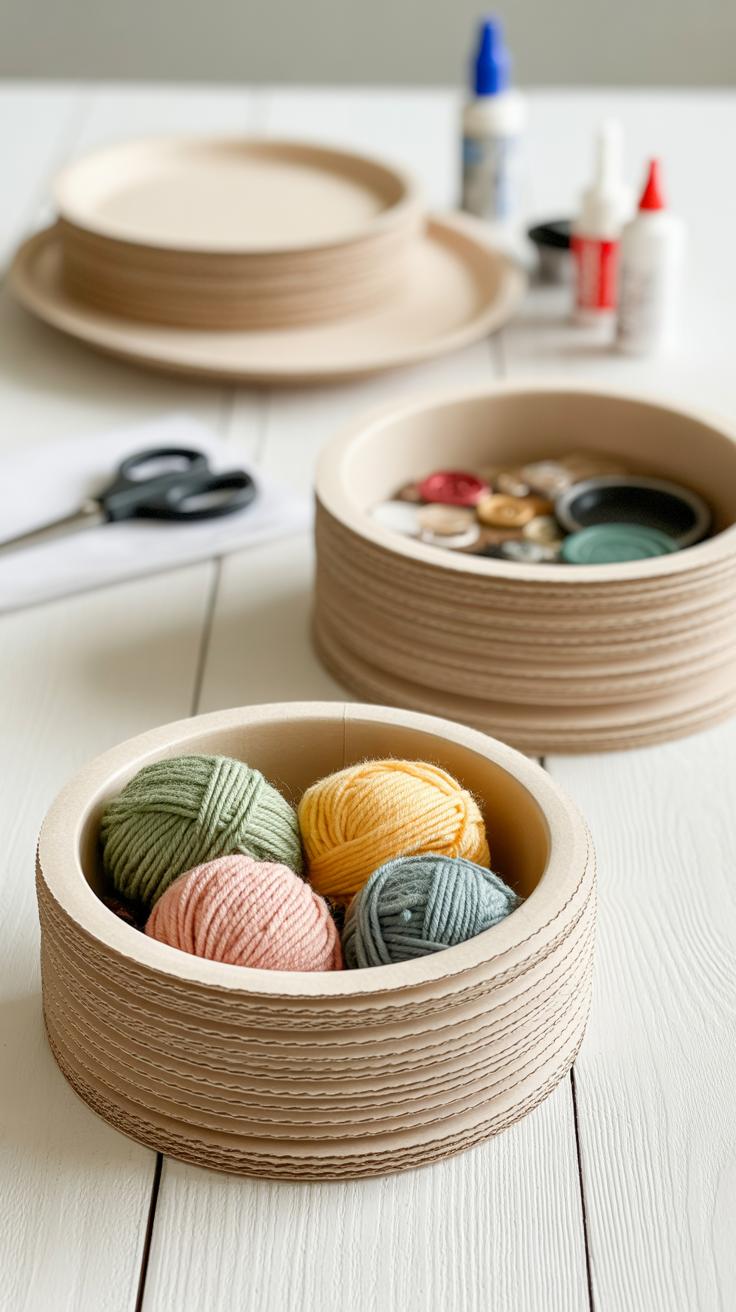
Once you have the general bowl shape, you can secure the folds with glue or staples if you want more durability. Thin layers of glue work better here; too much makes the plate soggy or wrinkled. Let it dry before adding anything heavy. If the plate feels too flimsy, you might want to double it up—stack two and glue them together. It’s a bit trickier but worth it for sturdier containers.
For holding small things like office supplies or jewelry, size matters. Small plates, around 6 to 7 inches, are easier to handle and create just the right space. Bigger plates can be made into deeper bowls by folding the edges higher—though keeping those folds even every time is a bit challenging.

You can also fold the plate’s rims inward to avoid things slipping out, or cut the plate into segments before folding to make more creative shapes. It pays to experiment. I found that sometimes an imperfect fold gives the bowl a quirky charm, and it still functions just fine.
When you finish folding and shaping, adding a bit of paper tape or a rim made from washi tape can reinforce the shape. This might seem like extra work, but it really helps prevent the edges from bending back down after use.
Have you tried making bowls with different folding patterns or heights? There’s no one right way—maybe that’s what makes this craft so accessible and practical. Once you get the basics down, you’ll likely find your own favorite technique.
Step-by-Step Folding Techniques
Start with a clean paper plate—regular thin ones work fine, but sturdier plates hold shape better if you have them. Fold the plate in half, then half again, and once more, so you get a quarter or eighth segment, depending on size. Once folded, cut along the edge where the folds meet, stopping about an inch before the center. This creates flaps you can bend upward.
Unfold gently to reveal a shape with four or eight flaps (depending on your cuts). Now, fold each flap inward toward the center, overlapping slightly. Use a small dab of glue or tape under the flaps to hold them in place. Press firmly to smooth edges, aiming for neat corners; roughness here will make the bowl less stable.

If you want a deeper bowl, try layering two folded plates, securing them together. It adds sturdiness, especially for holding slightly heavier items. The folding isn’t perfect the first time—kind of like me trying it for the first time—it takes a little fiddling to get those corners tight, but the fun is in that trial and error.
Decorating Your Storage Bowls
Once the basic shape is set, you can personalize it to suit your space or mood. Paint works well—acrylic paints adhere nicely without soaking through. You might try bright solid colors or simple patterns. For a softer look, crayons or markers add color but won’t be as durable.
Adding stickers, washi tape strips, or even gluing fabric scraps can give a textured, tactile feel. Don’t shy from mixing materials—layering a bit of glitter or sequins can turn a plain bowl into a fun accent piece. Occasionally, I think the decorating process feels more enjoyable than the folding itself—plus, it hides any imperfect edges.
Try sealing your decorated bowl with a clear craft sealer or a brush of diluted white glue to add durability. That way, your new storage bowls can survive everyday use without falling apart too quickly.
Making Hanging Storage From Paper Plates
Attaching Strings And Hooks

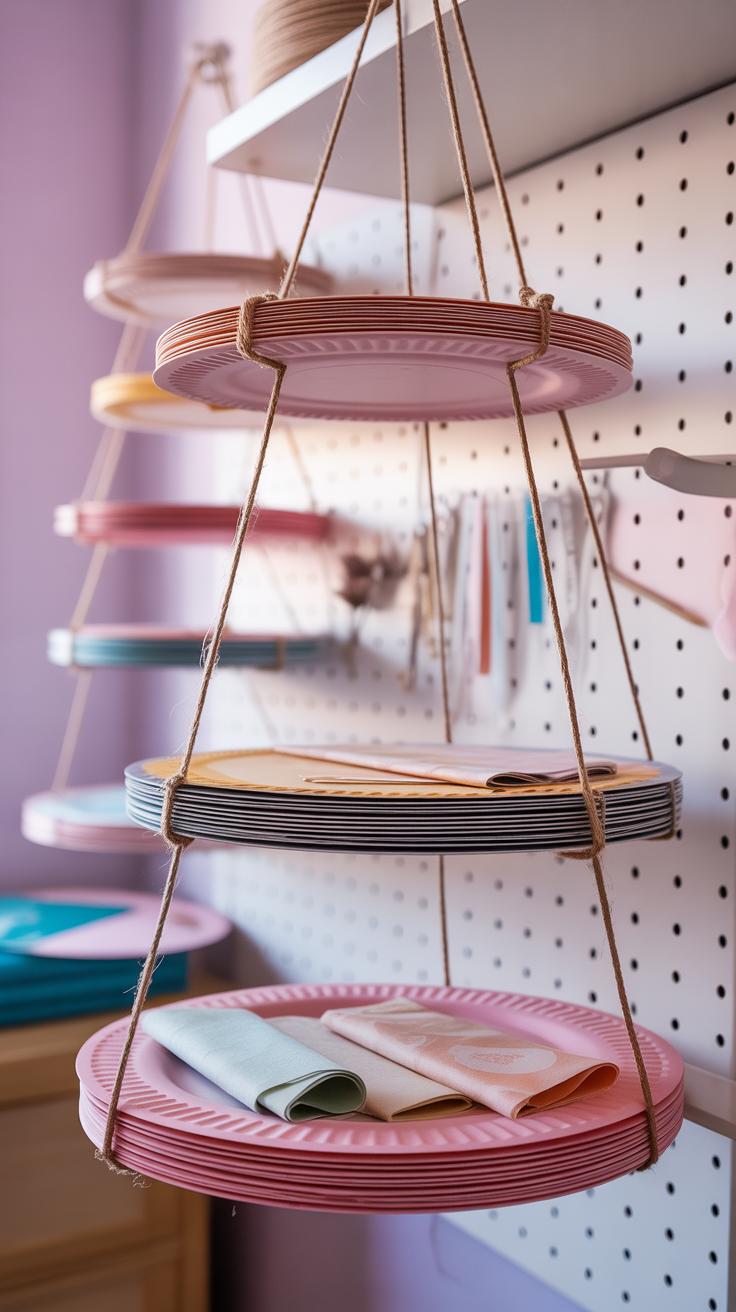
Designing hanging storage with paper plates starts with finding a good way to attach strings or ribbons. Punching small holes near the plate’s edge is common, but you want those holes spaced evenly and not too close to the rim to prevent tearing. Reinforcing the holes with tape or thin cardboard rings can help—I’ve found this step often saves the plate from ripping when heavier items hang.
Another trick is using small binder clips or clothespins to hold ribbons at the edge instead of piercing the plate. It feels less permanent and makes swapping strings easier if needed. Some even glue lightweight hooks or attach paperfasteners (brads) at points that support the hanging materials. Picking the right adhesive matters too. White craft glue works fine, but for more durability, I prefer hot glue, despite the mess.
Practical Uses For Hanging Storage
Once you have the hanging plates ready, think about where they might really help. Keys are an obvious choice—hanging one plate by the door to hold keys and small notes keeps clutter off surfaces. For craft supplies, a cluster of plates hung in a craft room or play area can store buttons, thread, or small scissors. Arranging them in a vertical line or a small grid keeps things visible and easy to grab.
Bathrooms could benefit too; storing hair accessories or cotton pads within tied-on paper plate holders saves drawer space. I sometimes hang these near desks for office supplies like paper clips or rubber bands. The real trick is not just hanging them but grouping items so you’re not overwhelmed looking for one thing. Does grouping by use or frequency make more sense? You might decide after a couple of tries, as I did.
Building Drawer Dividers With Paper Plates

Measuring And Cutting Plates For Dividers
Start by measuring the interior dimensions of your drawer carefully. Take note of both width and length because the plates need to fit snugly without wobbling around. If the drawer is deeper or wider than a standard paper plate, you might need two plates per divider, or cut plates into sections.

Use a pencil to lightly mark cutting lines on the paper plates. Straight cuts work well, but you can also shape edges for specific compartments—for example, rounding corners for softer items like socks. Cutting along these lines with scissors or a craft knife should be done slowly to avoid tearing or jagged edges. Sometimes, I found myself trimming a couple of times until the fit felt right. Don’t hesitate to test fit as you go.
Securing Dividers Inside Drawers
Once your pieces fit, think about how to keep them from sliding when the drawer opens. One easy way is using double-sided tape or adhesive putty under the plates. They hold well but won’t damage the drawer surface. Alternatively, a few small strips of Velcro at the bottom corners can do wonders, especially if you want removable dividers.
If you prefer no adhesives, try adding a slight pressure fit by adjusting the sizes very precisely. Sometimes the drawer rails help keep dividers pressed in place. It might take some trial and error to find the best method for your specific drawer and items, but it’s worth it when everything stays neatly organized.
Designing Customized Desk Organizers
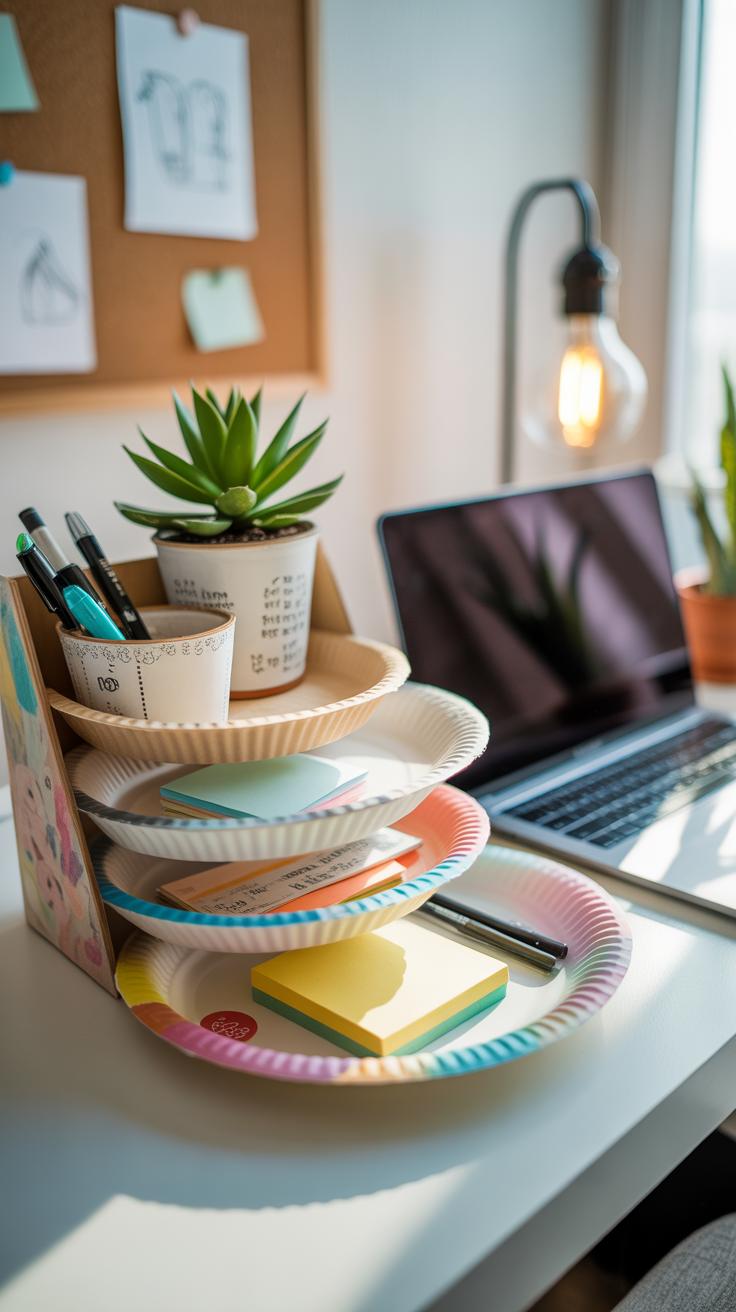
When it comes to organizing pens, notes, and paper clips, paper plates can surprisingly step up as a neat desk organizer. Start by thinking about what you actually use every day. Maybe you need a spot for a few pens, a place for sticky notes, and a tiny compartment for paper clips or binder clips. A single paper plate can handle all that if you divide it thoughtfully.
Multi-Section Organizer Layouts
Try cutting small sections or folding parts of the plate to create different compartments. For example:
- Divide the plate into thirds—one for pens, one for notes, one for clips.
- Use strips of leftover paper plates or cardboard to make low dividers glued onto the base plate.
- Or, fold the plate slightly to create raised edges that keep items separate but still accessible.

You might experiment with circular sections or even asymmetrical shapes, based on what you want close at hand. It’s okay if it’s not perfectly even; a little irregularity can add a unique charm to your desk space.
Painting And Labeling Sections
To avoid digging around, paint each section a different color or add simple labels. You could handwrite words like “Pens” and “Notes” with a fine marker or use stencils for cleaner lettering. Using different paint finishes—matte for clips, glossy for notes—can make subtle distinctions easier to spot at a glance.
Sometimes I find that hand-drawn labels stick better because they feel more personal, although if you want a more polished look, stickers or washi tape work too. Either way, labeling keeps the organizer clear and saves seconds each time you’re grabbing something, which eventually piles up into minutes saved daily.
Crafting Decorative Storage Boxes With Lids
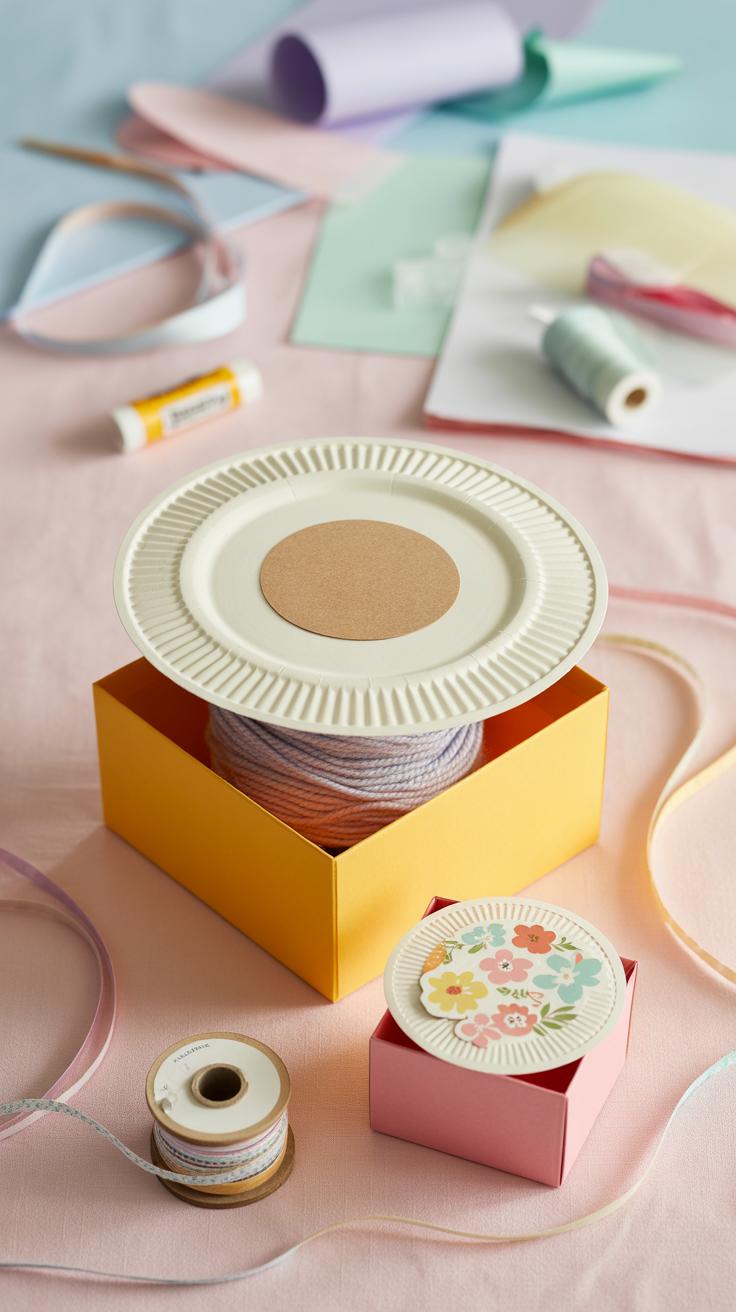
Forming The Box Base
Start with a sturdy paper plate, preferably a thicker one if you can find it—thin plates tend to bend too easily. To form the base of your storage box, gently cut slits around the edges, about an inch or so deep, spaced evenly. These flaps will fold upward to create the sides.

Fold each flap straight up, trying to keep the edges as neat as possible—this step is a bit fiddly. You can reinforce the base by gluing a second plate or a circle cut from cardboard inside the bottom, which really helps when you’re placing slightly heavier items later.
The key is to balance sturdiness with flexibility. Too stiff, and the box looks awkward; too soft, and it won’t hold weight well. I think the best part of this process is seeing the flat plate magically turn into a box, even if the edges get a bit uneven sometimes.
Making And Attaching The Lid
For the lid, grab another plate the same size—or slightly larger, depending on how snug you want it to fit. If you want a neat look, fold down the rim edge about half an inch all the way around, pressing gently. This folded rim helps the lid sit securely atop the box without slipping off.
Attaching a lid to the box isn’t necessary, but if you want one, you can make a hinge by taping a narrow strip of fabric or paper along one side, connecting lid and box. It adds charm and keeps the lid handy.
If you prefer a simple removable lid, just ensure the folded rim is smooth and even so it fits well. I’ve learned that a little patience here goes a long way—uneven folds mean a loose lid, which is annoying when storing tiny items.
Using Paper Plates For Toy Storage Solutions

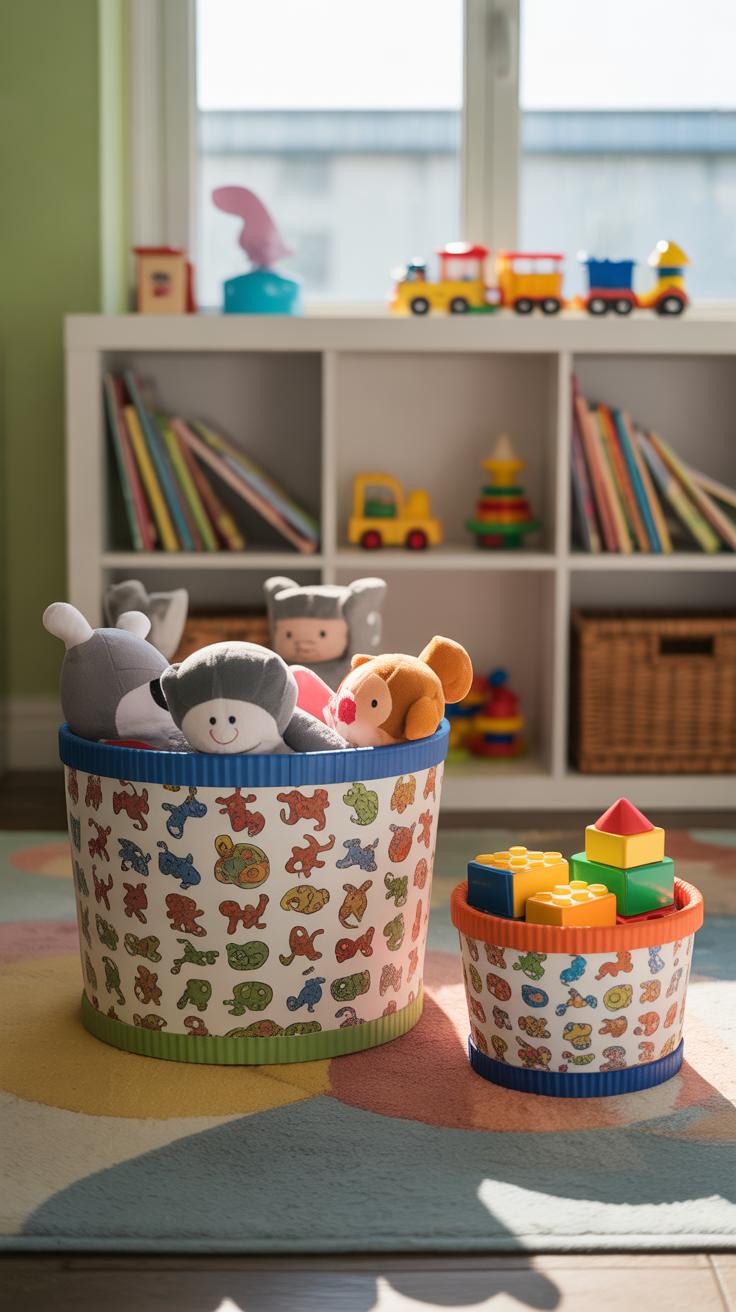
Paper plates can surprisingly become handy helpers when it comes to sorting and storing small toys or craft materials. They offer a simple, low-cost way to keep things organized, and kids can actually reach their toys easily without making a mess. One way to use paper plates is to divide them into sections, either by folding or taping smaller plates inside. This helps you separate items by color, type, or size. Imagine sorting beads into reds, blues, and greens right on a plate—clean and clear.
Sorting by color or type can make cleanup less frustrating for everyone. With a few plates laid out, children quickly spot where each piece belongs. This approach works well for blocks, puzzle pieces, crayons, or even tiny figurines. You might find that kids feel a little more in control when they can see their options clearly spread out, and that can encourage them to tidy up more often.
Teaching kids to use these plate organizers might take some patience, though. At first, you could turn it into a game—asking them to match items or place things in the right compartment. Praise and gentle reminders seem to help, but sometimes it’s worth dropping the perfectionist approach and letting some chaos stay. After all, the goal is a system that works for your family, not an art exhibit. You might be surprised how quickly children start to enjoy having their toys sorted and accessible, even if every piece isn’t perfectly in place.
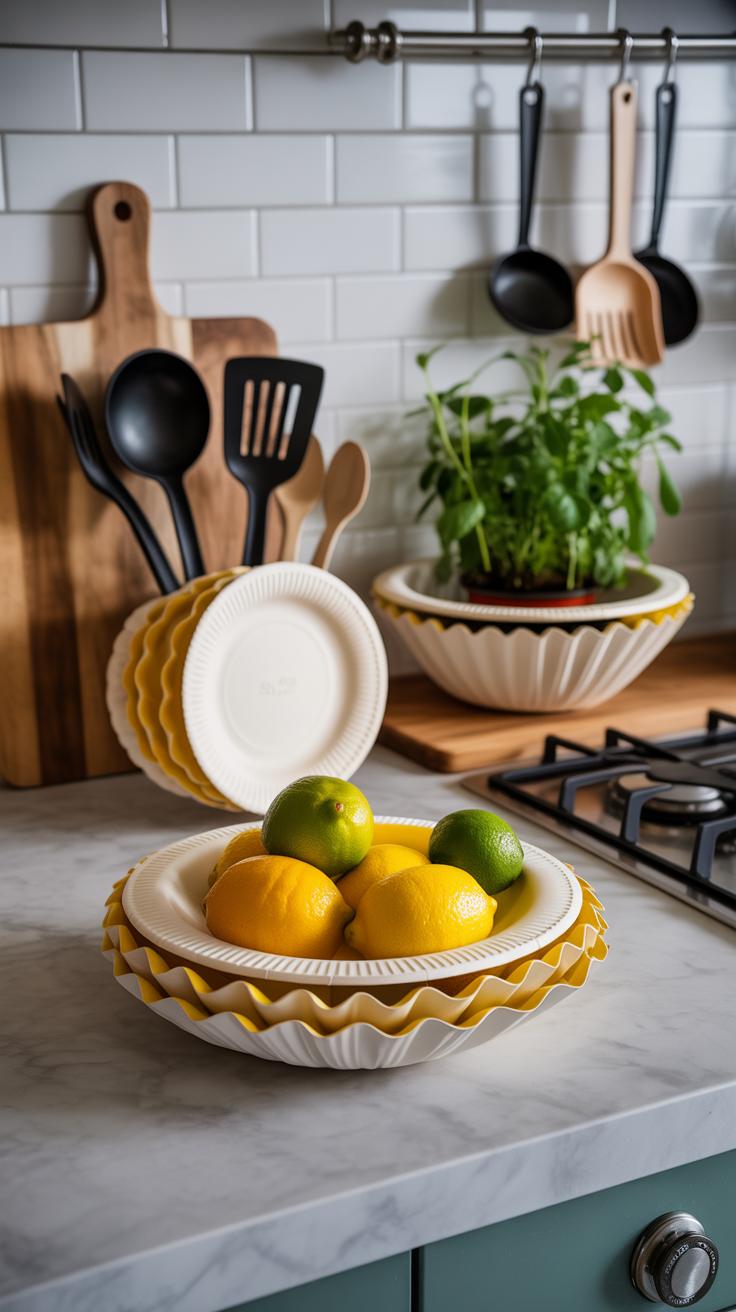
Innovative Uses Of Paper Plate Storage In The Kitchen
Organizing Spices And Small Containers

Paper plates can surprisingly help keep your spices and small kitchen containers in order. You might try using shallow paper plate trays as easy-to-move spice holders that fit inside your cabinets or on countertop shelves. Because they’re light and disposable, it’s simple to swap them out if spills happen or if you want to change your spice layout.
Cut the edges of a paper plate slightly deeper to create small compartments or stack a few plates to form mini bowls that hold seasoning packets, salt jars, or tiny oil bottles. I once lined a cabinet shelf with these, and it made finding the right spice so much quicker — no more rummaging around or spilling tiny jars. Plus, paper plates won’t scratch your shelves, which is a nice little bonus.
You could even color-code them for different spice types or cooking frequencies, though I never got around to that myself. Still, imagining a bright red plate just for your baking spices sounds practical, doesn’t it?
Storing Utensils And Napkins
For utensils and napkins, paper plates can be folded or cut to build simple holders that keep things neat on the kitchen table or counter. Roll some napkins and nestle them in a paper plate bowl to prevent them from flying around when you’re setting up an outdoor meal.
Crafting an upright paper plate stand by folding it into a cone shape can hold forks, spoons, or even chopsticks. It’s not the most permanent solution, perhaps, but it works well for parties or when you need quick cleanup afterward.
I once made a similar holder that doubled as a spot for holding both utensils and place cards during a casual dinner. It may not win any design awards, but it’s surprisingly helpful when you need to keep everything close and tidy. Have you tried folding a paper plate like this before? It might be worth experimenting with, especially if you have kids who lose their silverware constantly.
Upcycling Paper Plates For EcoFriendly Storage
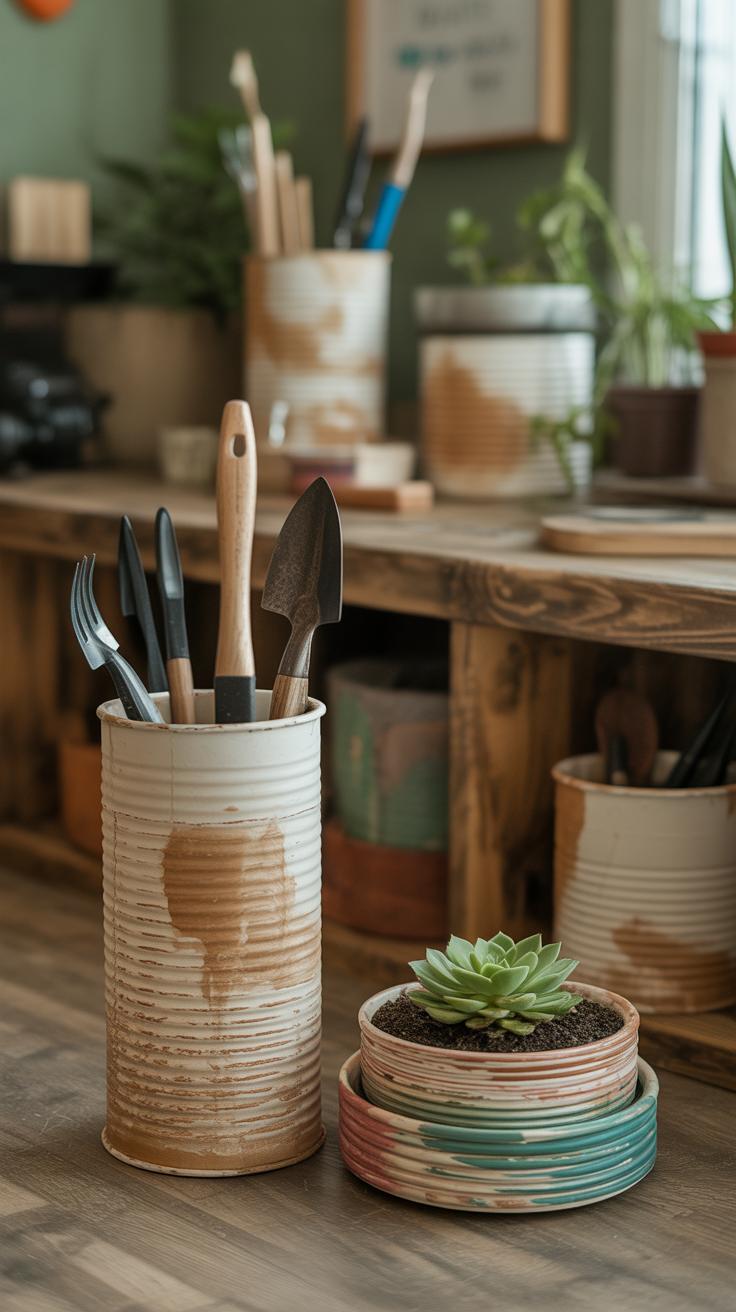
Environmental Benefits of Reusing Paper Plates
Reusing paper plates for storage projects can gently nudge you toward cutting down waste. Instead of tossing those plates after a single use, giving them a second life as organizers helps reduce landfill piles. It’s a small act that eases demand for new storage materials, which often come with a bigger environmental footprint. You might be surprised how this simple choice lessens your household’s trash output.
Plus, when you craft storage using old paper plates, you dodge the energy and resources needed to produce plastic or metal containers. Even if these crafts don’t last forever, their short-term usefulness beats single-use disposal several times over. Maybe not a perfect solution, but still a kind of quiet win for the planet.
Choosing Recyclable Or Biodegradable Plates
Not all paper plates are created equal. Some contain plastic coatings or wax that hinder recycling or composting. When picking plates for your crafts, look for ones labeled as biodegradable or compostable. These tend to break down naturally and leave less waste behind.
Plain, uncoated paper plates usually work best. Sometimes, you can find plates made from recycled paper—those can double down on the eco-friendliness. If recycling options exist locally, opting for recyclable plates can keep your efforts green beyond just the crafting stage.
Caring For Your Paper Plate Storage Crafts
Once you’ve crafted your storage pieces, keeping them functional means treating them gently. Paper plates aren’t designed to handle heavy load or moisture, so placing them in dry, low-traffic spots helps extend their life.
If you notice wear, consider reinforcing them with tape or light glue—small fixes lengthen usability. When the time comes to part ways, try to recycle or compost the plates instead of throwing them in the trash. That way, your efforts at reducing waste continue even as your storage evolves.
Combining Paper Plate Crafts With Other Materials
Paper plates, on their own, can be a bit flimsy for storage purposes. Adding materials like fabric, ribbons, or cardboard can really change the game. Cardboard, for example, can be glued inside or between paper plates to give your storage unit more weight and structure. I tried this once making a small organizer, and the difference was clear—things held up better when the cardboard was in place.
Fabric and ribbons don’t just boost appearance—they also add a layer of protection and grip. Think about lining a paper plate basket with scrap fabric; it softens the surface and prevents smaller items from slipping through. Ribbons work well for handles or decorative edges. But you do need to be careful with attaching these materials so they don’t just fall off after a few uses.
Attaching Fabrics And Decorations Safely
Gluing fabric and decorations onto paper plates can be tricky. You want the pieces to stay put but not compromise the purpose of your storage craft. A strong craft glue or hot glue gun often works best. Sewing is an option, but with paper plates, piercing holes can weaken the structure if not done gently.
When I attached fabric to a plate organizer, I used craft glue applied thinly and pressed firmly, then left it to dry under a book. That little step seemed to make a difference. For ribbons or buttons, adding small stitches or looping ribbons around carefully can keep them secure without tearing the plate. It’s a bit of trial and error—you’ll figure out what sticks without reducing usefulness.
Creating Multi-Material Storage Solutions
Combining materials—paper plates, fabric, cardboard, and decorative elements—creates storage projects that last longer and look nicer. The cardboard lends strength, fabric adds texture and softness, and ribbons or paints can punch up style. You get more than just a functional holder; you get something that complements your space.
But, could there be too much going on? Sometimes simpler is better. I’ve seen storage boxes overloaded with decorations that made them less practical. Balance is key: enough materials to boost durability and appearance, but not so much that function suffers. Does your storage solution need to be strong, pretty, or a bit of both? Thinking about this helps guide your craft choices.
Conclusions
Paper plate crafts are a smart way to organize your home without spending much money. They are simple to make and can be customized to fit your needs. By turning everyday paper plates into storage containers, you reduce clutter and find quick access to your belongings. These crafts encourage tidiness and creativity in your space.
Try the projects and ideas shared here to start organizing your home with paper plate crafts today. As you experiment, you will discover new ways to use paper plates for storage and develop your own creative solutions. Keeping your home tidy and organized can be fun and easy with paper plate crafts.