Introduction
Fairy crafts are a delightful way to add charm and function to your home storage. By combining creativity with practical solutions, you can create storage pieces that not only organize your belongings but also bring a touch of magic to your living space. Fairy crafts use simple materials and imaginative designs to transform ordinary storage into enchanting features.
This article explores various fairy craft ideas that enhance your home storage. From making fairy-themed jars to whimsical boxes, you will learn how to blend utility with artistic expression. The following chapters guide you step-by-step to make your storage both beautiful and useful.
Gathering Materials for Fairy Crafts
When you start crafting fairy-themed home storage, the materials you choose can make all the difference. You don’t need fancy or expensive supplies—often, simple things you find around the house work just fine.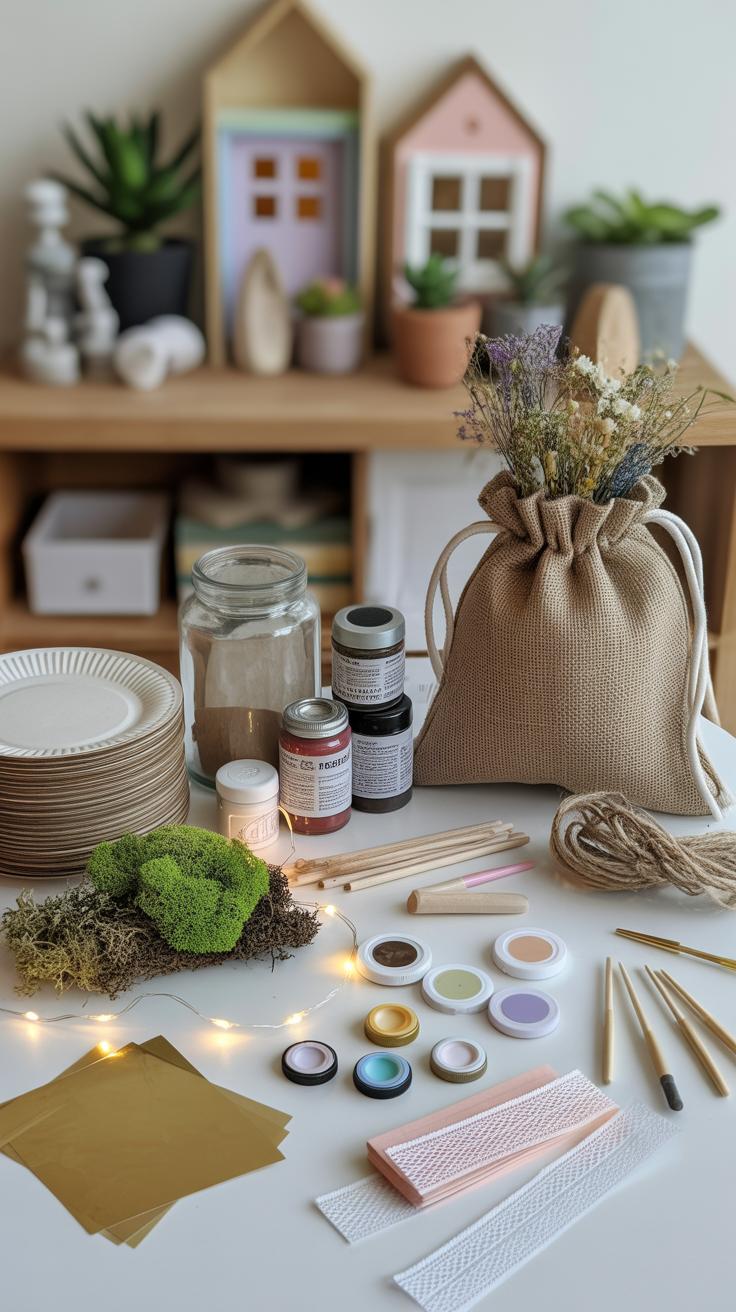
Look for items like:
- Twigs, small branches, or pinecones—nature offers plenty of magical-looking pieces.
- Glass jars, old tins, or wooden boxes are great bases to transform into fairy homes or enchanted containers.
- Fabrics such as burlap, felt, or lace add texture and softness.
- Glue, paint, and scissors—basic craft staples that you probably have already.
- Natural accents like dried flowers, moss, or pebbles bring life and an earthy vibe.
When selecting your supplies, keep safety in mind, especially if kids will help or use the finished storage. Avoid sharp edges or toxic paints. Affordable choices usually come from thrift stores, your backyard, or craft bins.

Sometimes, picking materials is part of the fun—wandering around outdoors, imagining the possibilities. You might hesitate over a piece of bark or a glass jar, wondering if this really fits the fairy world you want to create. But that uncertainty often sparks creativity, which is what makes fairy crafts feel so alive, right?
Basic Supplies You Will Need
When you start fairy crafts for home storage, some materials show up again and again as useful. Think of simple glass or plastic jars: they’re great bases for magical containers. You’ll want acrylic paint for bright colors and some twigs or small branches to add natural texture—these bring a bit of the outdoors inside. Glue is a must, preferably a strong craft glue that holds things well but isn’t too messy.
Fabric scraps can help create little doors or curtains on your fairy homes, and small decorations like beads, buttons, or seashells add charm. Tiny fairy lights or glitter are common too, but if you’re unsure about glitter, maybe skip it or find alternatives like iridescent paper.
Where to Find Materials on a Budget
Almost all of these can come from around your house. I’ve often found twigs from last autumn’s walks still lurking in the backyard. Jars? The kitchen or bathroom probably has some you no longer use. If you don’t find what you need at home, thrift stores or dollar shops usually have an odd jar here, craft paint there—sometimes a fabric bundle or a small string of fake pearls for pocket change.
Don’t overlook clearance aisles in craft stores. You might hesitate on colors or sizes, but mixing and matching can end up being part of the creative fun. When choosing supplies, think about safety—especially if children are involved—and avoid anything too brittle or sharp. The fairy world should stay gentle, after all.
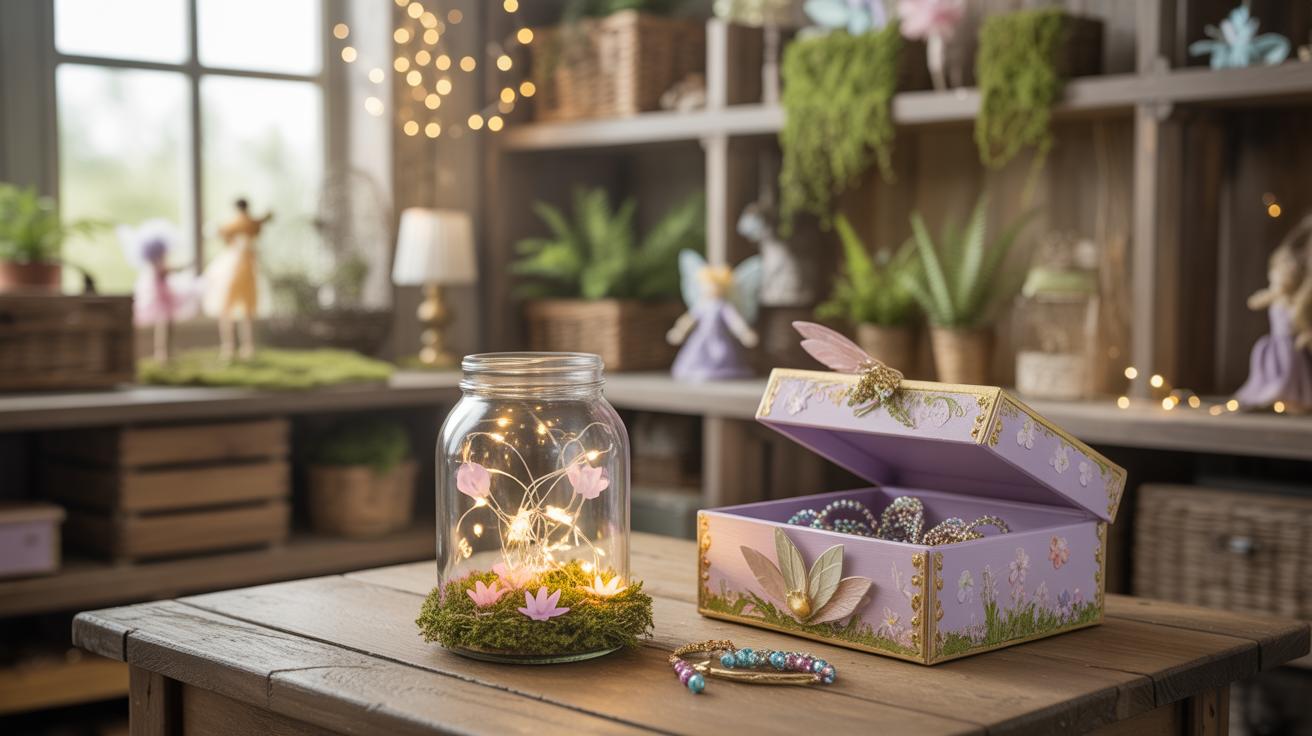
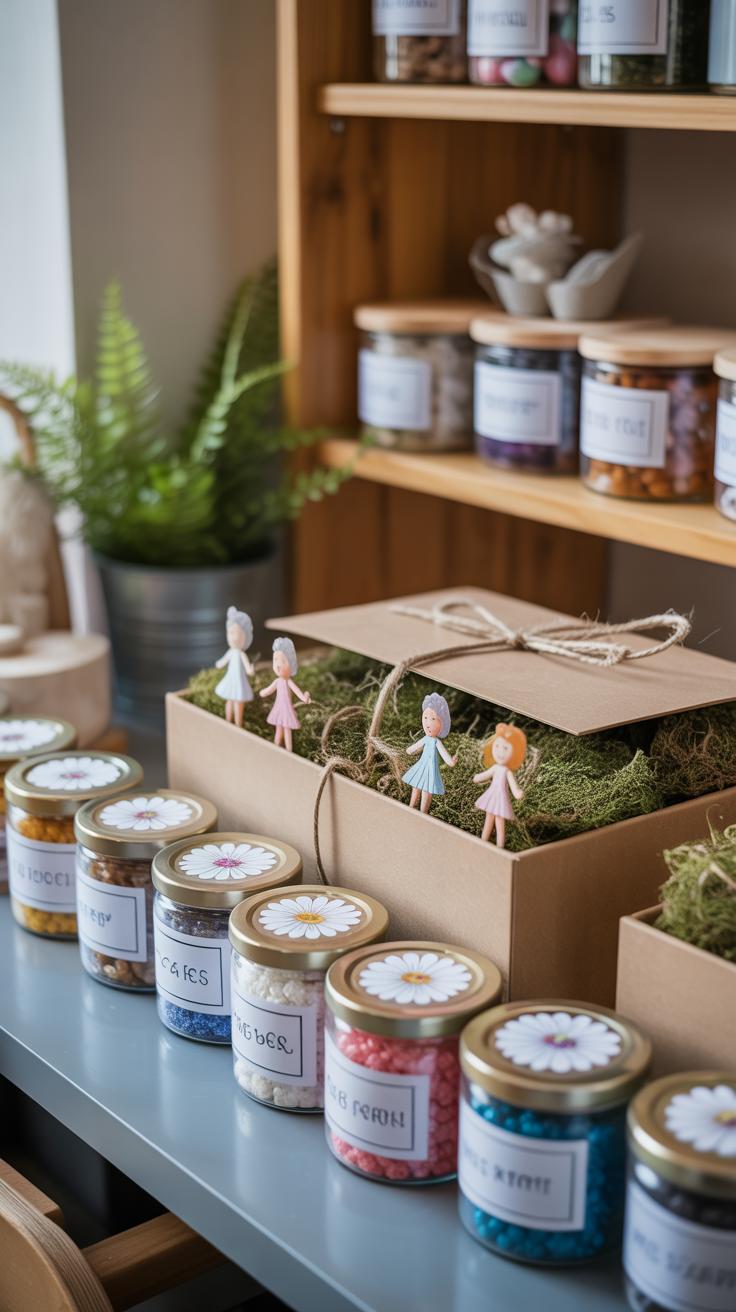
Making Fairy Jars for Small Storage

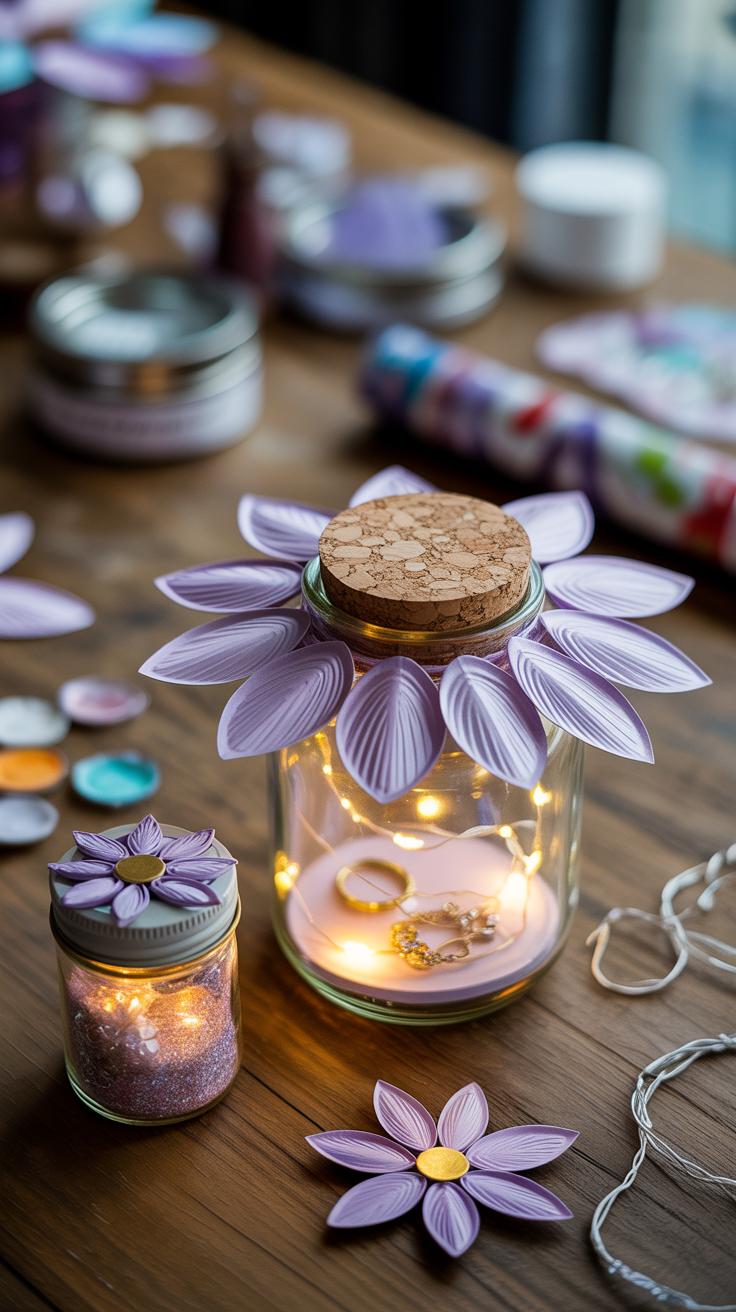
Turning simple jars into enchanting fairy storage is easier than you might think. Start with clean, empty jars—you can find these almost anywhere—then add some personality. Maybe paint the lids with soft pastel colors or give them a gentle coat of shimmer. Don’t worry if the paint isn’t perfect; hand-painted charm suits fairy jars well.
Next comes the lighting. Tiny fairy lights tucked inside your jar create a magical glow. Battery-operated ones work best for this purpose, as you can hide the pack behind or under the jar. You can wrap a thin string of mini LEDs around a handful of dried flowers or glittering moss for extra effect.
Seal your decorations carefully. If you’ve glued things outside, a clear top coat can protect the pieces and keep dust away. Inside, the fairy lights should be secure but accessible for battery changes. Once done, these jars make cute homes for small items you might scramble to find otherwise.
Step-by-Step Guide to Decorate Fairy Jars
Step one: Wash your jars thoroughly. Any sticker residue or dirt can ruin the look and cause paint or glue to peel off. Let them dry completely.

Step two: Pick your base color for lids or jar exteriors. Acrylic paints work well, and you don’t need a steady hand—streaks add texture.
Step three: Add your fairy lights. Twist and tuck the tiny strings gently inside, maybe along with some natural elements like small twigs or dried flowers to scatter the light interestingly.
Step four: Embellish the jar lids or exteriors with ribbons, lace, or faux gems. Craft glue or hot glue guns help keep these in place.
Step five: Apply a clear sealant if you want extra durability for decorations on the outside. If you skip this, just be mindful to handle your jars gently.
Using Fairy Jars to Store Small Items
Fairy jars make organizing simple treasures surprisingly delightful. For instance:
- Keep your favorite jewelry—rings, earrings, delicate chains—safe and visible.
- Sort and store buttons or beads by color or type, creating a vibrant display.
- Hold small craft supplies like pins, sequins, or thread spools to access quickly without creating clutter.

You’ll notice that these jars make even the smallest objects feel special. Plus, they add a bit of whimsy on your shelves or desks. Sometimes, I catch myself just turning them on to admire the soft glow—even if I have nothing to store in them at the moment.
Creating FairyThemed Boxes and Baskets
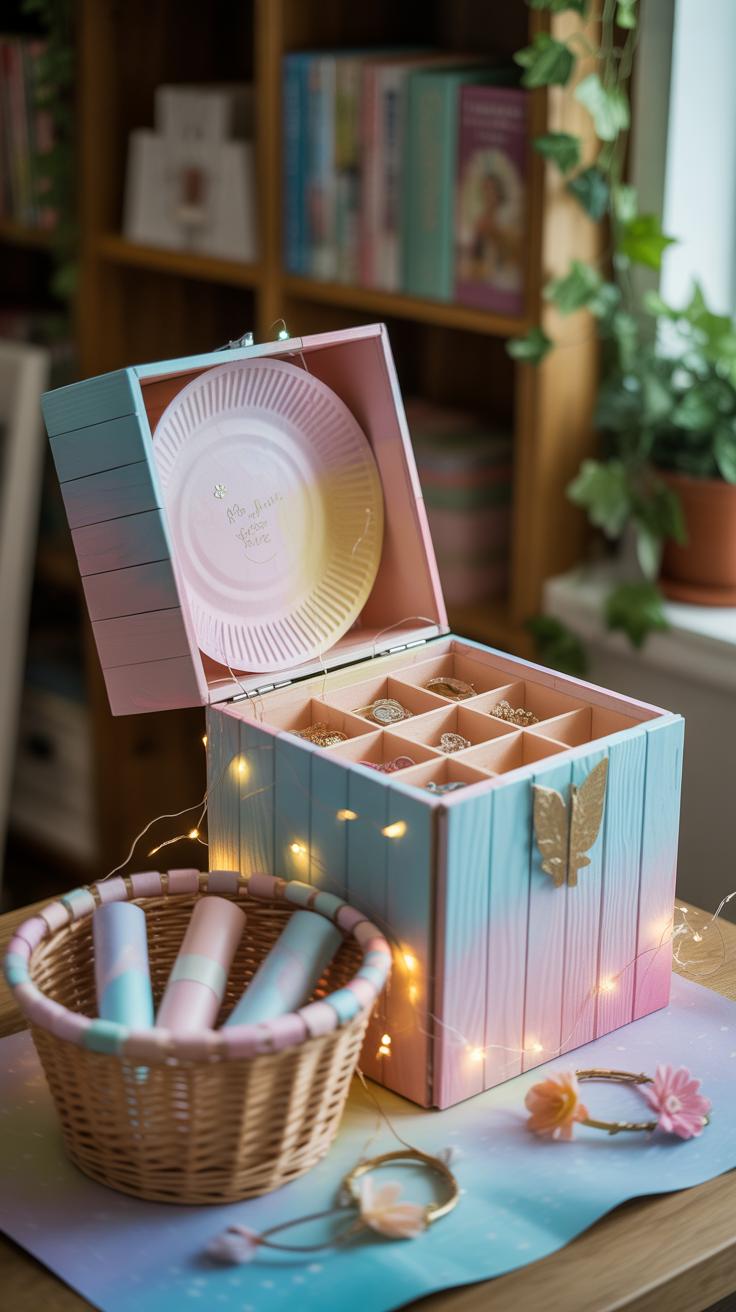
Design Ideas for Fairy Boxes
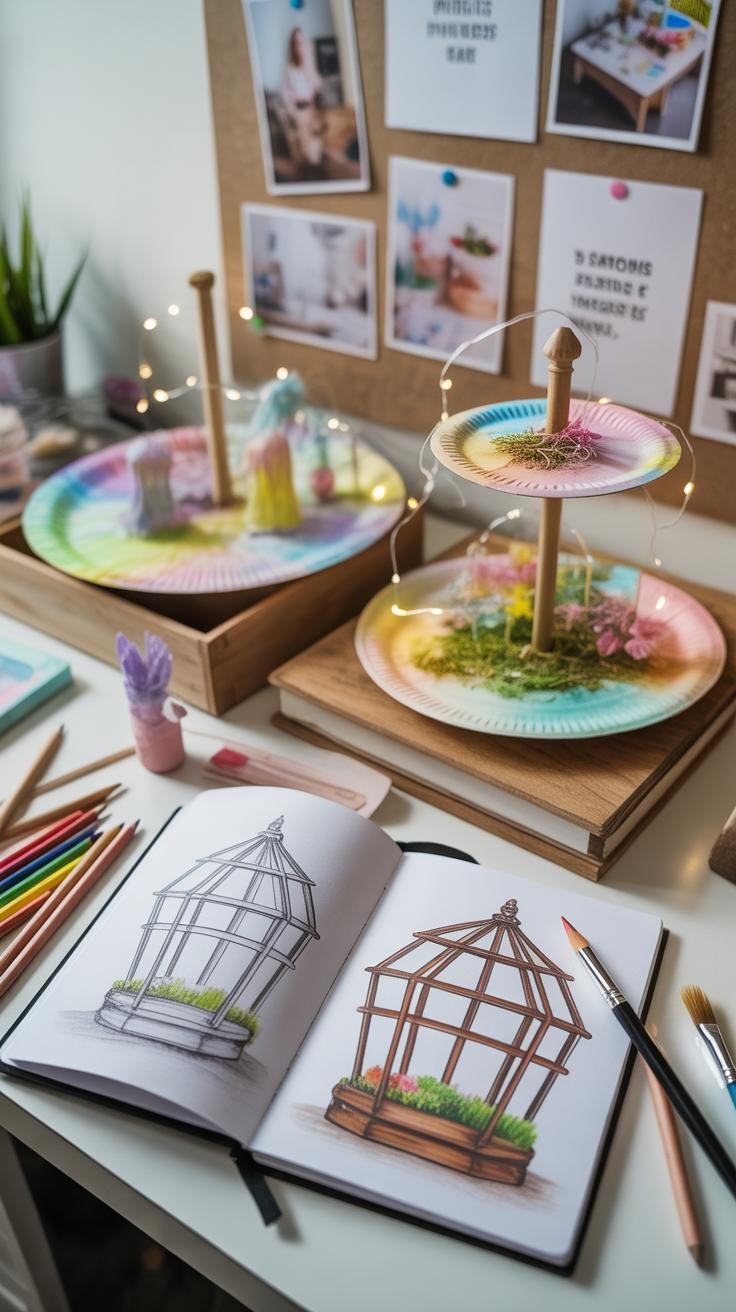
Painting boxes with soft, whimsical colors sets a gentle tone—think pastel greens, blues, or even subtle pinks. But just plain color isn’t quite enough to make them feel fairy-like. Adding small foliage designs—like leaf patterns or delicate vines—can bring that natural magic to the surface. I’ve tried using thin brushes for tiny leaves and sometimes even stamps for a bit of texture. If you want to get more tactile, try gluing on bits of moss or bark. These natural textures make the boxes feel less like everyday containers and more like little woodland treasures.
Don’t be afraid to layer textures or mix materials. A scratchy burlap lining inside a painted wooden box, for example, can balance smooth paint with rough surfaces. It might sound odd, but uneven edges or chipped paint spots can add personality—it’s like your storage has a story to tell, not just holding clutter.
Practical Uses for Fairy Baskets
Baskets are surprisingly versatile. You can easily organize toys, and they look much more inviting than plain plastic tubs. For a child’s room, a fairy-themed basket decorated with small flowers or ribbons can make tidying up less of a chore—and maybe even fun, though that depends on the kid. Around the vanity, think about fairy baskets for makeup brushes, nail polish, or hair accessories. It keeps everything in one place without needing a drawer.
At the office or craft table, fairy baskets can hold pens, washi tape, or scissors neatly. Plus, their charm might inspire creativity just by being there. But here’s a question: do you want your storage to blend in or stand out? These baskets tend to invite attention, so place them where their magic feels right. Sometimes, practical storage can have a quiet beauty that changes how you feel about the room.
Integrating Natural Elements into Storage Crafts

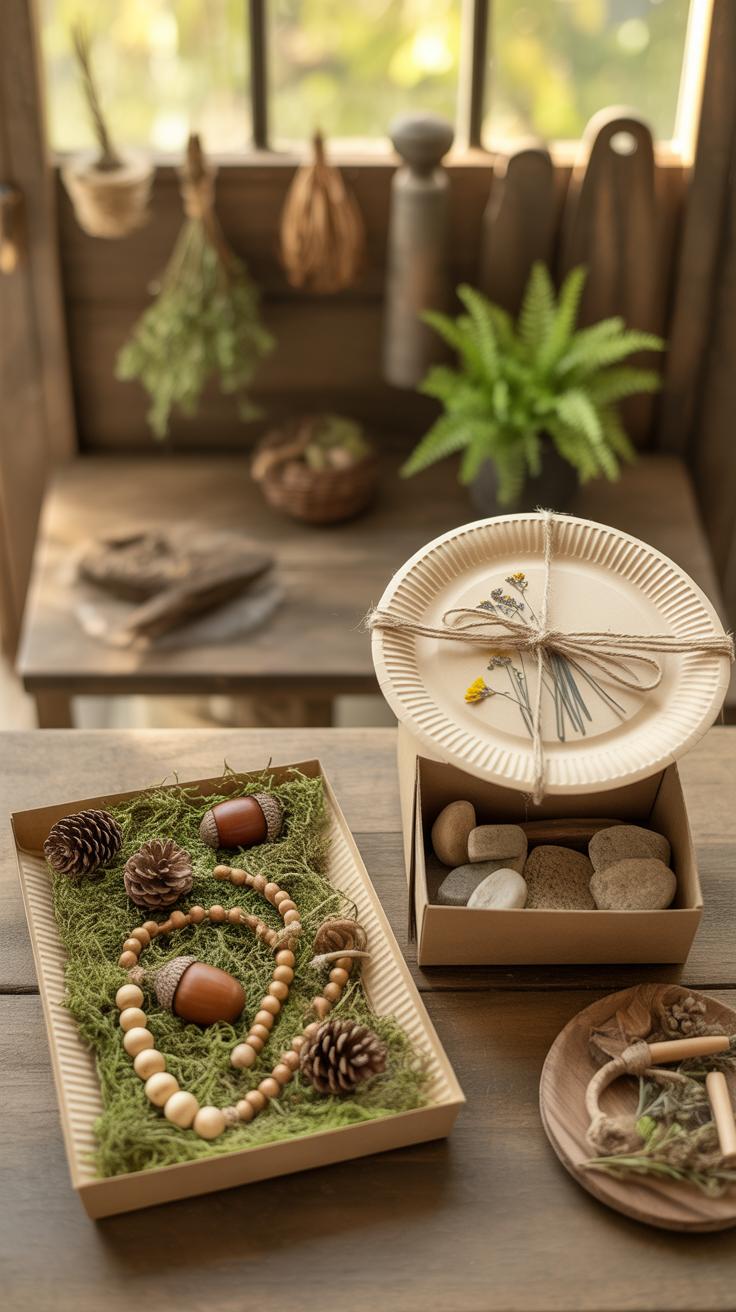
Using stones, leaves, and pieces of wood in your fairy crafts can bring a genuine touch of nature right into your home storage. I find that these materials add a quiet charm that’s hard to achieve with just paint or fabric. For example, small, smooth stones can become little accents on box lids, almost like tiny fairy steps. Twigs or bark can serve as borders or handles, lending a rustic feel. Sometimes, pressing dried leaves onto baskets creates patterns that feel like part of a forest floor. These simple natural bits connect the crafted pieces to the outdoors, making storage feel a bit more alive and textured.
Choosing Natural Materials Safely
When collecting materials, take care not to strip everything bare or damage ecosystems—you might only need a few fallen leaves or bits of broken wood. I usually gather things on walks, picking up what’s already on the ground. Before using them, it’s best to clean leaves gently with a damp cloth and let wood dry completely to avoid mold or mess. Stones are more straightforward—just a quick rinse usually works. If you want to keep leaves longer, pressing them between books can help preserve their shape and color. Honestly, preparing these materials feels like part of the craft itself, and a little extra patience goes a long way.
Enhancing Storage Charm with Nature
Natural details tend to make storage pieces feel warmer and more inviting. Adding a few pinecones glued inside a basket, or a cluster of moss around a jar, can shift the whole vibe. You might notice visitors glancing longer or even asking questions—they seem drawn to the subtle imperfections and textures. Nature refuses to be perfectly symmetrical, and that unpredictability makes storage less about utility and more about wonder. Do you prefer bright, polished storage, or something a little softer, a little earthier? Sometimes, mixing both works, but subtle natural touches often win in creating a magical, cozy corner.
Fairy Craft Storage for Kids Rooms
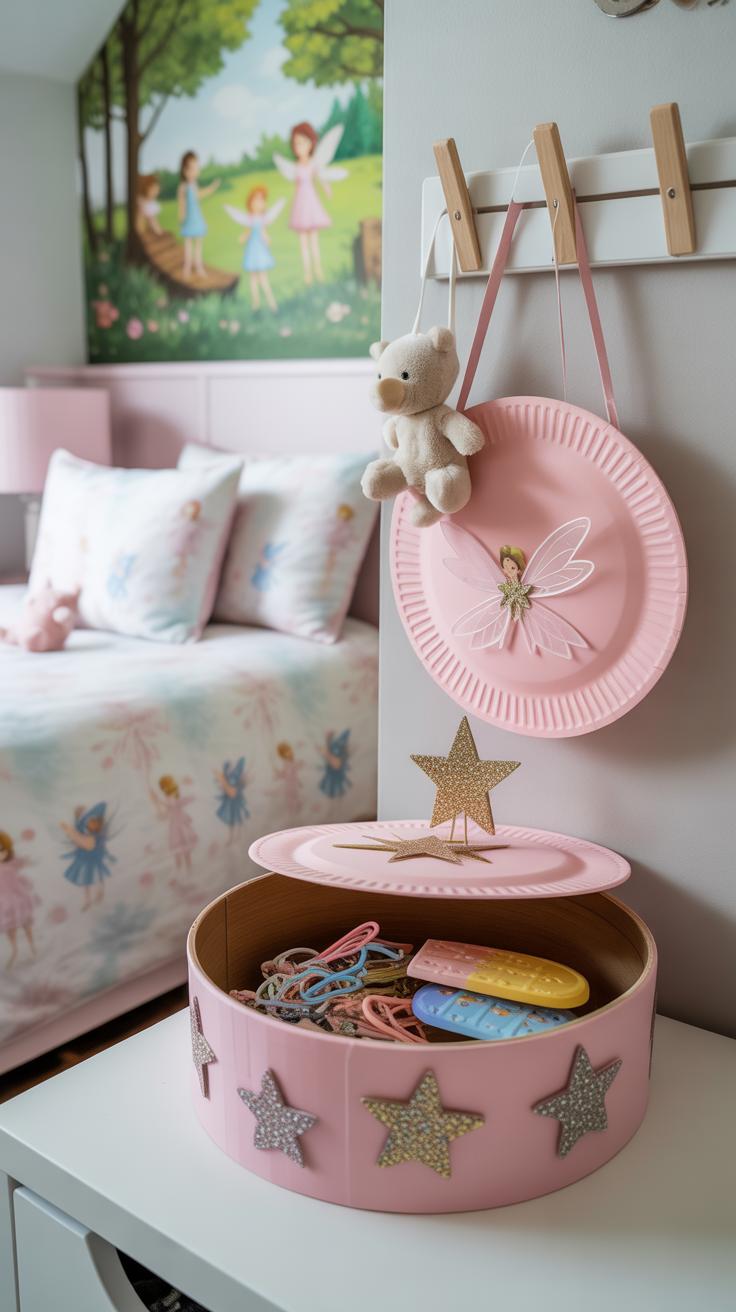

Getting children involved in organizing can be tricky, but fairy crafts turn tidying up into something more playful and personal. You don’t have to be a craft expert to make little projects that help store toys, books, or art supplies—all with a bit of fairy magic.
Simple crafts like decorating jars with fairy stickers to hold crayons or creating a fairy-themed hanging pouch for small toys are easy for kids to join in on. Even painting wooden boxes with bright colors and adding sparkly fairy wings can excite children about storing their belongings.
When kids build their own fairy storage pieces, they often feel proud—there’s a real sense of ownership that makes them want to keep their space neat. It’s like the fairy crafts say, “This is yours, and it deserves care.” This kind of motivation might seem small, but it changes how children view their rooms and their stuff.
Maybe it’s about encouraging responsibility or simply making organization less of a chore. Either way, fairy crafts can be a gentle nudge toward keeping rooms tidy without too much nagging. You might even find that kids ask to craft more storage solutions—though sometimes, that enthusiasm fades, but for a while at least, it’s a nice boost.
Using Fairy Crafts to Store Office and Craft Supplies
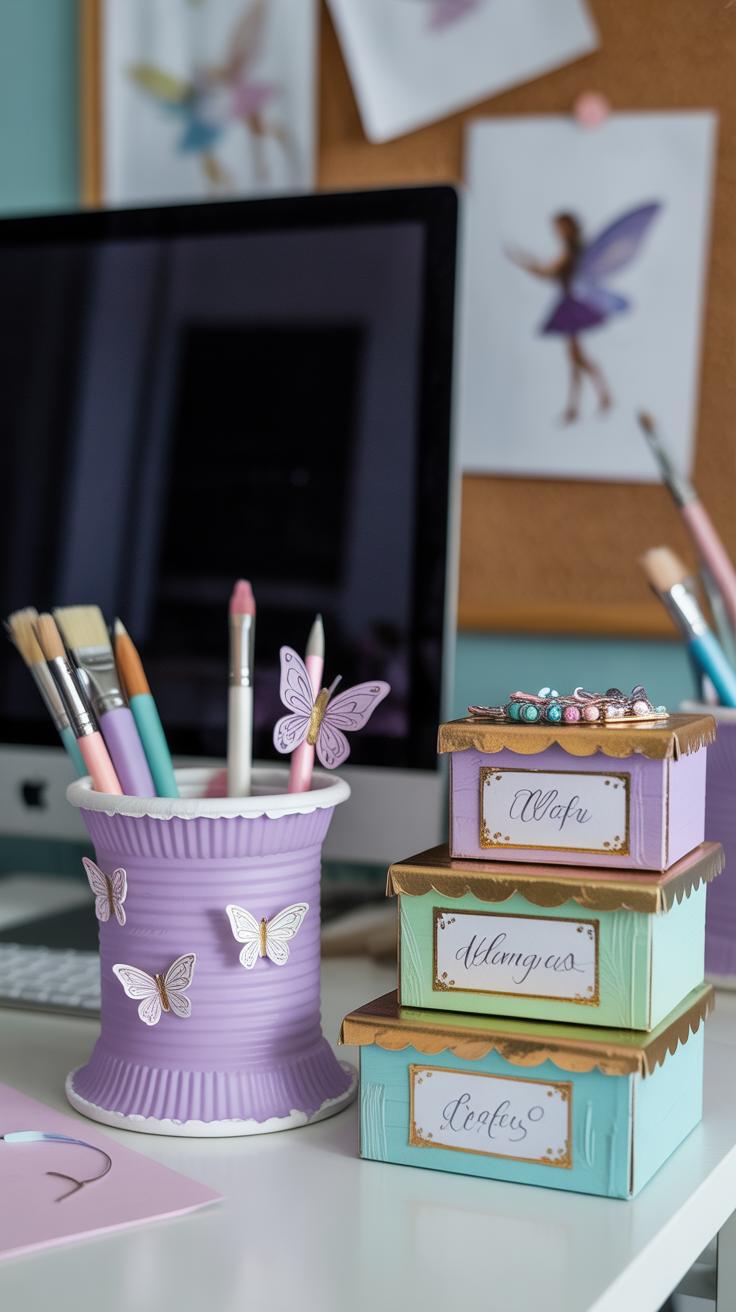

Fairy crafts can bring a sense of charm and whimsy to your workspace, turning an otherwise cluttered desk into a place that feels inviting and orderly. You might think fairy themes are just for kids’ rooms, but they actually offer clever ways to organize your pens, papers, and tools while adding a bit of personality.
For instance, creating fairy-themed holders for your office supplies can be surprisingly simple. Imagine tiny wooden boxes painted with delicate patterns, labeled by hand to keep your pens or paper clips sorted. Or try glass jars adorned with miniature fairy wings or mossy accents—these work well for scissors or craft knives and let you spot what you need without digging through piles. I once made a fairy “toadstool” container from a decorated ceramic pot that holds all my brushes; it’s practical and fun.
When organizing craft supplies, fairy flair invites playful containers that also keep things accessible. Ribbons can be wrapped around miniature spools stuck into handcrafted fairy stumps, beads sorted by color in little flower-shaped tins, and scissors tucked into fabric pouches sewn with petals or leaf motifs. It’s not just cute—it makes reaching for what you want easier because each item has its own spot.
Does bringing these gentle, imaginative touches actually make you work better? Maybe. Sometimes, having storage that feels personal nudges you to keep things neat. It’s easy to overlook, but when your craft area feels magical, organizing becomes less of a chore—and more like part of the creative process.
Maintaining Your Fairy Craft Storage Over Time
Simple Cleaning and Upkeep Tips

Keeping your fairy craft storage looking charming doesn’t have to be a chore. Dust tends to settle quickly on delicate surfaces, especially those with intricate details like tiny flowers or glimmering wings. A soft brush or a microfiber cloth works wonders here—gentle enough not to damage, but effective at lifting dust away. Sometimes, I find it helpful to do a quick sweep every couple of weeks; it feels less overwhelming that way.
When parts become loose or tangled, taking a moment to repair can save you from bigger headaches later. A dab of glue on a wobbly wing or retying ribbons can make a big difference. Refreshing colors or sparkles with a light touch of paint or glitter dust also keeps things vibrant. You might think it’s unnecessary, but small fixes help maintain the magical effect that drew you to these crafts in the first place.
Adapting Crafts as Your Needs Change
Fairy craft storage items aren’t set in stone. Over time, your needs might shift—maybe you want to store different items or even reimagine the decor. Repurposing becomes a quiet friend here. That little fairy basket once holding buttons could easily house jewelry or keys. I once turned a fairy-themed box into a mini planter for succulents when my storage needs shrank. It felt like the craft ‘grew up’ with me.
Have you ever considered tweaking the style itself? Maybe a fairy shelf could become a book nook with a few tweaks, or hanging fairy jars could evolve into light holders. The charm lies in making these items adaptable. It’s a flexible kind of magic, really, to keep your space functional without losing its whimsical touch. Why settle for storage that can’t grow alongside you?
Expanding Your Fairy Craft Skills and Ideas
Once you’ve settled into making your own fairy crafts, the urge to try new projects tends to grow quietly but persistently. You might wonder where to find fresh ideas that challenge your current skills or introduce new materials and techniques. Books remain a solid resource, especially ones dedicated to miniature crafts or nature-inspired décor—for example, “Fairy Houses and Fairy Gardens” offers detailed projects that stretch beyond basic crafting. Websites like CraftStash or Instructables also host tutorials varying from beginner to complex levels. I found some YouTube channels surprisingly helpful, especially those that show step-by-step construction of tiny fairies or enchanted storage containers.
But there’s something about sharing your journey with others that can’t be replicated by books or videos alone. Joining online communities—whether on Facebook groups, Reddit forums, or dedicated craft sites—opens you up to a world of ideas and critiques that keep your motivation alive. Sometimes, simply seeing how someone else solved a problem you’re stuck on sparks a fresh approach. Plus, giving feedback to others can hone your own eye for detail and creativity. So, connecting with fellow fairy crafters isn’t just about socializing; it’s like having a constant, gentle nudge to push your skills forward, even on days when crafting feels slow or repetitive.
Conclusions
Fairy crafts provide a unique way to personalize your home storage. By using accessible materials and focusing on imaginative but practical designs, you can create storage solutions that fit your needs and style. This approach helps keep your space orderly and visually appealing.
Engaging in fairy crafts allows you to express creativity while solving everyday storage challenges. Once you start experimenting with these crafts, you will find joy in making your home feel more magical and organized. Your efforts will show in the charming, functional storage pieces you craft.