Introduction
Organizing your storage bins can be both a practical and creative task when you use fabric ornaments. Fabric ornaments, known for their versatility and charm, add a special touch to plain storage bins, transforming them from simple containers into personalized organization tools. These ornaments are easy to make, reuse, and customize with various colors and textures, fitting seamlessly into your home decor.
In this article, we will explore different uses of fabric ornaments specifically designed to enhance the look and functionality of your storage bins. From making labels that are both useful and decorative to crafting unique handles, you will learn how fabric ornaments can help you organize effectively while keeping your space lively and tidy.
What Are Fabric Ornaments
You might picture fabric ornaments as soft, handcrafted decorations made from various textile materials. They are often small, tactile pieces designed to add charm or function wherever they’re placed. While they can be purely decorative, these ornaments also serve practical roles, especially when it comes to organizing your space.
Fabric ornaments vary in style: some are simple tags with stitched labels, others are colorful bows or appliquéd patches. You’ve probably seen them hanging on holiday trees, but beyond festive uses, they can be sewn or pinned onto storage bins. This way, they don’t just prettify an area; they help you quickly spot what’s inside each container.

Because of their softness, fabric ornaments blend well with other household items, without scratching surfaces or adding bulk. Their versatility means you can find—or make—styles that perfectly match your home’s vibe or your organizing needs.
Materials Used For Fabric Ornaments
Most fabric ornaments lean on basic, accessible materials that many crafters have around. Here are a few common ones you’ll encounter:
- Cotton: A breathable, easy-to-sew option, often chosen for simple tags or mini pillows.
- Felt: Its slightly stiff texture holds shapes well, making it great for patches or layered bow designs.
- Thread: Both for stitching construction and decorative embroidery; you’ll find regular cotton threads and embroidery floss often used.
- Embellishments: Beads, buttons, ribbons, or fabric paints add personality—or help with identification when labeling bins.
Sometimes stuffing is added to create a bit of volume, especially in ornaments shaped like tiny pillows or pouches. The materials chosen often reflect the intended use—something purely functional might be sturdier, while a decorative piece will focus more on color and pattern.
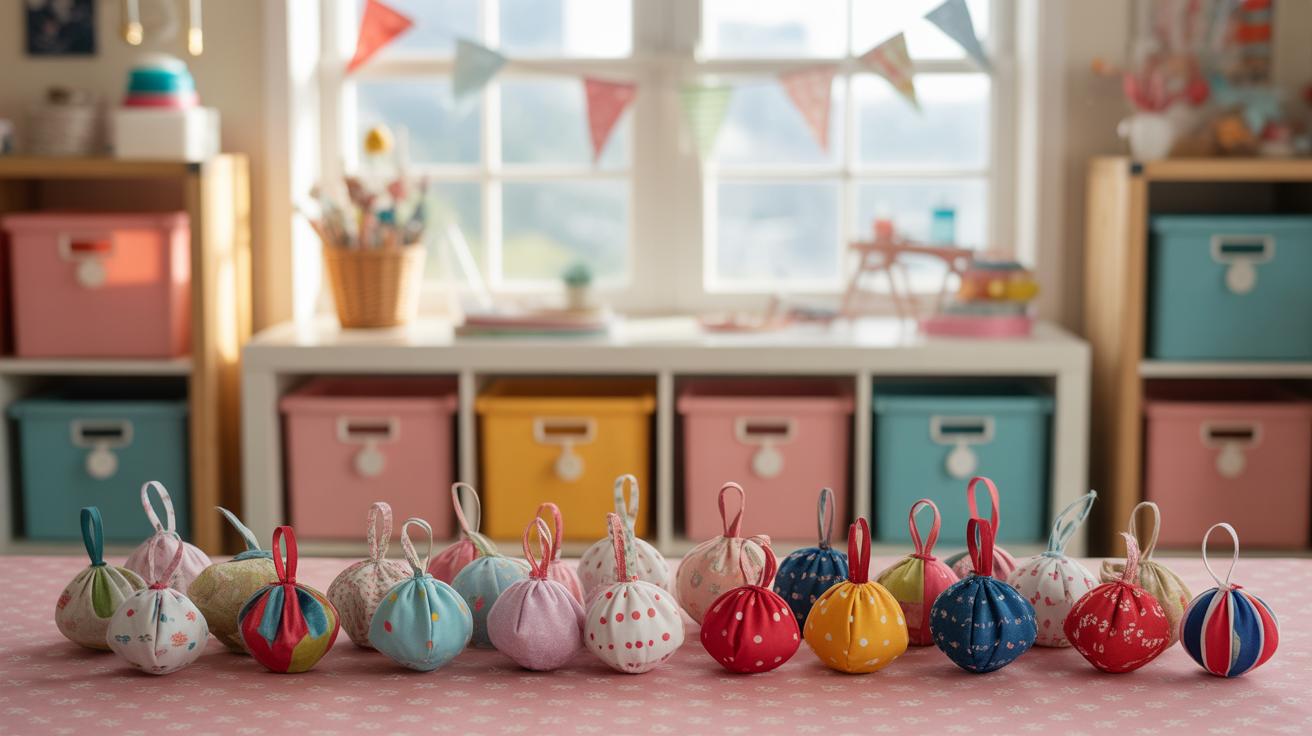
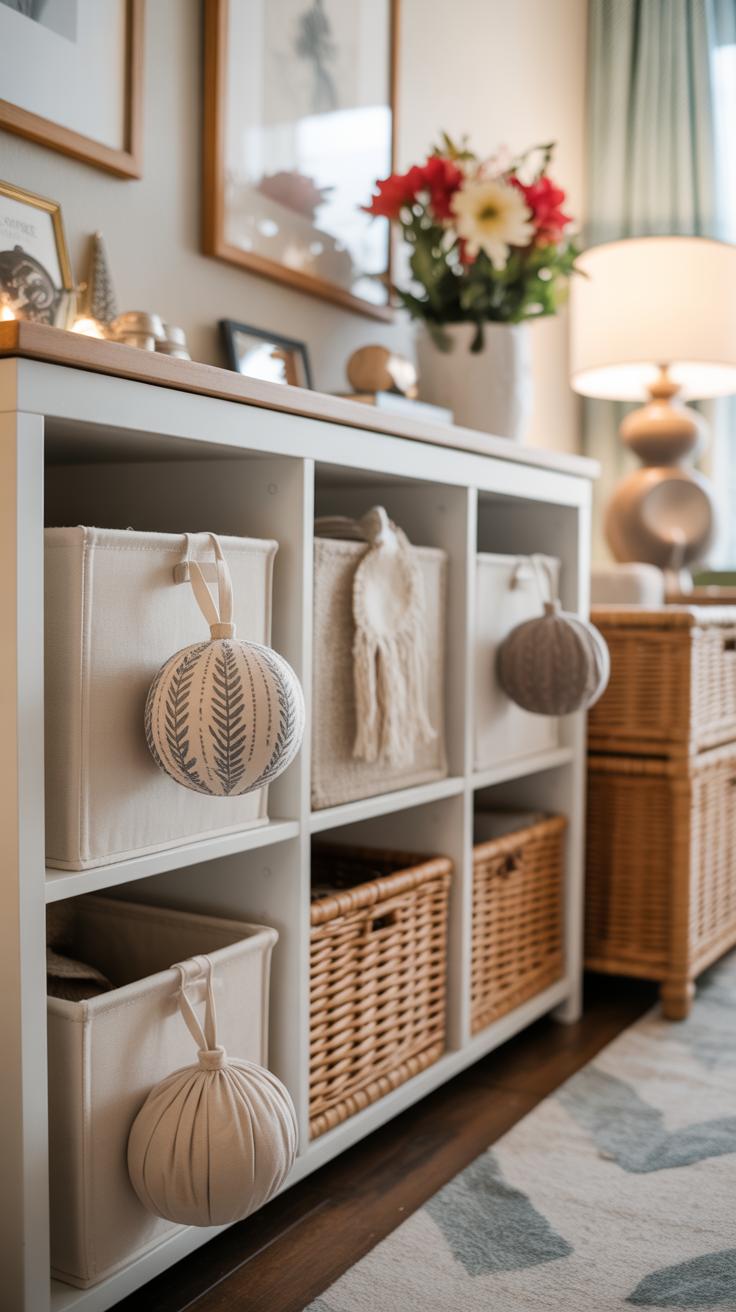
Types Of Fabric Ornaments Suitable For Storage Bins
When it comes to storage bins, fabric ornaments can take on practical forms that make organizing easier and more visually pleasant. You might want to try:
- Tags: Soft, sewn tags with written or embroidered labels. They attach via ribbons, snaps, or Velcro for quick swapping.
- Bows: Decorative but functional; a simple bow can mark a category or indicate bins meant for certain seasons or people.
- Patches: Sewn or ironed-on patches provide a clear visual cue without extra space usage.
- Pouches: Small fabric pockets fixed onto bins hold notes, keys, or inventory lists—turning storage into mini command centers.
These options don’t have to be fancy. Sometimes, a plain felt tag with a handwritten label feels more inviting than a rigid plastic label. Plus, fabric ornaments tend to soften the look of storage areas, making them feel less industrial and more homely. Have you ever thought about the little details you pass by each day? Fabric ornaments invite you to look closer.
Benefits Of Using Fabric Ornaments For Storage

Fabric ornaments offer more than just a touch of decoration on your storage bins. They bring practical benefits that often go unnoticed at first glance. For one, their softness and texture add a subtle layer of warmth that plastic or metal tags simply can’t match. This can make your storage areas feel less sterile and more inviting.
Personalization is another plus. You can choose patterns, colors, or even shapes that resonate with your style or the space’s vibe. I once saw someone use small fabric birds as tags for their garden tools bins—charming and easy to spot. The visual aspect here does more than please the eye; it helps with those moments when you’re rushing and need quick recognition.
Then there’s the ease of identification. If you’ve ever fumbled through plain bins with no clear labels, you’ll appreciate how fabric ornaments stand out, especially when they catch the light or add a pop of color. Even without reading a label, your brain starts associating colors or shapes with contents—a surprisingly useful trick.
Improving Organization With Fabric Tags
Using fabric tags can really change the way you approach labeling. Unlike paper or plastic, fabric tags don’t curl, tear, or smudge easily, which keeps your labels clear over time. You might find yourself actually motivated to keep things labeled once you realize these tags look nice and last longer.

Plus, fabric tags come in endless varieties. You could use embroidered names, hand-painted letters, or appliqué designs. It’s not just about what’s inside anymore but how inviting your storage setup appears. Does it look chaotic or thoughtfully arranged? Fabric tags tip the balance toward organized without feeling stiff.
Think beyond standard rectangles—small fabric shapes or even tied ribbons can serve as tags. This visual appeal also makes it easier for anyone else using the storage to find what they need, sparing awkward “What’s in here?” moments.
Adding Personality To Storage Areas
Fabric ornaments give you a chance to show off a bit of personality through your storage, which might seem trivial but actually makes a daily chore slightly more pleasant. Each bin becomes more than a container; it turns into a little expression of your taste or mood.
Maybe you match your ornaments to seasonal colors, or you pick fabrics that reflect hobbies and interests. For instance, a knitting enthusiast’s yarn bin tagged with soft, cozy fabric ornaments can feel just right, aligning with the contents more closely than a boring label ever could.
There’s also the unexpected bonus: a unique storage area invites curiosity, and you might find that family members or roommates pay more attention to where things go, all because it looks a bit more personalized. It’s almost like a quiet encouragement toward better tidiness.
Choosing Fabric Ornaments For Different Storage Bin Types

Matching Ornaments To Bin Materials
Picking fabric ornaments that suit your storage bins isn’t just about looks; it’s also about how well they stick or fit. For plastic bins, smooth surfaces mean you might want ornaments with some kind of backing, like Velcro or adhesive strips, to keep them from slipping off. Plain cotton patches or soft ribbons tend to slide, so think about adding a bit of firmness or structure to the ornament if you want it to hold.
Cardboard bins are a bit forgiving. You can pin or staple fabric ornaments more easily, but the material can weaken over time if you’re rough with attachments. Lightweight ornaments—maybe made from felt or canvas—work better since they don’t strain the cardboard. Also, patterns can bring warmth to an otherwise dull surface, so choose fabrics that brighten the tone of your cardboard.
Woven baskets offer texture and depth. Here, lightweight ornaments might get caught or tangled, so simpler shapes with flat backs work best. Think small fabric tags or sewn-on patches. Fabrics with a bit of stiffness hold shape, which complements the basket’s weave. You probably want to avoid anything too bulky or floppy; otherwise, the baskets lose their neat look.
Durability And Care Considerations
Fabric choice impacts how long your ornaments last. Natural fibers like cotton and linen look nice but absorb moisture and dirt, which can wear them down faster if the bins live in busy or humid spots. Synthetic fabrics—polyester, nylon—resist stains and hold color longer but might feel less cozy or homey.

If you’re attaching fabric ornaments to bins you move often, consider reinforced stitching or double layers to prevent fraying. Ornaments that can be detached easily make washing or cleaning the bins less hassle, which is a small convenience that adds up.
One thing I’ve noticed is that fabric ornaments on plastic bins tend to get dustier because plastic attracts static. A quick wipe or gentle hand wash now and then helps keep them fresh. With woven baskets, dust can settle deeper, so removing and refreshing the ornaments feels almost necessary over time.
It’s a bit of a balance between durability and maintenance. You want something sturdy enough to last but simple to care for, not a complicated chore every time you tidy up.
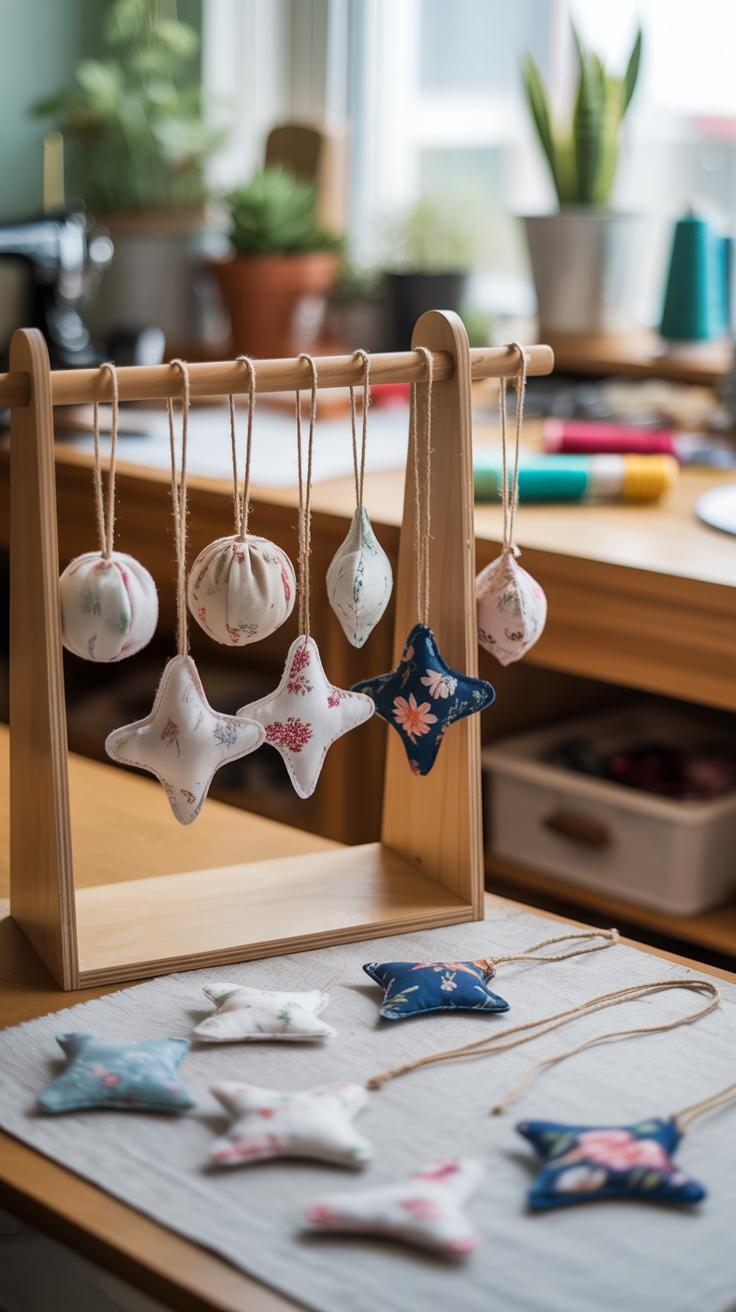
DIY Fabric Ornaments For Your Storage Bins
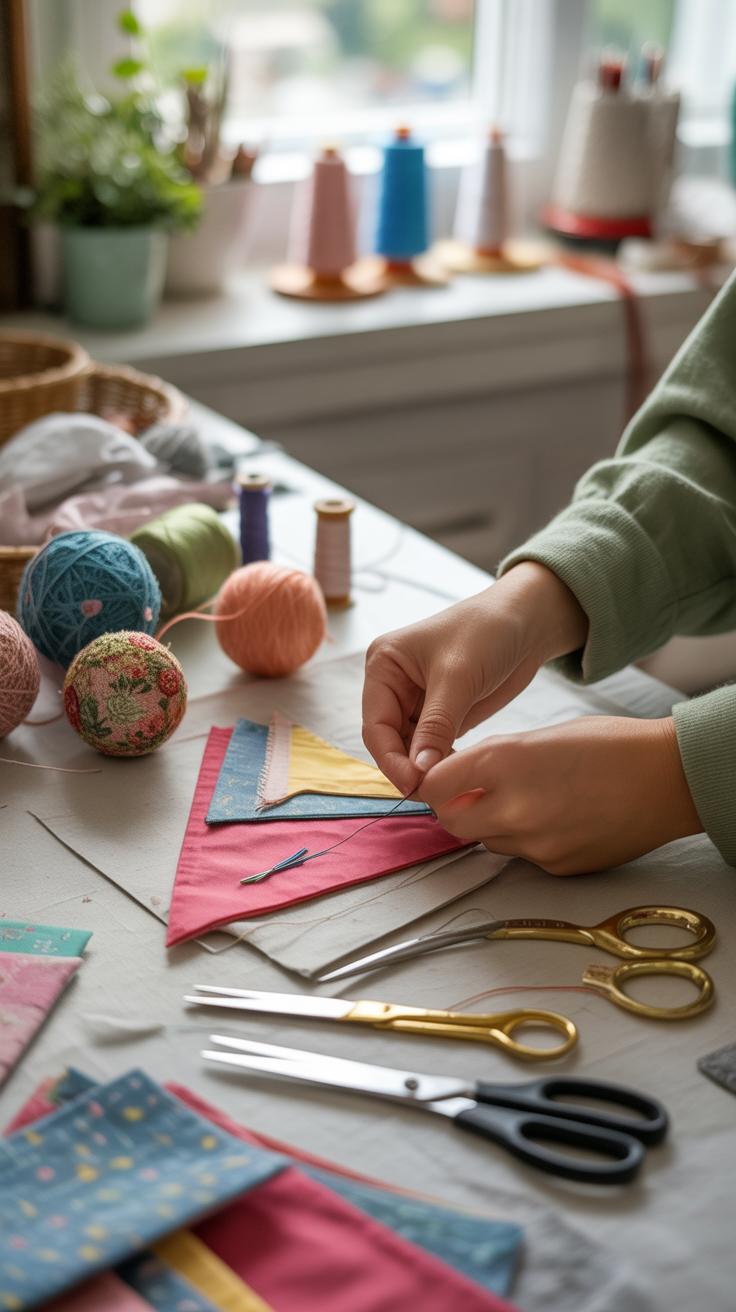
Making fabric ornaments for your storage bins can be surprisingly simple, even if you’re not a sewing expert. With just a few basic materials and a little patience, you can create practical and charming additions like name tags, bows, and pockets that brighten up your organization. Let’s start with the basics.
How To Make Fabric Name Tags

Start by cutting small rectangles or squares from fabric scraps—cotton or linen works well. If you want to keep it uncomplicated, take fabric paint and carefully write or stencil names or labels directly onto the fabric. This might feel a bit intimidating if you’re not steady-handed, but hey, a little imperfection adds character. Embroidery is another route, especially if you enjoy handwork. Simple stitches like backstitch or running stitch can form letters, and while it takes more time, the textured effect is often worth it.
Once your label is ready, sew or hot glue a small fabric loop or ribbon onto one corner. This allows you to thread it onto bin handles or tie it around baskets. If you wonder about durability, consider ironing on interfacing behind your tag for some firmness. It’s a small tweak, but it helps the tags keep shape after a few uses.
Creating Ornamental Bows And Ribbons
Turning scraps into bows for your bin handles is straightforward and fun. Cut strips of fabric—around 1 to 2 inches wide and 6 to 10 inches long—depending on the size of your bin handle. Fold the strip in a basic bow shape and secure the center with thread or a thin ribbon. Tying a knot in the middle works too if you want a softer look.
You could play with layering different fabrics to add visual interest—try combining a patterned strip with a solid one. Fabric type matters here; a stiff fabric like canvas or denim holds shape better, but softer cotton feels cozier. Once your bow is ready, pin it or stitch it directly on, or attach it using a ribbon loop to slip on and off easily. Ribbons can also be wrapped around bin handles and tied into simple knots or bows—sometimes less is more.
Another idea is to create small fabric pockets. Cut out a square or rectangle from fabric, hem the edges by folding them under and sewing or gluing, and then sew the bottom and sides onto the bin’s front or side. These pockets offer extra storage for small items—tags, pens, or receipts—and give bins a charming, handmade feel. You might find this handy for office supplies or craft materials.
Attaching And Arranging Fabric Ornaments On Storage Bins

Best Attachment Methods
When it comes to securing fabric ornaments onto various storage bins, the choice of attachment depends on the bin’s material and how permanent you want the decoration to be. Sewing is reliable for fabric or soft bins; it keeps ornaments firmly in place without damage. But I get that sewing isn’t always practical, especially if you’re short on time or tools.
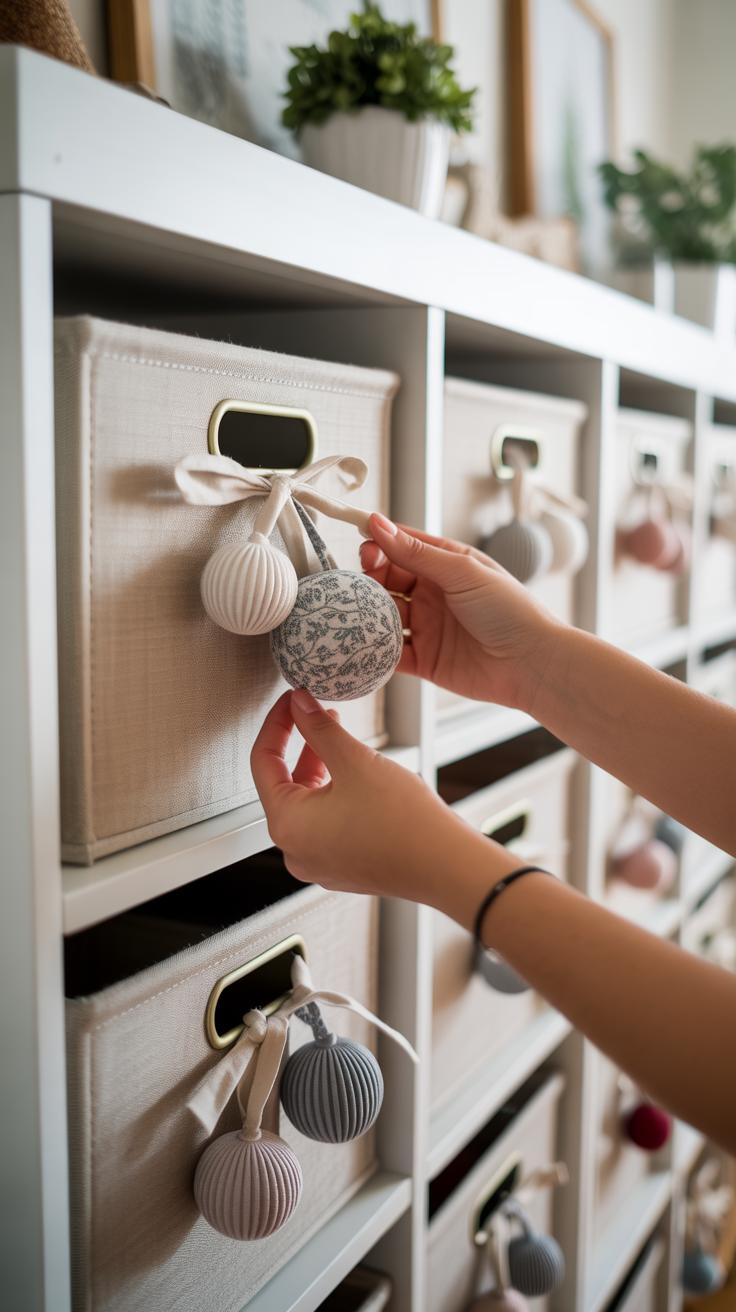
Glue—fabric glue or a strong craft adhesive—works well on hard surfaces like plastic or wood. Though, some glues may not hold up over time, especially on flexible bins or those exposed to moisture. Velcro strips offer a neat alternative, allowing you to remove or switch ornaments easily. This is great for things you like to update now and then.
Safety pins? They’re quick and versatile, especially on cloth or mesh bins. Just be careful; pins can scratch delicate surfaces or snag other fabrics nearby. Sometimes, combining methods makes sense—for example, Velcro paired with a tiny dab of glue for extra security.
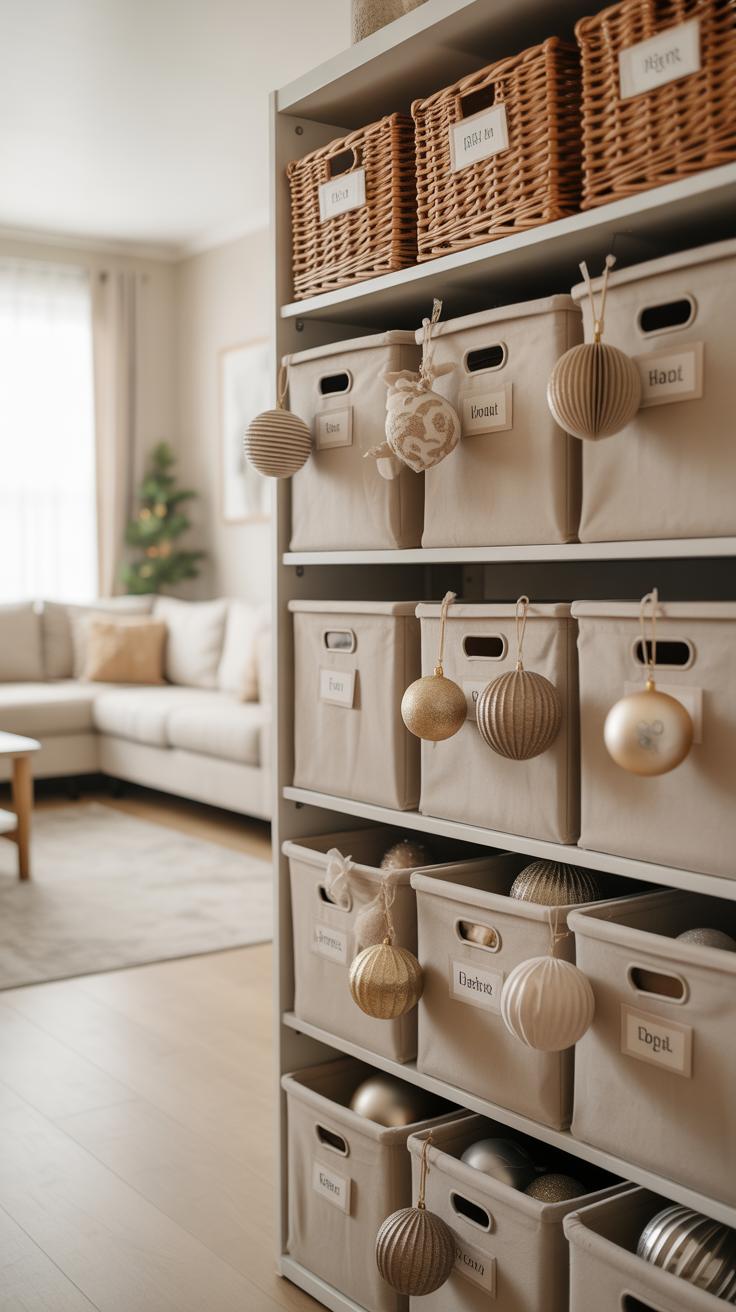
Organizing Ornaments For Easy Access
Think of fabric ornaments as more than just decoration. They’re like clues guiding you to what’s inside the bin. Grouping similar items together and marking their containers with matching or themed ornaments can speed up finding what you need. You might arrange them by size (big ornaments for big bins), by color, or even by function, like all craft supplies adorned with flower-shaped tags.

Placement matters too. Keep ornaments visible but not intrusive—usually near the top or front where you can glance quickly. If you have several bins stacked, use larger or more vibrant ornaments on the bottom or back ones to help them stand out.
Have you noticed how a simple tag can save you from endless rummaging? It’s small but impactful. Experiment with spacing ornaments evenly or clustering them for distinct categories. There’s no one right way; sometimes a bit of trial and error helps you figure out what clicks in your space.
Using Fabric Ornaments To Sort And Categorize Items
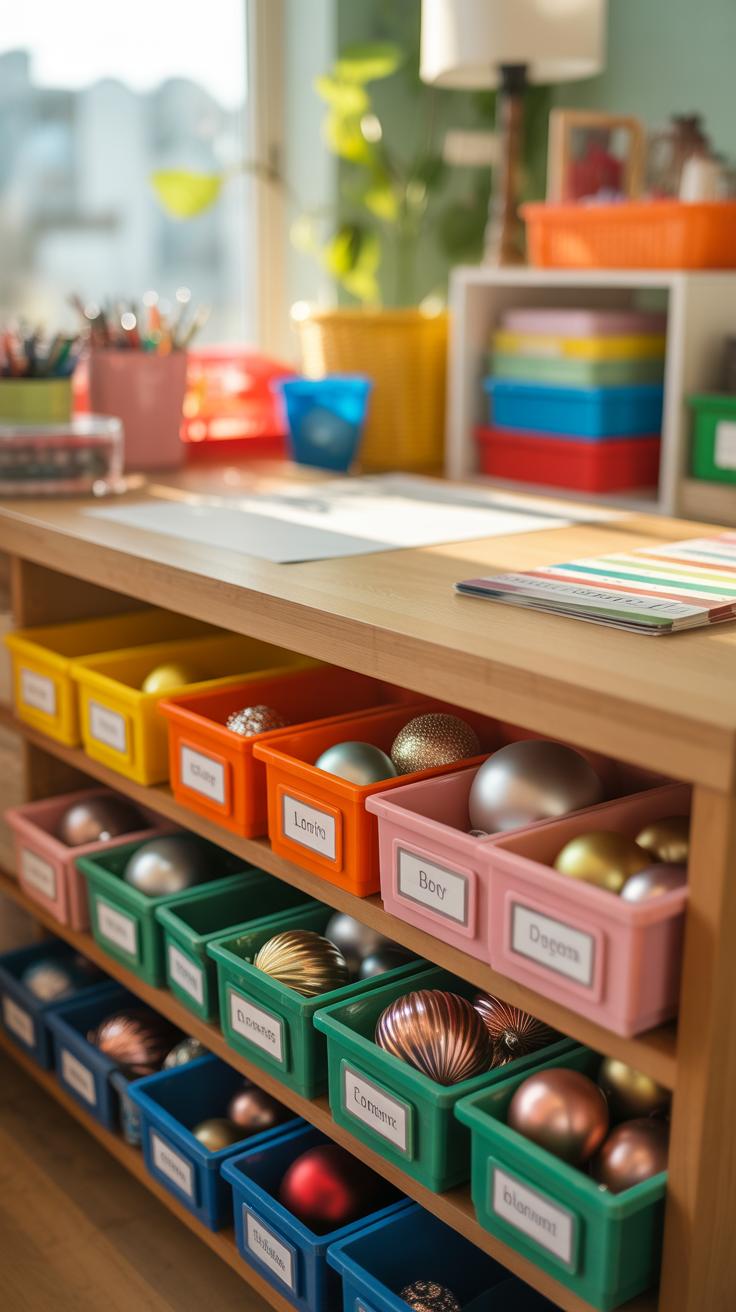
Fabric ornaments can do more than just decorate storage bins; they can actually help you sort and categorize your belongings in a way that’s pretty straightforward and visually handy. One approach I’ve found useful is using color coding with fabric pieces. Think of assigning specific colors to different types of items or even individual rooms—like red for kitchen tools, blue for office supplies, and maybe green for craft materials. When you glance at your bins, the color instantly hints at what’s inside without even opening it.
There’s something about this system that just sticks with you over time, even if it’s not perfectly consistent at first. You might start using purple for toys but then shift it to seasonal decorations later on. It’s flexible in that way, and that’s fine. The colors don’t need to be perfectly matched either; different shades can still work as indicators.
Another layer you can add to the system is attaching symbolic fabric ornaments—little shapes or icons sewn or glued onto the tags. For example, a star-shaped ornament might mean holiday decorations, while a small fabric circle could stand for miscellaneous items. These symbols act as quick visual markers, which is helpful if you’re juggling lots of bins and want to avoid guessing what’s inside.
Sometimes, people get overwhelmed by the idea of making a strict system. But honestly, mixing colors and symbols offers a balance between organization and creativity. Plus, it’s easier for others in your household to find things too, since they just learn to recognize the symbols or colors. Have you tried combining both? It changes how your storage ‘speaks’ to you.
Maintaining Fabric Ornaments Over Time
Cleaning And Washing Tips
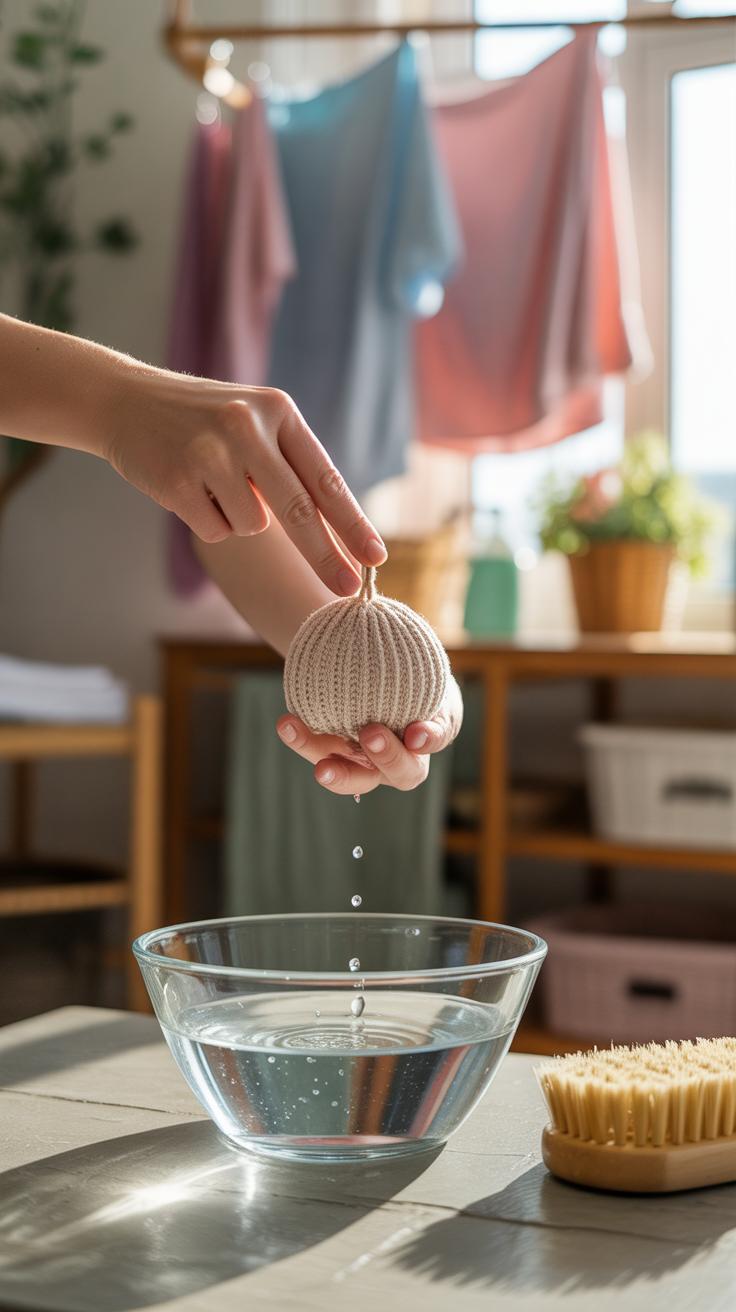
Fabric ornaments can pick up dust and grime pretty quickly, especially if they’re attached to bins you use often. Keeping them clean doesn’t have to be complicated, though—it’s best to avoid harsh soaps or rough scrubbing, which can wear down the fabric or fade colors. Instead, try spot cleaning with a mild detergent diluted in water. Use a soft cloth or a small brush to gently dab the surface, then let it air dry naturally.
If you need to wash the ornaments more thoroughly, removing them from the bin first is usually a good idea—some attach with Velcro or simple ties, making this easy. Hand washing in cold water reduces the chance of distortion or shrinkage. Avoid wringing out fabric ornaments; instead, press them gently between towels to get rid of excess water.
Just a heads-up, machine washing can be risky unless the ornaments are very sturdy and well-stitched. I once threw a fabric ornament into the wash and ended up with a frayed mess. So, better safe than sorry with gentle care.
Replacing Worn Ornaments
Over time, fabric ornaments might start to look tired—edges fraying, colors fading, or stitching coming loose. It’s tempting to keep them because they’ve served well, but replacing them when they no longer clearly identify your bins actually helps maintain order in your system.
You don’t have to wait for an ornament to be completely worn out before swapping it. If it’s looking dull or starts to peel away from the bin, that’s a good cue. Sometimes a small repair extends life, like sewing loose edges back or reinforcing the attachment, but other times fresh ornaments work better.
Updating ornaments offers a chance to rethink your labeling approach, maybe adding new colors or shapes that fit evolving storage needs. So, if you notice the fabric ornament doesn’t quite catch your eye anymore, or if it confuses more than clarifies, it’s probably time for a change.
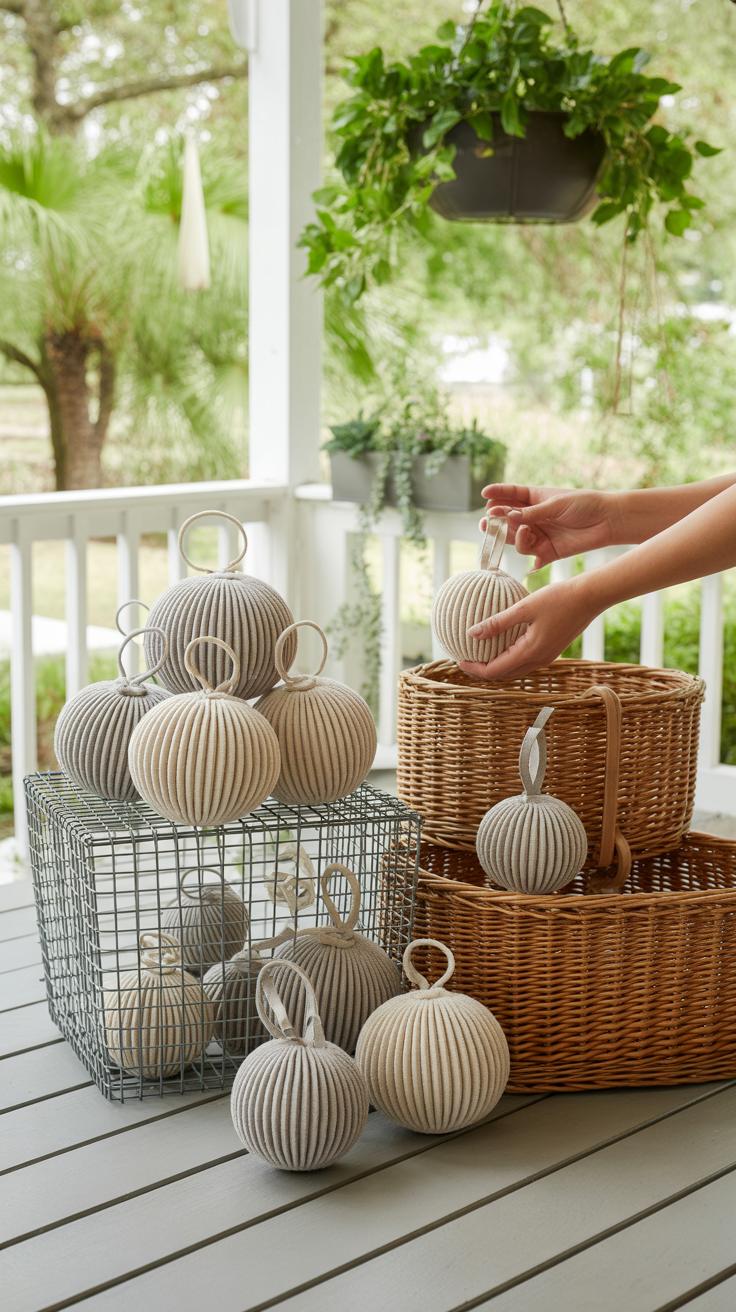
Sourcing Fabric Ornaments And Supplies
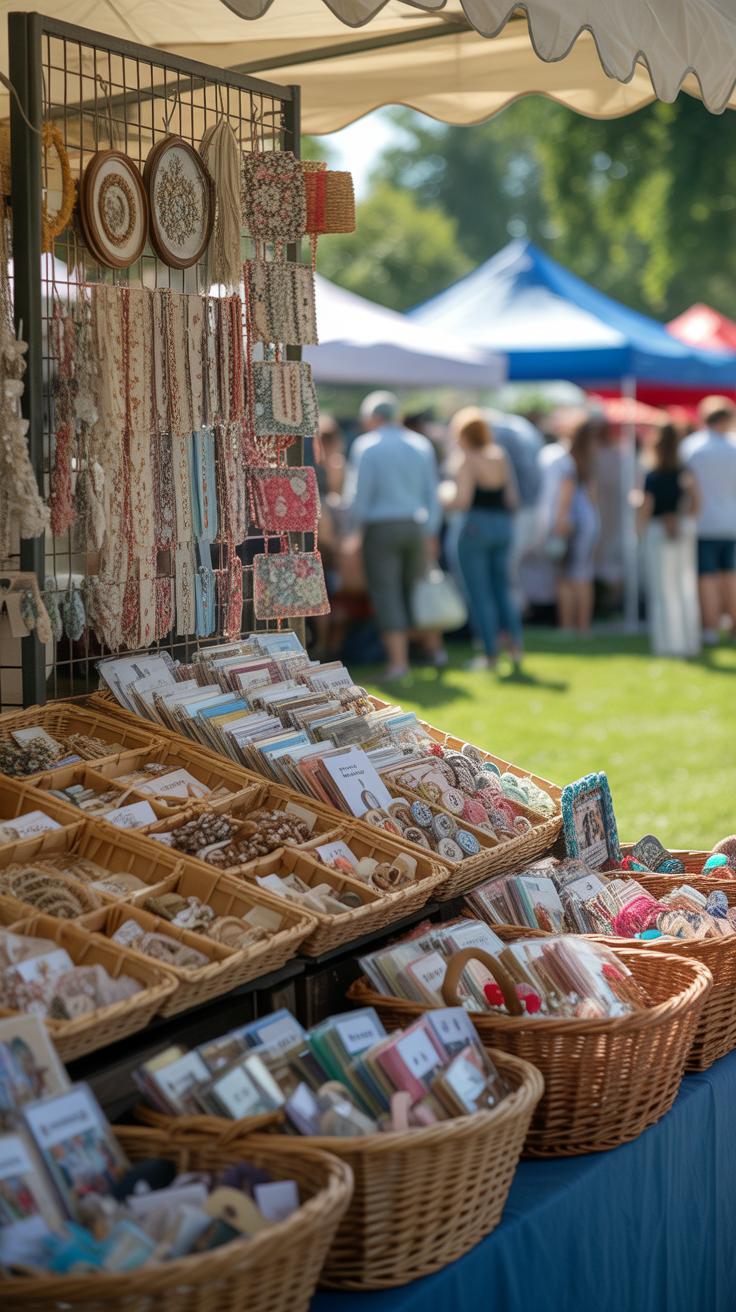
Finding fabric ornaments and the supplies to make your own can be a bit of a treasure hunt, but that’s part of the fun, isn’t it? Local craft and fabric stores often have a nice selection of materials—everything from pre-made fabric ornaments to embellishments like ribbons, buttons, and embroidery threads. Places like hobby shops, sewing centers, and even some home goods stores usually carry seasonal ornaments or the raw materials you’d need if you want to create something custom.
Expect to see a variety of fabric types—cotton, felt, burlap—and tools like needle sets, hot glue guns, and stuffing for 3D ornaments. Sometimes, the choices can feel overwhelming though. I remember searching for just the right trim and ending up wandering the aisles longer than I planned.
Online options open a different world. Websites like Etsy or Amazon offer countless individual handmade fabric ornaments, often unique or vintage-style. If you want to try your hand at making your own but aren’t sure where to start, crafting kits from sites like Michaels or Joann Fabrics include step-by-step instructions, patterns, and all the necessary bits. They can be great for beginners who want guidance without the guesswork.
Sometimes, kits include extra materials, which can be a bit much if you’re just looking for a simple project. Still, having those extras can come in handy for future organizational touches. Have you tried any online craft kits before? They can spark ideas, even if you don’t follow them exactly.
Creative Ideas To Personalize Your Storage Bins With Fabric Ornaments
Using fabric ornaments to personalize your storage bins can turn a plain container into something that feels a little more like part of your home. You might try attaching small fabric flowers, patches, or braided trim to the edges or corners of your bins. Sometimes, a cluster of tiny fabric leaves or buttons can give a subtle texture that’s easy on the eye but helps you spot the bin faster.
If your home leans toward rustic or vintage styles, think about rough linen or burlap pieces stitched or glued along the rim. For a modern look, sleek geometric fabric patches in monochrome colors work well. Maybe you prefer something brighter—fabric with bold prints can make your storage bins pop, especially in kid-friendly spaces.
Don’t hesitate to mix sizes, shapes, and types of fabric ornaments. A single oversized fabric rosette for one bin can stand out among smaller motifs on neighboring bins. It’s a little trick I picked up—it’s not essential for all bins to match perfectly; variety can actually help organizing by giving each bin its own character.
Combining Fabric Ornaments With Paint And Stickers
Fabric ornaments don’t have to stand alone. Pairing them with paint or stickers can create clearer, more attractive labels. Imagine painting a simple frame or background directly on the bin, then placing a fabric patch inside the painted area. This contrast helps draw attention to labels without overwhelming.
Stickers add another layer. Try alphabet or icon stickers next to fabric tags to spell out contents or denote categories. A small, sewn fabric shape combined with a sticker number can work great if you prefer a coded system. I’ve found that layering these elements keeps things visual and tactile, making it easier to find items quickly.
One time, I painted a chalkboard panel on a bin, stuck a delicate lace fabric piece on one side, and wrote the content with chalk. Switching out the chalk note was quick, but the fabric stayed as a permanent, pretty touch.
Seasonal And Themed Fabric Decorations
Switching fabric ornaments seasonally can refresh your storage bins without needing to change bins themselves. For winter, small felt snowflakes or wool-knit patches can hint at coziness. Spring might call for floral fabric buttons or lightweight cotton leaves.
Themed decorations let you group bins not just by function but by mood or event. For example, holiday décor bins could wear small fabric ornaments shaped like pumpkins, stars, or hearts, depending on the season. It can be fun—and a bit motivating—to update these each year.
I sometimes worry this might get a bit fussy, but it usually keeps me more engaged with my storage system. Plus, it’s a chance to use leftover fabric scraps you might otherwise toss. Changing fabrics seasonally also helps avoid visual clutter, giving your spaces a subtle rhythm that can be surprisingly calming.
Conclusions
Fabric ornaments offer simple and creative solutions to organizing your storage bins. They improve accessibility through clear labels and easy-to-grip handles. Plus, they brighten your storage areas making them pleasant to use every day. By choosing sustainable and reusable fabric ornaments, you also help reduce waste and support eco-friendly practices.
Using fabric ornaments, you shape an organized space that reflects your style and keeps everyday items handy. You can start with small projects like fabric tags today and gradually add more ornaments to fully personalize your bins. The practical ideas shared here empower you to turn storage chaos into orderly, colorful, and enjoyable spaces.