Introduction
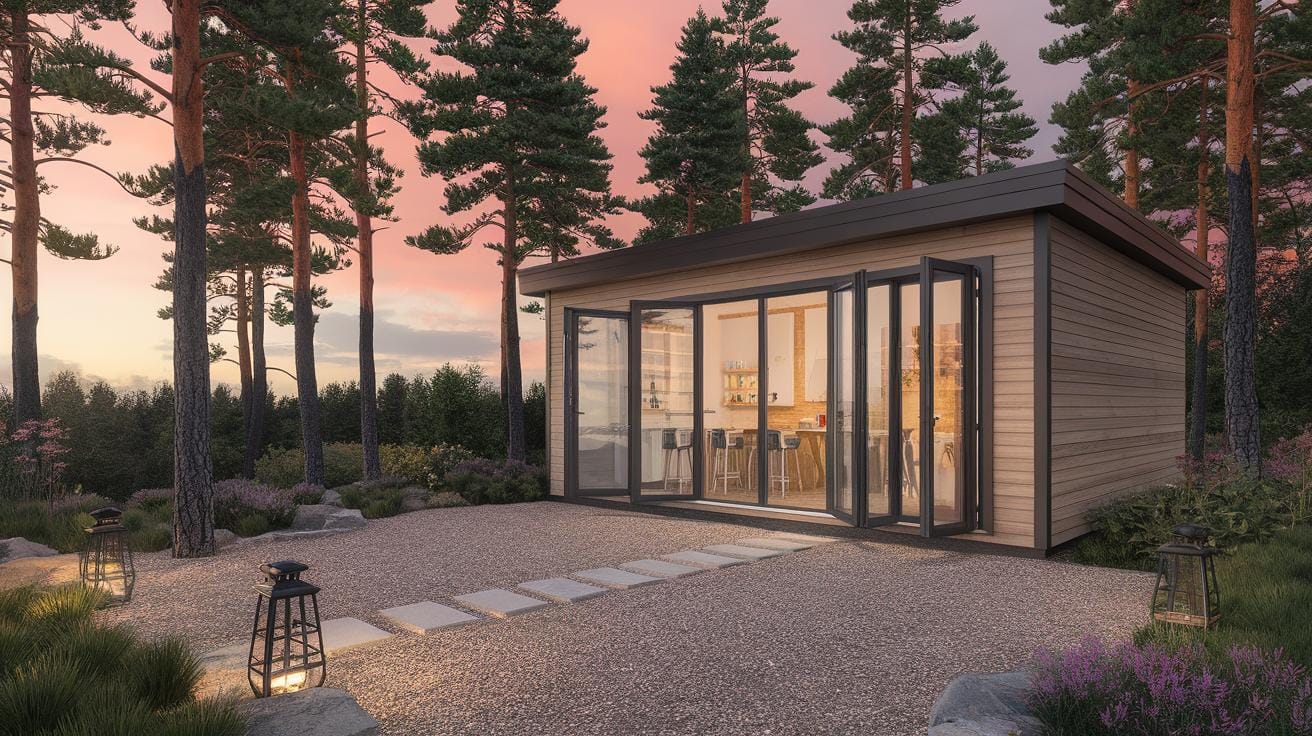
Creating a backyard studio opens new possibilities for your creative work. It offers a private setting where you can focus without distractions from the main house. Whether you are an artist, writer, or maker, a dedicated space right outside your door improves your workflow. Consider what your ideal work environment looks like and how a backyard studio can fit that vision.
Think about your studio as more than just a structure. It should nurture inspiration and productivity. Planning your studio involves choices on size, location, lighting, ventilation, and storage. Each factor impacts how you use the space daily. This guide will help you design a backyard studio that is practical and supports your creative routine with clear, actionable advice.
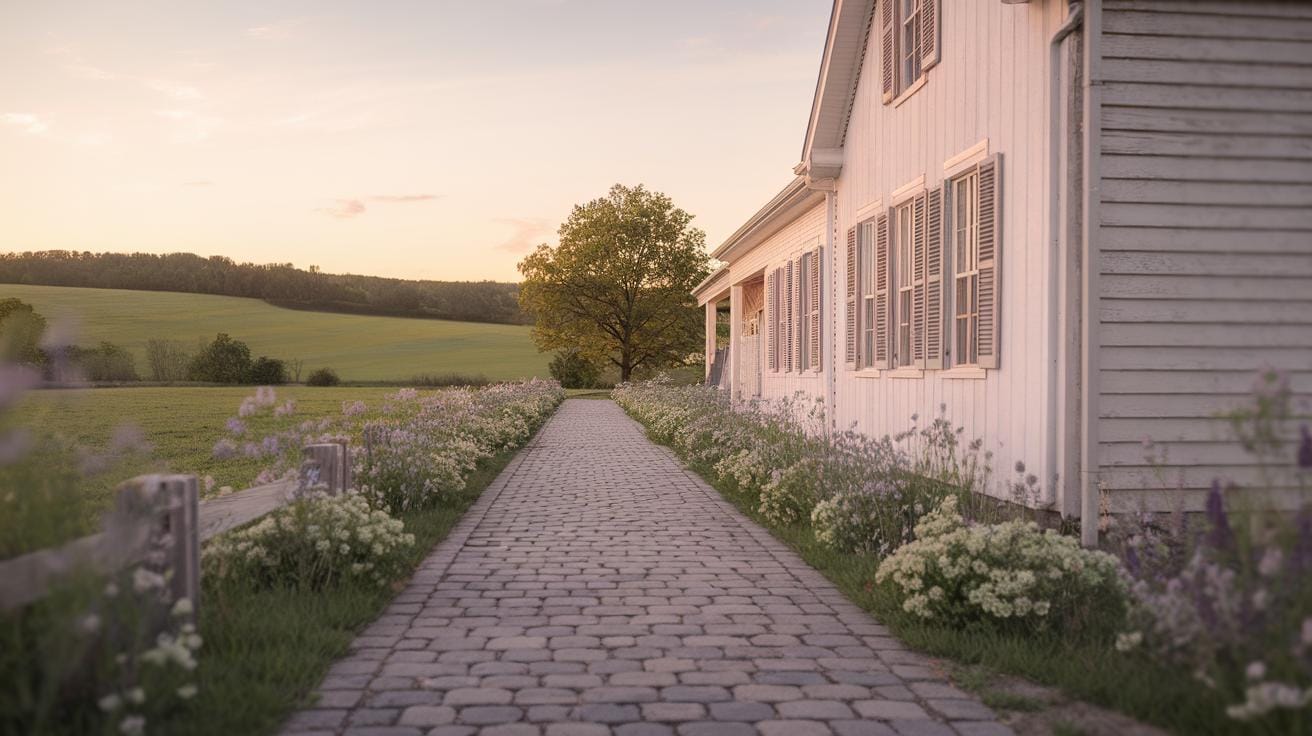
Choosing the Right Location for Your Studio
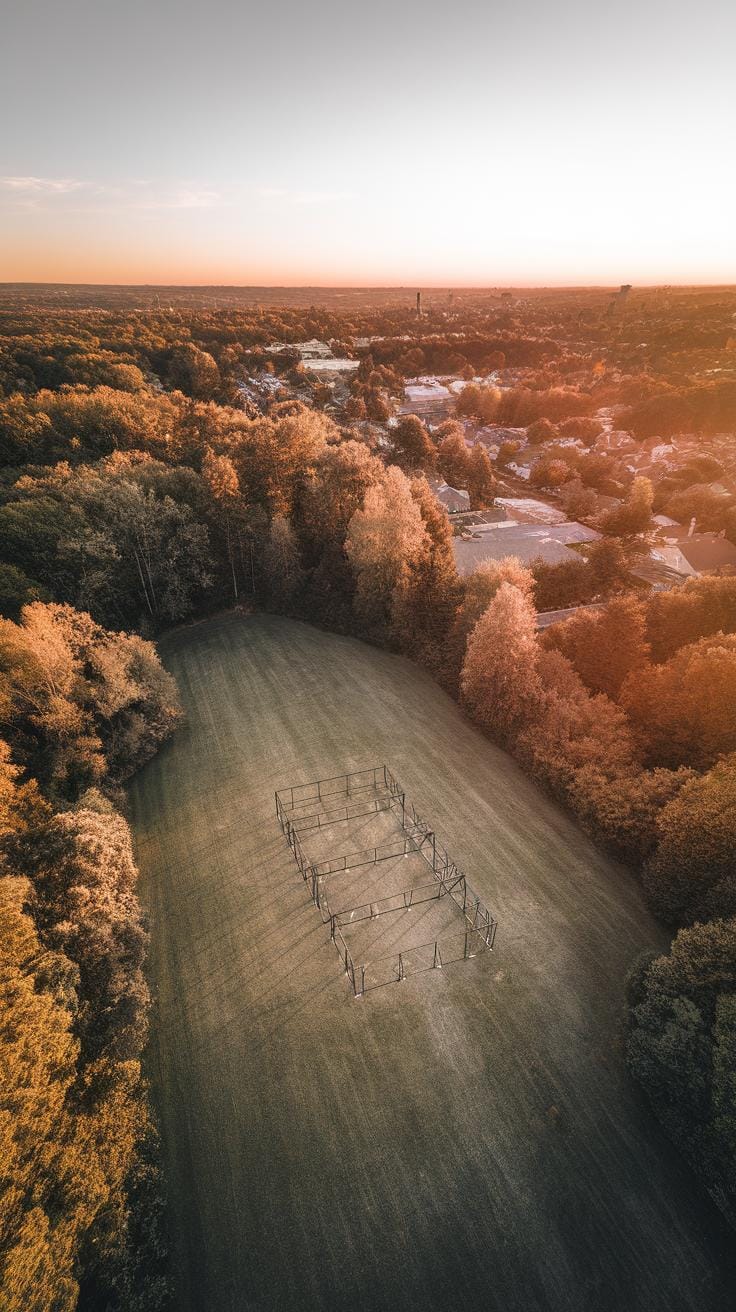
Picking the perfect spot for your backyard studio shapes how well you work. Start by observing how sunlight moves across your yard. A spot with morning light can boost energy, but make sure it won’t cause glare on screens or work surfaces.

Think about noise too. Places near busy streets or neighbors might bring distractions. A corner tucked behind trees or fences often feels quieter.
Privacy matters. You want a place where you can focus without interruptions, yet it should remain close enough to your home for comfort and safety—especially if you plan to use tools or expensive equipment.
Ask yourself: Will you carry supplies back and forth? Do you prefer a spot with a view or more enclosed? How much natural light do you want? Answering these questions helps find a location that supports your creativity daily.
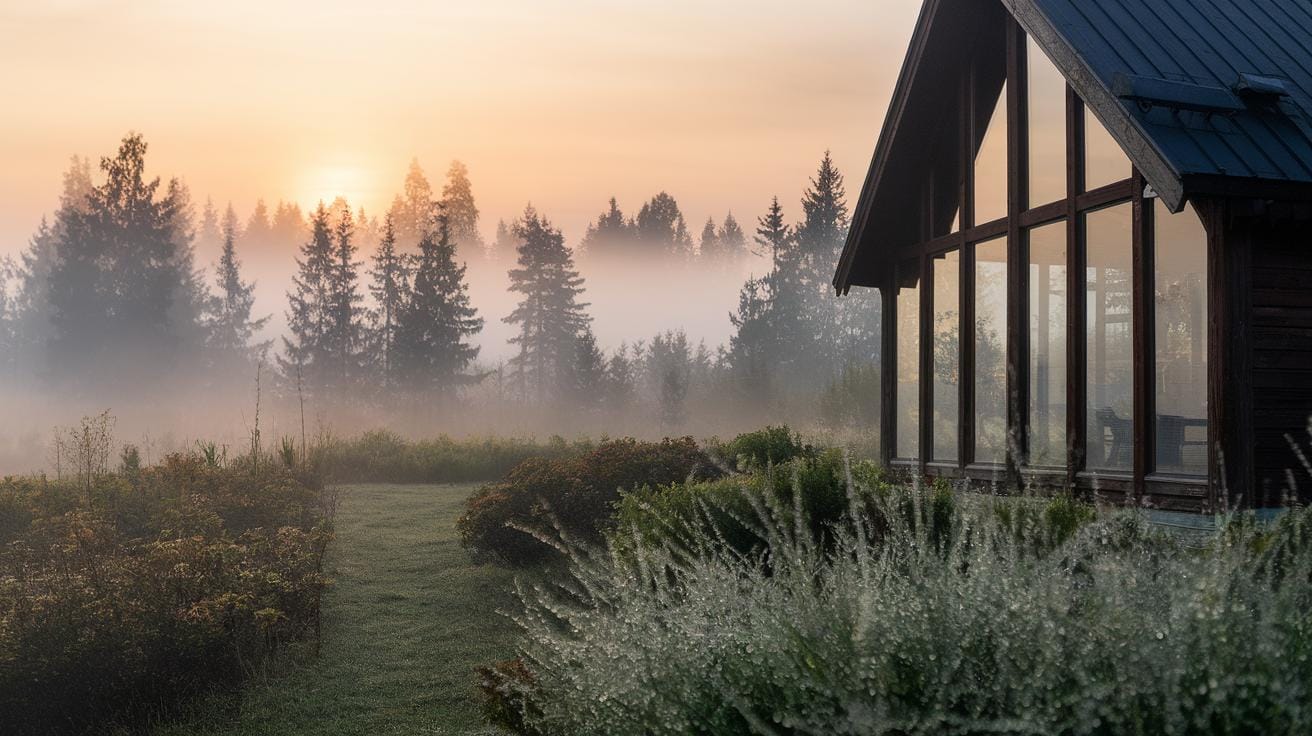
Evaluating Sunlight and Natural Elements
Sunlight influences how you feel and perform in your studio. Bright light can keep you alert, but harsh sun can strain your eyes or overheat the space. Observe your yard at different times to spot areas with steady, soft light.
If full sun hits too hard, think about adding adjustable shades, awnings, or planting trees to create filtered light. Windows facing north or east offer gentle morning light without the heat.
Consider how natural elements like wind and rain affect your spot. A sheltered location can protect your studio from weather but still allow fresh air through windows or vents. Proper airflow prevents stuffiness during long work sessions.
Balancing Privacy and Accessibility
Balancing privacy with easy access keeps distractions low without making your studio hard to reach. Putting your studio near fences, hedges, or garden walls offers privacy from neighbors.
Choose a place where you can get in quickly from your house, especially if you plan to work irregular hours or carry heavy supplies. Security matters too—a visible route from your home and good lighting reduces risk.
Think about noise levels. Position the studio away from street noise or noisy appliances. Also, find a spot that doesn’t block pathways or limit outdoor activities for other family members.
Where can you place your studio to feel both connected and separate? Finding this balance makes your backyard studio a productive and comfortable retreat.
Determining the Size and Layout That Fits Your Needs
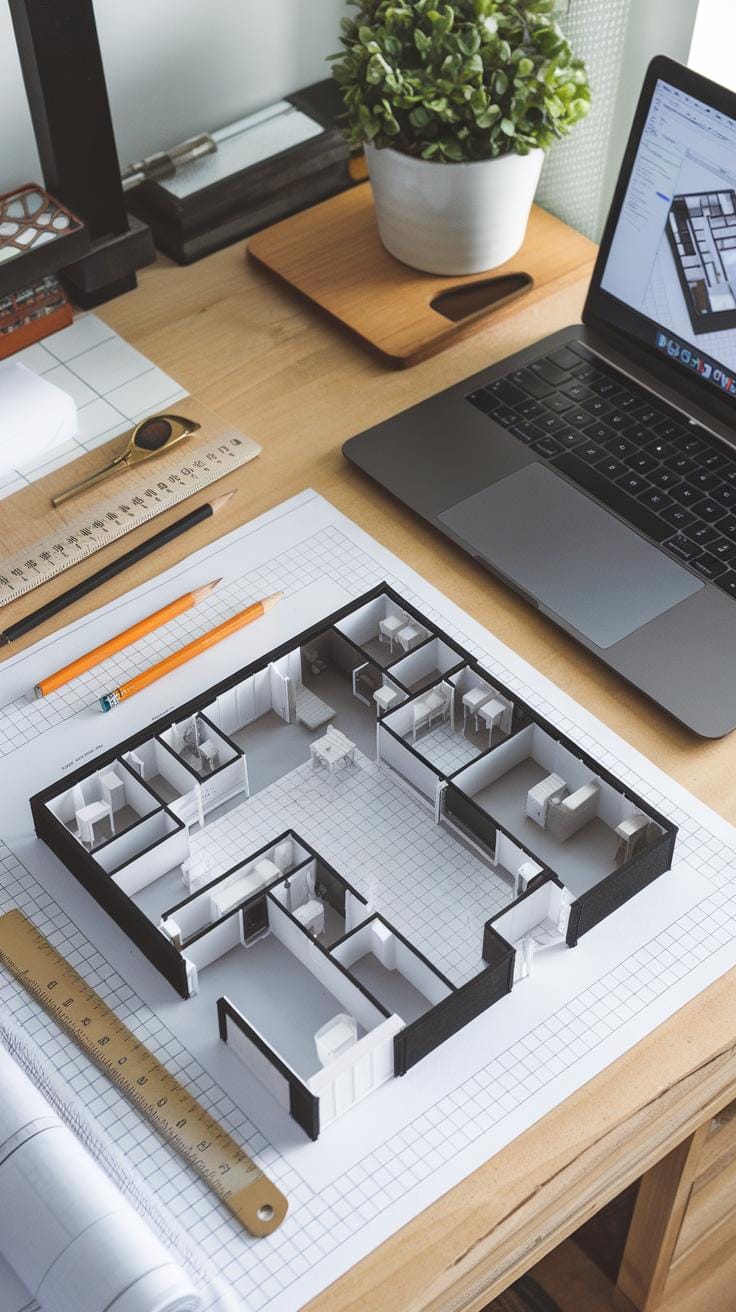
Think about what activities you’ll do in your studio. Are you painting large canvases, building models, or editing videos? Different tasks need different amounts of space. Start by listing the tools and materials you use often. For example, if you work with big brushes or long boards, you’ll need more room than if you mostly use a laptop and sketchbook.
Measure these items and add extra space to move freely. If you plan to have shelves or storage cabinets, include that in your calculations. Your layout should match your workflow. If you need to switch quickly between tasks, arrange the space so those areas are close together. Have you thought about leaving open floor space for large projects or spreading out materials?
Your studio size will also depend on what fits comfortably in your backyard. Keep in mind future needs. Will your creative work grow and require more storage or equipment soon? You want a space that stays functional and flexible as your projects change.
Assessing Your Work Requirements
Begin by making a detailed list of your tools, supplies, and equipment. How much surface area do you need for working? If you paint, a large table or easel might take a lot of space. If you sew, you’ll want room for your machine and fabric storage. Include the space you use to sit or stand comfortably.
Consider how you move through your creative process. Do you prefer spreading things out or keeping them close at hand? Think about how often you bring in new materials and how to store them efficiently. Measure your largest items and think about the paths you need for moving between work zones without disruption.
Ask yourself: do you need dedicated zones for messy work, clean work, or relaxation? Will you share this space with others or keep it private? Answering these questions will guide your space needs and keep your studio organized.
Planning an Effective Floor Plan
Divide your studio into zones based on tasks: a work area for creating, a storage area for supplies, and a relaxation or planning corner. Arrange these zones so you can move easily between them. For example, keep your storage near your workspace for quick access, but out of the way enough to avoid clutter.
Use vertical space for shelves to save floor area. Place larger equipment against walls and leave open space in the center for flexibility. Think about your natural workflow. Do you need separate zones for drying artwork, assembling parts, or computer work? Design your plan to reduce needless steps and interruptions.
Consider adding mobile storage or fold-down tables. They help adjust your space as needed. Can your layout change with different projects? Designing with flexibility protects your productivity and creativity over time.
Incorporating Natural and Artificial Lighting

Your backyard studio needs a lighting setup that supports focus and creativity throughout the day and evening. Natural light improves mood and reduces eye strain, but relying only on daylight can limit your working hours. Combining natural and artificial lighting ensures a balanced environment that adapts to changing conditions.
Consider how sunlight enters your space and how to control it to avoid glare on your work surfaces. Then plan for layered artificial light that adjusts as natural light fades. Thoughtful lighting influences productivity and comfort, making your studio a more inviting place to work.
Maximizing Daylight Inside Your Studio
Position windows to capture daylight while avoiding harsh direct sunlight. South-facing windows bring consistent light in northern climates, but east and west-facing windows allow morning or afternoon sun, which can be softer.
Use glass types that diffuse light, such as frosted or low-iron glass, to reduce glare and shadows. Consider installing adjustable blinds or shades to control brightness and protect materials from sun damage.
Have you checked how sunlight moves across your studio during your peak working hours? Mapping this can guide your window placement and reduce unwanted glare on screens or drawing tables.
Choosing the Right Artificial Lights
Pick lighting that mimics natural daylight to maintain color accuracy and reduce eye fatigue. LED bulbs with a color temperature around 5000K work well. Use adjustable fixtures so you can control light intensity and direction based on your task.
Task lighting is essential for detail work. Desk lamps with flexible arms or track lighting lets you focus light exactly where needed. Overhead ambient lights fill the room evenly, making sure no corners stay dark during evening hours.
Consider the layout of your studio when placing lights. Will you need dimmable switches or multiple zones for different activities? Planning for this keeps your space practical and comfortable no matter the time or weather outside.
Ventilation and Climate Control Strategies
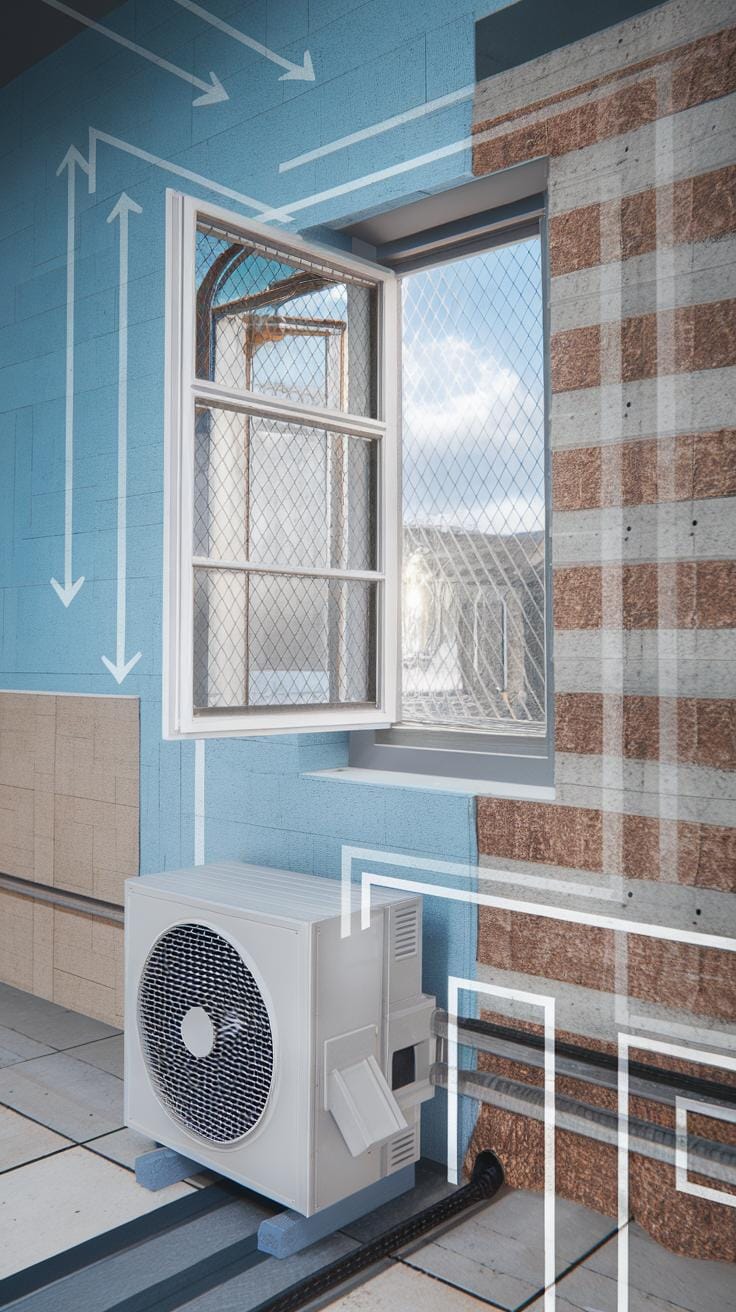
Keeping your backyard studio comfortable affects how much time you want to spend creating there. Good airflow prevents stuffy air and keeps the space fresh, which helps your focus. Designing windows and vents so air can flow through the studio works well without relying on electricity. For example, positioning windows on opposite walls can create cross-ventilation, moving air naturally through the room. Adding adjustable vents near the ceiling allows hot air to escape, while lower windows bring in cooler air.

Think about how the wind usually blows around your yard. Placing openings in spots that catch breezes boosts airflow. Consider windows that open wide or louvers you can adjust depending on the weather. This makes it easy to bring in fresh air and keep humidity down, especially in warmer months.
Using Windows and Vents for Airflow
Windows on opposite sides of your studio promote cross-ventilation. When air enters from one side and exits from the other, it shifts stale air out quickly. Try to align windows or vents according to the prevailing wind direction around your home.
Adding vent openings near the roof can release hot air that rises naturally. Some artists use skylight vents that open electronically or manually when needed. You could install a small exhaust fan for times when the air is still.
Think about how often you want to keep your studio sealed or open. Using insect screens lets you leave windows open without bugs getting inside. This setup improves comfort and prevents indoor air from feeling trapped.
Maintaining Temperature Year-Round
Comfort in your studio depends on more than airflow. Insulation plays a big role in keeping it warm in winter and cool in summer. Adding wall and ceiling insulation reduces temperature swings, letting you control the climate better.

In hot climates, a fan can increase evaporation and keep you cool. Ceiling fans or portable fans work well when open windows don’t provide enough breeze. For cold months, a small electric heater can target your workspace without heating the entire studio.
If your area has extreme seasons, consider a window air conditioner or a mini-split system. These keep the room at a steady temperature without bulky equipment. Can you imagine working comfortably all year without weather distractions?
Selecting Durable and Insulating Building Materials
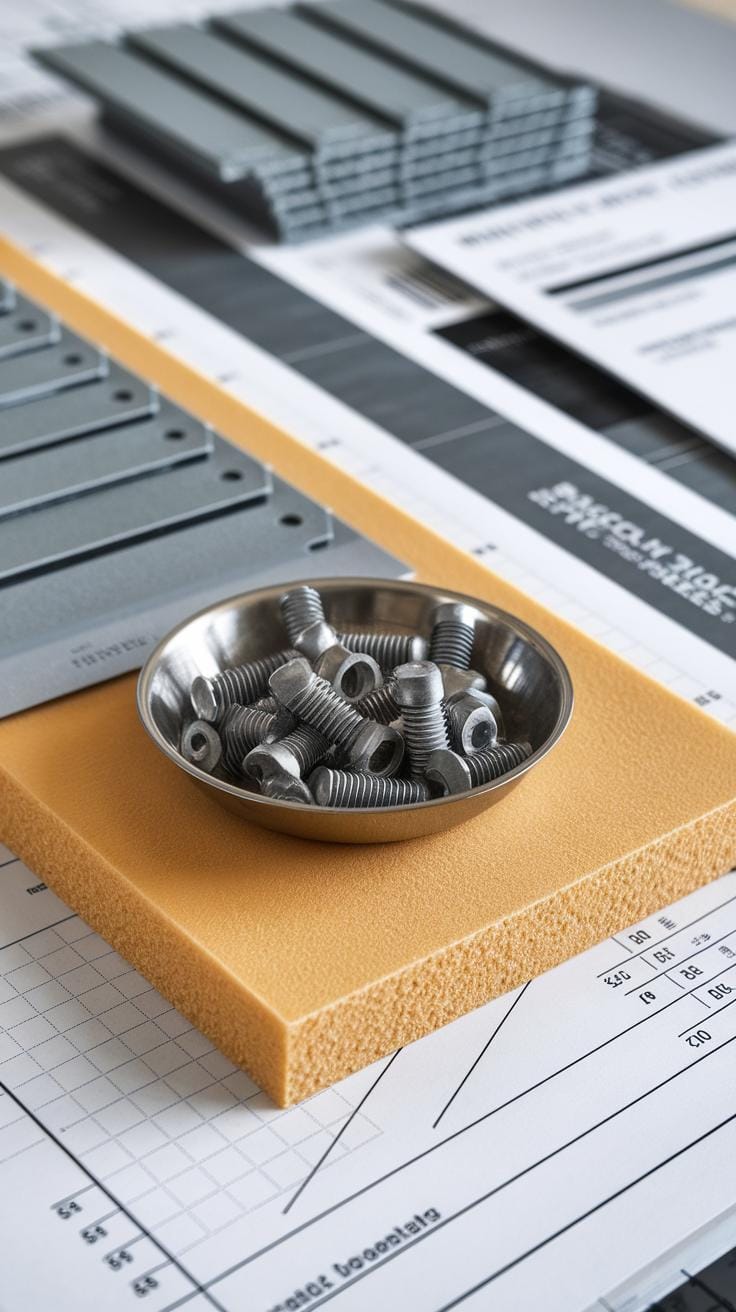
Choosing the right materials for your backyard studio protects your creative space from weather changes and cuts down noise distractions. Look for materials that resist moisture, sun damage, and temperature swings. Fiberglass or metal roofing can shield against rain and heat while lasting many years with little upkeep. For walls, treated wood or composite panels offer strong defense against wind and humidity without the constant need for repairs or repainting.
Insulation plays a key role in keeping your studio comfortable and energy efficient. Consider foam board or spray foam for inner walls to block cold drafts and keep heat in during winter. These materials also improve sound dampening to some degree, enhancing focus during work sessions.
Weather Resistance and Longevity
Materials like cedar and redwood naturally resist rot and insects, making them useful for siding. Vinyl siding stands out for its low maintenance and weatherproof qualities. You want materials that won’t fade, crack, or warp under sun or moisture exposure. Choosing weather-resistant options means you spend less time fixing issues and more time creating.
Have you thought about how often you’re willing to maintain your studio? Durable materials reduce upkeep costs, freeing your energy for creative work instead of repairs. Also, durable materials keep the studio structure sound over years, so you won’t worry about leaks or drafts interrupting your flow.
Soundproofing to Minimize Distractions
Noise can break your concentration quickly. To keep distractions low, use dense materials like mass loaded vinyl between wall layers. Double-pane windows reduce sounds coming from outside. Adding thick curtains or acoustic panels inside the studio also absorbs echoes and muffles noises.
Insulated doors with seals prevent sound leaks at entrances. Soundproofing products designed for home studios work well in backyard studios too. Imagine not hearing nearby traffic or neighborhood sounds, allowing you to dive deeper into your projects. What noises bother you most in your current workspace? Target those areas for soundproofing first.
Using the right materials, your backyard studio becomes a quiet retreat shielded from weather extremes. This lets you focus completely on your creative tasks without interruptions or discomfort from the outdoors.
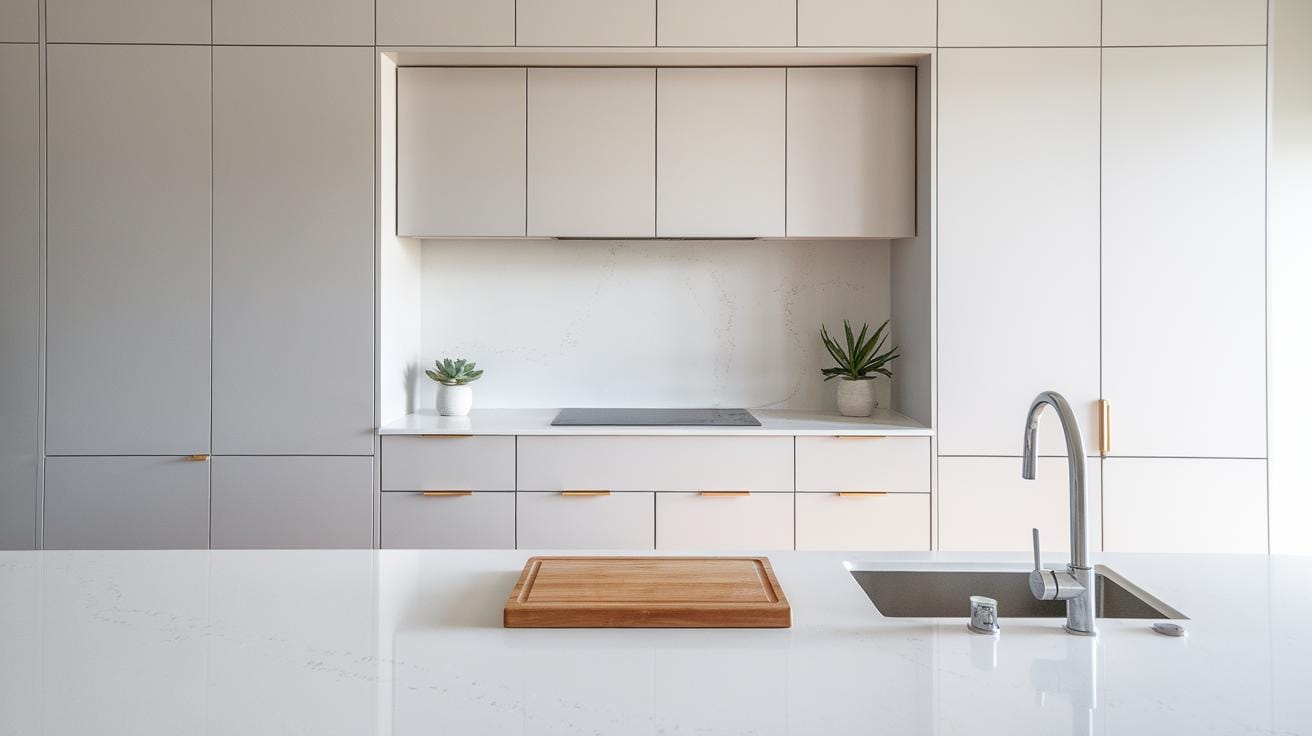
Designing Functional Storage Solutions
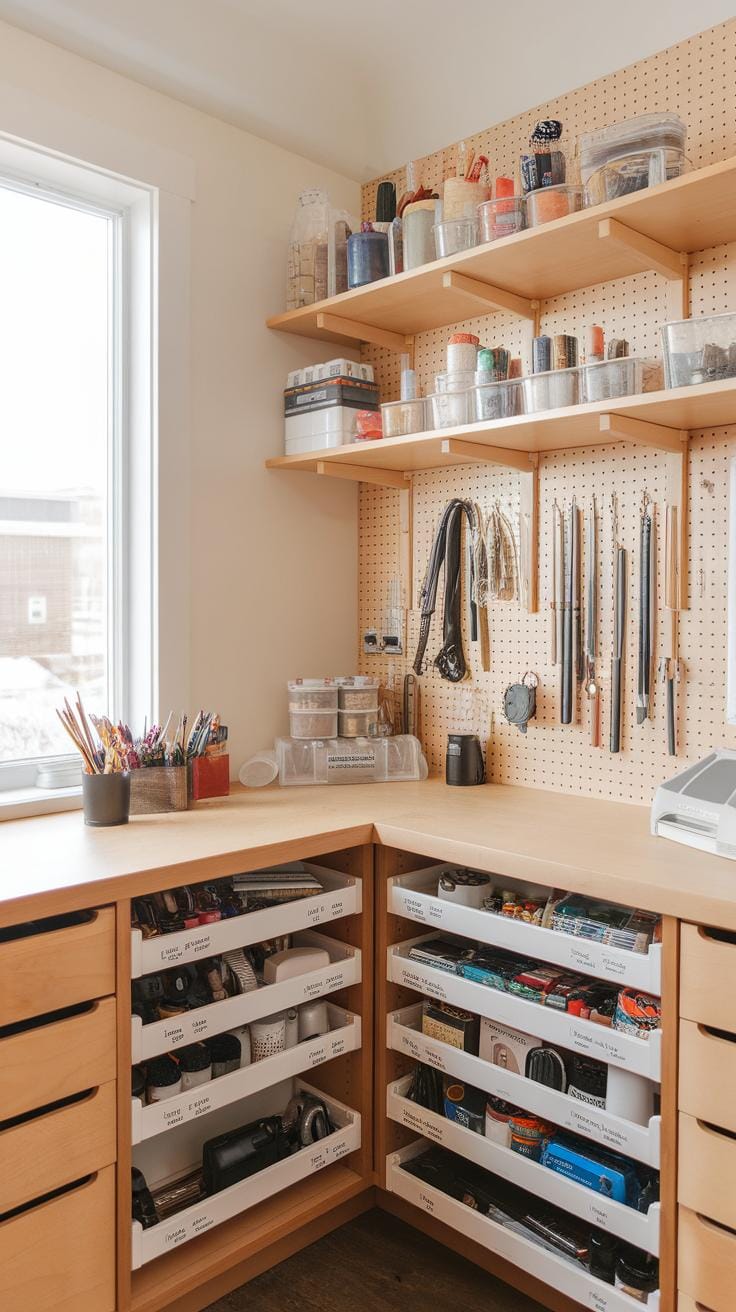
Keeping your backyard studio organized begins with a solid plan for storage. You want your supplies and tools within easy reach, but not cluttering your workspace. Think about how often you use each item. Would it be better on open shelves, in drawers, or tucked away in cabinets?
Small bins and clear containers help you see what’s inside without digging through piles. Label everything to speed up finding what you need. Use wall space wisely by installing pegboards or hooks to hang tools vertically. This keeps surfaces clean and gives every item a dedicated spot.
Consider the flow of your creative work. Can you group similar materials together? For example, keep all painting supplies in one area and crafting tools in another. This setup saves time and reduces frustration during your creative sessions.
Assessing Storage Needs
Start by listing all your creative materials. What size are they? Are they fragile or bulky? A sculptor will need different storage than a writer or a digital artist. Small items like brushes or pencils might fit in drawer organizers or jars, while larger materials need sturdy shelving units.
Think about future growth. Will your collection of materials expand? Choose storage solutions that can adapt, such as adjustable shelves or stackable boxes. This approach helps prevent overcrowding later on.
Ask yourself: How often do you acquire new supplies? Do they require special conditions like moisture control? Addressing these questions ensures your storage system protects your investments.
Incorporating Multi-Use Furniture
Choose furniture that offers more than just seating or work surfaces. A bench with storage underneath can hold art materials or tools you use frequently. Desks with built-in drawers keep small items close without cluttering your workspace.
Folding tables or cabinets on wheels add flexibility, making it easy to reconfigure your studio when needed. A storage ottoman can double as extra seating and a place to tuck away supplies out of sight.
When selecting these pieces, think about your studio’s size and layout. Multi-use furniture conserves space and helps keep your studio tidy, letting you focus on your creative work without distractions. What pieces will best suit your workflow and space constraints?
Integrating Technology and Power Access
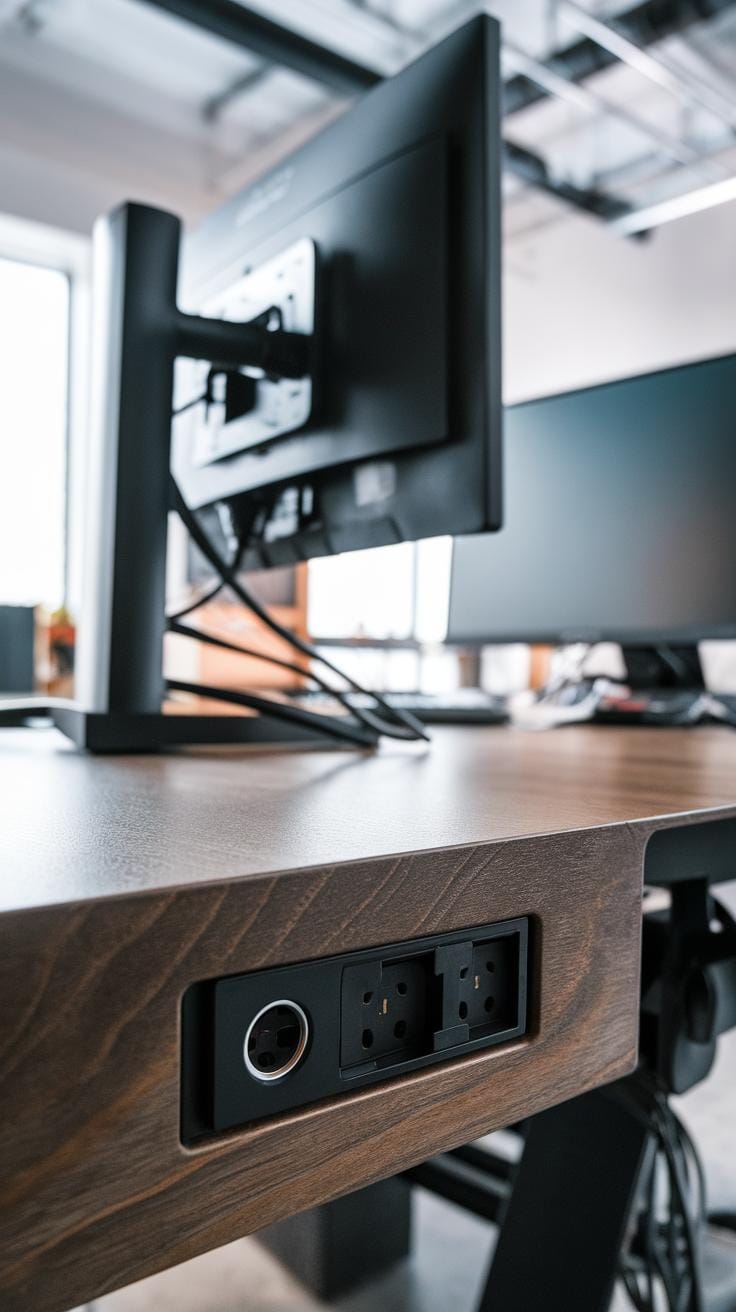
Planning your backyard studio includes a clear strategy for electrical outlets and internet access to keep your creative work flowing without interruption. Knowing where to place outlets helps prevent tangled cords and clutter, making your space safer and more efficient. Think about the devices you use daily, such as computers, printers, lamps, and audio equipment, and position outlets within easy reach. Installing multiple outlets along walls and near work areas avoids the need for extension cables that can trip you or limit movement.
Consider the total power your devices consume and consult a professional electrician to ensure your studio’s wiring supports those needs safely. Don’t forget to include GFCI outlets if your studio has any outdoor exposure to protect against electrical shock. Planning your technology setup early lets you arrange your workspace around power sources, so your studio stays practical and clear.
Planning Safe Electrical Installations
Place outlets at a height that suits your equipment and desk arrangements to reduce bending or stretching for plugs. Space outlets every 4 to 6 feet along walls where you will use electrical devices most. Avoid overloading single outlets by spreading devices across circuits. Use power strips with surge protection to defend your gear against voltage spikes.
Lighting plays a big role in creative work. Install switches near entry points for easy control, and use dimmer switches to adjust brightness. Choose LED bulbs for energy efficiency and less heat. Position outlets near lighting fixtures to avoid extra wires across your workspace. Avoid placing outlets behind large furniture, which may block access and cause hassle later.
Ensuring Reliable Connectivity
Reliable internet connection in a backyard studio matters, especially if your work involves online research, streaming tutorials, or video calls. Check your main house’s Wi-Fi coverage near the studio first. If the signal is weak, consider a Wi-Fi extender or mesh network to strengthen coverage outdoors.
If you need a stable and fast connection, running an Ethernet cable from your house to the studio provides the best speed and reliability. Underground conduit protects cables from weather and damage. Alternatively, if wiring isn’t possible, some 4G or 5G mobile hotspots offer decent internet, but they depend on signal strength and data plans.
Position your router or signal boosters centrally or close to your studio for best performance. Test connection speeds before finalizing your setup, and think about placement that minimizes interference from trees or walls. How could improved connectivity change your workflow and creativity in this space?
Creating a Comfortable and Ergonomic Workspace
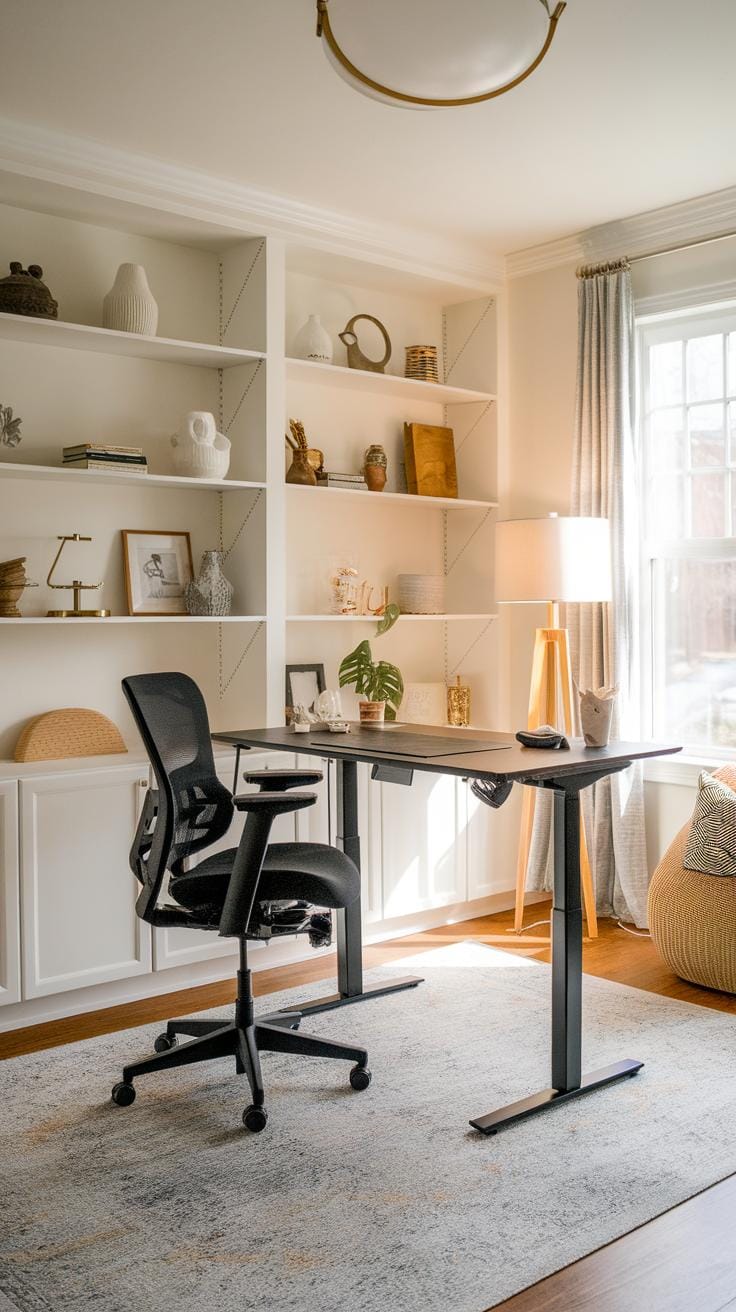
Your backyard studio should support not just creative inspiration but also long hours of work without causing discomfort. Focus on furniture that helps you maintain good posture and reduces strain. An adjustable chair with proper lumbar support allows you to sit comfortably while keeping your spine aligned. Pair it with an adjustable desk that lets you switch between sitting and standing positions. This change prevents stiffness and improves blood flow.
Consider seating options that match your creative tasks. For example, a cushioned stool might work well for sketching, while a swivel chair suits computer work. Your workspace should invite movement, not confinement. Think about where you place tools and supplies to avoid reaching awkwardly. Keep frequently used items within easy arm’s length.
How often do you stretch during work? Setting up your studio layout to encourage standing, bending, or walking can break up long sitting periods. Clear pathways and enough space to move around make your creative process more dynamic and less taxing. Does your current workspace feel physically draining or energizing? Adjust your setup until it feels supportive every day.
Choosing Ergonomic Furniture
Ergonomic furniture adapts to your body and work style. Look for chairs with height adjustment, tilt control, and good back support. A chair should support the natural curve of your spine. Your feet should rest flat on the floor or on a footrest. Desks that adjust in height give you choice between sitting and standing. This variation can reduce muscle fatigue.
Seating positions matter too. When sitting, keep your hips and knees at roughly a 90-degree angle. Position your computer screen at eye level to avoid neck strain. Use a supportive cushion if your chair feels too hard. If you work on multiple projects, having different seating options nearby helps shift your posture throughout the day.
Have you tested your furniture’s adjustability yet? Small changes in chair height or desk position can make a big difference in comfort and focus. Investing in ergonomic pieces is investing in your health and productivity.
Optimizing Studio Layout for Movement
Arrange your studio to let you move freely without strain. Position your desk near natural light but avoid glare on screens. Place tools and materials strategically to reduce excessive stretching or twisting. For example, keep drawing pads, paintbrushes, or notebooks within easy reach. Clear floor space allows you to stand up or walk around easily.
Designate separate zones for different tasks. A computer area, a creative workspace, and a storage corner prevent clutter and confusion. This setup encourages flow and prevents fatigue from repetitive motions. If possible, keep your space open enough to change positions often.
Have you considered how your current layout impacts your daily movements? Rearranging even a few pieces can lower muscle tension and boost your ability to focus. Your studio should support shifts in activity, helping you stay productive and comfortable throughout your creative sessions.
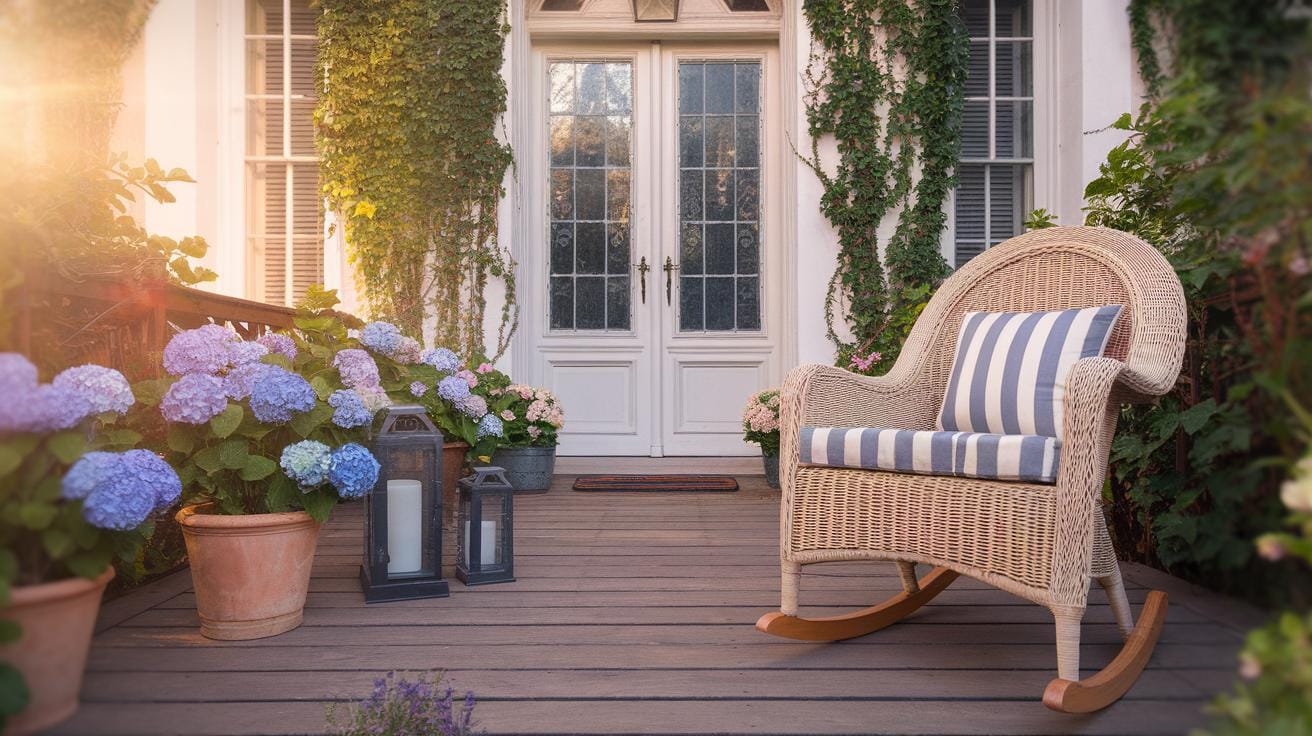
Incorporating Personal Style and Inspiration
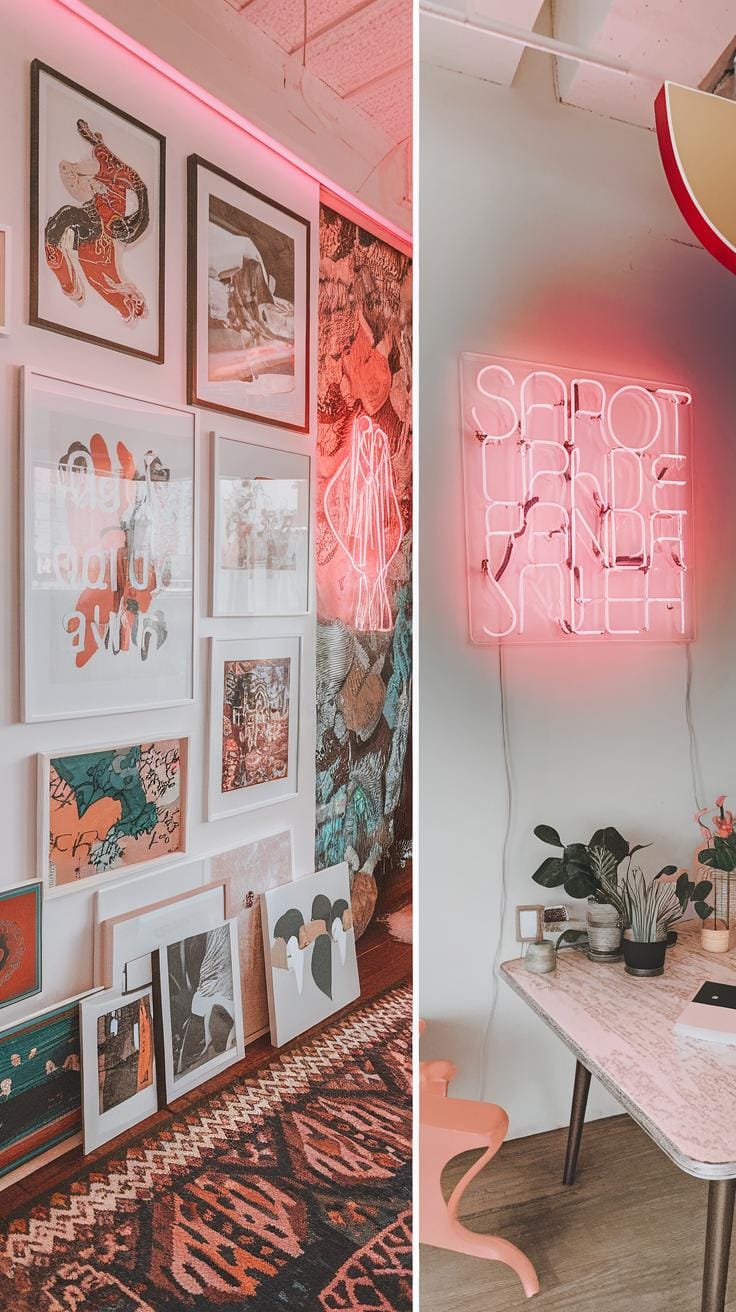
Your backyard studio should feel like an extension of yourself. How do you want to feel when you walk in? The colors you choose can have a strong impact on your mood. Warm tones like soft yellows and oranges can boost energy, while cooler blues and greens bring calm and focus. Try painting one wall a bold color to mark your creative zone.
Surround yourself with items that inspire you. This might be artwork that sparks ideas, photos reminding you of goals, or even plants to bring life indoors. Think about displaying tools or materials you love using, not just for convenience but to keep your mind engaged with your process.
Consider lighting that highlights your favorite pieces and creates a welcoming atmosphere. Natural light is best, but pairing it with adjustable lamps lets you control the mood based on your work or time of day.
Personalizing Your Creative Space
Select decor that motivates while keeping you comfortable. Canvases of your own art or prints from artists you admire can fuel creativity. Use cushions or rugs in colors you connect with for comfort and a welcoming feel.
Organize your studio to balance display and practicality. Open shelves work well for showing special items and keeping tools within reach. Leave space for new creations or ideas you’ll add later.
What objects hold meaning for you? Including personal mementos, books, or collectibles can make your space unique and invite deeper engagement with your work every day.
Balancing Aesthetics with Function
Adding personal touches should never get in the way of your work. Think about how each decorative item fits with your workflow. Can shelves that hold creativity reminders also store supplies? Can a unique lamp provide necessary task lighting?
Keep walkways clear and surfaces tidy so inspiration doesn’t get buried under clutter. Use multipurpose furniture that blends design with storage to maintain simplicity without sacrificing personality.
Ask yourself if your studio invites you to create without distraction. Is it easy to find what you need? A beautiful space that also supports your daily work habits will keep you inspired longer and help avoid frustration.
Setting Up for Maintenance and Future Expansion
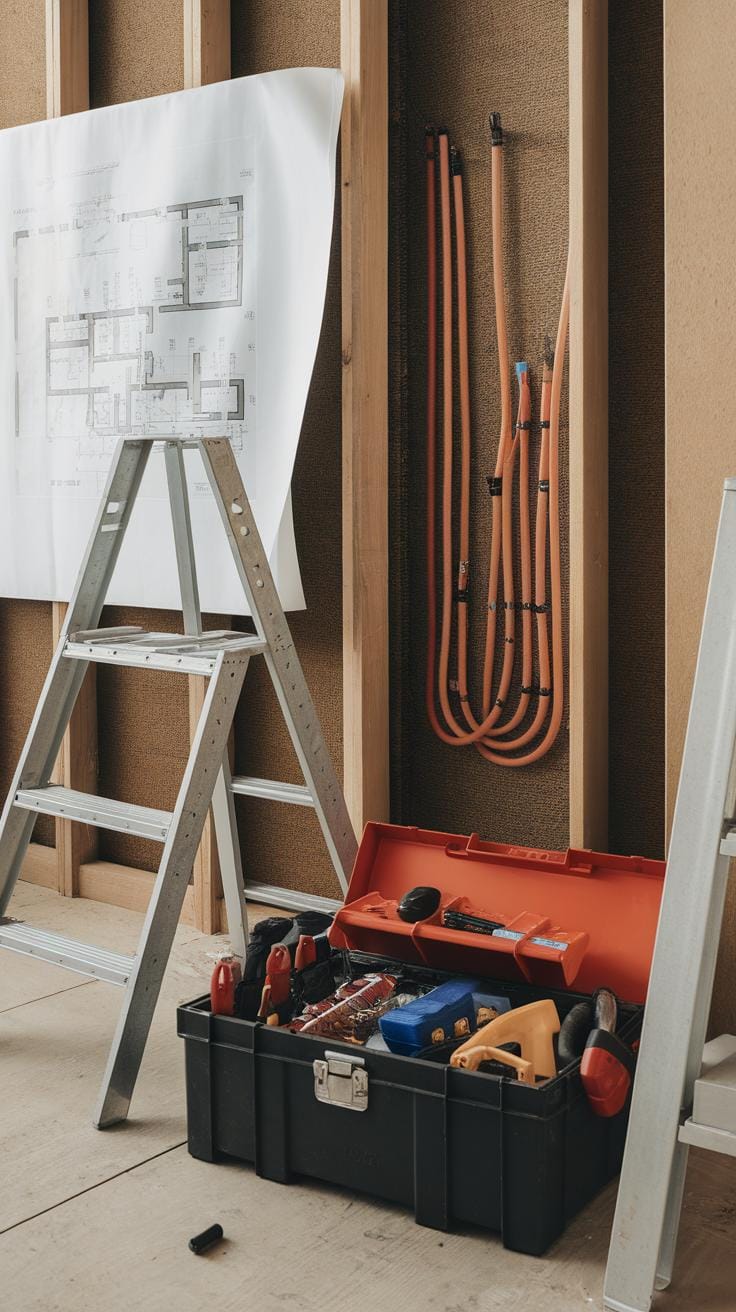
Planning for Regular Cleaning and Repairs
Think about how easy it will be to clean your studio each week. Choose materials for floors and surfaces that wipe down quickly, like sealed wood or laminate. Avoid carpets that trap dust and require deep cleaning.
Make sure windows and doors open fully so fresh air can flow. Good ventilation helps reduce dust buildup and keeps your workspace comfortable.
Keep wiring and plumbing accessible but protected behind panels you can open. This saves time when fixing or upgrading electrical outlets or water connections.
Use storage solutions that keep your tools and materials off the floor. This prevents clutter and makes it easier to sweep or mop.
Ask yourself: How long will it take to tidy this space after a week of work? Can I reach everywhere without moving heavy furniture? Answering these questions will make daily upkeep less of a chore.
Designing Flexibility for Adding Features
Leave extra wall space clear for future shelves or cabinets. You might want to add new storage as your needs grow.
Plan electrical outlets in groups and at different heights. This setup fits changing tech like new lighting, printers, or charging stations without rewiring.
Consider modular furniture that can move or expand, like foldable desks or carts on wheels. These adapt when you create new zones for different projects.
Think about where you could add bigger tools or machines later. Mark areas that feel free from fixed furniture or wiring.
What new equipment might you need in a year? How can your studio change to support that? Building in this flexibility helps your space evolve alongside your creative process.
Conclusions
Designing your backyard studio requires balancing your creative needs with the limitations of your yard. Thoughtful planning of layout, light, and comfort ensures it becomes a place where ideas flow freely. Prioritize flexibility in your space to adjust as your work evolves. Including practical elements helps maintain productivity in your new workspace.
Your backyard studio can transform how you approach creative projects. Using the concepts discussed encourages creating an environment that suits your style and tasks. Focus on what helps your creativity thrive and practical solutions to build an efficient, welcoming studio. Take first steps today toward a productive space just steps from your home.


