Introduction
Creative corner frame designs offer a fresh way to highlight unique art pieces and hobbies. Instead of using traditional frames, corner designs focus on the edges, adding character and style that make artworks and collections stand out. By focusing on corners, you can create frames that are not only protective but also act as a decorative part of the display.
This article discusses various corner frame ideas that can inspire your next project. You will learn why corners matter, how to choose or create corner designs, and see examples that can suit different artistic and hobby styles. With easy-to-follow steps and practical tips, you can apply these ideas to your home or studio.
What Makes Corner Frame Designs Special

Corners are often overlooked in framing, yet they silently shape the whole look and feel of your art or hobby piece. They’re more than just junctions where two sides meet. The corner design draws attention, sometimes subtly, sometimes boldly, steering the viewer’s gaze toward or away from the edges. They define the boundary but also add character.
Think about it: a sharply angled, finely detailed corner can make a piece feel polished and intentional. Whereas softer, rounded corners might soften the mood, making the art feel more approachable. You might not consciously notice corners, but they anchor the frame’s personality. They also guard against wear and tear. The corners usually receive the most bumps or knocks. Well-built corners protect your item from damage, keeping the edges stable and straight.
In short, corners hold the dual role of being aesthetic focal points and practical shields. They subtly shape how you perceive the framed work and quietly guard its integrity, which might be why I’ve grown to appreciate corner designs more than I expected.
Corner Design’s Role in Art Presentation
The way corners are styled can totally change how an artwork or a hobby display reads. Sometimes, simple mitered corners provide a clean, unobtrusive look that keeps focus on the art itself. Other times, elaborate corner carvings or inlays add a sense of tradition or luxury. It really depends on the mood you want to set.
For example, ornate Victorian-inspired corners can bring a nostalgic or classic feeling to a aged photograph or detailed needlework. Meanwhile, sleek metal corners might perfectly complement modern abstract paintings or tech-inspired models.
There’s also the option of “invisible” corners — minimal joins that almost vanish — which can make your piece look like it’s floating or extending beyond its frame. This kind of corner design invites curiosity, making the display feel less confined and more open.
So, corners don’t just hold your piece in place—they add layers of meaning and help guide emotional reactions to the work. I once swapped a simple corner frame for one with delicate filigree corners around a mixed-media project, and it suddenly felt like the whole piece told a different story.
Comparing Corner Frames versus Full Frames
Corner frames, which highlight just the corners without continuous sides, offer a distinct break from traditional full frames. They can lend a certain openness or minimalist vibe that’s hard to replicate with standard frames. On the upside, corner frames let more of your wall show through, often making the artwork feel integrated with its surroundings.
But they do come with quirks. Since full edges are missing, there’s often less protection from dust or damage overall. They might not suit more delicate pieces that need comprehensive safeguarding. Meanwhile, full frames encase the entire work, which adds a sense of completion and formality.
Functionally, full frames handle wear better and can be sturdier. But they might feel heavy or overwhelming with some art styles, especially smaller or lighter crafts. Corner frames, in contrast, strike a balance between framing and freedom—though that balance depends on your display environment and how careful you can be with your piece.
Choosing between them boils down to what you value more: openness or protection, subtlety or structure? Neither is strictly better; each serves slightly different goals. I guess sometimes it’s about what kind of conversation you want your framed work to have with its audience.
Why Choose Creative Corner Frames
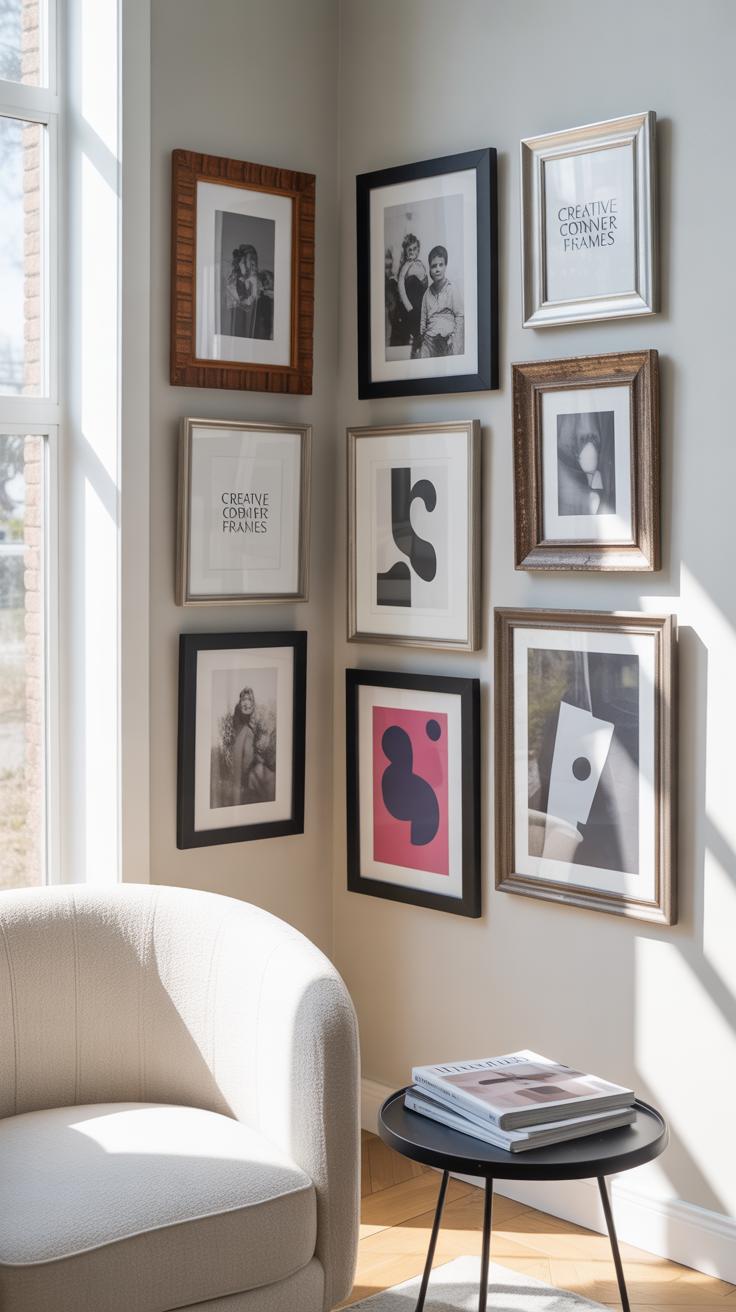
Creative corner frames do more than just hold your art or hobby pieces—they change how your space feels and functions. When you use a corner frame, you introduce a fresh style that’s often overlooked because corners tend to be neglected spots. These frames pull attention toward those nooks, turning them into focal points. It’s a simple way to add personality without overcrowding your walls.
Space-saving is another big reason. Living or working in small rooms, you might notice how wall space feels precious, and corners often seem wasted. Unlike standard frames, corner frames nestle into these areas, giving you an extra display zone without taking up much floor space or wall room. They can make your collection look intentional rather than squeezed in.
Customization opens up quite a few doors. You might think frames are just frames, but corner designs offer room to tinker with materials, colors, and shapes that match your art or hobbies perfectly. Maybe you want a rustic wood frame to contrast modern prints, or a sleek metal edge to highlight delicate models. The choices invite you to go beyond what’s usual, hopefully sparking some unexpected ideas as you pick and mix styles.
How to Design Your Own Corner Frames
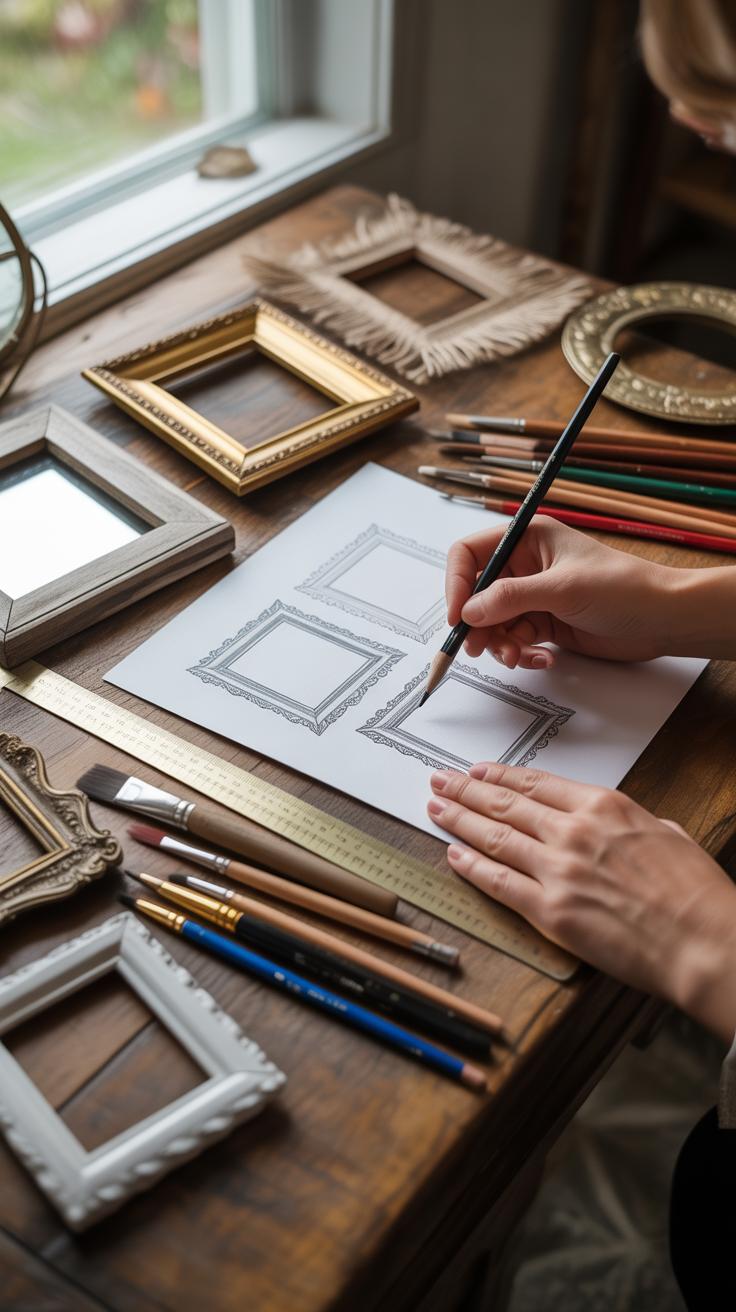
Designing corner frames might seem straightforward, but there’s a surprising amount of creativity you can pour into them. First, start by deciding the style you want—do you prefer simple straight edges or something a bit more intricate like curves or even layered corners? Sketch your ideas out on paper. Don’t rush this part; these rough drafts guide every step ahead.
Gather your tools early: a miter saw or handsaw for precise cuts, measuring tape, clamps, wood glue, and sandpaper. For painting, acrylic or spray paint can work well, depending on your finish goals. Also, think about materials. Wood is standard but cardboard or even recycled materials can give interesting textures.
Before cutting, measure twice. Mistakes here are common but avoidable, trust me. After cutting the corners at 45-degree angles, dry-fit them to check alignment. Then, glue the pieces together and clamp them until dry. Sand edges smooth, then apply your paint or finish. Simple tweaks like adding a carved pattern or layering thin strips can make your frame unique. It’s a methodical process but one that leaves room for your personality. What kind of art deserves your personal touch in a frame?
Setup Checklist for DIY Corner Frames
Before you dive in, make sure you have the essentials. Here’s a checklist to get you ready:
- Wood or alternative frame material
- Miter saw or handsaw
- Measuring tape or ruler
- Clamps for holding glued corners
- Wood glue or strong adhesive
- Sandpaper (medium and fine grits)
- Paint, stain, or varnish
- Paintbrushes or spray paint
- Protective gloves and a mask (especially when sanding or painting)
- Workspace with good lighting
- Safety goggles if using power tools
- Pencil for marking
Setting up in advance saves you from scrambling mid-project. I often underestimate the importance of a clean, well-lit workspace. It really changes how smoothly things go. Have you prepared your space yet?
Step-by-Step Corner Frame Making Process
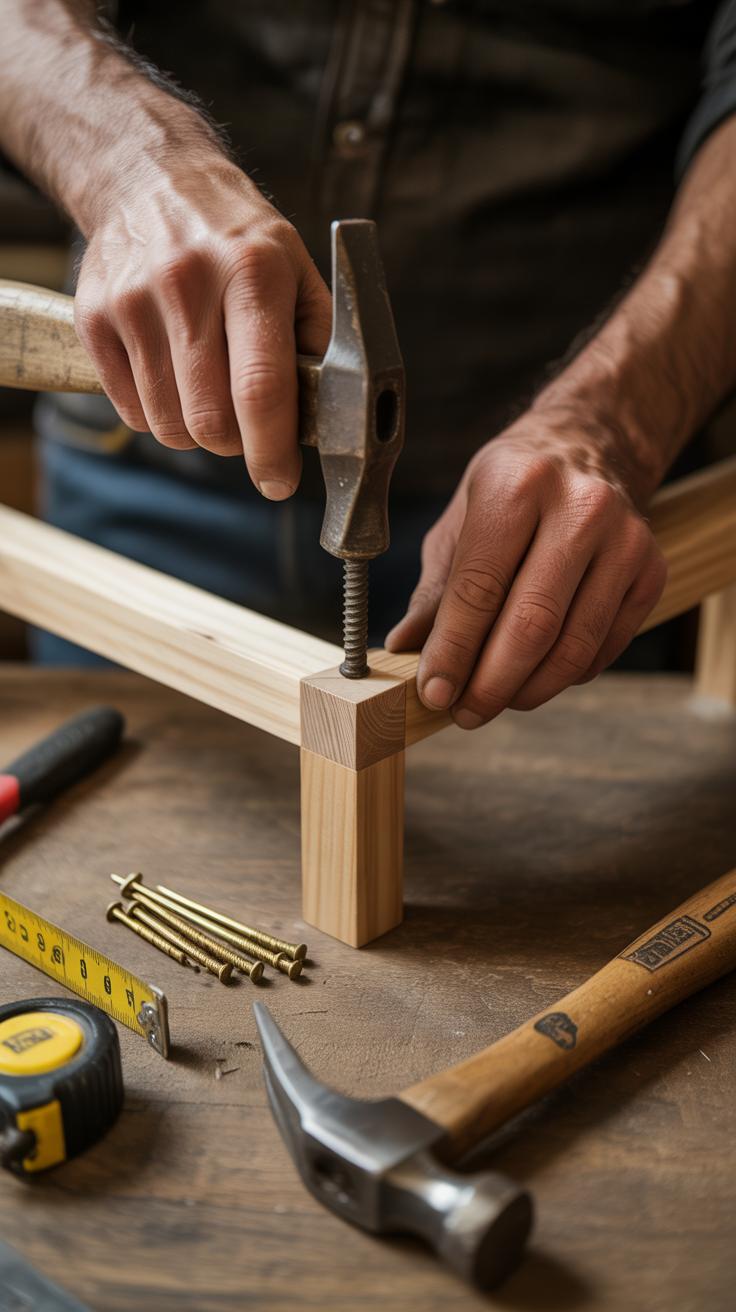
Start by measuring your artwork or hobby piece and add extra space for the frame thickness. Cut your frame material into four pieces with 45-degree angle ends—this shape helps corners fit precisely. Place pieces together without glue first to check your cuts.
Once satisfied, apply wood glue along the edges and join the corners. Clamp firmly, but not so tight that the wood dents. Let it dry for at least an hour. After drying, sand all edges to remove roughness or glue residue.
Next is decorating. Paint in thin layers, letting each dry fully before the next. This avoids drips and uneven finish. Alternatively, stain the wood for a natural look or use wax for a subtle sheen. Once fully dry, consider sealing with a clear coat to protect your design.
Finally, attach hardware like hanging hooks if the frame is for wall display. If your project includes glass or a backing, insert those carefully after frame finishing. The process can be a bit repetitive but focusing on one step at a time helps.
What’s your frame going to hold? Sometimes, thinking about that helps make design choices clearer, almost like the frame comforts the art or object inside.
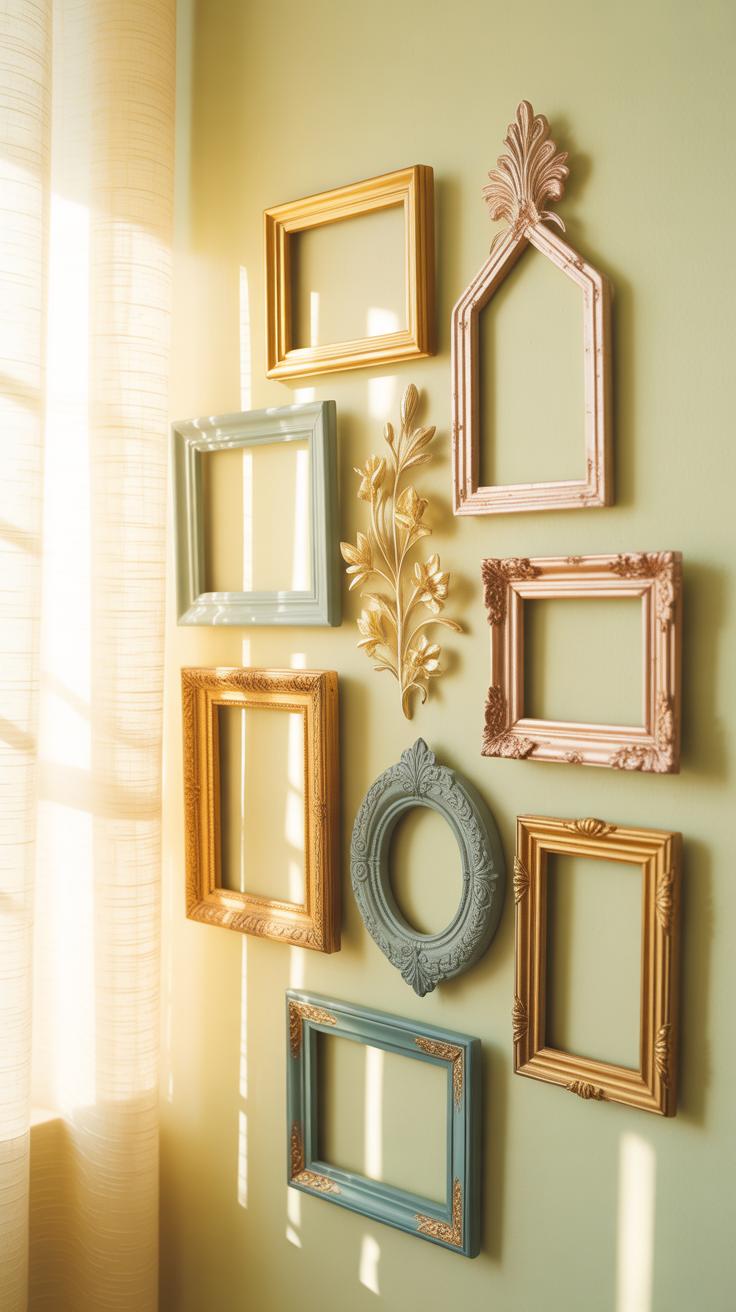
Popular Corner Frame Styles
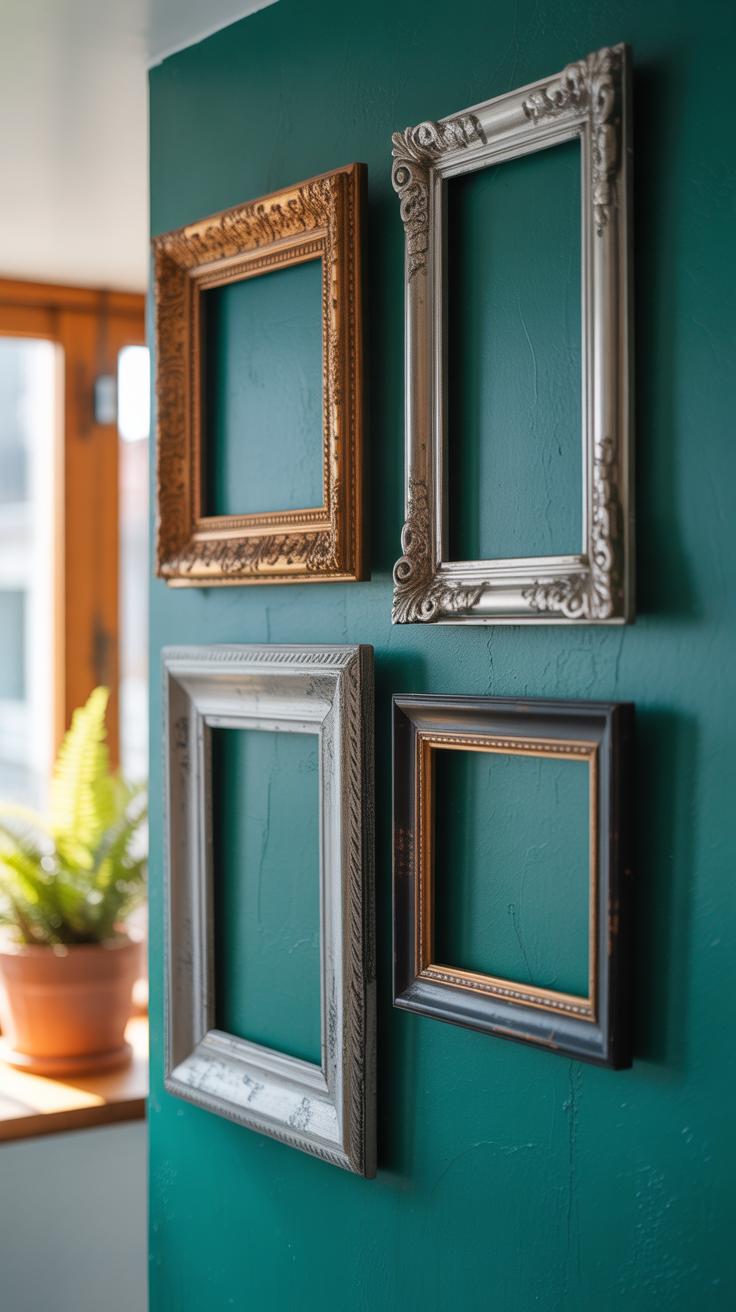

Corner frames come in many shapes and styles, each bringing its own character to your art or hobby display. Some popular types pop up again and again—modern, vintage, rustic, and minimalistic. They’re not just about holding the piece together but also about setting a mood or accentuating details.
Modern corner frames often feature sharp lines, sleek metals, or glossy finishes. Think chrome or matte black aluminum with clean edges that don’t distract but rather highlight the artwork’s boldness or color.
Vintage styles tend to have ornate, carved corners that recall classical paintings or old photographs. They feel warm and laden with history, sometimes painted gold or deep brown. These can make your piece look more substantial or sentimental.
Rustic corners use natural materials like reclaimed wood or distressed textures. They work well with handmade art or objects inspired by nature or simple living. There’s a tactile roughness to them that feels honest, kind of grounding even.
Minimalistic frames are just corners subtly joined—no frills, just essence. Thin, sometimes barely-there edges in muted tones or light woods. The effect? A quiet, almost invisible support that lets your art speak for itself.
Each style shifts how the corner visually balances the piece, sometimes drawing your eye right to the border, other times leading it gently back inside.
Modern Corner Designs for Contemporary Art
Modern corners often ditch ornamentation for sleekness. You’ll spot smooth, straight cuts, precise right angles, sometimes with a slight bevel to catch light. Materials lean toward metal or plastic composites, frequently in neutral colors like black, white, or silver.
They pair well with contemporary artworks that use bold shapes, colors, and abstract forms. The clean corners don’t interfere, allowing the art to pop. For hobbyists displaying things like graphic designs or digital prints, these corners echo the themes of innovation and simplicity.
What’s interesting is how these frames offer a kind of quiet confidence. They don’t shout for attention but quietly elevate your art’s modern vibe. Sometimes less really is more—though sometimes that “less” feels almost too cold, but that depends on your taste.
Rustic Corner Frames for Handmade Items
Rustic corners usually come from wood, sometimes with bark still faintly showing or paint peeling in places. They offer a tangible connection to nature and craft. When framing handmade or craft items, these corners add authenticity and a cozy feel.
Natural imperfections in the corners—knots, rough patches—aren’t flaws but part of the charm. They bring a sense of history or story, which handmade items often carry on their own.
You might notice that rustic corners don’t compete with the item but rather support its handmade quality. They invite you to feel the texture and the earthiness embedded in the work.
Though rustic corners can seem simple, they’re not just about nostalgia. They also suggest sustainability or slower, more thoughtful creativity. Does your handmade piece have room for a corner frame that tells a story too?
Corner Design Mistakes to Avoid
When working with corner frames, a few mistakes tend to pop up often—some subtle, others more obvious. One I see a lot is misaligned corners. When angles don’t quite match, gaps or uneven edges appear, which can really distract from the overall look and reduce structural integrity. Sometimes it’s because the frame pieces aren’t cut precisely at 45 degrees, or the corners aren’t clamped properly during installation. It’s frustrating, I know, especially when you’ve spent time choosing your materials carefully.
Another common error is over-tightening fasteners in the corner joints without considering the material’s reaction. This can cause cracks or warping, especially in delicate woods or certain plastics. On the flip side, loose joints don’t hold well and lead to wobbling over time. So there’s a fine line between too tight and too loose—and yes, it’s a little tricky to get just right.
Sometimes corners are designed without thinking through the frame’s depth and thickness. A corner that’s too bulky or thin compared to the rest of the frame disrupts balance and can look off. And if you don’t properly seal or sand the edges, roughness or splintering ends up visible, which ruins the clean finish you wanted in the first place.
Common Installation Errors
Here are a few mistakes seen regularly during installation:
- Cutting corners at incorrect angles, causing poor fit and visible gaps.
- Neglecting to check for square corners before fixing joints.
- Using inappropriate adhesives or fasteners, leading to weak or uneven holds.
- Ignoring material expansion, resulting in cracked or warped corners later.
- Failing to properly sand or finish corners, leaving rough surfaces exposed.
These slip-ups don’t just affect looks—they can cause frames to come apart or hang unevenly. Sometimes the damage isn’t immediately obvious, but it compounds over time.
Tips to Fix Corner Design Flaws
If you notice your corners aren’t quite right, don’t panic. Fixes are often straightforward. Loose corners? Try reinforcing with small corner brackets or adding a bit of wood glue and clamps. For uneven edges, careful sanding or filling small gaps with wood filler or putty helps smooth things out. If angles are off, trimming and recutting might be needed—measure twice, cut once still applies, but if you slip, adjusting pieces can save you from starting over.
Prevention comes down to patience and proper tools. Using a good miter box or saw guide makes a big difference. Testing fit before final assembly saves headaches. And when in doubt, practice on scraps. It might take a few tries, but you’ll get a cleaner, sturdier frame that way.
Do you ever find yourself stuck choosing between a quick fix or redoing a corner entirely? Sometimes it’s worth the extra effort. After all, corners hold everything together—both structurally and visually.
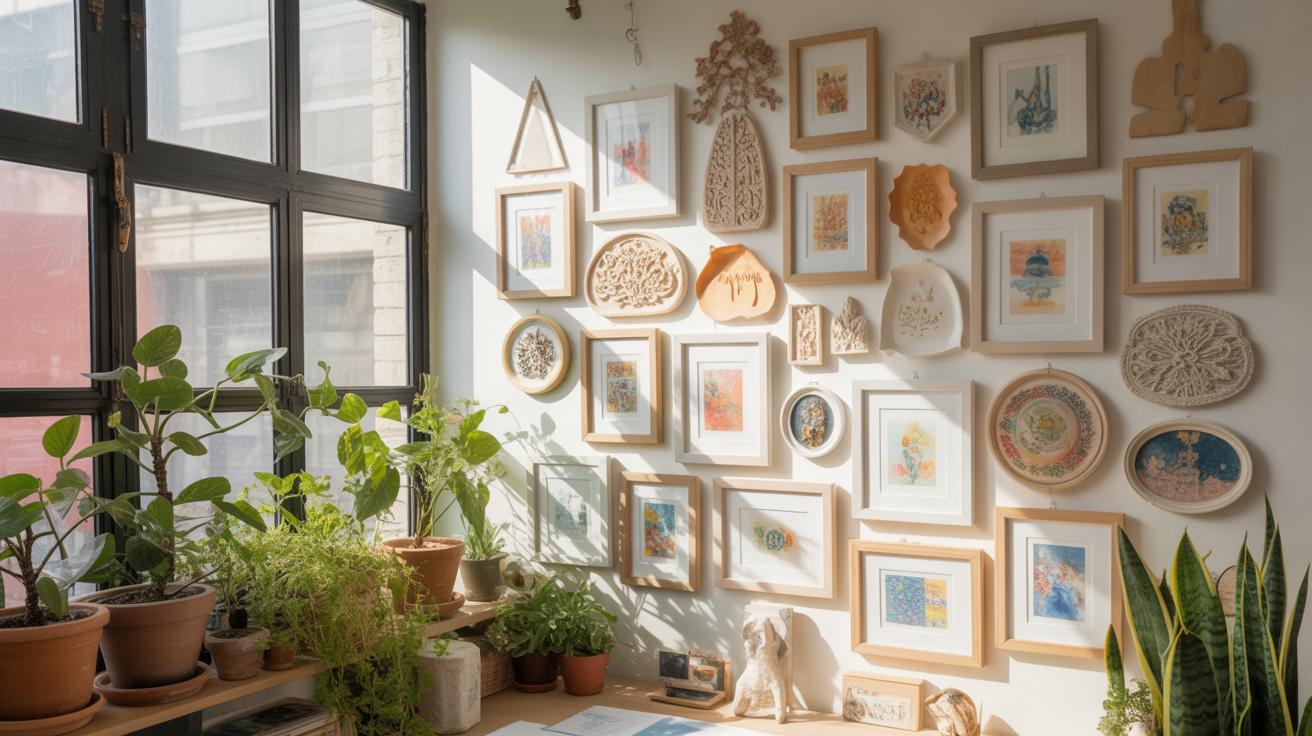
Examples of Creative Corner Frames
Sometimes, the subtlety of a corner frame shapes how you see the entire piece. In art galleries, you might notice frames that don’t just hold the artwork but somehow enhance it. For example, some galleries use sleek, minimal metal corners that extend slightly beyond the canvas edge, creating a floating effect. This draws your eye in, making the art seem to hover rather than sit flat. You might picture a large abstract painting surrounded by thin, black steel corners—simple, yet arresting.
Other galleries opt for ornate corner details carved from wood, echoing the artwork’s historical period. I once saw a Renaissance portrait where gilt-accented corner frames matched the warm tones of the subject’s cloak. It wasn’t just decoration; the corners seemed to invite you closer, emphasizing textures and depth.
On the hobby side, corner frames perform a different role. Consider a model train display where corner frames serve as small shelves or mounting points, showcasing collectibles neatly. Some hobbyists use irregular, colorful corners that break the monotony of classic frames. A friend of mine had an array of handcrafted wooden puzzles highlighted by corner frames painted in soft pastels, which made the whole arrangement feel fresh and less rigid.
In crafts, corner frames sometimes become part of the creation itself. I’ve seen handmade quilts bordered by fabric corner pieces that echo the patchwork design, blurring the line between frame and artwork. It begs the question: when does the frame stop being just a frame and become part of the art?
Materials for Corner Frame Making
When it comes to corner frame making, the choice of material shapes not only the look but also the feel and longevity of your piece. Wood is a classic option. It’s warm, easy to carve or paint, and fairly forgiving if you need to adjust measurements or fix mistakes. But wood can warp over time, especially in humid conditions, and some types get scratched or dented too easily.
Metal frames, on the other hand, offer a clean, modern edge. They hold up well against wear and tear and rarely bend out of shape unless you’re dealing with thinner gauges. Metal can be tricky to work with if you don’t have the right tools or skills, and it might feel cold or impersonal depending on your aesthetic.
Plastic corner frames are lightweight and often affordable. They resist moisture better than wood but might lack the sturdiness you want, especially for larger or heavier art pieces. Plus, plastic sometimes looks less refined, though that depends on the quality and finish.
Then there’s recycled or unconventional materials. Things like old bicycle parts, driftwood, or scrap metal can add character you won’t get elsewhere. These can be fun to experiment with, but they require patience and a creative eye. Also, not every salvaged item will hold together well or be easy to join at neat corners.
Choosing a material, in the end, depends on your priorities—appearance, durability, ease of working, and budget. Maybe try mixing materials? That’s always an option, too.
Wood versus Metal for Corner Frames
Comparing wood and metal turns out less straightforward than it seems. Wood generally costs less upfront, especially if you grab common species like pine or poplar. But if you’re after hardwoods—say, oak or walnut—that price can jump. Metals like aluminum or steel often start pricier but last longer under most conditions.
Durability leans toward metal, especially if you expect your frame to endure knocks or outdoor display. Yet wood’s imperfections—tiny knots, grain patterns—lend a personality metal sometimes lacks. Appearance-wise, wood can be rustic or polished; metal often signals sleekness or industrial vibes.
If you want a frame you can repaint easily, wood scores points. Metal may need sanding and special primers. On the flip side, metal frames can be slimmer, letting your art stand out more instead of the border drawing attention.
Cost, durability, style—all matter. But your project’s purpose might tip the choice one way or another. What kind of statement do you want the frame to make?
Innovative Recycled Materials Usage
Looking beyond traditional materials opens up corner frame making to all sorts of creative possibilities. I once saw a frame crafted from reclaimed pallet wood mixed with old window hardware. It was rough but had this unexpected charm.
Some artists dip into discarded vinyl records, cutting and shaping their edges to form unique, glossy corners. Others use pieces of broken ceramics or even bicycle inner tubes—these add texture and tell stories beyond the art itself.
Sometimes, recycled materials pose challenges. For instance, uneven edges or mixed substances can make joining corners tricky without special adhesives or fastening methods. Yet this complexity is partly what makes them interesting.
Do you want a frame that’s totally your own? Try hunting for materials that others see as trash. They might become your next conversation piece. After all, unconventional corners can bring new life—not just to frames, but to the art they hold.
Costs of Corner Frame Projects
Breaking Down the Costs
When you start thinking about making or buying corner frames, costs can quickly add up—or surprisingly stay low, depending on your approach. Materials like wood, metal, or plastic vary a lot in price. A simple wooden corner frame might cost you just a few dollars if you grab scrap pieces, but buying premium hardwood or decorative metal corners pushes the price higher. Don’t forget tools. If you already own a miter saw or a good-quality glue gun, great. If not, investing in these can be a noticeable part of your project budget.
Time matters too. Labor hours can add invisible costs if you value your own time highly or need a quick turnaround. Trying to rush might lead to mistakes that mean you waste materials or need to start over. Sometimes, a slower, more careful pace saves money in the long run. But other times, you have to weigh if your time is better spent elsewhere.
Budget-Friendly Corner Frame Ideas
It doesn’t always take fancy tools or expensive materials to create frames that stand out. I once used leftover cardboard and fabric scraps to make corner accents for a friend’s craft project. The result wasn’t museum-quality, but it had charm and was definitely unique. Think about things like:
- Using painted or stained wooden skewers or dowels to outline corners
- Repurposing old picture frame corners from thrift stores and customizing them with inexpensive paint or embellishments
- Making the corners from folded paper or cardstock with decorative edges, especially when framing things like lightweight posters or drawings
You don’t always need power tools either. A good craft knife, ruler, and some clamps can go a long way. The key is to make the most of what you have and not to overcomplicate the process.
When to Hire a Professional
Sometimes, a project is just too complex or precise to tackle alone. If you’re dealing with very large art pieces, antique frames, or funky, unconventional materials, a professional might be the better choice. They bring skills that guarantee clean, durable joints and proper mounting, which can save you stress—and money—on repairs later.
If you want custom carving or specialized finishes, those require techniques and equipment that aren’t always friendly to DIY. Also, when time is tight, or the frame is part of a larger display needing exact alignment, an expert ensures you don’t end up with wonky corners or uneven spacing. Hiring out might seem costly upfront, but sometimes it avoids headaches and keeps your project on track.
Maintaining and Updating Corner Frames
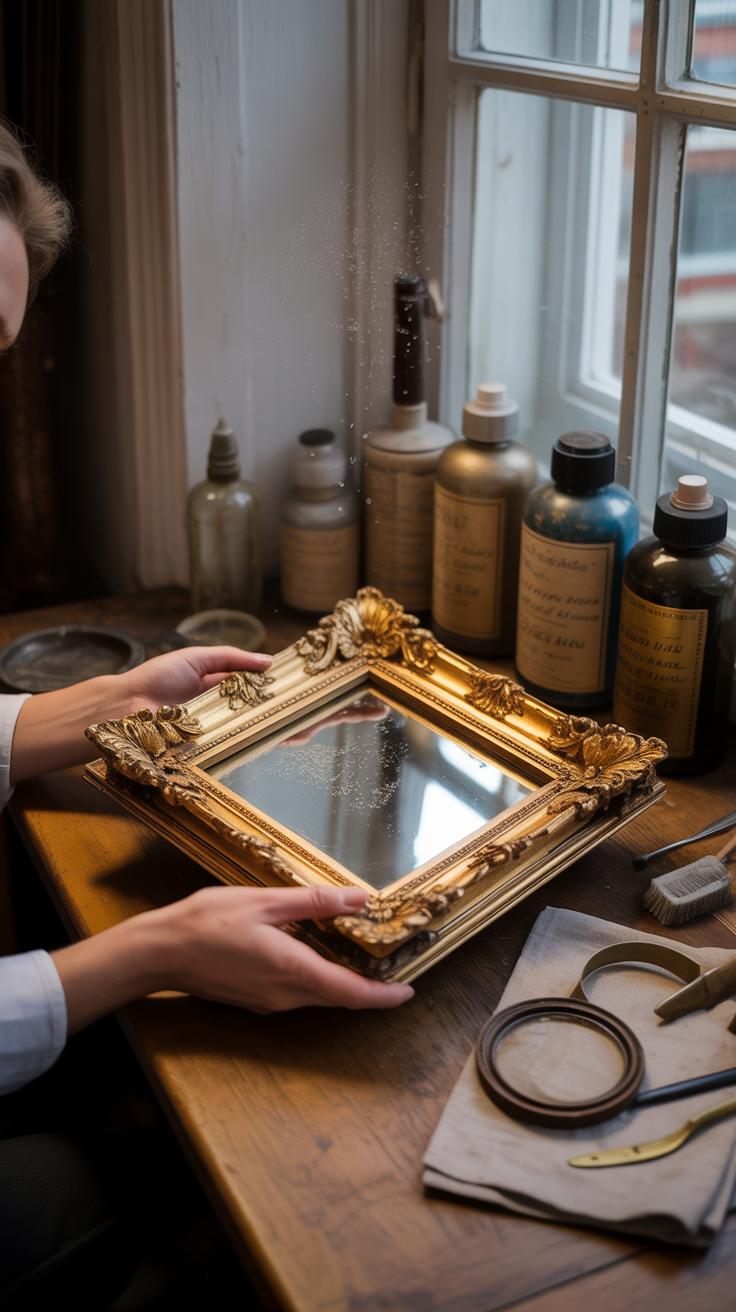
Corner frames, like any artful detail in your space, can wear down or start to look tired over time. Caring for them isn’t complicated, but it does take a bit of attention. Dust tends to collect in the grooves and edges of corner designs, so using a soft brush or microfiber cloth regularly works well to keep dirt at bay. For painted or finished wood frames, a slightly damp cloth can clear stubborn spots—just be careful not to soak the material.
Small scratches or chips appear, especially if your frames are in busy areas. Filling these little flaws with a matching wood filler or paint helps preserve the frame’s look without needing a full replacement. Sometimes, you might spot gaps at the corners where glue has dried out; pressing these tighter or injecting a bit of glue can hold everything together again.
Ever thought about shaking things up by refreshing the frame’s appearance? Simple updates like repainting with bold colors or layering subtle gold leaf can transform dull corners entirely. You might also try adding decorative accents—tiny beads, metal studs, or even fabric trims can give the corners a unique character. If the frame’s shape feels too rigid, sanding down sharp edges or carving in minimalist curves might open up new visual possibilities.
Do you find that some updates improve the frame’s style but make it feel less “original”? Maybe a balance could mean touching only one or two corners each time, testing ideas without losing the frame’s initial charm. Taking care of corner frames is a mix between gentle maintenance and creative experimentation—it’s not always clear what’s best until you try.
Conclusions
Creative corner frame designs bring new life to the way art and hobbies are displayed. Focusing on corners allows you to create a unique and personal touch while protecting your items. The key is to understand how different corner styles can influence the overall look and how to select or craft them according to the theme of your piece.
Whether you prefer simple, modern corners or intricate, decorative ones, experimenting with corner designs opens up many possibilities. You can easily enhance your art and hobbies’ presentation while adding charm and style to your space.


