
Introduction
Keeping your home organized can feel hard, but crochet projects make it easier and fun. You can create cozy storage solutions with just yarn and a hook. This article shares 10 cozy crochet projects that will help you organize your home storage effectively.
Using crochet, you can make baskets, containers, and covers that not only help keep things neat but also add a warm touch to your home. These projects are simple and practical, perfect for anyone who wants to tidy up in a handmade way.
Crochet Baskets For Decluttering
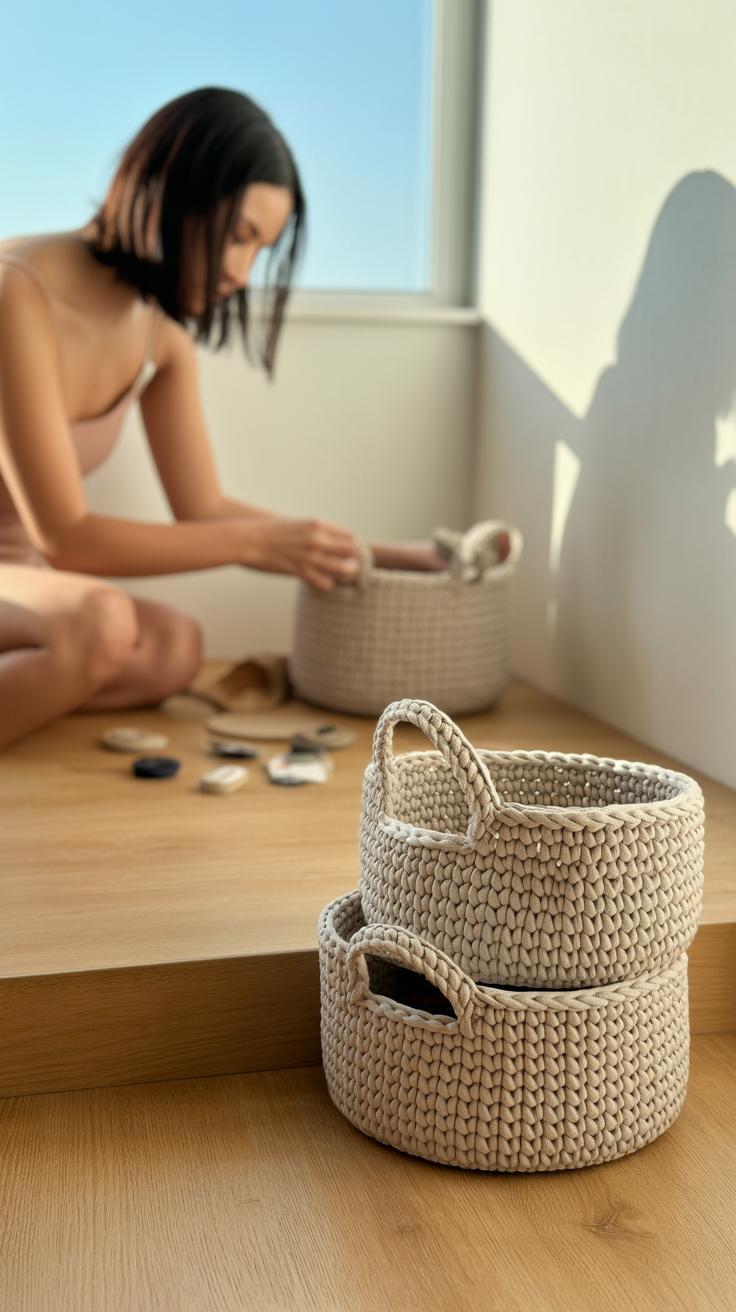
Crochet baskets can be surprisingly helpful when it comes to tidying up various rooms around your house. You might find them perfect for holding remote controls and magazines in the living room or for sorting toiletries and accessories in the bedroom. Their open tops make it easy to toss things in quickly — and grab them again just as fast. Plus, they don’t take much time to make, which is a relief if you’re not into long, complicated projects.

What I like about these baskets is you can customize their size to fit almost anywhere — a tiny corner shelf or even under your bedside table. They bring a kind of neat order without screaming “storage box.” Also, crochet adds a softer, more homey touch compared to plastic bins. But really, once you try making a few, you might catch yourself thinking, why didn’t I organize like this sooner?
Choosing Yarn And Hook For Durable Baskets
The yarn you pick really matters, especially if you want your baskets to hold up over time. Thicker yarn such as cotton or even a cotton blend tends to be sturdier. It won’t stretch out or sag when filled with heavier items. I’ve found that using bulky weight yarn can make the process quicker too — fewer stitches to work through. But then again, some people prefer medium-weight yarn for a more flexible basket.
The hook size is just as important. A larger hook size paired with thick yarn creates a looser fabric that might not stand up as well. So, going slightly smaller on the hook helps make dense stitches, giving your basket better structure. For example, a 5.5 mm hook for bulky yarn or a 4 mm hook for medium-weight yarn usually works well. You want your basket firm but still with a bit of give.
Basic Basket Crochet Techniques
Starting a simple crochet basket isn’t as daunting as it seems. Most baskets begin with a magic ring or chain circle to shape the base. Then, you work in rounds, increasing stitches to widen the bottom before building the sides tall enough to hold items. Single crochet stitches are usually best because they create a tight fabric, preventing things from slipping through.
Once you nail the basic shape, just keep crocheting rounds without increasing to make the walls. You can change colors or add stripes if you want something more interesting. For a beginner, sticking to basic stitches like single crochet and slip stitch works fine. It’s enough to make a basket that’s not only functional but looks nice too. And honestly, there’s something satisfying about watching a flat circle turn into a three-dimensional basket before your eyes.
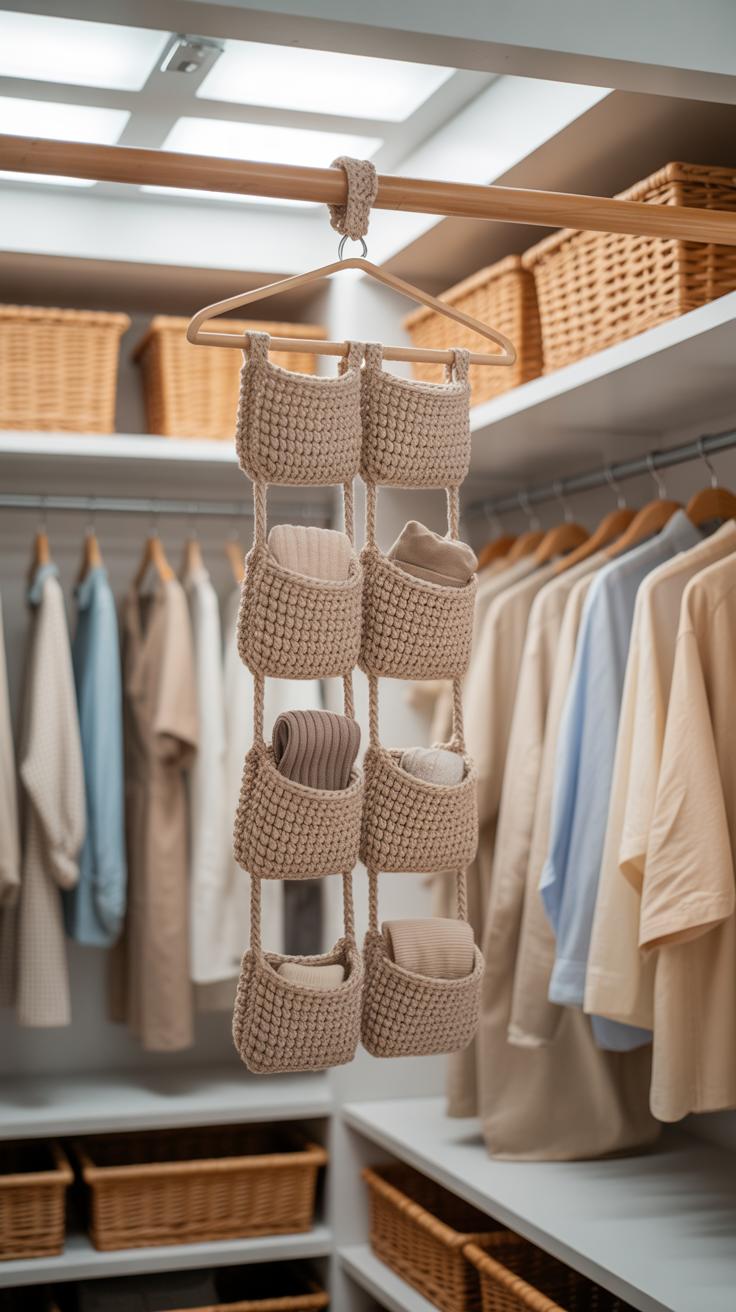
Crochet Wall Pockets To Save Space

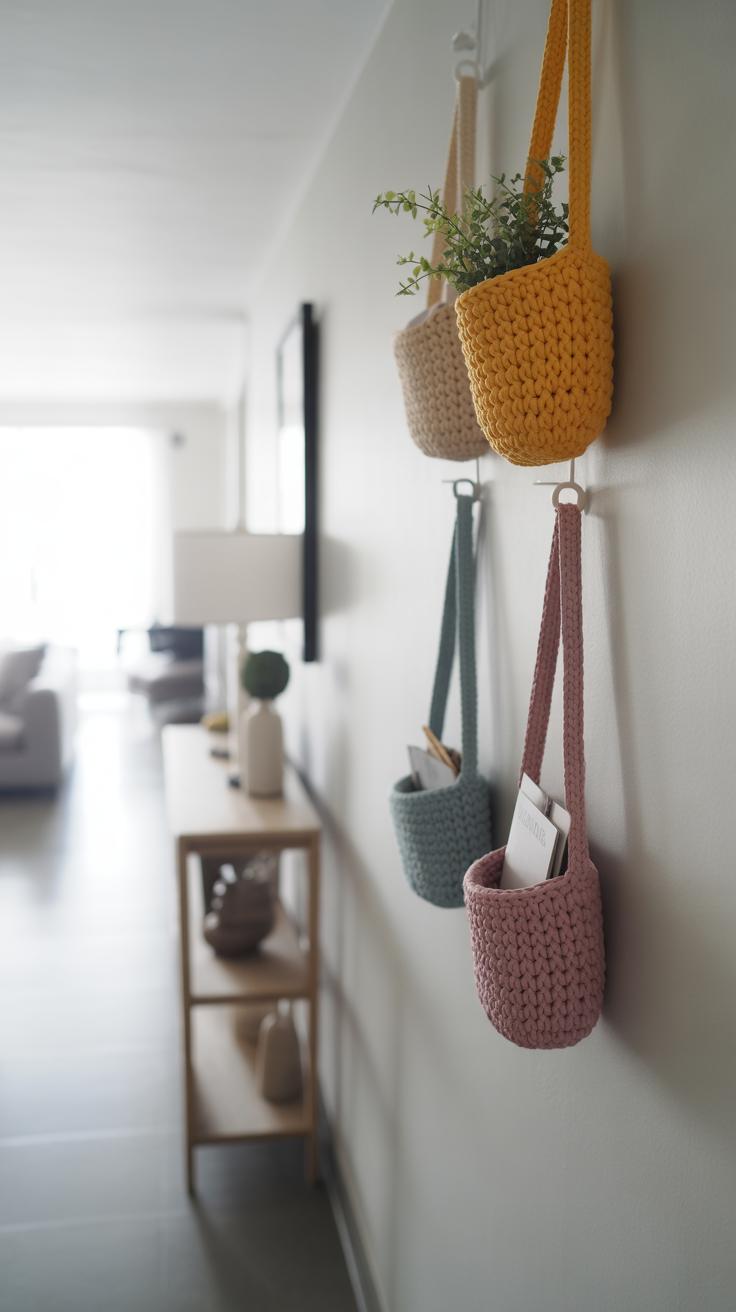
How Crochet Wall Pockets Keep Small Items Organized
Crochet wall pockets offer a clever way to clear cluttered countertops and tables. You can hang them on walls near entryways or in kitchens to gather things like keys, mail, sunglasses, or even small notepads. This keeps those everyday essentials within easy reach but not scattered around. The pockets hold just enough without bulking up the space, perfect for cramped areas where extra storage surfaces are limited.
When you think about it, having these little containers on the wall frees your mind from hunting through piles. I gave my keys their own spot by making a simple, sturdy pocket near the door—it changed my rushed mornings a bit. Sometimes, the visual cue alone helps stop clutter from forming again.
Designing Functional And Stylish Wall Pockets
Designing these pockets takes a bit of thought. You want something sturdy enough to hold heavier items but still flexible. Tight stitches, like single crochet or half-double crochet, usually work well. Choosing colors that blend or contrast with your wall can make the pockets pop or subtly fit in.
Consider size, too. A narrow, tall pocket is great for mail or slim magazines, while wider, shorter ones can handle sunglasses or chargers. Adding small details—like buttons, appliqués, or patterned stitches—can personalize them without overwhelming a room’s style. You might want multiple pockets arranged vertically or in a cluster to maximize storage and visual impact.
Attaching And Installing Crochet Wall Pockets

Getting your wall pockets securely hung doesn’t need to be complicated. Small nails or picture hooks work well, especially if you include a sturdy loop or built-in hanging strap at the top of your pocket. If you want to avoid holes, adhesive hooks can be an option, though they might not support heavier contents.
Another idea is attaching your pockets to a wooden rod or dowel that can then be hung with brackets. This disperses the weight and can look neat too. Just keep in mind where you’re placing them—high-traffic areas may need stronger fixes to avoid the pockets slipping down or getting damaged.
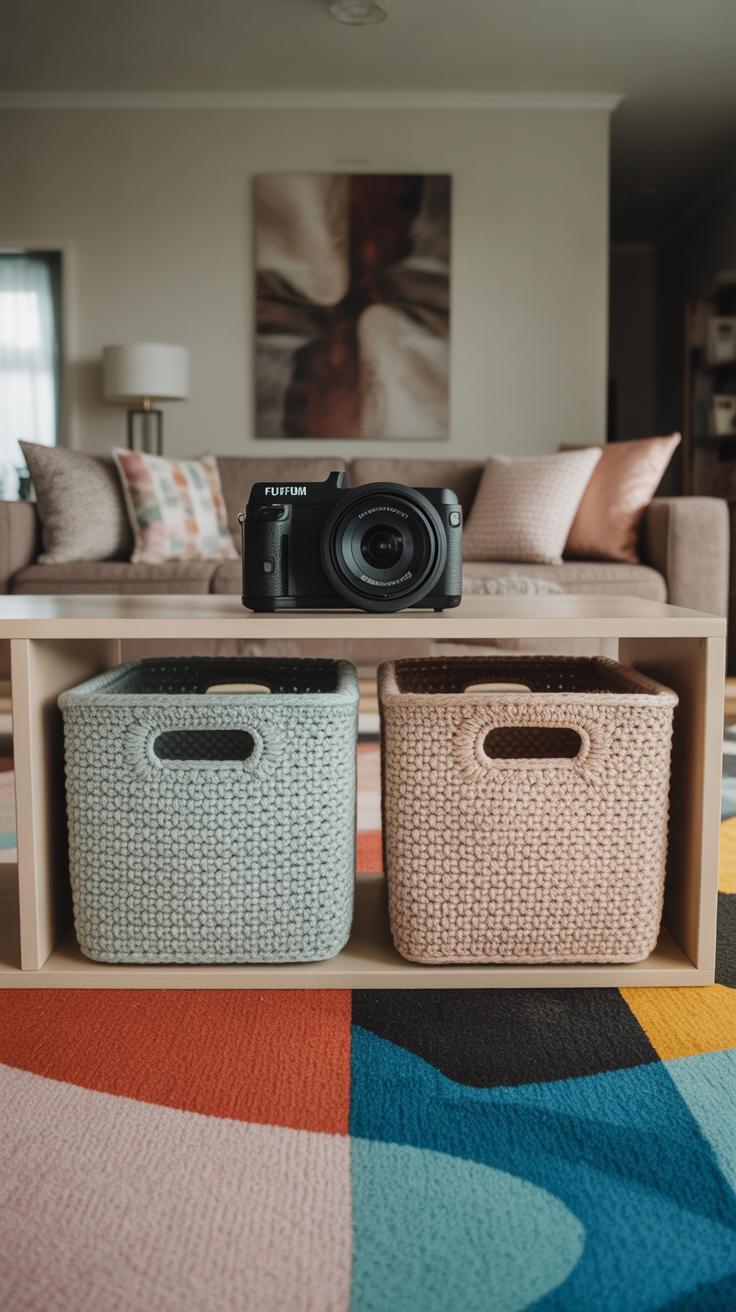
Soft Crochet Storage Boxes For Shelves
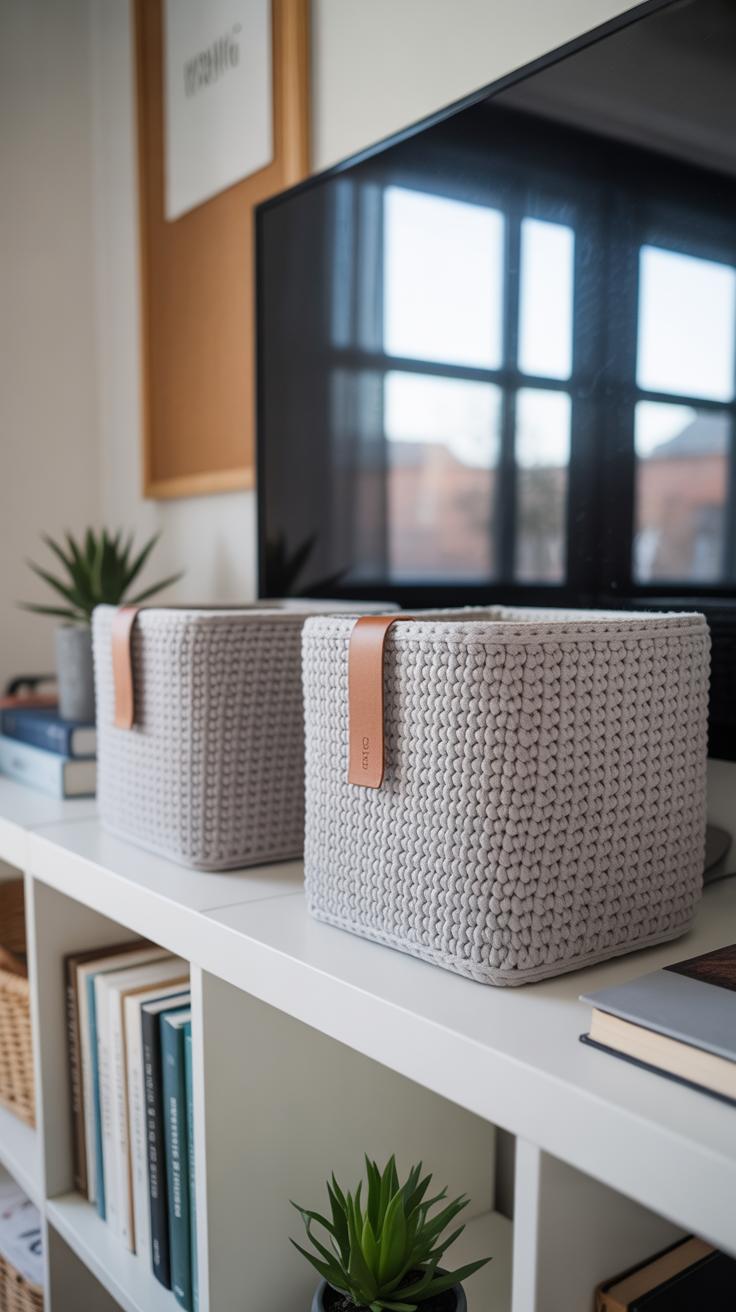
Crochet lends itself well to creating soft storage boxes that fit beautifully on shelves and inside cupboards. These boxes bring a gentle texture to storage, unlike rigid plastic or cardboard, which can feel cold or brittle. The flexibility of crochet means the boxes can slightly bend or squash, making them great for snug spaces where exact fit matters but some give is helpful.
To make these storage boxes, start with sturdier yarn—cotton or blends with some thickness work well. You want a box that holds shape but can also fold or collapse when not needed. The pattern usually involves making a firm base, then building up the sides with consistent stitches that keep the structure steady without being too rigid.

Personal experience: I once made a set of crochet boxes for my living room shelves, and I loved how they softened the look while organizing random clutter. Yet, they weren’t perfect—they had to be supported with light cardboard inserts because the yarn alone wasn’t enough for taller boxes. That said, they still felt cozier than plastic bins.
Measuring And Creating Uniform Boxes
Getting your boxes the right size is trickier than just eyeballing it. You want to measure the shelf space carefully. Use a tape measure to note height, width, and depth where you want the boxes to sit.
Consider these points:
- Measure the depth twice—once for the shelf interior and again accounting for the thickness of the base and yarn.
- Think about clearance space; boxes shouldn’t be too tight or you won’t be able to pull them out easily.
- To make multiple boxes uniform, crochet to the same stitch count and rows carefully, and maybe keep a swatch to check your gauge.
It’s a bit of trial and error. I usually make a prototype box first, test if it fits well, then adjust the stitch count and height from there. Uniformity matters more than you might expect—it keeps your shelf looking neat and balanced.
Adding Labels And Handles To Boxes
Labels and handles turn your crochet box from pretty storage to truly practical. For labels, you can crochet small pockets or loops to slip in paper or fabric tags. It keeps things flexible—you can change labels easily if you rearrange or switch contents.

Handles can be simple crocheted bands sewn onto the sides or loops you can grab when pulling boxes off shelves. Even braided yarn cords make good grab points. Sometimes I add slightly thicker yarn for handles so they don’t stretch out.
Think about how often you move these boxes and what you store inside. Bulky handles might be best for heavy items, while subtle loops work for lighter contents. Also, attaching labels in a way that doesn’t interfere with stacking or shelf space is key. Small details, yes—but they make a big difference in everyday use.
Crochet Drawer Dividers For Small Items
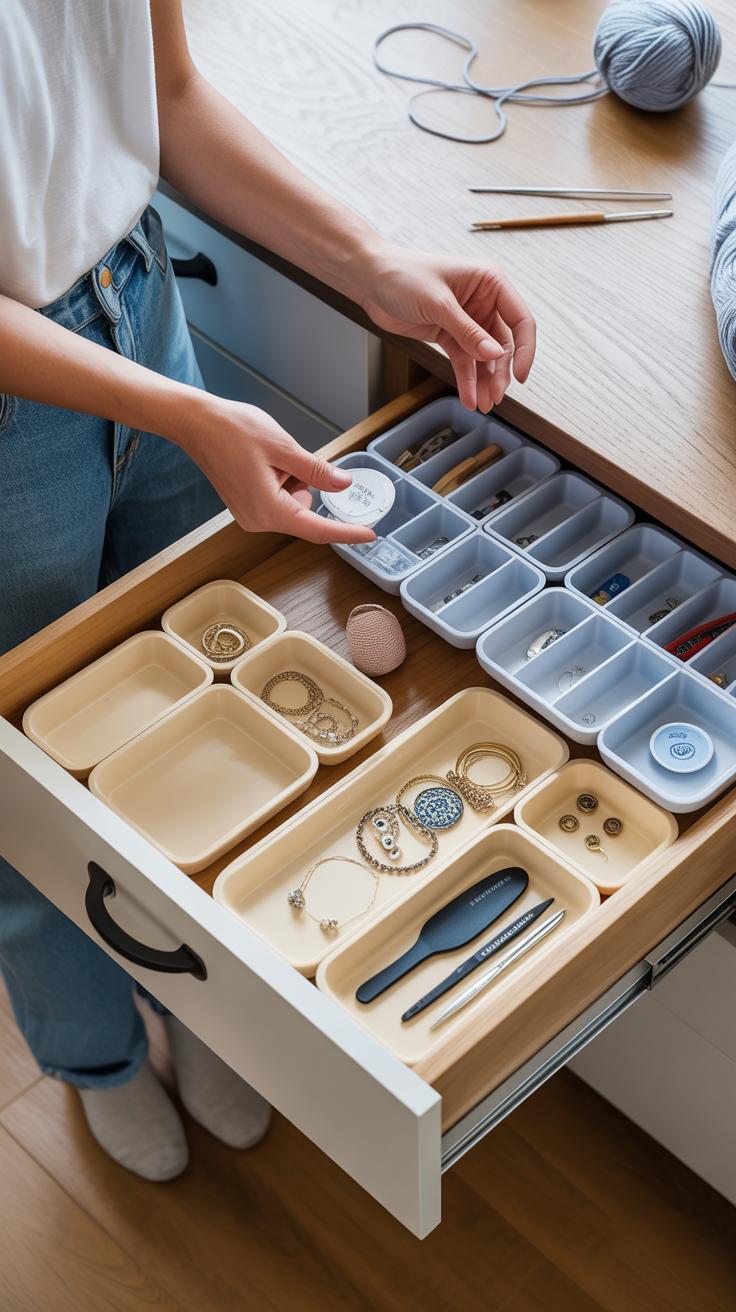
Using crochet dividers inside drawers can really change how you manage small items. Things like socks, jewelry, or stationery often get jumbled up, and these dividers create neat little sections to keep everything visible and easy to grab. Personally, I lost track of a favorite pair of earrings until I made some dividers. Suddenly, no more digging around—it just feels quieter inside the drawer.
Because crochet work is flexible, the dividers fit snugly even in oddly shaped drawers. You can gently squash or stretch them without losing their shape. Plus, they add a bit of texture, so items don’t slide around as much as they would on bare wood or plastic. This might feel a little unusual if you’ve only used hard, rigid dividers before, but trust me, the softness has its own benefits.
Simple Patterns For Dividers
If you’re not into complex stitching, don’t worry. There are easy patterns that you can whip up quickly. Think straight rows of single crochet or half-double crochet for a solid but flexible fabric. Adding simple grid patterns by chaining across and working double crochets in intervals works well, too. Here’s what to try:
- Create a rectangle or square panel with tight stitches for sturdiness.
- Make smaller strips that connect or overlap inside the drawer.
- Use cotton yarn for durability and minimal stretch.
- Don’t over-complicate edges—just a few border rows keep things tidy.

I found that keeping the pattern simple actually helps the dividers last longer. Too many holes or a very loose stitch pattern can let smaller objects slip through, which defeats the purpose. The challenge is balancing flexibility without sacrificing separation.
Maintaining Dividers For Longevity
Because these dividers sit where dust and occasional spills can happen, they need care. Washing them gently by hand with mild soap is usually enough. Avoid rough scrubbing; you don’t want to stretch or distort your hard work. Air drying flat helps keep the shape intact—never toss them in the dryer unless you want a shrunken divider.
If your divider gets dusty, a quick shake or light vacuuming can refresh it without a full wash. Also, consider making a set you can swap out seasonally. That way, if one gets a bit worn or stained, you’re not stuck with only one. It sounds a bit excessive, but trust me, having backups saved me on more than one occasion.
Crochet Hanging Organizers For Closets
Selecting Spaces In Closets For Hanging
Finding the right spot in your closet to hang crochet organizers can be trickier than it sounds. You want to save space but not crowd your clothes or create awkward gaps. Look for unused vertical areas—like the side walls or the back of the closet door. These spots usually go unnoticed but offer plenty of room for slim, hanging organizers.

Sometimes, there’s that awkward empty space between clothing rods or below a shelf that’s perfect. You might even consider installing an extra hook or small rod just to hang your organizer. Just make sure it won’t block your access to other items or make the closet feel too cluttered.
Patterns For Multi-pocket Crochet Organizers
Multi-pocket designs are practically a lifesaver when you want to keep things sorted. Imagine having rows of small-to-medium pockets—some deeper for gloves, others wide enough for scarves or even shoes. One basic but surprisingly handy pattern is a simple rectangle with evenly spaced pockets crocheted on the front.
You can vary pocket sizes by alternating rows of single crochet and double crochet stitches. Adding some reinforcement at the edges with a tighter stitch helps pockets hold their shape, especially for heavier items. I’ve found that leaving the top of each pocket slightly open, without folding over or closing, makes slipping things in and out less of a hassle.
Want to get creative? Try layering smaller pockets over larger backing or even incorporating sections with mesh-like stitches for better airflow—perfect for storing shoes without trapping moisture. What I like about these crochet organizers is you can decide exactly how many pockets you need and adjust their sizes on the fly, depending on what you typically store.
Cozy Crochet Laundry Bags
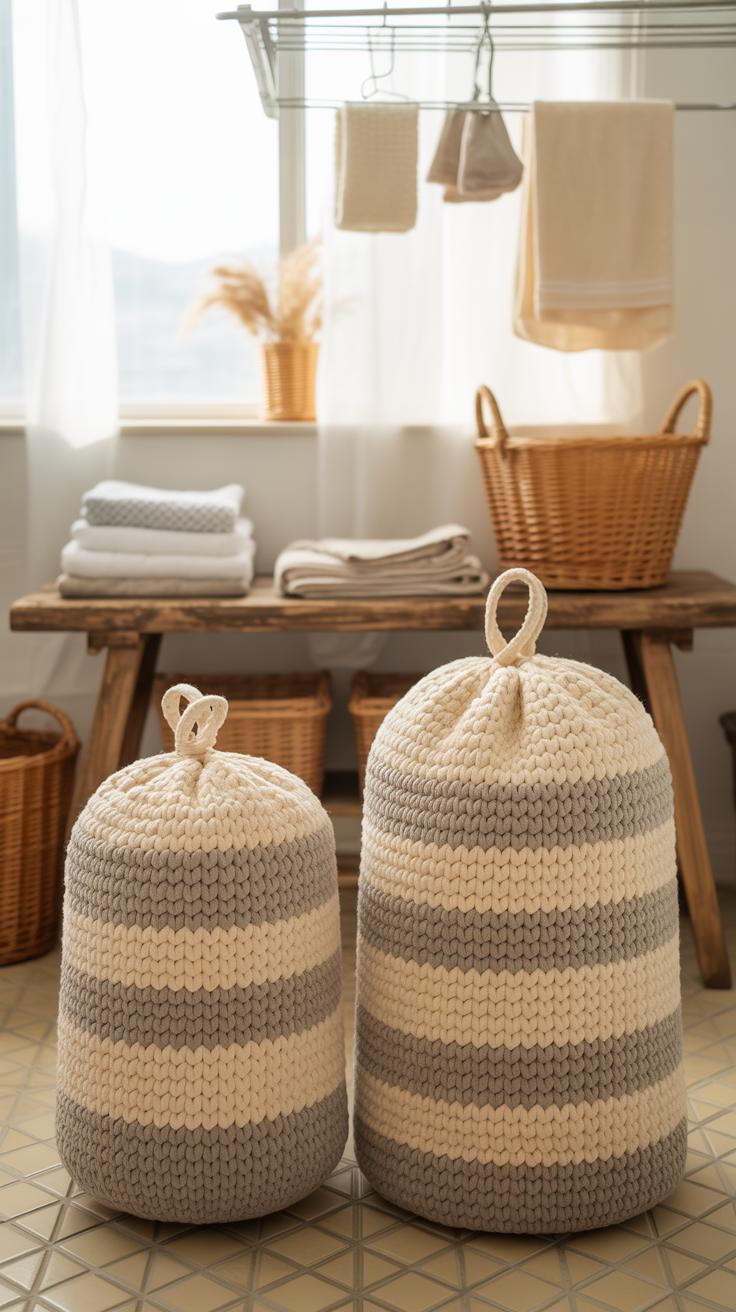
Choosing Breathable Yarn For Laundry Bags
When making laundry bags, the yarn you pick really shapes how practical the finished bag will be. You want something breathable—this means cotton or a cotton blend usually works best. Synthetic fibers might trap moisture, and that’s not what you want when laundry sits inside, waiting for its turn. I’ve found that cotton yarn lets air flow, which helps reduce that certain, let’s say, “not-so-fresh” smell.
Plus, breathability helps prevent mildew. If you’ve had damp clothes just hanging out in a bag for too long, you know what I mean—it gets that musty, unpleasant odor. So, the right yarn can actually stop that from happening, just by letting the moisture escape.
Simple Closure Techniques For Bags
For closures, you don’t need something complicated. Drawstrings are straightforward and practical—they let you open and close the bag easily, and they also serve as handles if you want to carry the bag. Buttons are another simple choice, adding a little charm without extra fuss.
You can crochet a thin cord for a drawstring, thread it through evenly spaced holes near the bag’s opening, and pull tight. Or, add a loop on one side and sew a button on the other to create a neat closure. I like drawstrings better, honestly, because they adjust better to the amount of laundry inside.
These small details make a big difference in keeping dirty clothes neatly contained and ready to be taken to the laundry room without spills or drips.
Crochet Covers For Storage Bins
Plain storage bins and boxes often feel cold or utilitarian, making storage areas look less inviting. Crochet covers can soften that harsh look, adding a warm, handmade touch that blends function with style. I’ve found that a simple crochet cover can completely change how a shelf or closet feels—suddenly, it’s less about hiding mess and more about creating cozy order.
The texture of yarn, the subtle patterns—these elements make storage seem part of the room’s decor instead of just a clutter spot. While the idea might seem small, it creates an inviting vibe, and oddly enough, I think it even encourages you to keep things tidier.
Measuring Bins For Perfect Fit Covers
Getting the measurements right is trickier than just grabbing a tape measure. You want your cover to fit snugly but not so tight that it’s hard to put on or take off. Loose covers can look sloppy, and tight ones strain the stitches.
Start by measuring the height, width, and depth of the bin. Make sure to check if the bin has handles or lips that might change how the cover fits. Sometimes, it’s better to crochet a slightly looser cover and add a drawstring or elastic edge to adjust for different shapes.
- Measure width and depth at the widest points.
- Note any handles or irregular shapes.
- Double-check your gauge before starting to ensure size accuracy.
- Consider ease of putting the cover on and off.
It might feel like overthinking, but these steps save a lot of rework—and frustration.
Decorative Crochet Stitches For Covers
Crochet covers don’t need to be plain. Using decorative stitches adds character without sacrificing practicality. Stitches like shell, puff, or waffle create texture that’s pleasing to touch and see, but still hold up well when stretched over a bin.
I like combining simple stitches with lacy ones to give covers lightness without losing structure. Pattern repeats, like clusters or bobbles, add depth and keep the cover interesting. Plus, they often hide small stains or wear better than smooth surfaces.
- Shell stitch for a classic, scalloped edge look.
- Puff stitch adds cozy thickness and subtle detailing.
- Waffle stitch provides grip so covers don’t slip off easily.
- Lacy mesh patterns keep covers breathable and lightweight.
Choosing stitches depends on yarn thickness and your storage bin’s purpose—some stitches hold better, others just look nice. Do you want a cover that’s decorative or one that also strengthens the bin? Sometimes, I can’t decide either.
Crochet Plant Pot Holders For Organized Greenery
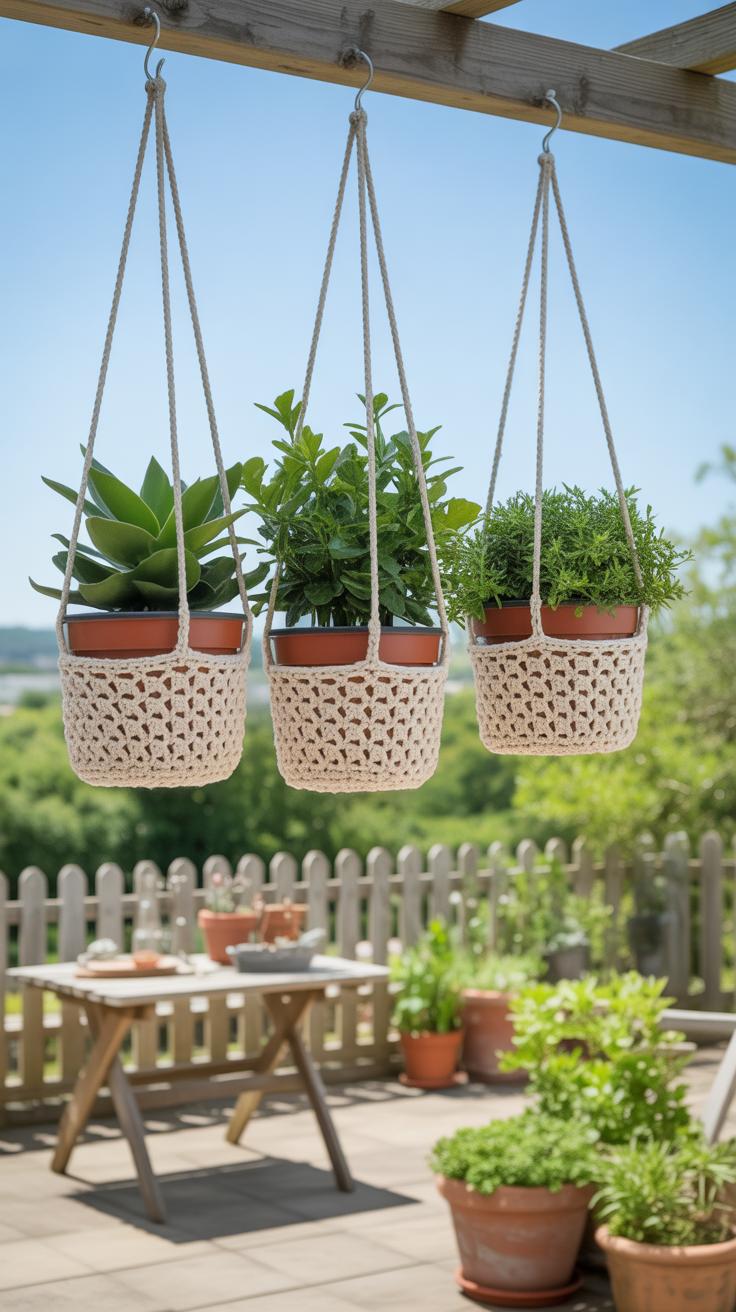
Crochet plant pot holders are a simple way to keep your indoor plants in check while cutting down on mess. Soil spills or water drips are common when you have multiple pots around. Using crochet holders creates a neat barrier between the pot and your shelf or windowsill.
They hold plants steadily, preventing pots from sliding or tipping unexpectedly. Plus, they help group pots together visually, so your greenery looks arranged instead of scattered. I once tried placing plants directly on my wooden table—soil stains were such a pain to clean. Switching to crochet pot holders helped me avoid that hassle and kept the area tidy.
Choosing Materials To Support Plant Weight
Not every yarn is made to hold the weight of a plant pot, especially if it’s heavy or large. You’ll want to pick stronger yarns—think cotton or a cotton blend rather than something fancy but flimsy. The yarn choice makes a difference in durability and how long the holder lasts, especially with regular watering and occasional leaks.
Stitch choice matters, too. Tighter stitches add extra hold and stop the pot from straining the holder. For heavier pots, consider stitches like single crochet or double crochet in a dense pattern. I tested a few stretchy stitches once, but pots swayed too much—it felt risky.
Hanging And Placing Plant Holders
You can hang crochet holders from hooks or curtain rods, which saves space and adds a little life to bare walls. Hanging groups at varying heights creates an eye-catching display but requires you to ensure the holders are securely fastened and can carry the load.
If hanging feels tricky, placing holders on shelves or window sills is just as effective. They keep pots steady and contained. Sometimes I cluster a few medium pots in one crochet holder on a shelf, which feels like a mini indoor garden. It’s practical and nicer to look at than random pots just sitting there.
Conclusions
With these 10 cozy crochet projects, you can turn clutter into order with handmade storage solutions. Crochet baskets, pouches, and containers are great for organizing small and large items. These projects bring warmth and charm while keeping your home neat.
Trying these cozy crochet ideas encourages creativity and helps maintain a tidy space. Start with simple designs and enjoy making your home organized with your own hands.