Introduction
Making your own Christmas ornaments can bring joy and personalization to your holiday decorations. Diy Christmas ornaments easy projects let you create festive and unique pieces without much fuss or cost. Whether you want to make ornaments with your kids or add a personal touch to your tree, easy DIY methods are perfect for everyone.
This article explores simple DIY Christmas ornament ideas and practical ways to store your decorations safely after the holidays. Creating ornaments and storing them well ensures they last for many festive seasons. You will find straightforward advice to help you craft and care for your Christmas ornaments with ease.
Materials You Need For Easy Christmas Ornaments
When it comes to making Christmas ornaments on your own, you don’t need too many fancy supplies. In fact, many items are likely already in your home or easy to pick up at a craft store nearby. It’s surprising how simple materials like paper, glue, and string can turn into something festive in just a few steps.
Common Craft Supplies
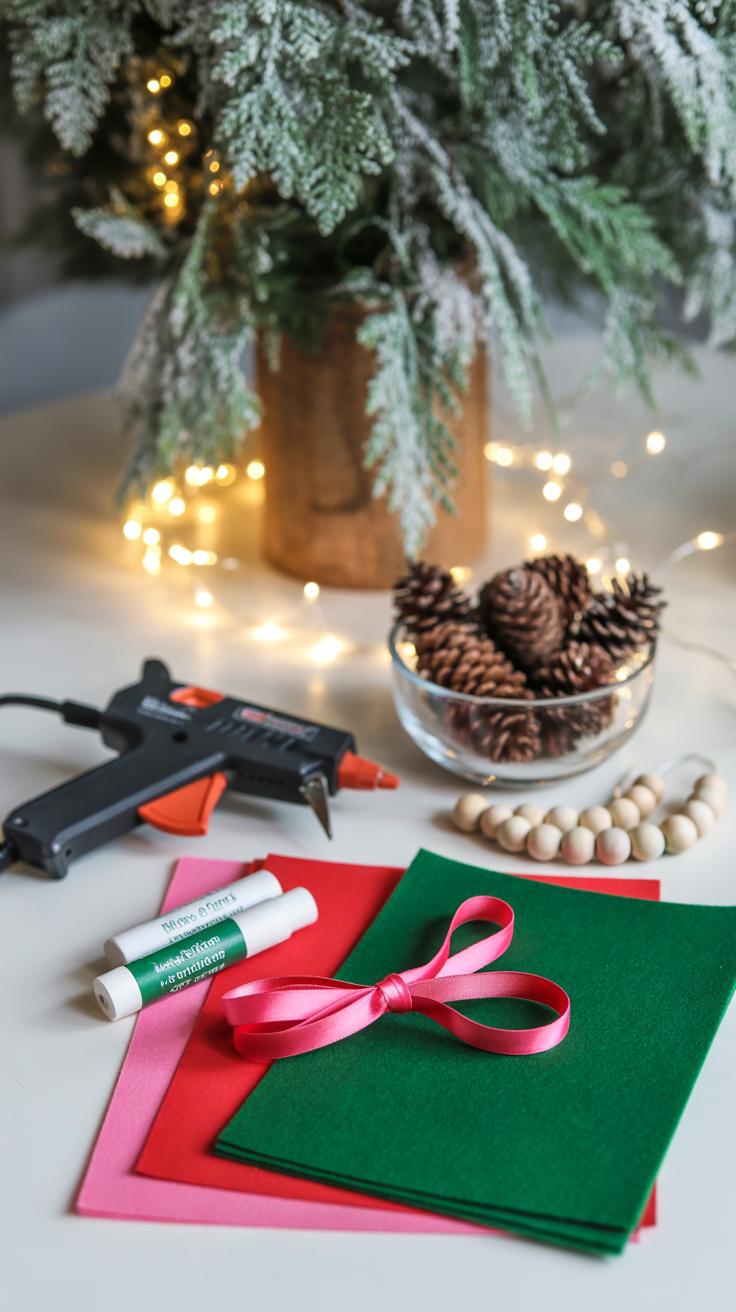
Start with basics: some paper, scissors, glue, and string. Plain or colored paper works fine. Scrapbook paper or even magazine pages can add a nice touch if you want a bit of pattern. You’ll want glue that dries clear and holds well—white school glue often does the trick. Scissors don’t need to be special, but sharper ones help with precision. String or thin ribbon lets you hang the ornaments once they’re done. Small beads can add a little sparkle or texture, making your creation stand out without being complicated.
Using Recycled Materials
Look around your house, you might be sitting on a treasure trove of ornament supplies. Ever thought of using bottle caps? They can frame a tiny photo or hold a cluster of beads. Old buttons come in all shapes and sizes; they attach easily and add character. Fabric scraps, especially from old shirts or holiday-themed linens, can be shaped into mini bows or cutouts. These bits add charm, and of course, they’re a great way to repurpose items you might otherwise toss.

Sometimes, mixing a little of both—new and recycled—makes the process more fun and unique. You don’t have to buy everything new to create something that looks thoughtfully made. It’s almost like a small puzzle, putting together what you have to make something special. Could it get any easier?
Simple Ornament Ideas For Beginners
Starting with easy DIY ornaments can be surprisingly satisfying, even if you’re not very crafty. Some of the simplest projects, like paper snowflakes and stars, only need basic supplies — scissors, plain or colored paper, and a little patience. Folding paper carefully and cutting simple patterns creates delicate decorations quickly. You might not get perfect shapes the first time, but that’s part of the charm. Kids often enjoy this too, even if their shapes end up a bit lopsided. It’s a quick way to add texture and interest to your tree.
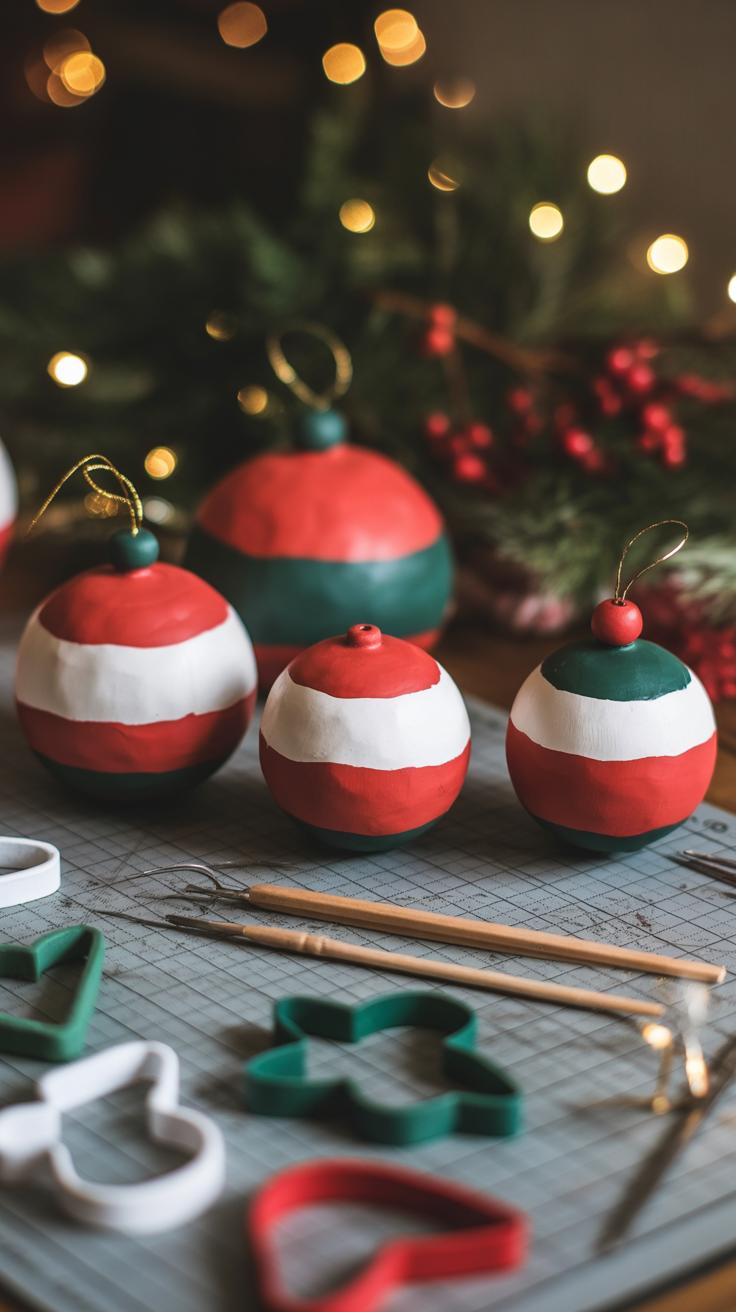
Salt dough ornaments also belong to this beginner-friendly category. You only need salt, flour, water, and some simple cutters or even just a knife to shape pieces. The dough feels almost like playdough, making it easy to form stars, circles, or hearts. You can bake your shapes in a low oven until hard, then paint or decorate them afterward. It’s almost like a small baking project with a creative twist. While these take a bit more time than paper cutting, they last longer and hold up well for storage, too.
Adding Personal Touches To Your Ornaments

When it comes to making your Christmas ornaments truly yours, a few simple personal touches make all the difference. You might want to add names, special dates, or even a small photo to capture a memory. These additions turn basic decorations into keepsakes that tell stories year after year.
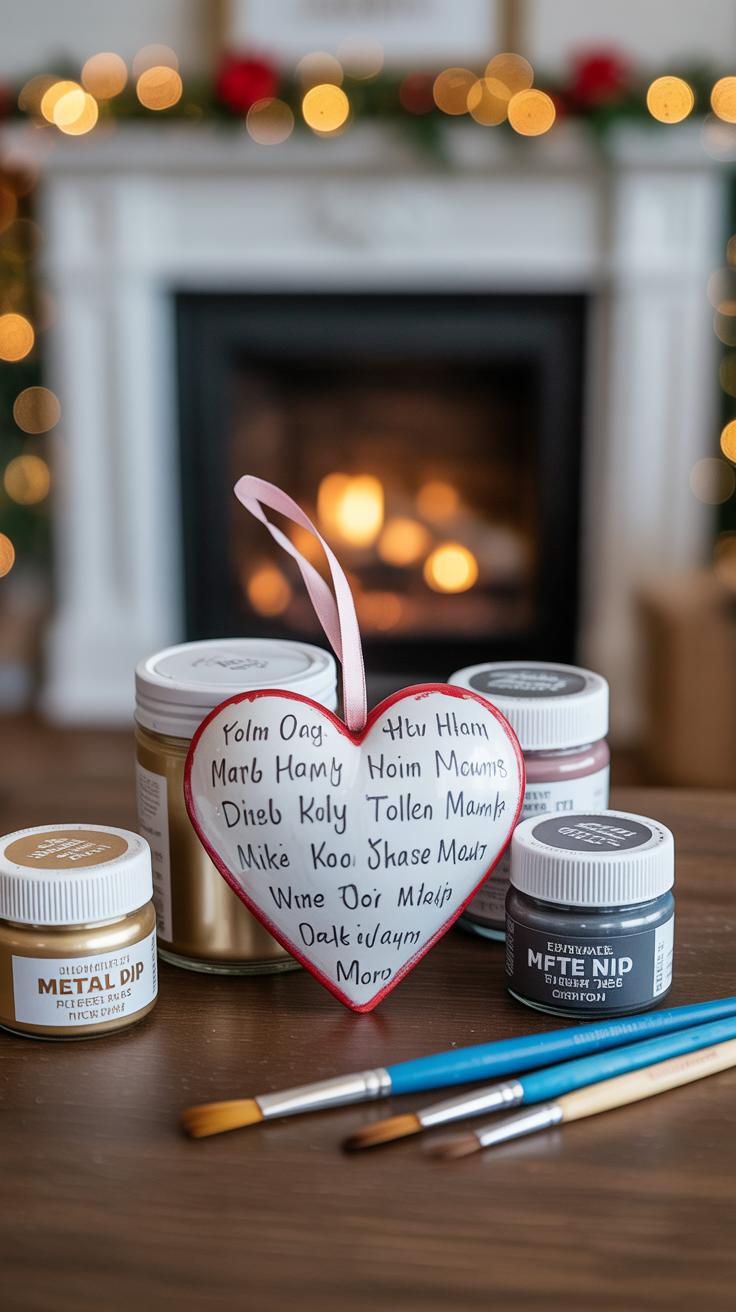
One easy way is writing directly on the ornament. Permanent markers are quite handy for this. You can write a name, a date, or a short message—sometimes, just the year alone adds that nostalgic feel. If you prefer something a bit more colorful, acrylic paint works well too. It takes a little longer to dry but offers more creativity with fonts or little drawings. I once added a tiny hand-drawn snowflake beside a name, and it kept the look simple yet personal.
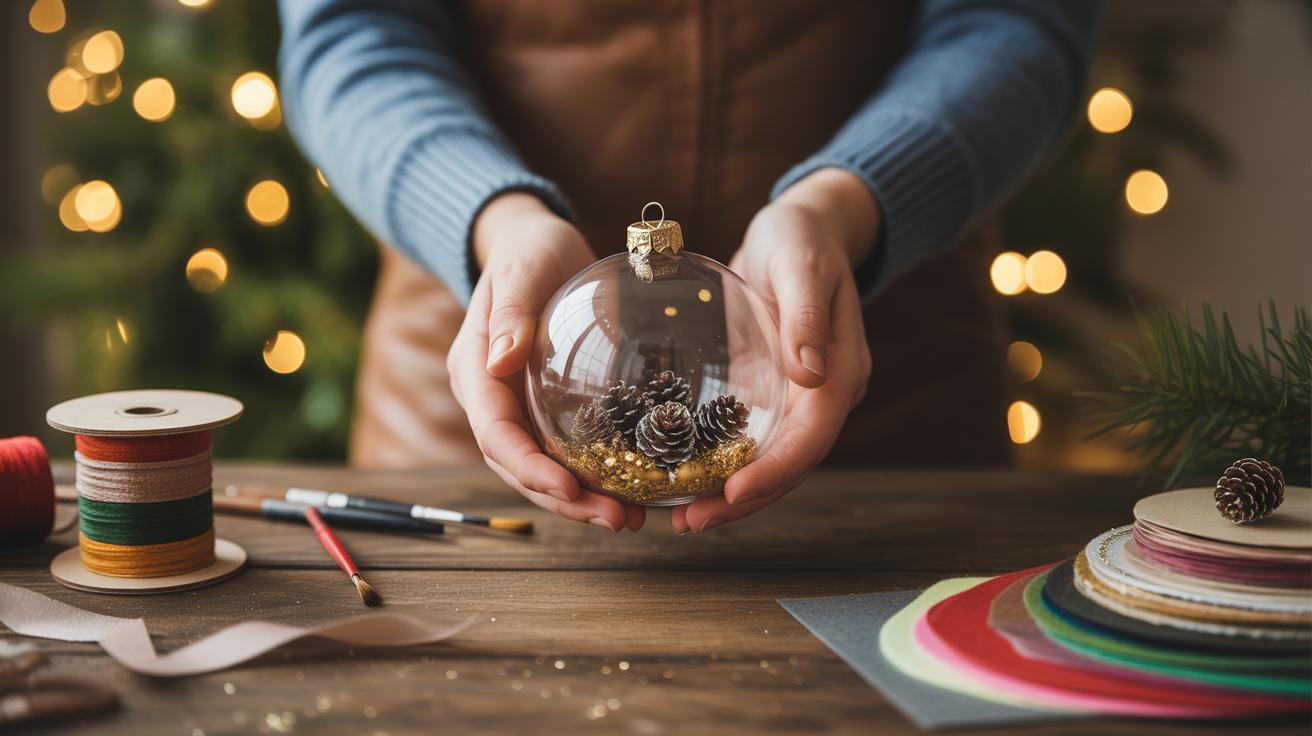
Photo ornaments add another layer of meaning. Take small printed pictures—maybe wallet-sized—and place them inside clear coverings or glass globes made for ornaments. You can glue the photo onto a stiff backing to keep it flat, then seal it with a clear plastic sheet or resin for protection. It’s straightforward, and seeing a familiar face on the tree invites a little warmth every time you glance their way. If you want, you can even write something on the photo’s border to make it feel more like a postcard from the past.
Have you ever wondered how these tiny details affect the way you feel about your decorations? Sometimes, it’s less about the ornament and more about the memory or the meaning behind it.
Safe Handling While Crafting
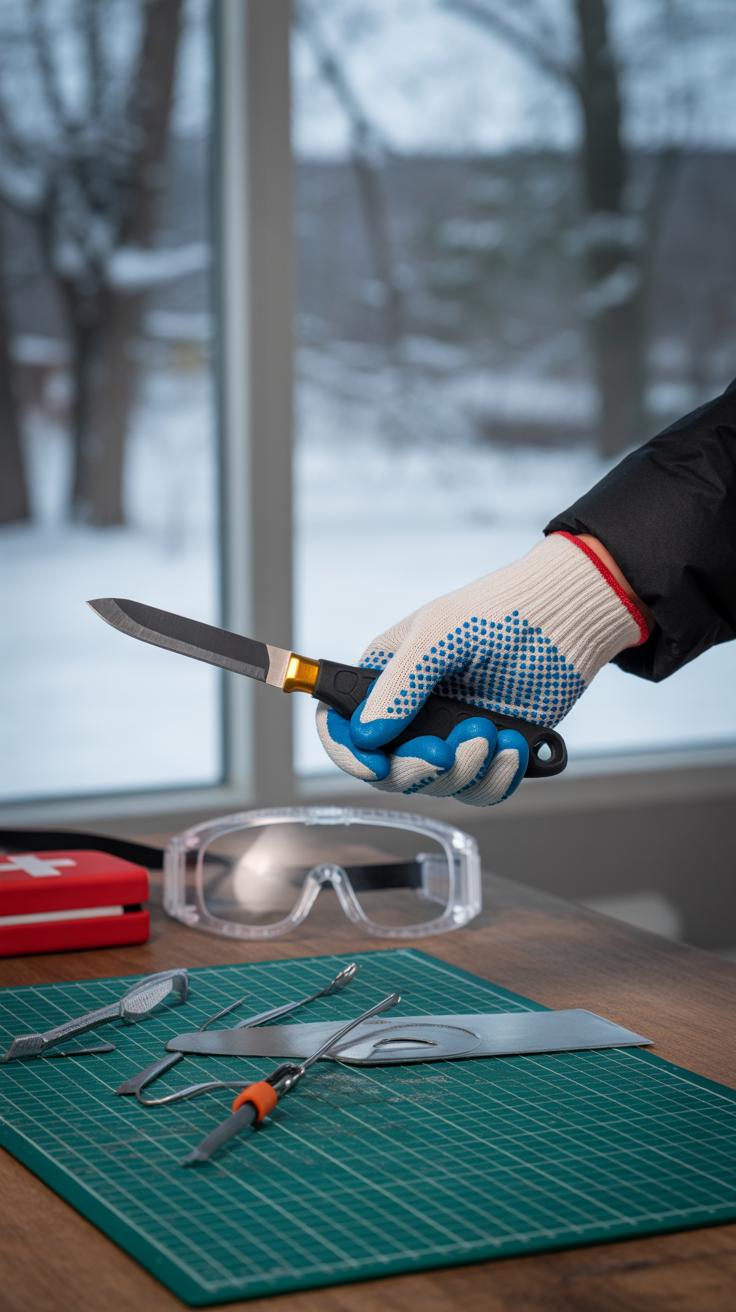
Using Scissors And Glue Carefully

Scissors might seem straightforward, but careless use can lead to nicks or uneven cuts that ruin your ornament—or worse, cause a small injury. When cutting, always make sure your fingers are clear of the blades. Hold the scissors firmly yet relaxed to avoid slips. Cutting in short, deliberate snips often works better than trying to slice through everything in one go. Also, keep your workspace well-lit; it makes you less likely to misjudge the cut.
Glue, on the other hand, can get messy quickly if you’re not careful. Try to avoid squeezing the bottle too hard or too fast. A thin, steady line is often enough to hold parts together. If you’re using hot glue, be cautious—the tip and the glue itself can burn you easily. Working on a protected surface prevents stubborn glue stains, but sometimes, a rag nearby is the best friend in case of slips.
Keeping Small Parts Organized
Jewels, beads, buttons—they add charm but cause extra annoyance when lost. I once spent half an afternoon chasing down a single bead that rolled under the table. To avoid that, sort these tiny bits into small containers with lids—pill organizers or old spice jars work well. Labeling the containers helps too, especially when your projects span days.
You might think leaving parts out for easy access speeds things up, but it often backfires. Kids or pets could knock them over, creating a mess or even a choking hazard if left unattended. If the bits are tiny, consider working on trays with edges or shallow bowls to catch any dropping pieces. It’s a little extra effort, but it saves frustration later—and keeps your crafting space tidy.
Creative Uses For Natural Elements
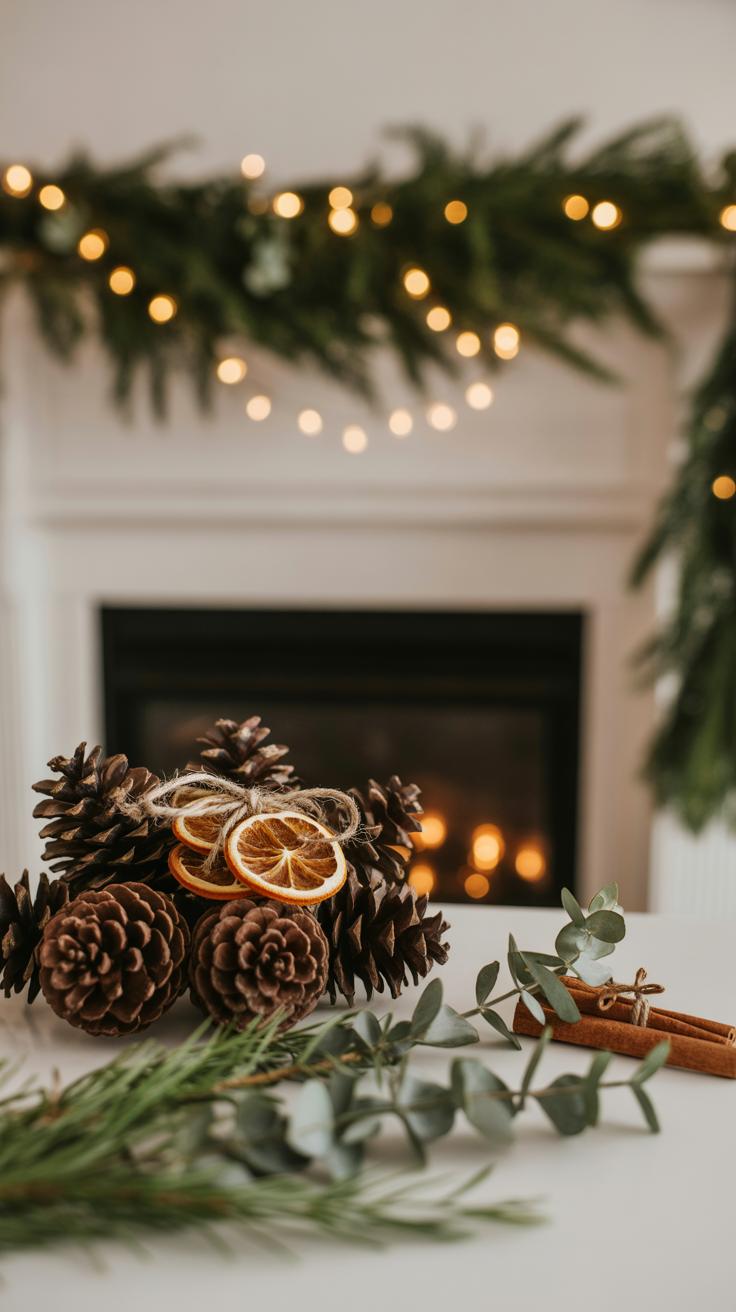

Pinecones, twigs, and dried fruit offer simple, down-to-earth material for your Christmas ornaments. They bring a quiet charm that’s hard to find with store-bought decorations. If you’ve got a walk in the woods nearby or a few trees around your yard, gathering these elements can be a fun part of your holiday prep—sort of like bringing a bit of the outside in.
Making Pinecone Ornaments
Start with clean, dry pinecones—sometimes the tricky part is finding ones that aren’t broken or too open. Once you’ve got your pinecones, a light coat of paint can change their whole look. White paint on the tips can mimic snow, or try gold or silver for a more festive touch. Glitter? Yes, but you might want to apply it sparingly so it’s not too overwhelming; it’s nice when the pinecone’s texture still shows through.
Attach a loop of ribbon or thin twine to the top with a dab of hot glue, and you’ve got yourself a rustic yet charming ornament that feels handmade without too much fuss. They hang beautifully and even smell faintly woody if you keep them near heat. I found that making a few different sizes creates a nice cluster effect on the tree.
Using Dried Citrus Slices
Drying citrus slices—like oranges or lemons—is surprisingly easy. Slice them thinly, lay them on a baking sheet lined with parchment paper, and dry at a low oven temperature for a couple of hours. It’s a slow process that needs a bit of patience, but the result is worth it. These slices keep their natural color, and the drying brings out a faint scent that lingers just enough to remind you of fresh fruit without being overpowering.
Once dried, they can be threaded with twine or thin ribbon to hang on your tree or placed in bowl arrangements with cinnamon sticks and pinecones. The natural shapes and warm tones fit right into a cozy holiday scene. Plus, they feel quite different from typical shiny baubles; it’s a subtle way to mix textures and smells into your decorations. You might wonder if the scent really lasts through the season—sometimes it fades quicker than you’d hope, but refreshing the arrangement or storing slices in an airtight container may help hold that freshness longer.
How To Display Your Ornaments

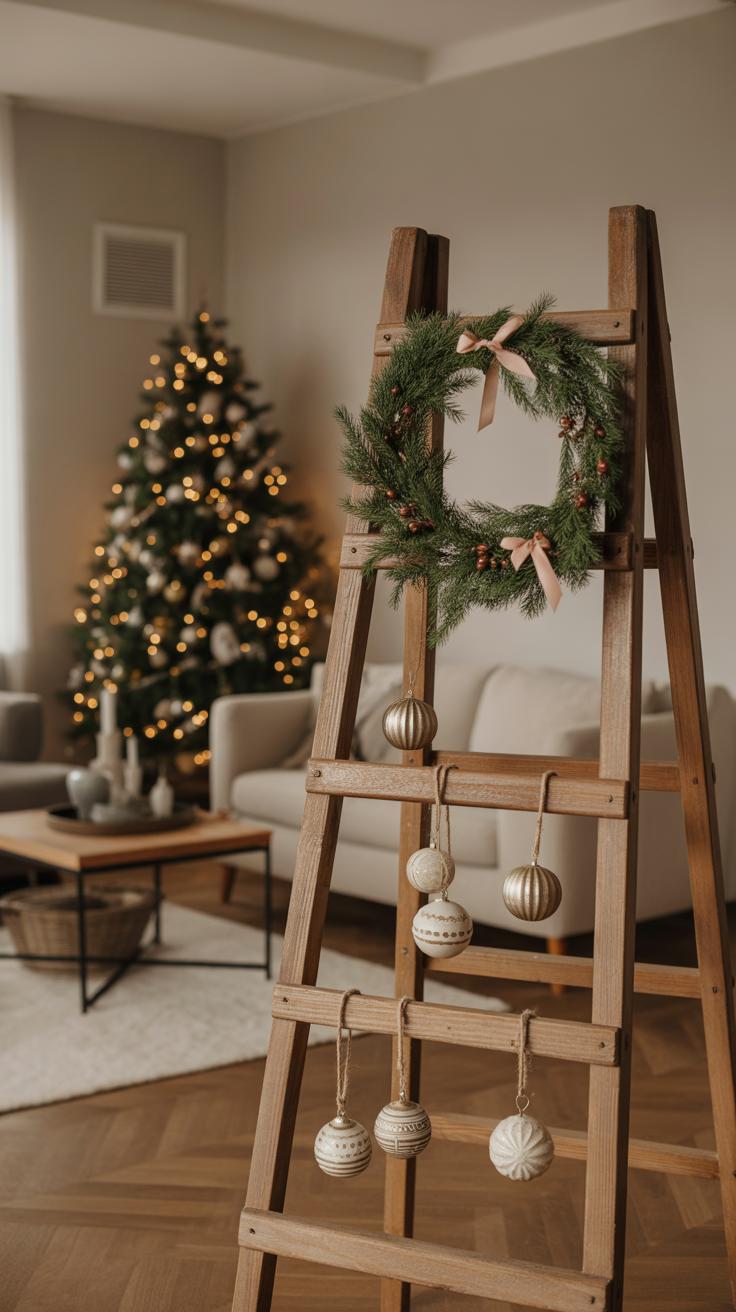
Finding ways to show off your handmade ornaments can be just as fun as making them. One straightforward method involves attaching ribbons or hooks. I usually go for thin satin ribbons, which can be tied in neat bows or simple loops, making hanging easy on branches or even walls. Sometimes, I use small metal hooks—those little S-shaped ones you find at craft stores—they slide right onto branches without fuss. The key is to match the attachment to the look you want and the weight of your ornaments.
Another option worth trying is creating ornament garlands. Stringing your decorations together lets you spread their charm beyond the tree. You can use fishing line, twine, or ribbon to thread through small holes or around hooks on the ornaments. Once strung, drape them over mantels, doorways, or windows. I once made a mobile from lightweight paper ornaments hung at different lengths; it gave my room a casual, festive vibe that I didn’t expect but really liked. Garlands invite a little playfulness and can make rather plain spaces feel more decorated without needing a whole tree.
Do you prefer something more traditional or something a bit unexpected? Either way, these display ideas make your crafts part of the holiday scene, not just tucked away until next year.
Choosing The Right Storage Containers
Hard Plastic Containers

When it comes to fragile DIY Christmas ornaments, hard plastic containers with dividers can make a real difference. These containers keep items from bumping into each other, which means fewer chips and cracks. I’ve noticed that ornaments with delicate paint or glass tend to last longer when nested separately. The rigid walls protect against pressure from other boxes stacked on top. Plus, having built-in dividers means you don’t have to improvise with paper or foam every time.
One thing though, these containers can sometimes be a bit bulky or expensive, which might not work for everyone’s storage space or budget. You might ask yourself, is it worth investing in these? For me, the peace of mind alone made it a yes, particularly for treasured ornaments that I don’t want to replace anytime soon.
Using Cardboard Boxes Safely
Not every ornament needs a fancy box. Cardboard boxes can work well, especially for sturdier decorations. But they do need some help. Reinforcing the bottoms with extra tape or even a thin layer of cardboard helps keep the box from collapsing under weight. I once had a box cave in and scatter decorations across the floor – it’s not fun.
Organization inside the box is key too. You could create simple dividers with cardboard scraps or use small paper cups to hold individual ornaments. It’s not perfect, but it reduces movement and protects the shapes. Though cardboard won’t give you the hard protection of plastic, careful packing can do quite a bit. Still, I usually reserve this method for less fragile or easily replaceable pieces. It’s a practical choice when space or funds are tight, but just be prepared for some wear and tear over the years.
Preparing Ornaments For Storage

Cleaning Ornaments
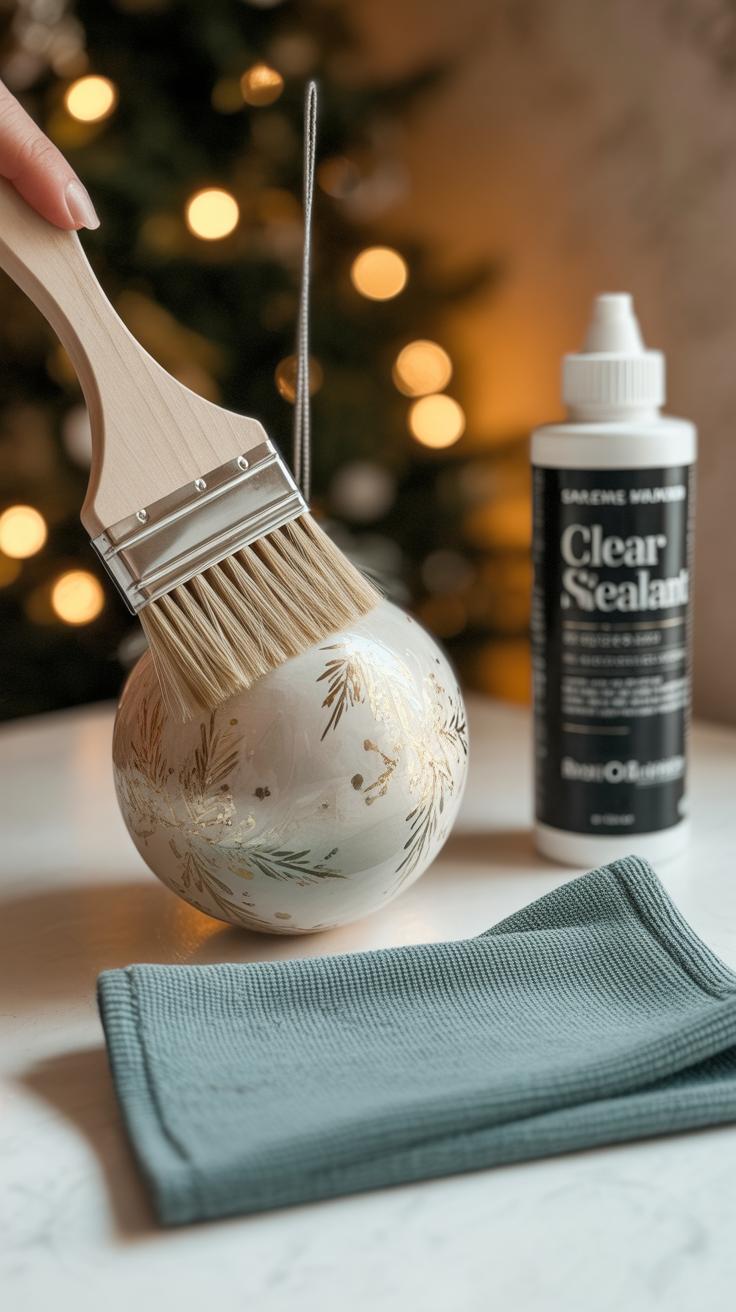
Before tucking your ornaments away, it’s a good idea to give them a little cleaning. Dust settles even when we can’t see it, and that layer might dull your handiwork. Take a soft, dry cloth or a gentle brush—sometimes a paintbrush works well—and carefully remove surface dust. For ornaments made of glass or plastic, a slightly damp cloth can help, but avoid soaking them. If you have something with glitter or fragile paint, be extra cautious; a quick, gentle wipe usually does the trick.

Personally, I find it tempting to rush through this step, but taking a few extra moments can save you time later when decorations shine bright again next year. Are all parts dry before storing? That’s key. Moisture can cause damage or promote mold, which you definitely want to avoid.
Wrapping And Padding
Once your ornaments are clean and dry, wrapping is next. Tissue paper is a classic choice, soft enough to protect delicate surfaces without scratching. For more fragile pieces—think ceramic or glass—bubble wrap offers extra cushioning against bumps and knocks during storage. You might even wrap some in a layer of tissue followed by bubble wrap for added safety.
Organizing them individually does take a bit of patience. When I hurriedly tossed ornaments together in the past, I occasionally found chips or smudges the following year. So, if you want to keep those simple Christmas decorations looking like new, consider wrapping each one separately. That said, not every ornament requires the same level of care. Some, like sturdy wooden or felt ones, can handle less padding, so you might save time and materials there.
In the end, a little thought about how to wrap and protect your ornaments now can mean fewer worries next season. Which types of ornaments do you think need the most attention? It’s worth experimenting to find what works best for your collection.
Organizing Your Storage Space
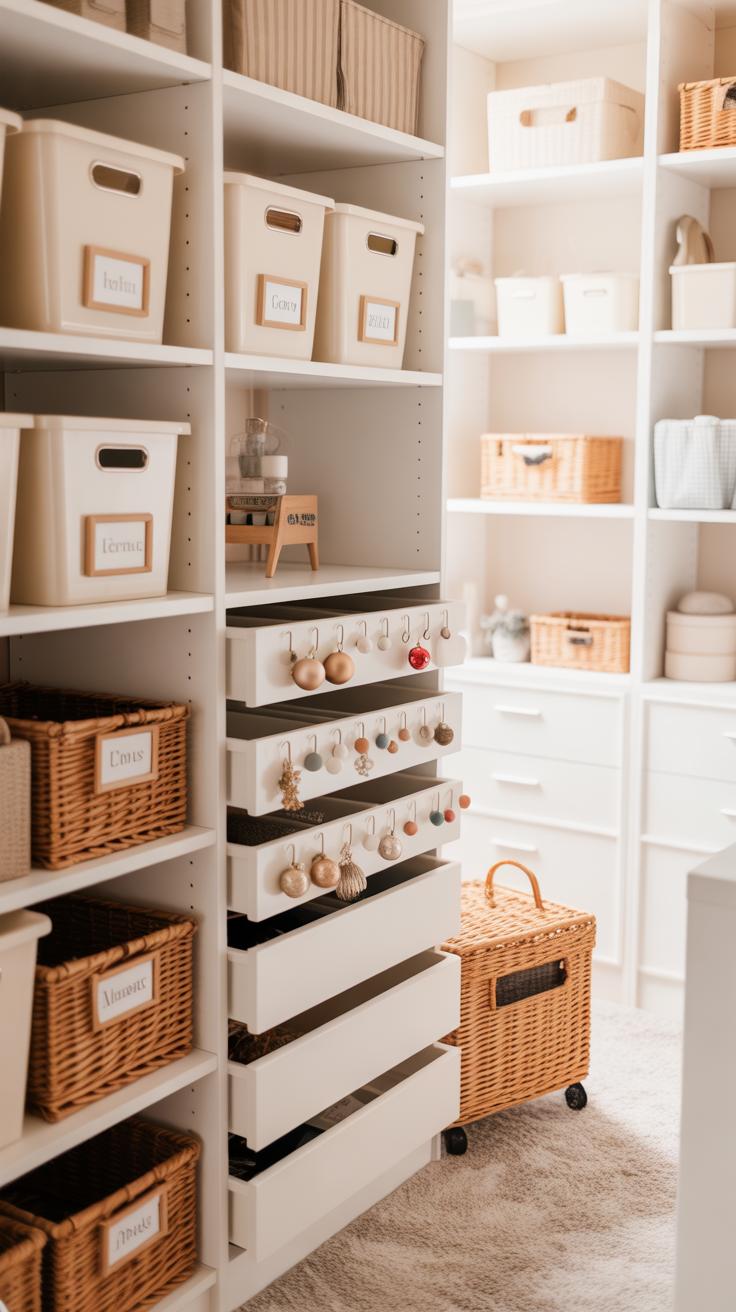

Keeping your ornament storage organized makes holiday decorating easier—no scrambling through boxes to find your favorite pieces each year. You want a system that helps you spot exactly what you need quickly, without frustration. Clear labels play a big role here. When containers have simple tags describing what’s inside—like “homemade glitter balls” or “family photo ornaments”—you save time and avoid that annoying guesswork.
Think about when you’re putting ornaments away after the holidays. Label the container right then and there. I’ve found that my own system works best when labels face outward on clear bins. It’s tempting to skip this step because, well, it feels like extra work, but it really pays off later.
Using vertical space can also transform a cramped closet or basement. Stacking clear, sturdy containers lets you fit more in a smaller area. You might even hang some storage bags or small boxes on wall hooks or an over-the-door rack. This frees up floor space where large tubs usually go. It sounds simple, yet I often forget to rearrange my storage each year and end up with a jumbled mess—maybe you do too.
Does your current system let you reach the ornaments without pulling everything down? If not, try grouping similar items together and placing the most-used containers at eye level. It’s a small change but can make a big difference every December.
Maintaining Ornaments Over Time
Each year when you bring out your DIY Christmas ornaments, it’s worth taking a moment to look them over carefully. Small cracks, loose parts, or fading paint can sneak up on you. I usually find a few that need gentle touch-ups or a bit of glue to stay intact. You might be surprised how a quick fix extends their life—sometimes by years.
Here’s a simple routine to keep in mind before decorating:
- Look for chips, tears, or loose elements on each ornament.
- Clean them gently; dust and grime build up even if stored properly.
- Use mild soap and water on non-porous materials but test first.
- Repair minor damage now so it doesn’t worsen during the season.
Extreme temperatures can be tricky. Ornaments stored in places like attics or garages might face hot summers or freezing winters, which can cause materials to warp, crack, or fade unpredictably. I try to keep mine in a cool, dry spot inside the house, ideally where the temperature is steady—not too hot in summer or cold in winter.
If your storage is prone to temperature swings, consider airtight containers or insulated boxes. It’s a bit more effort, but seeing fragile decorations ruin is frustrating. Do you ever wonder if that old ornament might last just one more Christmas? Taking these small steps makes that a little more likely.
Conclusions
Creating easy DIY Christmas ornaments can enhance your holiday experience with personal and joyful decorations. With simple materials and clear steps, anyone can make charming ornaments. Taking time to store these decorations properly keeps them safe and ready for each Christmas season. Good storage protects your handiwork from damage and fading.
Your easy DIY Christmas ornaments will become treasured parts of your holiday traditions. By following practical crafting tips and storage advice, you ensure your festive decorations remain beautiful year after year. Enjoy making and keeping your Christmas ornaments with ease and care.


