Introduction
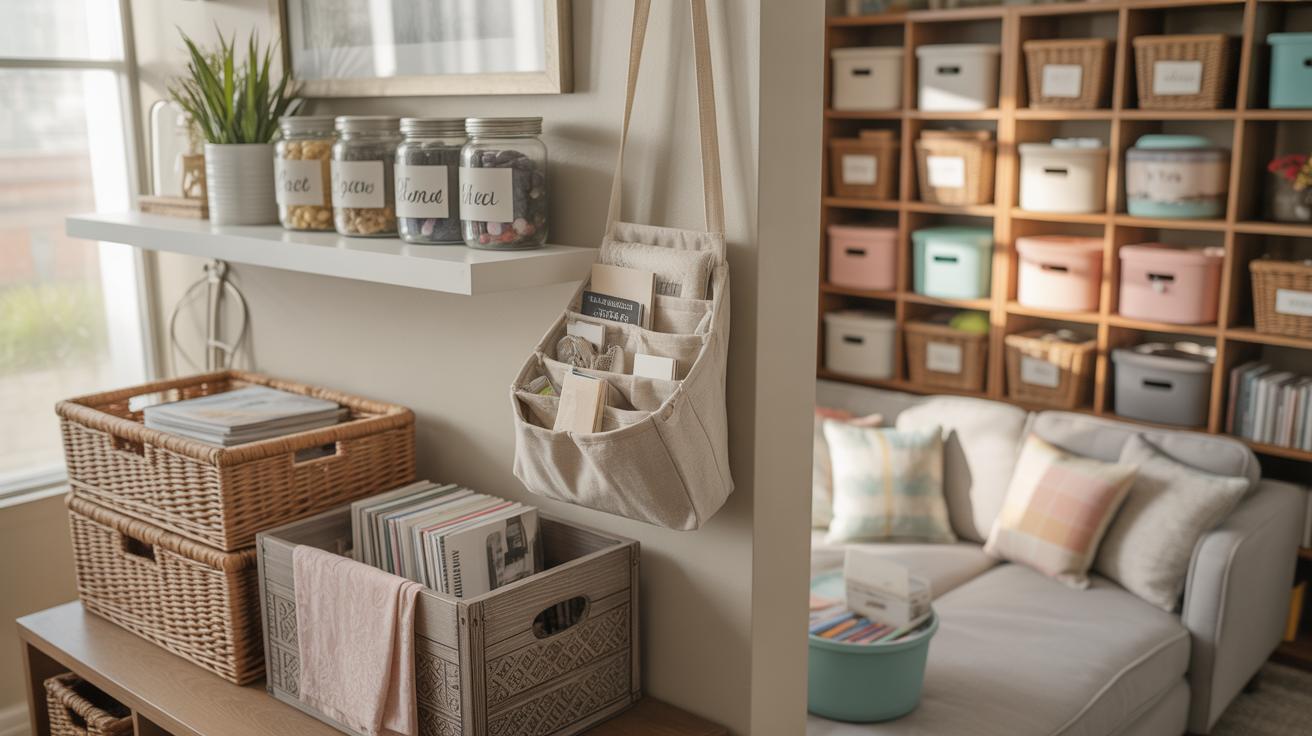
DIY crafts offer a great way to express your creativity while organizing your home. Love for DIY crafts can help you beautify your home storage, making your living space not only neat but also visually appealing. With simple materials and a bit of effort, you can create storage solutions that fit your style and needs perfectly.
In this article, we explore various ideas and practical tips on how to use DIY crafts to improve your home storage. You will learn easy projects to build or decorate storage units and ways to add a personal touch to your space. These ideas are designed to be straightforward, fun, and doable for anyone interested in enhancing their home organization with love and creativity.
Choosing the Right Materials for DIY Home Storage
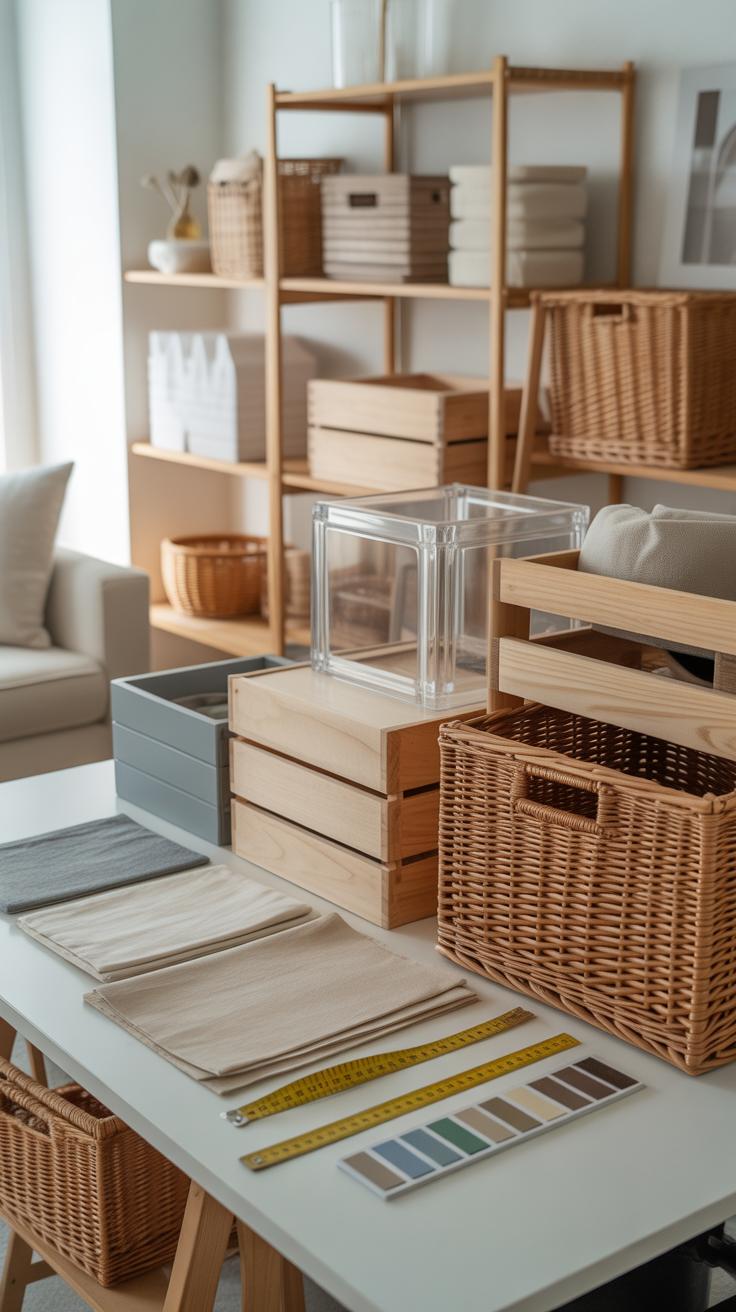
When picking materials for your DIY home storage projects, cost and how easy it is to find them often shapes your choices more than you expect. Wood, for example, offers solid durability and a natural look that’s hard to beat. If you find yourself near a lumber yard or even hardware stores, scrap wood can come surprisingly cheap. Still, working with wood may take some effort—cutting and sanding aren’t always fun, especially if you’re new to this.

Then there are recycled materials, which I think many of us overlook. Old crates, pallets, or even cardboard boxes can be turned into creative shelves or storage bins with a little paint or fabric. These are both affordable and better for the environment, although they won’t last forever and may require some upkeep.
Fabric is another option that brings softness and flexibility. It works well for making baskets or drawer dividers. Canvas or cotton blends don’t usually cost much, especially if repurposed from old clothes or linens. Still, fabric isn’t going to hold heavy stuff well—you’ll want to reinforce it or combine it with sturdier materials for bigger projects.
Plastic and glass containers are great for organizing small items like craft supplies. They’re easy to stack and see through, which is a bonus. But I sometimes wonder about long-term durability and sustainability here, given how plastic can wear down or crack over time.
Here’s a quick look at which materials suit different storage types:
- Shelves: Wood or strong recycled pallets work best.
- Baskets: Fabric, wicker, or braided recycled materials.
- Boxes: Cardboard for lightweight, wood or plastic for sturdier needs.
- Organizers: Plastic containers, fabric dividers, or upcycled jars.
Can you imagine turning something discarded into a neat storage piece? It’s satisfying—and you’ll probably save a bit, too. Still, thinking about how long your project needs to last influences the materials you pick more than anything.
Basic Tools You Need for DIY Craft Projects

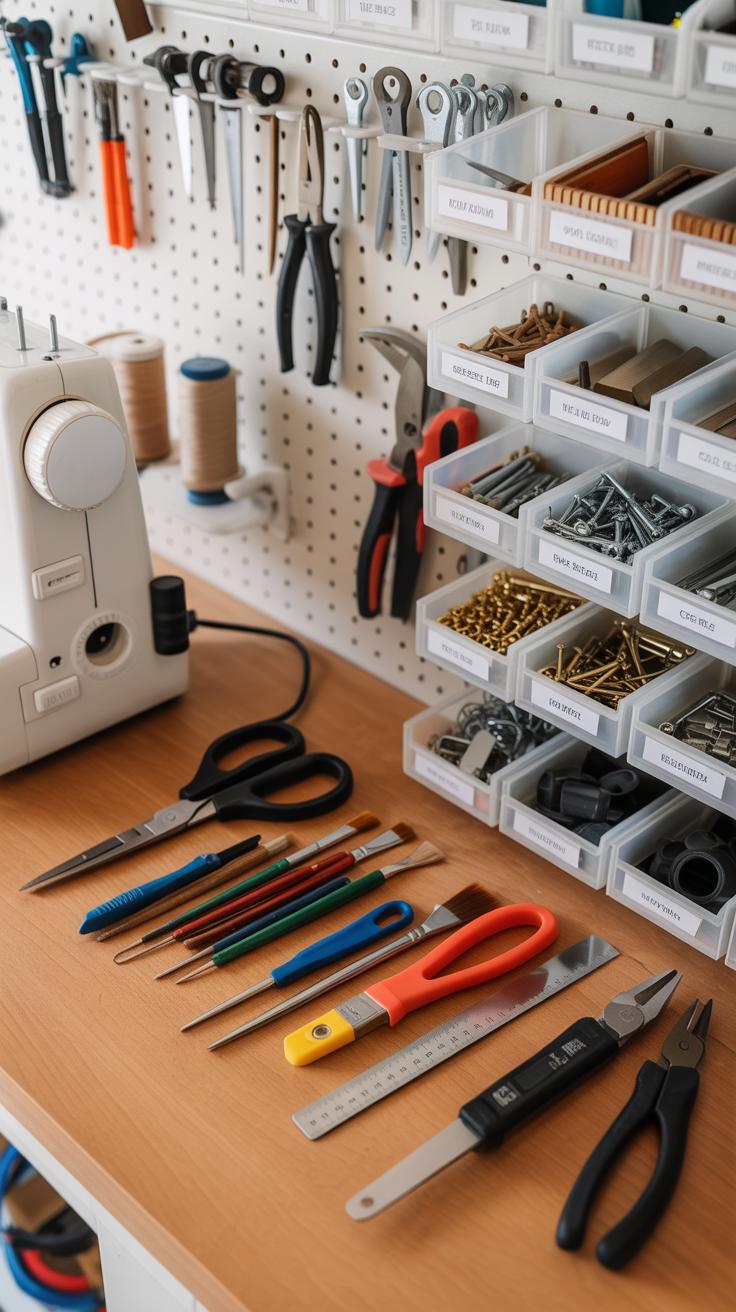
When you start working on DIY crafts for your home storage, having the right tools can make all the difference. You don’t need a fancy toolbox; just a few basic hand tools will do most of the work. Scissors are a must-have—they’re simple but essential for cutting fabric, paper, or even thin wood. A glue gun, though you might hesitate at first, quickly becomes your best friend for sticking materials together without fuss. It’s not perfect for everything but works surprisingly well for quick fixes.
Hammers and screwdrivers might sound a bit intimidating if you’re new to this, but they’re easier to handle than you think. A small claw hammer can help with nails for wooden shelves or frames. Screwdrivers—ideally a set with both flathead and Phillips heads—allow you to attach or disassemble parts smoothly. Look for ones with comfortable handles; it makes a difference if you’re working for a while.
Safety can’t be overlooked, even with these simple tools. Never ignore basic precautions like wearing protective gloves or glasses when cutting or hammering. It might seem a bit much, especially for small projects, but accidents happen quickly. Also, take your time with each step to avoid slipping or poking yourself with a screwdriver. Think of your safety as part of the craft—if you’re careful, you’ll enjoy the process more and avoid setbacks.
Building Simple Shelves and Racks
Step-by-Step Shelf Construction

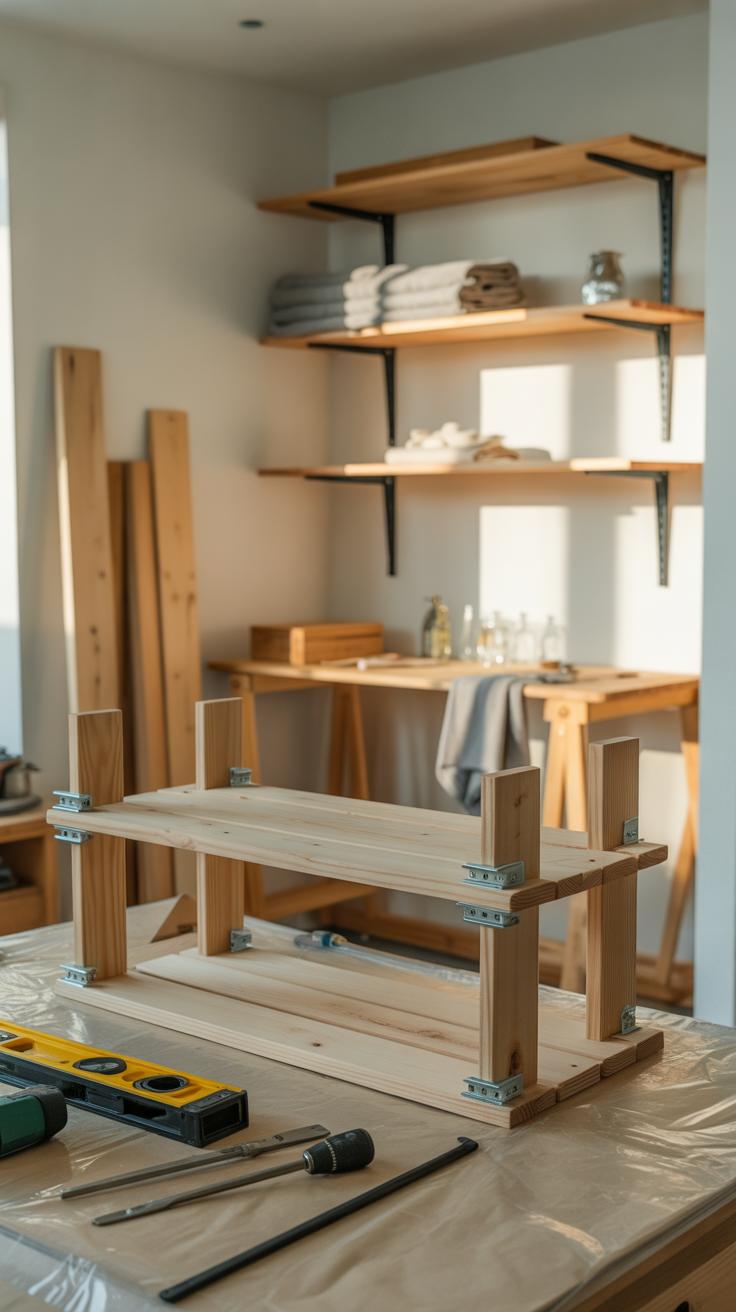
Making shelves for your home storage doesn’t have to be complicated. Start by choosing your material—common wood planks, plywood, or even reclaimed wood work well. Measure the space where you want to place the shelf, then cut your materials to size. You’ll need supports; simple L-brackets or wooden cleats fixed to the wall are easy options. Attach these first, ensuring they’re level. Next, place your shelf boards on top and secure them with screws. Double-check the sturdiness—you don’t want shelves that wobble when you put things on them.
Think about spacing between shelves — a good rule is to leave enough room for the tallest item you want to store. If you’re feeling unsure about measurements, it’s okay to take a moment, re-measure, or even hold an item up against the wall to get a sense of scale. Not every step needs to be fast or perfect. This process can take some trial and error, and that’s fine.
Customizing Your Shelves
Once your shelves are built, it’s tempting to just load them up and call it done. But adding a personal touch can make a big difference. Painting your shelves in a color that matches or contrasts with your walls can brighten or soften the space. Maybe you want a matte finish; other times, a glossy coat works better, depending on your style or the room’s purpose.
Labels are another easy way to add order and charm. You might use chalkboard paint on small sections for changing notes, or stick-on labels for a neater look. Some prefer decorating with stencils or simple patterns on the shelf edges—nothing too elaborate, just a subtle detail that feels like yours. Have you thought about mixing materials? Adding wicker baskets or fabric bins on the shelves can keep things tidy and add texture.
Building and customizing shelves can be surprisingly satisfying. It’s a project where a little effort yields visible and useful results that help organize your space *and* express your style. At least, that’s been my experience when tackling a corner that needed some order and a bit of personality.
Creating Decorative Storage Boxes

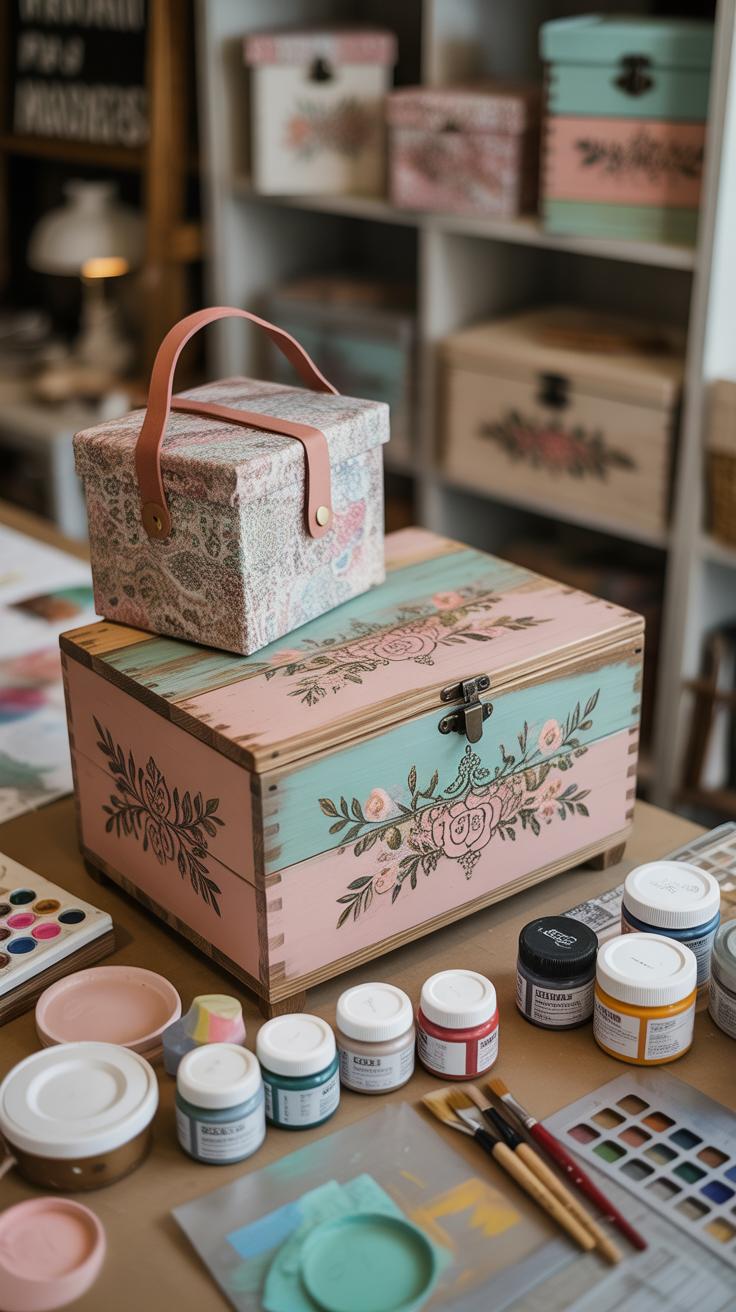
Making your own storage boxes can be surprisingly rewarding. You don’t need fancy materials—simple recycled cardboard or old wooden crates work just fine. I’ve often grabbed empty cereal boxes and thicker cardboard from packaging, then cut, folded, and taped them into box shapes that perfectly fit my cluttered drawers. It’s almost like giving new purpose to what might otherwise be tossed out.
When building these boxes, keep size in mind. Think about the items you want to store; small things like buttons or office supplies need smaller compartments, while scarves or cables need larger, sturdier boxes. Recycled wood pieces also provide a strong base but might require a bit more patience to sand and assemble.
Making Boxes from Recycled Materials
Turning leftover materials into neat storage doesn’t have to be complicated. Cardboard is easy to cut and glue, making it ideal for beginners. Wooden boxes, on the other hand, take a bit of skill but last longer. I once transformed a plain fruit crate by sanding rough edges and adding some hinges I found in the garage—turned it into a rustic storage box that now holds craft supplies.
Think about sealing the cardboard with glue or paint to make it sturdier. It can surprise you how durable these handmade boxes become with just a few coats of glue and a layer of decorative paper or fabric. Sometimes, you don’t even need new glue; leftover wallpaper samples or wrapping paper work great for lining the inside or wrapping the outside.
Decorating Ideas for Boxes

When it comes to decorating, the sky isn’t really the limit—you might prefer something simple, or maybe you want bold patterns that stand out. I’d suggest trying these approaches:
- Paint just the edges for a minimalist look.
- Cover the box with patterned paper or scrapbooking sheets.
- Use fabric scraps glued on the surface for texture.
- Add labels made from chalkboard paint or tags tied with string.
Sometimes a box doesn’t have to be perfect. The charm of a hand-decorated box can come from uneven brush strokes or slightly mismatched patterns. Have you tried mixing materials? Paper, tape, fabric, and paint together can create interesting effects you might not expect at first.
Organizing with DIY Fabric Pouches and Bags
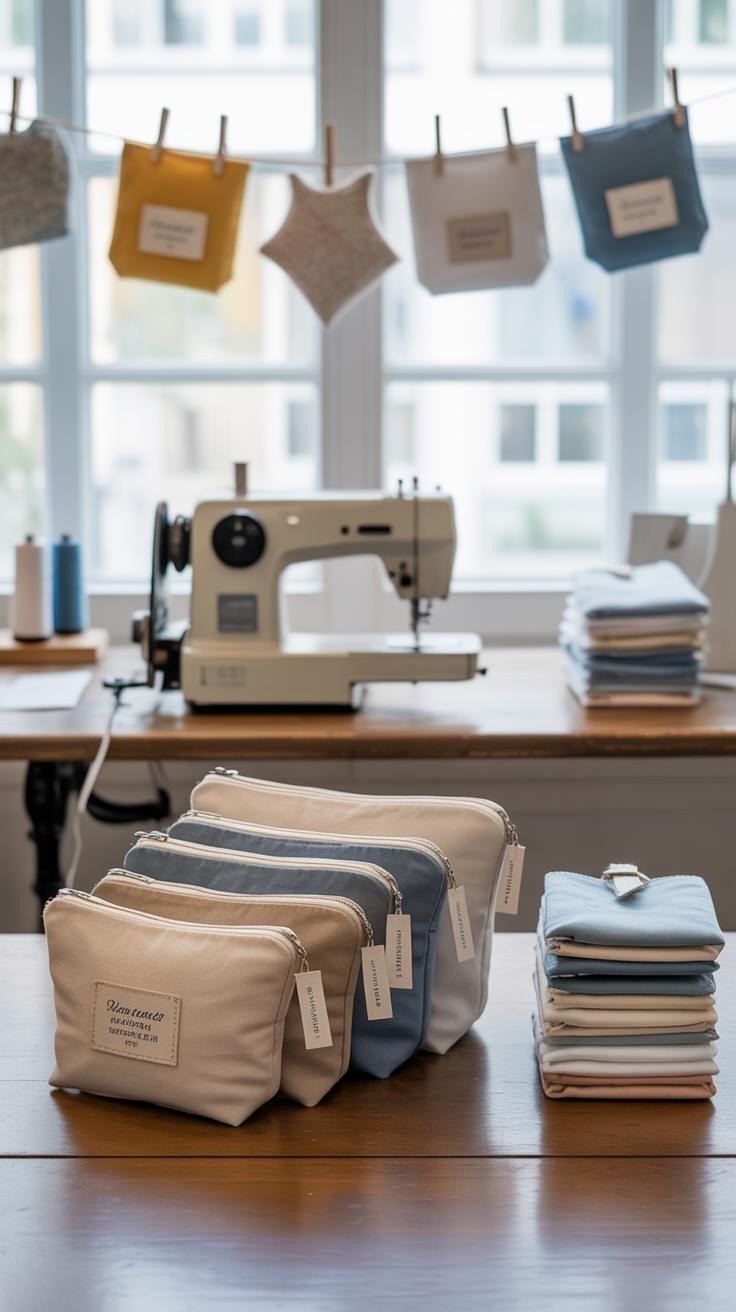
Fabric pouches and bags can be a simple yet flexible way to organize your home, especially if you enjoy crafting. Making these yourself lets you choose materials, sizes, and styles that fit exactly what you need—no extra fuss, and no off-the-shelf compromises. Whether it’s storing cables, makeup, or even kids’ small toys, these fabric holders create separate, neat spaces that prevent clutter from spreading.
You don’t need fancy tools or advanced sewing skills to get started. Basic sewing techniques, such as straight stitching along edges and adding a zipper or drawstring, can turn a piece of fabric into a useful pouch. It might sound intimidating but stitching a rectangle with a bottom seam and some form of closure can be surprisingly forgiving.

Consider how these fabric bags can transform your storage approach:
- Separate craft supplies like buttons or threads in small bags to keep them sorted.
- Collect children’s small toys or puzzle pieces to avoid losing them.
- Store seasonal accessories such as scarves or gloves, making them easy to find when needed.
There is also a certain charm in seeing a drawer full of neatly made fabric holders instead of a messy jumble. You might find yourself wanting to make more just because they bring order—and somehow warmth—to your space. Do you think handmade fabric bags could add a personal touch to your home organization?
Using Labels to Enhance Your Storage System
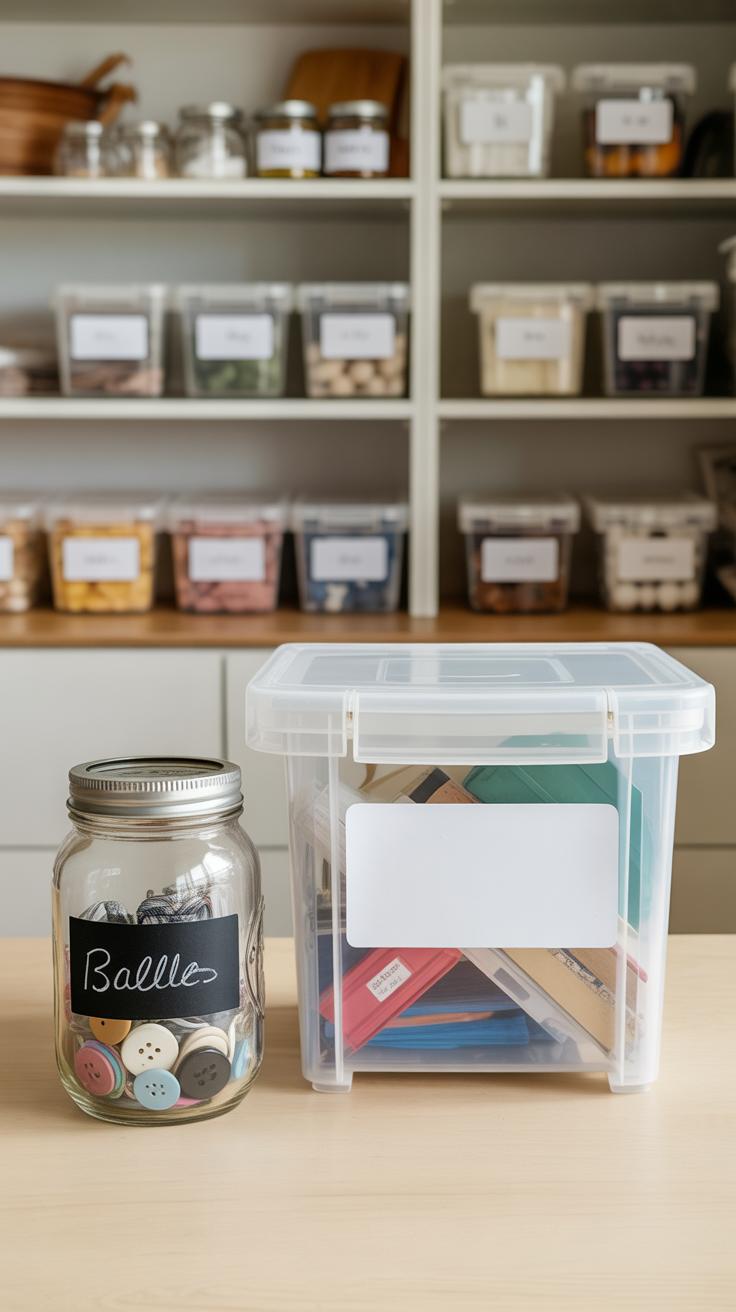
Labels might seem like a small detail, but they truly change how you interact with your storage. When you label containers, you don’t just guess what’s inside anymore. It saves time, reduces frustration, and actually helps keep things tidy because you know exactly where to put things back.
Making labels attractive yet clear can be surprisingly satisfying. You don’t have to be an artist—or a calligrapher—to create labels that look good. Simple printed fonts, neat handwritten tags, or even small doodles can do the trick. It’s about balancing style with readability, and sometimes, your labels might evolve as you get inspired.
Choosing Label Styles

Think about how you want your labels to feel and fit into your space. You could handwrite them with colorful markers for a personal touch, or print crisp labels from your computer for a cleaner look. Some people enjoy getting creative—adding small sketches or borders that match the room’s vibe. Maybe a mix is the way to go, combining neat prints for pantry items and playful handwritten ones for craft supplies. There’s no one right choice here. Just what works for you and your style.
Placement for Easy Identification
Where you place labels makes a real difference. Front-facing labels on boxes or jars are often best, making it quick to spot what you need without moving things around. For deeper shelves or stacked bins, labels on the top can work too, but you’ll have to lift items more often. Sometimes side labels help if you store containers sideways. Think about how you usually approach your storage. Do you stand in front of it, or look from above? Try to match labels to your habits for less hassle. I’ve noticed labeling the edge of shelves also works when you store open baskets—it’s less common but surprisingly effective.
Integrating Color Coding in Storage Designs
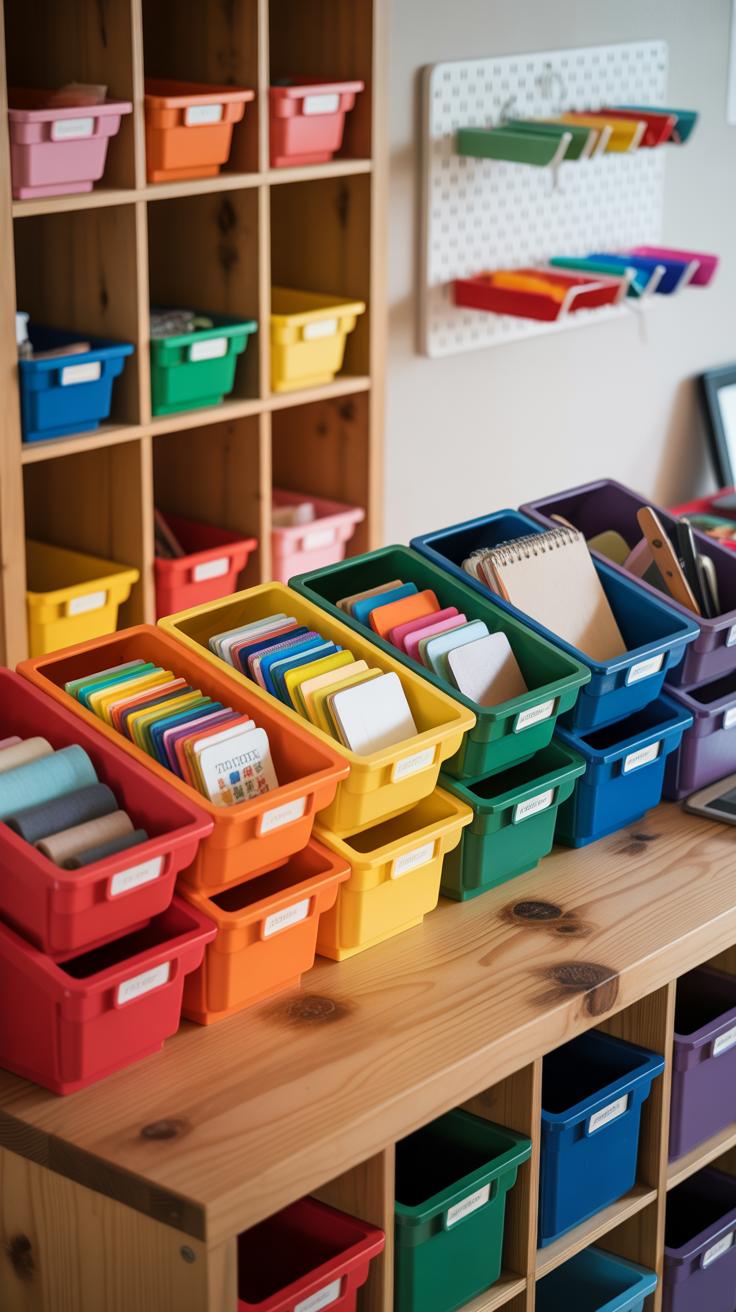
Using color in your storage system can really change the way you organize and experience your space. Colors don’t just look nice—they work as quick visual cues that help you find stuff faster, maybe without even thinking about it. Imagine reaching for a box and knowing exactly what’s inside because it’s blue, or instantly spotting your kids’ art supplies in the bright yellow bin.
Selecting a Color Scheme
Picking colors isn’t just about what feels pretty that day. You want shades that make sense for the room and your lifestyle. For example, soft tones might be calming in a bedroom, but brighter hues could energize a craft room or kitchen. Sometimes, sticking to a simple palette like pastels or primary colors keeps things neat. But then again, mixing unexpected colors can add personality—and maybe that messiness feels right for you. Think about how many categories you need. Too many colors can overwhelm, but too few might make sorting tricky.
Applying Colors to Storage Items

You don’t have to be a pro painter to add color. Spray paint works wonders for smooth surfaces, while painters’ tape helps create stripes or blocks of color. Alternatively, colored tapes and tags offer a quick way to code without a permanent change. Fabric covers or colored baskets bring texture and soft color, which some people prefer over painted boxes. Another simple trick I’ve found useful is using colored cardstock for labels—easy to swap out and refresh without hassle. Sometimes, it’s the small, imperfect touches that make the system feel more personal and really usable.
Maximizing Small Spaces with DIY Storage Ideas
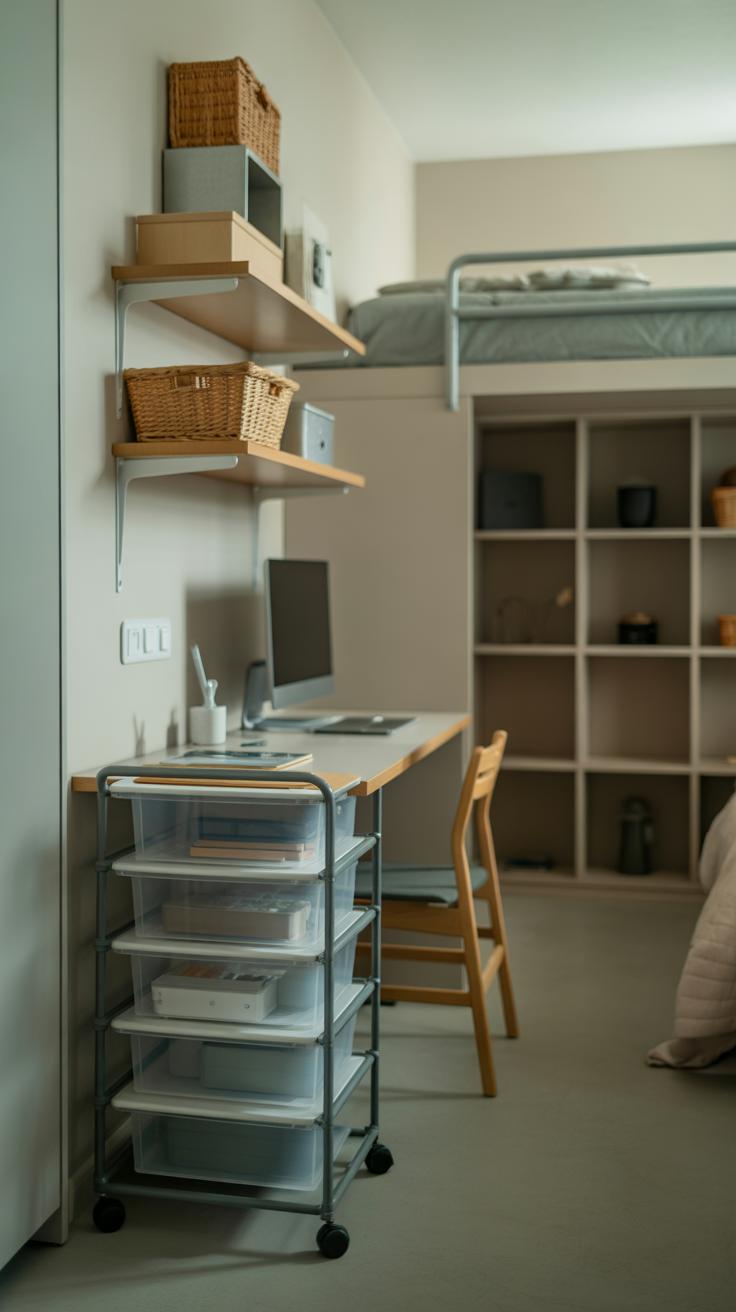
When space feels tight, every corner counts. Small or awkward spots in your home often get ignored, but they don’t have to. With a little creativity and some DIY spirit, you can turn those tricky areas into useful storage zones.
Think about vertical space—walls are often a blank canvas waiting for attention. Installing narrow shelves or a series of hooks can open up new storage possibilities, especially in kitchens or bathrooms. For example, a few floating shelves above a door frame can hold spices or small plants without cluttering counters. Or, hooks along a hallway can keep bags and scarves tidy and within reach.
Then there’s multipurpose furniture, which might surprise you. Why not add storage baskets under a bench at the entryway? Or a coffee table with built-in compartments for magazines and remote controls? These ideas blend storage with everyday life, so the room feels organized instead of cramped.
Sometimes, it takes a moment to see that little niche behind a couch or under the stairs as storage potential. What could be hidden away there—a slim bookcase, a rolling crate, or even hanging organizers? Don’t overlook these “in-between” spaces; they’re actually lifesavers.
Have you tried fitting storage into odd spots before? It’s not always straightforward, so give yourself some flexibility. A shelf that’s not perfectly aligned might still do the job. In the end, small tweaks can make a big difference in keeping your home neat and personalized.
Maintaining and Updating Your DIY Storage

Keeping your DIY storage projects in good shape doesn’t have to be complicated. A quick wipe-down with a damp cloth now and then can prevent dust and grime buildup. If you used wood or fabric, checking for small tears or chips regularly can save you from bigger repairs later. Sometimes, a little sanding and repainting can make an old box look almost new again.
When something breaks—like a loose hinge or a peeling corner—fixing it promptly usually takes just minutes. A drop of glue, a screw tightened here, or a patch added there can keep your storage working well. It may feel like minor hassles, but avoiding neglect keeps everything functional longer, and honestly, that’s satisfying.
Over time, your storage needs change, right? Maybe you want a different look or clearer labels. Redecorating with fresh paint or swapping out decorations can renew your space without starting from scratch. Even updating labels—using chalkboards, printed tags, or hand lettering—helps keep things organized as your priorities shift.
Have you tried repurposing parts of your projects when you want a change? Sometimes a drawer from an old crate becomes a shelf after a little tweak. It’s a simple way to keep things feeling fresh without tossing what you’ve worked on. What small updates make you want to use your DIY storage more? That’s an interesting question to consider as you maintain and adjust your space.
Encouraging Family Participation in DIY Crafts
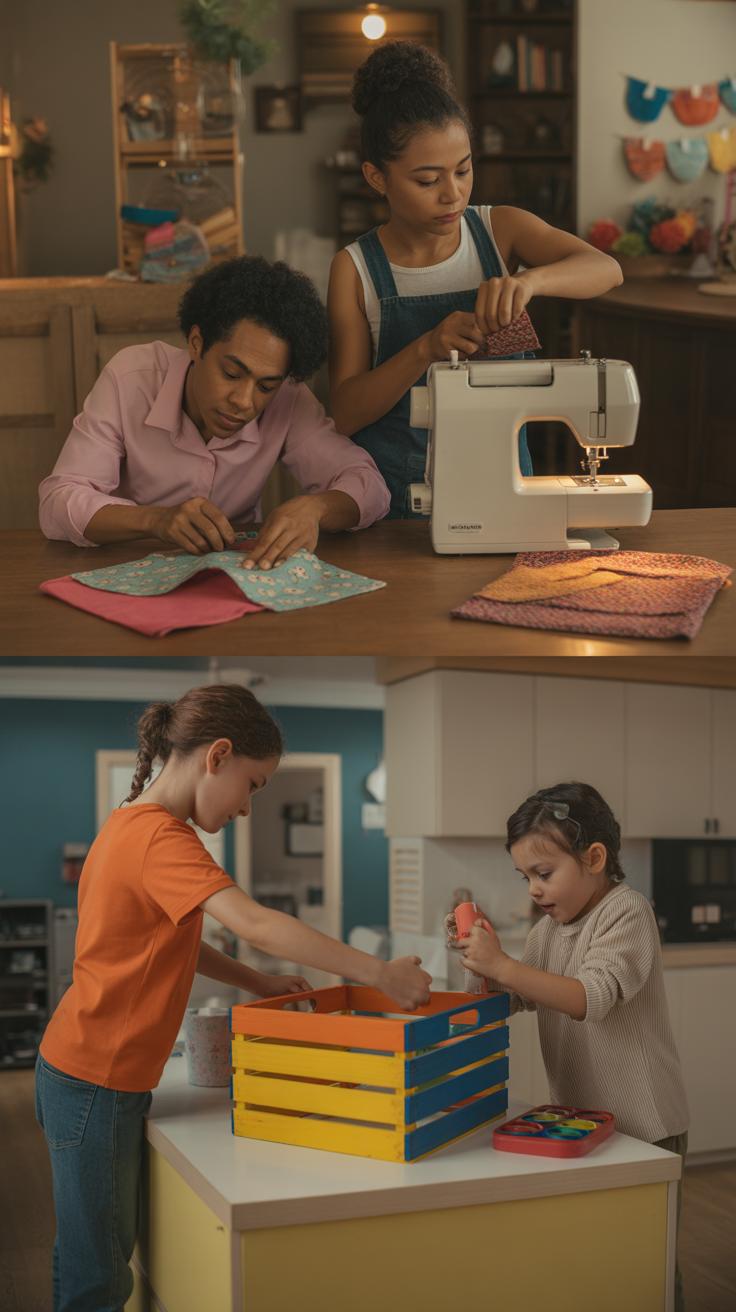
Getting the whole family involved in DIY projects for home storage can turn a simple chore into something surprisingly enjoyable. When everyone has a role, even the smallest contributions feel meaningful. Kids might get a kick out of painting colorful labels or sorting small items, while adults handle cutting or assembling. This cooperation can create moments that stick—maybe you’ll catch some laughter over a paint spill or a curious question about the tools being used.
Assigning manageable tasks to younger children helps them feel capable without getting frustrated. Think about activities like decorating boxes with stickers, drawing on jars to hold stationery, or even folding fabric bins. These kinds of simple crafts not only sharpen motor skills but also let kids express creativity right within the storage theme.
When family members combine their skills, they can build or personalize larger storage solutions together. Imagine everyone adding their touch to a wall organizer or decorating a reclaimed wood shelf. It’s not just about the finished piece, but the process—the teamwork, the decision-making, and yes, the occasional disagreement—that makes it worthwhile. Do you remember a time when working alongside family brought a project or a moment alive? That’s where DIY crafts really shine.
Conclusions
Love for DIY crafts opens up many possibilities to improve your home storage beautifully and cost-effectively. By using simple materials and creative ideas, you can organize your belongings while adding charm and personality to your home. The projects shared here help you start with practical and enjoyable steps to beautify your space.
Remember, effective home storage reflects your style and meets your everyday needs. Keep experimenting with new crafts and refining your ideas. Your home will become a place where order and creativity live together, making everyday life more comfortable and inspiring.


