
Introduction
Halloween is a time for creativity, fun, and a little bit of spooky excitement. You can make this season even more special for your kids by helping them craft Halloween decorations that will bring a festive and spooky look to their rooms. Halloween crafts are a great way to keep children engaged, encourage imagination, and celebrate this unique holiday.
This article explores various Halloween crafts that kids can easily make. The crafts are designed to be fun and simple, helping your children transform their rooms with themed decorations. From pumpkins to ghosts, there are plenty of ideas to make Halloween crafting both fun and educational. Are you ready to spookify your child’s room with creative projects? Let’s dive into the best Halloween crafts for kids.
Halloween Crafts For Kids To Spookify Their Rooms
Why Halloween Crafts Are Great for Kids
Halloween crafts give kids a chance to try new things with their hands. When children cut, glue, and color, their fingers get stronger and more precise. These are called motor skills, and they’re important for many things—like writing or tying shoes.

Crafting also lets kids use their imagination in fun ways. When a child decides what a ghost looks like or how a pumpkin should be decorated, they learn to think creatively. It’s not about being perfect. It’s about making choices and seeing what works.
Another good thing is that making Halloween crafts can bring families closer. Parents and kids sharing scissors, paint, and ideas can laugh and talk. Sometimes, those moments create memories that last much longer than the craft itself.
Building Creativity Through Crafting
Halloween crafts invite kids to design and invent. When kids draw scary faces on pumpkins, they practice thinking about shapes and expressions. A kid might decide a pumpkin needs big eyes or a crooked smile. This kind of decision builds creativity bit by bit.
Making ghost decorations lets kids imagine how spooky or friendly their ghosts should be. They choose materials, colors, and size, creating something that is truly their own. And that’s a good feeling, even if the ghost ends up looking a little funny or odd.
Each project teaches kids that there’s no single right way to do things. They learn by trying, making mistakes, and trying again. That’s how creativity grows slowly but steadily.
Crafting As Quality Family Time

Crafting Halloween items is a chance for parents and kids to spend time together in a relaxed way. It’s not a race or a test. It’s a time to laugh at silly mistakes or admire each other’s work.
Parents can join by asking questions like, “What color do you want here?” or “How big should this pumpkin be?” It makes kids feel heard and valued. Sharing stories about Halloween memories while crafting can also make the time enjoyable.
Try playing some Halloween music or making a small craft contest just for fun. These little things turn crafting into a shared adventure. It’s a moment to connect, not just to finish a project.
Easy Pumpkin Crafts for Kids
Pumpkins are a classic symbol of Halloween, and there are plenty of simple crafts you can do with kids to bring the pumpkin spirit into their rooms. One straightforward idea is making paper pumpkins. You only need colored paper, scissors, glue, and maybe some markers or stickers. Kids can cut out oval shapes, glue them into a round pumpkin shape, and add a little paper stem on top. It’s fun to let them decorate their pumpkins however they like — some might want googly eyes, others might draw spooky faces. It feels like a small art project but with creative freedom.
Paper Pumpkin Decorations

To make paper pumpkins, gather orange construction paper, green paper for stems, scissors, glue, and something to add personality, like crayons or stickers. Start by cutting out six or more ovals of the same size from the orange paper. Fold them gently in half and then glue the folded edges together, aligning them in a fan-like circle. When all pieces are glued, it forms a 3D pumpkin shape. Cut out a small green rectangle, curl it to make a stem, and glue it at the top. Kids can personalize by drawing faces, adding glitter, or attaching pipe cleaners for vines. It doesn’t take long, and you can see how proud they get displaying their pumpkin creations.
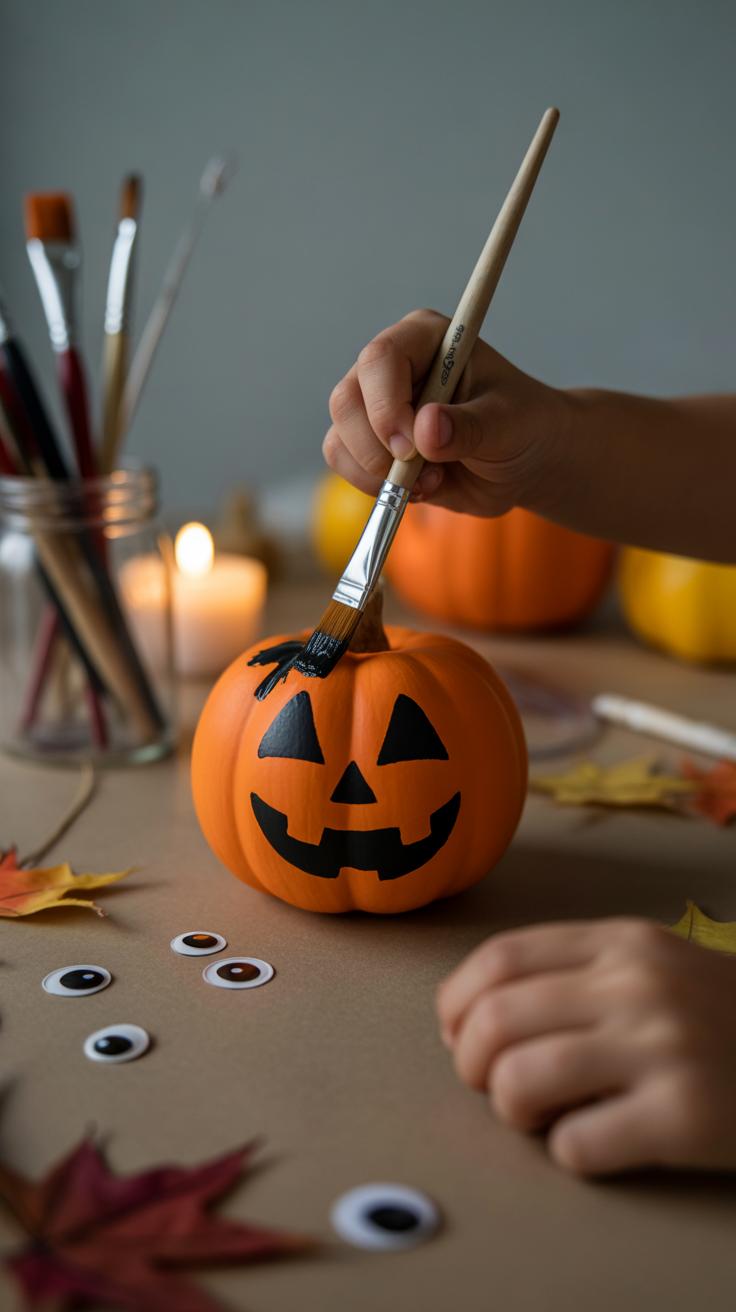
Painting Real Pumpkins With Patterns
Painting small pumpkins is another fun way to decorate without carving. First, pick smooth pumpkins that are easy to hold. Use non-toxic acrylic paints and a few brushes or sponges. Kids can paint simple designs like polka dots, stripes, or even little spider webs. I remember trying triangle eyes and goofy smiles on mine — messy but joyful. Keep the patterns basic so kids feel successful and don’t get frustrated. Make sure to keep the paints thin and let pumpkins dry flat to avoid smudging. Painting can be messy, yes, but it’s one of those activities that kids often ask to do again. It’s a great alley for them to express themselves without needing perfect skills.
Ghost Crafts That Are Fun and Simple
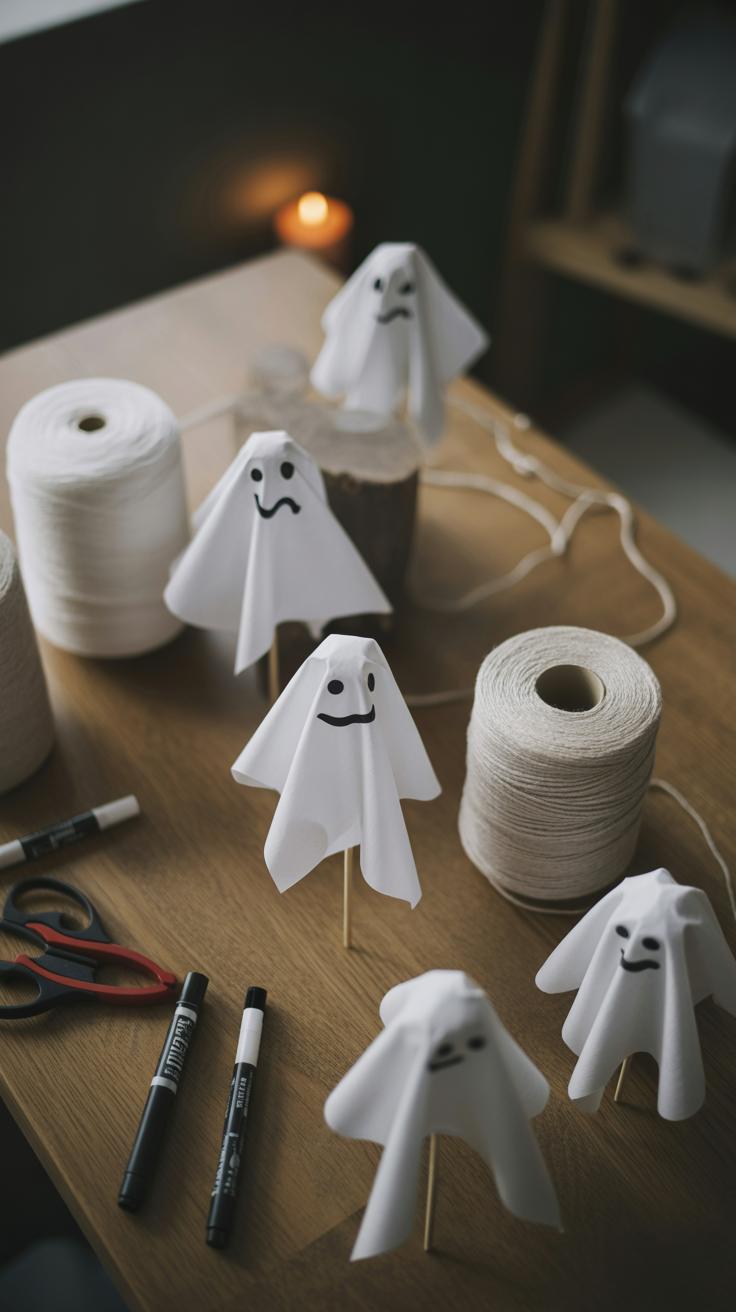
Tissue Paper Ghosts
Making ghosts from tissue paper is one of those easy projects that almost anyone can do with stuff lying around the house. Grab some white tissue paper—paper towels work too if you’re out of tissue—and a bit of string or yarn. Wrap the tissue around a small ball, maybe a scrunched-up piece of paper or cotton balls for the ghost’s head, then tie it underneath with the string to form a little ghost shape.
What I like about this is how flexible it is. You can leave the ghosts plain and floating from the ceiling, or you can draw faces on them with a marker. Maybe add some googly eyes if you happen to have them, or glue on small accessories like little hats or scarves made from fabric scraps. It’s simple but can look pretty cute or spooky depending on your style.

Almost no setup, and kids can get really creative decorating each ghost. Plus, they’re lightweight and easy to hang around the room with tape or string—a nice way to bring a little playful spirit into the Halloween vibe without needing anything complicated.
Sock Ghost Puppets
You might not think old socks have much life left—but they do, especially for Halloween crafts. Turn those socks into ghost puppets by stuffing them with cotton, old fabric, or even newspaper. Tie off the top with string or a rubber band to create the ghost’s head, and let the rest drape down like a spooky sheet.
Decorating these puppets opens up loads of fun options. You can glue on buttons for eyes, use fabric paint to sketch faces, or even add little arms with pipe cleaners. My niece loved making hers with brightly colored eyes and crazy mouths, turning them into silly characters instead of scary ghosts. It made the whole project a bit less spooky and more playful, actually.
Once done, kids can put on puppet shows with their ghost puppets. It’s a craft that doesn’t just stop at decoration—it becomes a toy, a way to tell spooky stories, or just a goofy Halloween companion. Definitely worth trying if you want something hands-on and a bit different from the usual hanging ghosts.
Spider Crafts to Add a Creepy Touch


Spiders fit Halloween perfectly, don’t they? Crafting them can be simple, safe, and a little bit spooky without crossing any lines. Using everyday items like cotton swabs, paper, and pipe cleaners, kids can create creepy-cool spiders with ease. These crafts don’t need to be complex—sometimes, the charm lies in their simplicity.
Cotton Swab Spiders
To make spiders from cotton swabs, start by arranging eight swabs in a rough spider shape—four on each side, radiating from the middle. Use glue to stick them onto a small piece of paper or cardboard. Once dry, let the kids paint the cotton swabs black, or maybe even dark purple or green for a twist. Add a small cotton ball or paper circle for the spider’s body right in the center. It’s surprisingly fun to watch the legs take shape as the paint dries. The process is straightforward, and it might turn a bit messy, but that’s part of the fun.
Pipe Cleaner Spider Rings
Pipe cleaners are flexible and perfect for making wearable spider shapes. Twist a pipe cleaner into a small circle to fit a child’s finger or wrist. Then, cut another pipe cleaner into eight short pieces and attach them around the ring as spider legs. You can bend these legs to give a more lifelike effect. If you have small beads, adding two for eyes can be a nice detail, but it’s not necessary. These spider rings are fun because kids can wear their creepy creations and show them off—little reminders of Halloween mischief right on their hands. It’s simple, portable, and somehow feels extra festive.
Monster Masks to Spark Imagination
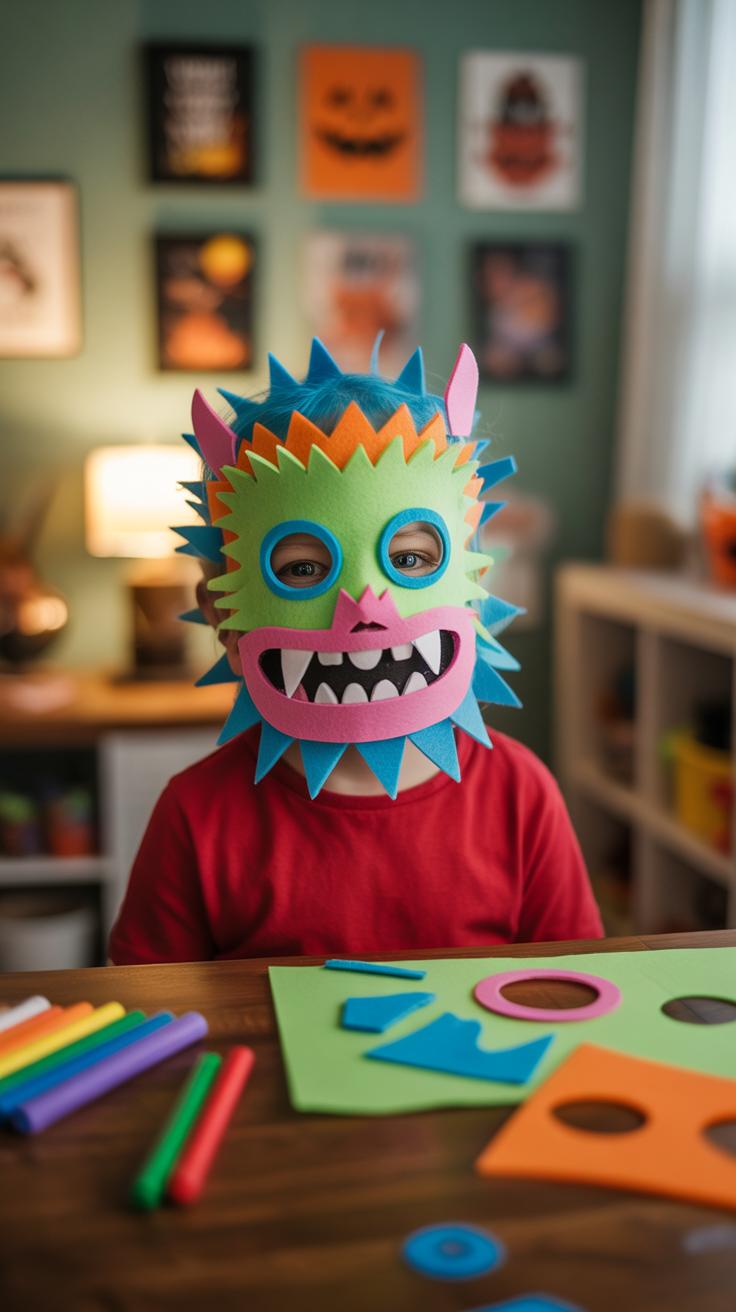
Designing Your Own Monster Face
Creating monster masks with kids is a hands-on way to boost their imagination. Start with simple materials like cardboard or thick paper—often leftover boxes work well. Let kids sketch monster faces right onto the mask base. Encourage them to try out all sorts of features: one big eye, crooked teeth, or wild horns. It’s not about perfection, really. The rougher and stranger, the better. Using paints, markers, or crayons, kids can add color and texture. Maybe some use glitter or torn fabric scraps to give the mask a creepy or funny look.

Ask your child what kind of monster they want to be. Is it scary? Silly? Weird? Sometimes they’ll hesitate, unsure if their idea works. That’s okay. Let them experiment with shapes and colors before gluing anything down. Watching their confidence grow as they personalize their mask is quite rewarding.
Using Masks for Fun Role Play
Once the masks are crafted, the real magic begins—using them in role play. Kids can invent stories around their monsters, creating little Halloween tales that twist and turn. You might try acting out a spooky scene together or hold a “monster mask parade” where each child introduces their character and makes monster noises or movements.
Masks help kids step into a different role, sparking both creativity and social play. Sometimes they’ll get shy or unsure about acting it out, but with gentle encouragement, you’ll see their enthusiasm build. Quick games like “Guess the Monster” or impromptu storytelling can keep the energy alive. The masks are not just decorations; they’re tools for storytelling—and sometimes, they lead to unexpected laughs or surprising ideas.
Creating Halloween Wall Art
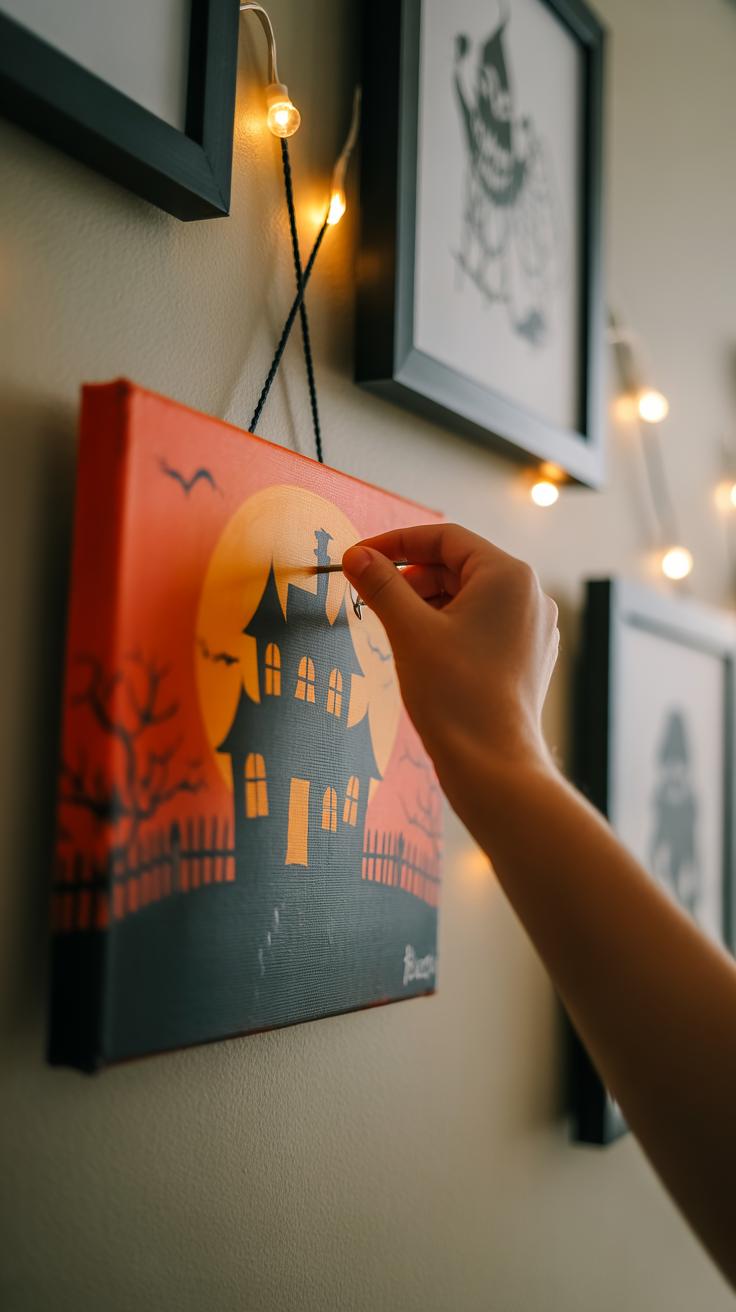
Kids can really have fun crafting their own Halloween-themed wall art to add a spooky touch to their rooms. One simple way is to use canvas boards or thick paper as a base and paint basic but atmospheric Halloween scenes. Think haunted houses with crooked windows, creepy trees, or starry night skies with glowing pumpkins. You don’t need to be an expert—sometimes the rougher, uneven brush strokes make the scene feel creepier, almost like a ghostly image fading in and out.
If painting seems a bit intimidating, cutting out shapes from colored paper is a great alternative. Children can create bats, ghosts, witches’ hats, or black cats by cutting simple outlines out of orange, black, purple, and white paper. Arranging these shapes in a collage or pattern on their bedroom walls works well, especially when layered. Sometimes just placing a few big cutouts at odd angles makes more of an impact than trying to fill every inch.

For a little extra twist, kids might try mixing painted parts with cut-out shapes—paint the background, then glue the paper figures on top. It lets them explore different textures and styles, which is fun and keeps things from looking too planned. Plus, it’s a terrific way to use scrap materials, making each piece unique and a bit unpredictable. Have you noticed how projects like these sometimes end up looking better when they stray from the original plan? It seems that’s part of the charm.
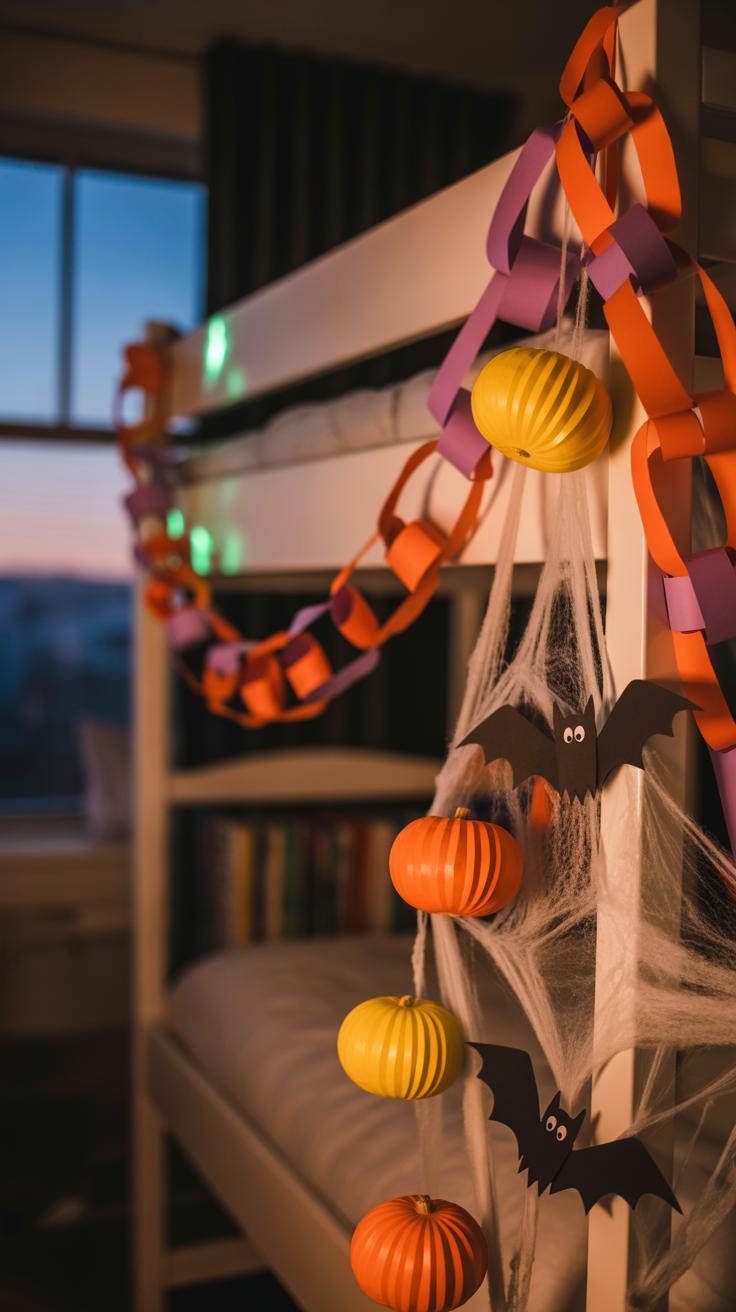
Making Halloween Garland and Banners
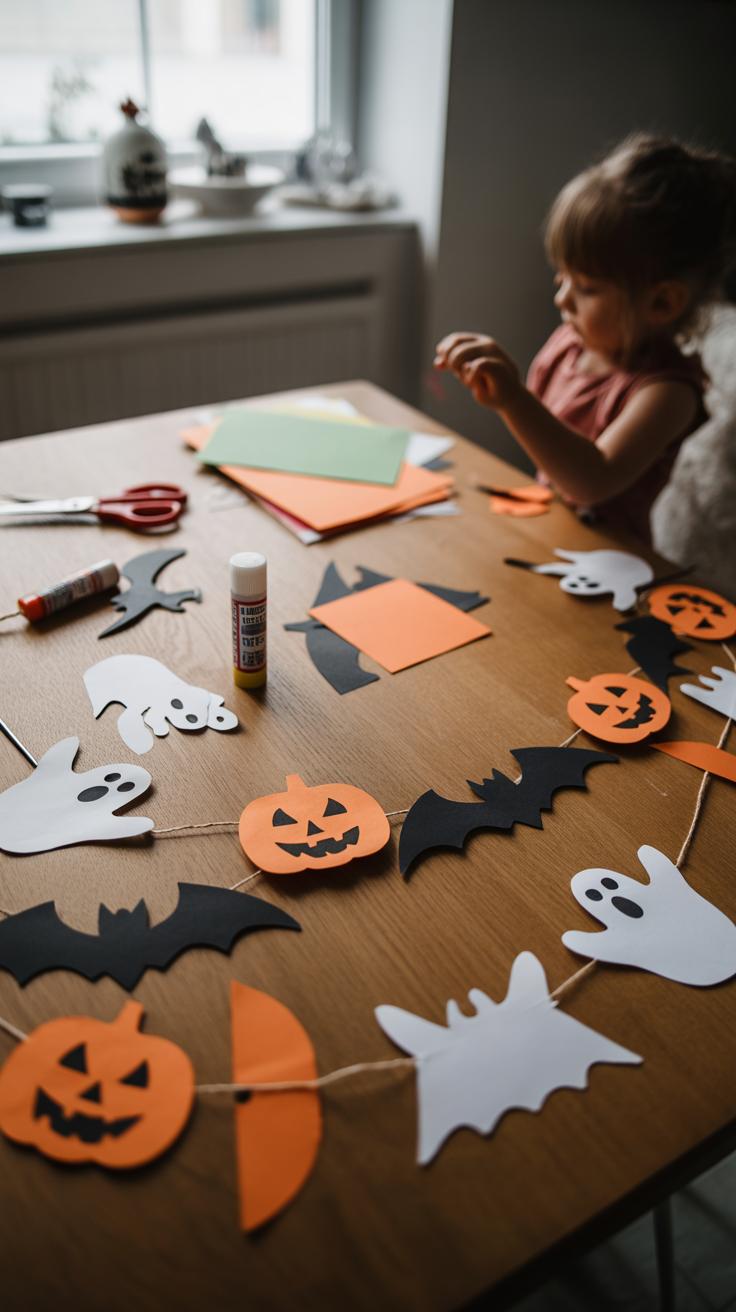
Creating garlands and banners can turn any room into a Halloween haven. Kids can start by cutting out simple shapes—think pumpkins, ghosts, bats—from colored paper or cardstock. It might take a couple of tries to get the shapes just right, but that’s part of the fun. Let them decorate these cut-outs with crayons, markers, or even glitter if you’re feeling brave about the cleanup.
Once decorated, stringing them together is pretty straightforward. Use yarn or thin ribbon and poke two small holes near the top of each shape. Then, thread the string through and space out the pieces evenly. It’s great to see kids deciding how far apart the ghosts and pumpkins should hang—sometimes they’ll want them jam-packed, other times spaced out.
Banners give a chance to add words. Cut triangles or rectangles out of construction paper and help kids write Halloween phrases like “BOO!” or “Trick or Treat.” They can jazz up these banners with little drawings—spiders, candy corn—or stickers. Letting kids mix letters and images adds a nice touch, making the banners feel a bit more personal, maybe even a little spooky!
Safe and Fun Craft Supplies for Halloween
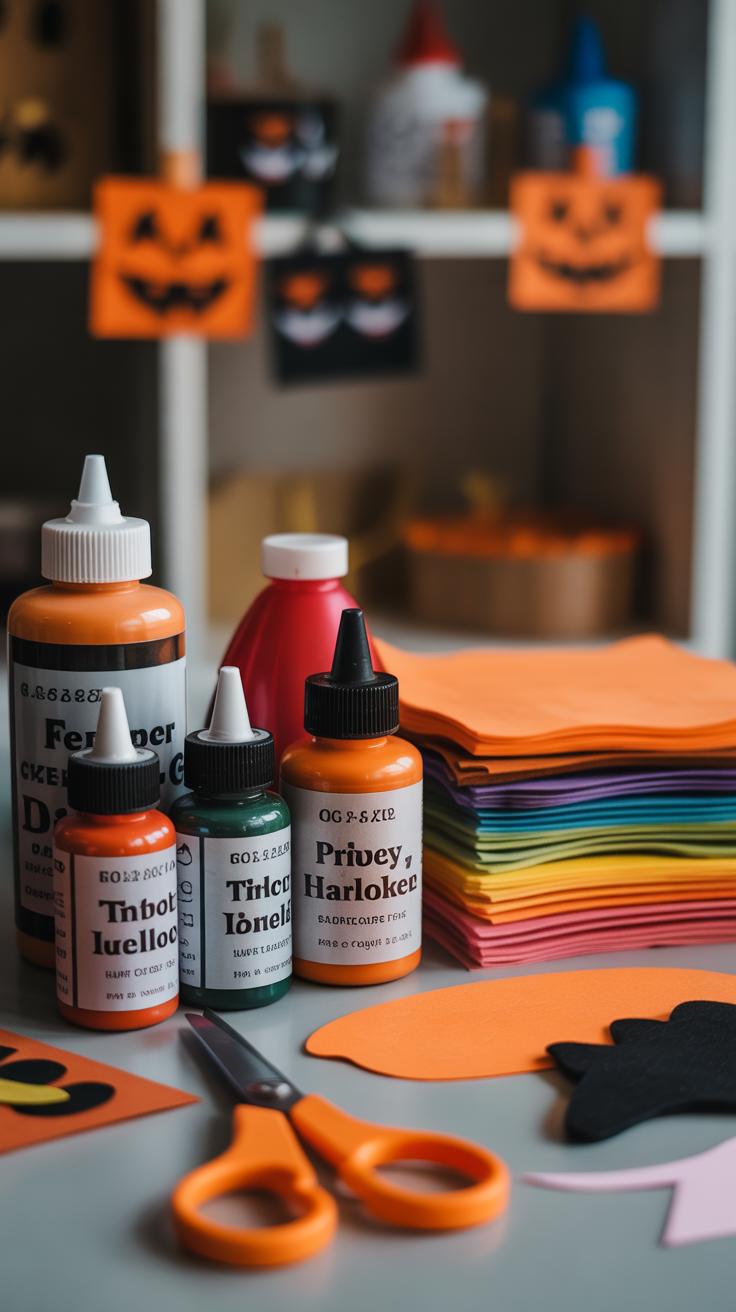
Essential Craft Supplies to Have at Home
When gathering materials for Halloween crafts, you don’t need anything fancy. Simple, everyday items work well and keep things straightforward for kids. Paper is a classic—colored construction paper is great for shapes like ghosts or pumpkins. White glue or glue sticks hold decorations together without the mess or risk of toxic ingredients.
Markers and crayons add detail and personality. Just watch out for permanent ones if you don’t want marks everywhere. Scissors with rounded tips are safer for younger hands, even if cutting shapes can get a little tricky at first. Paints, especially washable ones, bring colors alive but require a workspace that can handle a little spill.
In my own experience, having a good stash of pipe cleaners or cotton balls can be fun too. They’re soft, safe, and perfect for spooky textures. You could say these basics form a kind of toolkit everyone can rely on when crafting for Halloween.
Tips for Keeping Crafting Safe and Clean
Keeping the crafting process safe and neat can sometimes feel like half the battle. Start by setting up a dedicated area with a protective covering—maybe old newspapers or a plastic sheet. It’s easier to let kids go wild if you know cleanup won’t become a major ordeal.
Supervision really matters, especially with scissors and paints. Not that you need to hover constantly, but checking in helps prevent accidents—and those little “oops” moments. You might have to remind kids occasionally to use glue sparingly to avoid sticky fingers or watch for marker caps left off.
One trick I’ve found useful is to have damp wipes or paper towels handy. They’re perfect for quick hand cleans and sudden spills. Letting kids help with cleanup can also teach responsibility—though it might slow down the crafting a bit. Still, better than stained clothes or ruined furniture, right?
At the end of the day, materials that are non-toxic, washable, and easy to handle keep the hour—or two—of Halloween crafting more enjoyable for everyone involved. You want your child’s room spooky, sure, but your sanity matters too.
Conclusions
Halloween crafts offer a fantastic way to bring your children’s imaginations to life while decorating their rooms. By involving kids in making their decorations, you support creativity and fine motor skills. These projects do not require complex materials and are easy to set up at home with everyday supplies. Plus, crafting together creates lasting memories and fun learning experiences around the holiday.
Now that you know a variety of Halloween crafts for kids, you can plan simple yet exciting projects to spookify their rooms. Try combining different ideas, adding your own touches, and encouraging kids to express their Halloween spirit. Remember, the best part is the joy your children feel while creating. Happy crafting and happy Halloween!


