
Introduction
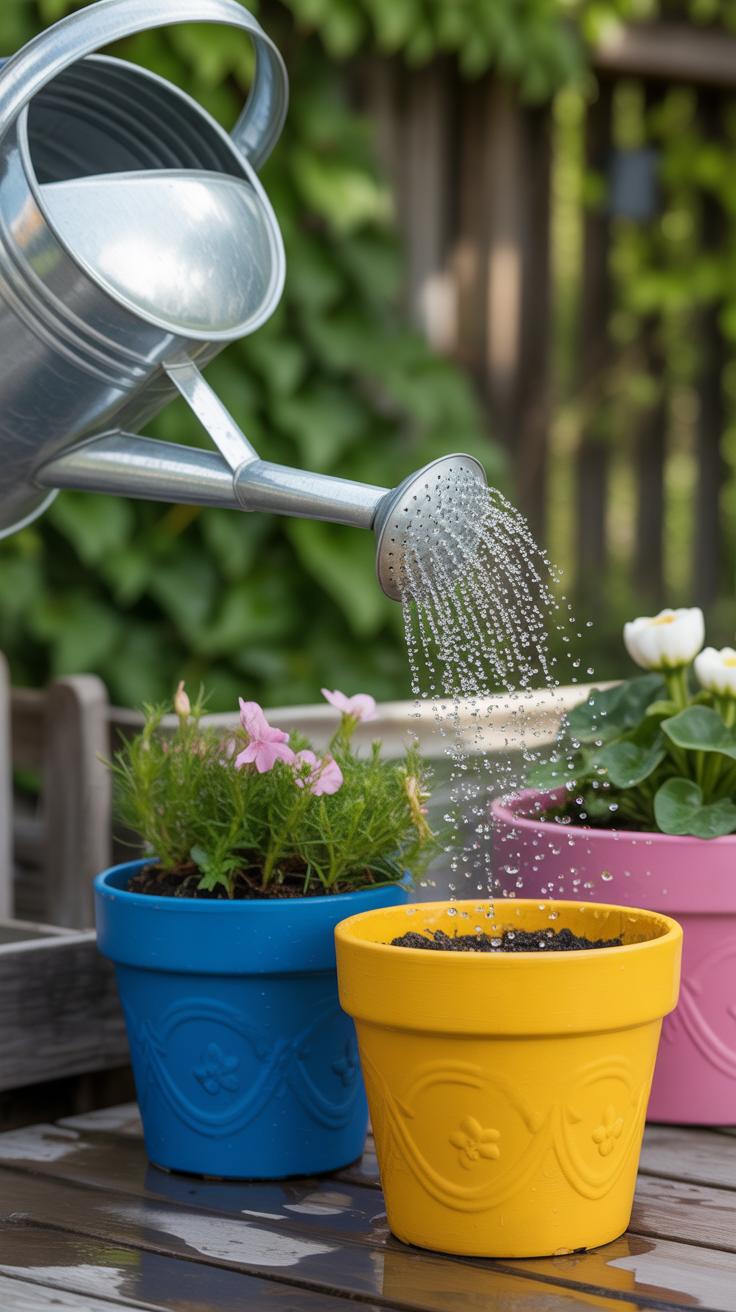
Summer is the perfect time to bring life to your outdoor spaces. One easy way to do this is by brightening your flower pots with summer crafts. These crafts add personality and charm, making your garden or patio more welcoming. You don’t need to be an expert artist; simple ideas can make a big difference.
In this article, you will find creative and practical ideas for summer crafts that anyone can try. These projects will help you personalize your flower pots and enjoy your outdoor areas even more. Get ready to transform your pots with colors, patterns, and fun designs that celebrate the summer spirit.
Choosing the Right Materials for Your Summer Crafts
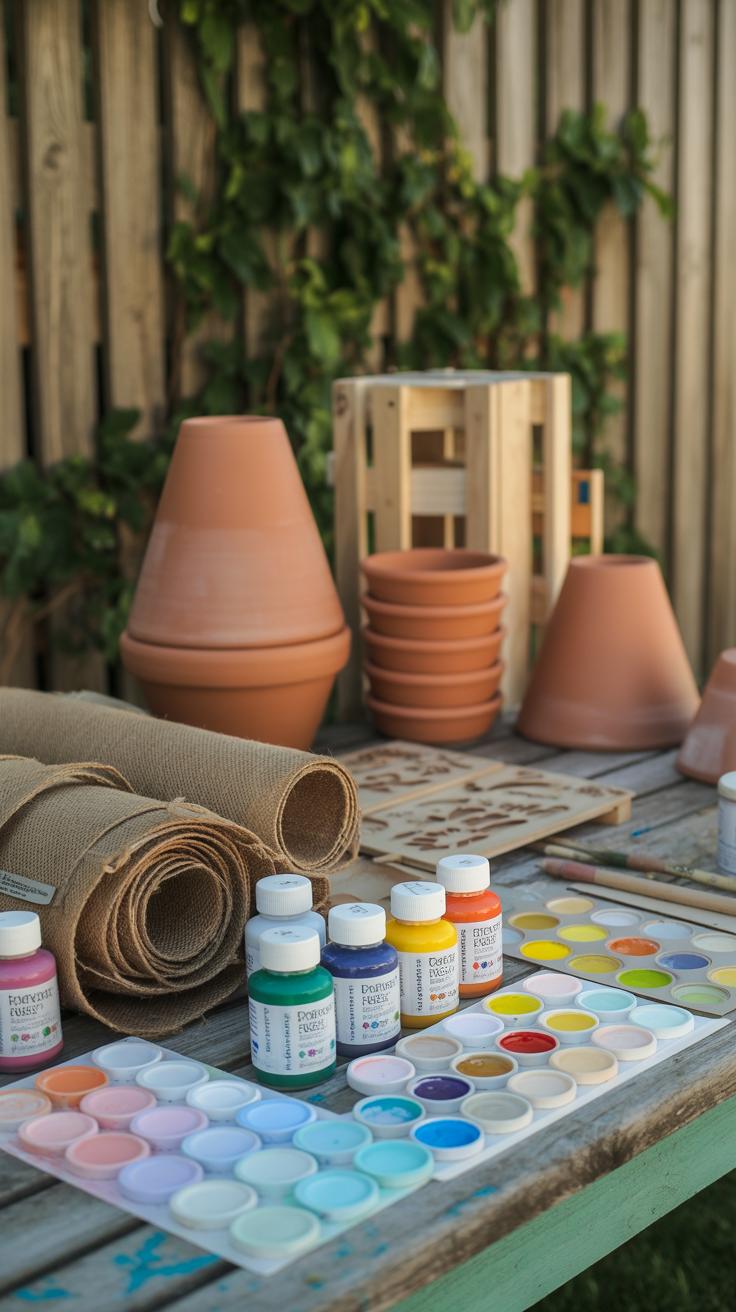
When you’re picking materials for summer crafts on flower pots, you want things that are easy to find and won’t break the bank. Simple acrylic paints often do the trick. They’re usually affordable and come in a bunch of colors. Plus, they dry quickly, which feels nice when you’re eager to see your pot transformed. Brushes don’t have to be fancy either; a few basic sizes, from fine tips to wide ones, cover most painting needs.

Glue can be a little tricky because not all adhesives hold up outdoors. I’ve had luck with waterproof craft glues—these usually keep decorations attached even if the pot gets rained on. For decorations, small stones, shells, or even sturdy ribbons can add visual interest without fading too fast.
The outdoors is tough on crafts. The sun can bleach colors, and rain might wash away weak glues. You want to think about what lasts when faced with moisture and sunlight. Some paints boast water resistance, and sealing your pot afterward helps a lot. If you use a varnish that’s meant for outdoor use, your design has a better chance of sticking around all summer long. It’s a bit of a balancing act—finding materials that are simple but also resilient, so your effort doesn’t disappear after a few showers or sunbaths.
Basic Craft Supplies You Need
Most outdoor pot crafts demand just a handful of supplies you can easily grab from a craft store or even around your home:
- Acrylic Paints: These are usually water-based, easy to clean, and dry quickly. Ideal for basic painting on terracotta or plastic pots.
- Paintbrushes: A small variety—fine for details, medium for filling in larger areas, and a flat brush for broad strokes works well.
- Waterproof Glue: Useful if you want to add stones, beads, shells, or other decorations that might get wet.
- Sealer or Varnish: A must if you want your design to last through the summer months. Look for a spray or brush-on sealant that’s weatherproof.
- Decorations: Think simple but durable. Small pebbles, buttons, glass gems, or twine all add texture and interest without complicating the process.
Materials That Withstand Summer Weather
Sun and rain can be harsh on flower pot crafts, so choosing the right finishes can make a big difference. Acrylic paint alone is water-resistant once dry but not waterproof. That means a good protective coat is usually necessary. Outdoor polyurethane or clear acrylic sealers help keep the colors bright and prevent chipping.
Some people swear by using spray sealants because they dry evenly and are less likely to smudge your paint. But, brush-on sealers allow better control around detailed spots. Either way, the coating creates a barrier against fading UV rays and moisture.

Materials like natural stones or shells don’t fade much and stand up well to rain, but glued-on fabric or paper tends to fall apart unless sealed thoroughly. Plastic pots are easier to decorate because paint sticks well and weather effects are minimal, while terracotta pots may need a bit more prep to keep everything intact longer.
It’s almost a mini science experiment every time you craft outdoors. Will the sun bleach that bright pattern? Will a sudden storm wash it off? You learn a bit more each time you try, adjusting materials or finishes for better durability. That’s part of the fun, really—crafting that lasts but still feels fresh and alive all summer long.
StepbyStep Painting Techniques for Flower Pots
Preparing Your Flower Pots for Painting
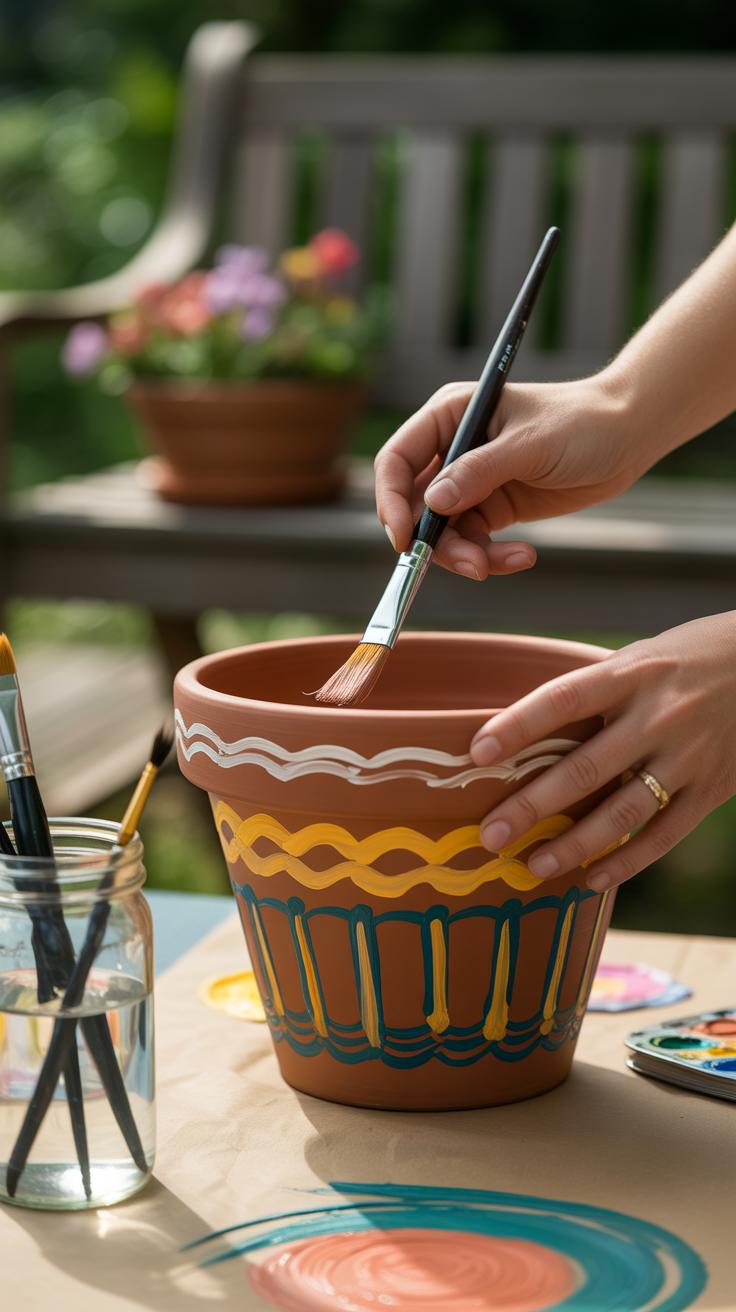
Before you get excited about colors, take a moment to prepare your pots properly. Start by washing them thoroughly—scrub off any dirt, dust, or residual grime with soapy water. I’ve noticed that even a slight residue can cause paint to peel faster, so don’t skip this step. Let the pots dry completely, preferably in the sun, but if time’s tight, air drying inside works too.
Next, roughen the pot’s surface lightly with sandpaper. This helps the paint “grab” better. I sometimes skip this with plastic pots but then regret it; paint tends to chip more easily. For clay or terracotta, that extra sanding step really matters.
To avoid paint soaking in unevenly on porous pots, apply a coat of primer or a layer of white acrylic paint first. It creates a smoother base and helps your colors pop, which might seem unnecessary if you’re going for a rustic look—but it saves frustration in the long run.
Simple Painting Methods for Bright Designs

Now comes the fun part—painting! You don’t need to be an artist to create eye-catching pots. Some simple, reliable styles include:
Stripes: Use painter’s tape to mark stripes. Whether thick or thin stripes, they add structure and a neat pattern almost instantly.
Dots: Grab the end of a paintbrush or a cotton swab to create uniform dots. It’s surprisingly soothing and can give your pots a playful personality.
Geometric shapes: Triangles, squares, or random polygons. You can sketch lightly with a pencil and fill in, or just freehand. Imperfections here add charm, don’t they?
One thing I’ve learned is that layering colors can create depth. For example, paint a base color, then add dots or stripes in a contrasting hue once the first layer dries. Don’t worry about making it perfect; texture and uneven lines often feel more natural outdoors.

Finally, seal your designs with a clear outdoor varnish to protect them from sun and water. A couple of thin coats usually do the job. Let each layer dry fully—or else, you risk sticky surfaces and smudging. Sealing keeps your bright designs lasting longer than you might expect.
Using Natural Elements in Your Crafts
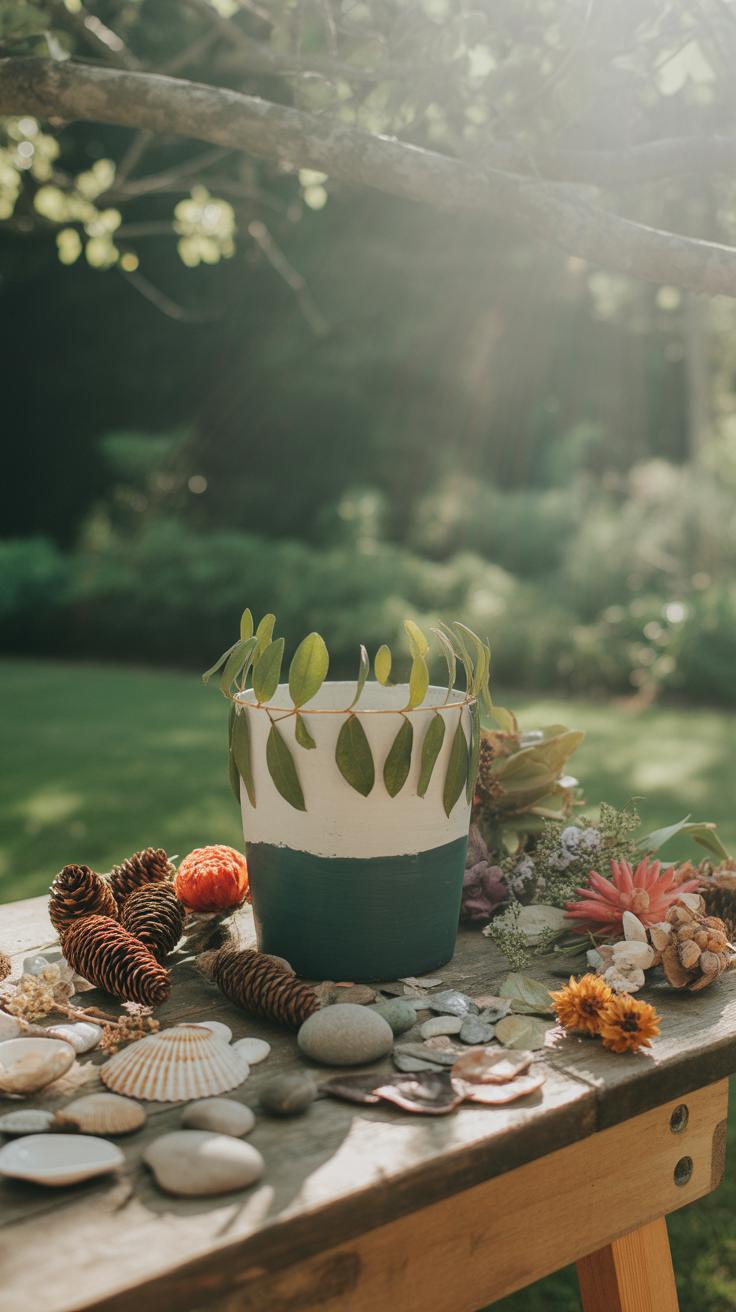
Bringing natural materials like stones, shells, and twigs into your flower pot decorations gives your summer garden a fresh, grounded vibe. These elements aren’t just charms; they tell stories of beaches, forests, and quiet walks. Sometimes, a single shell nestled against a plant changes the whole feel of a pot.
When you’re out collecting, think about where to find the best materials without disturbing nature too much. Pebbles from a stream, fallen twigs from your yard, or seashells from a trip can all work well. I often find some cracked shells more interesting than perfect ones—they add character, you know? But be careful not to take items from protected areas or disturb animals’ habitats.
Attaching these natural finds is surprisingly straightforward. For heavier items like stones, a strong outdoor adhesive works best, but for lighter pieces like small twigs or dry leaves, hot glue can do the trick—just watch your fingers! Sometimes, pressing shells gently into moist soil helps them stay put without glue. Also, layering glue in thin amounts prevents clumps and keeps the look clean. Feel free to experiment a bit; the irregular shapes mean you’ll rarely get a perfect fit on the first try.
Creating Patterns and Themes for Your Flower Pots

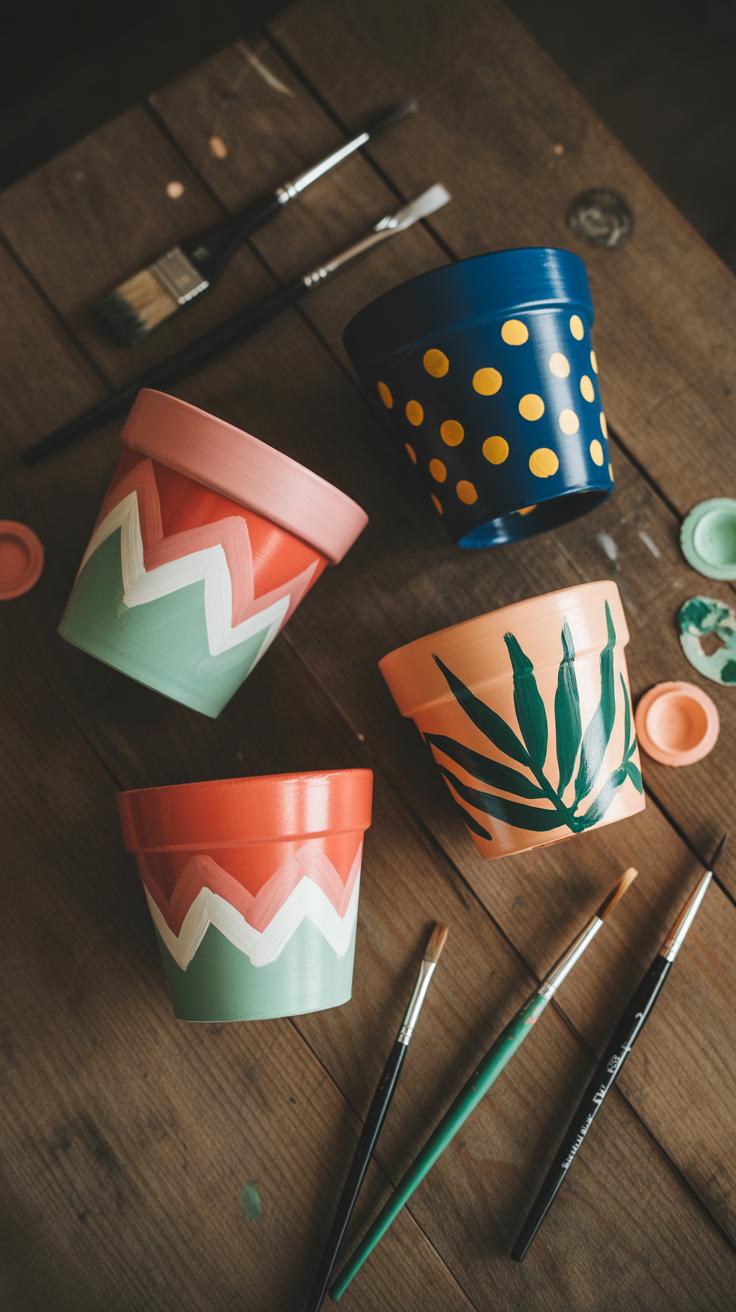
Choosing a theme for your flower pots can bring a sense of unity to your outdoor space. Some popular summer ideas include:
- Beach: Think soft sand colors, starfish shapes, or little waves painted in blues and creams. These evoke calm and sun-filled days, even if you’re nowhere near the ocean.
- Tropical: Bright, bold greens mixed with pink flamingos or palm leaves can instantly brighten things. This theme feels lively, but jumping straight into neon might overwhelm. Maybe try softer tones first.
- Garden: Gentle florals and leafy patterns echo what’s growing inside the pots. You might add tiny bees or ladybugs for some charm, but it’s easy to slip into cliché if you’re not careful.
When designing patterns, it’s tempting to paint each pot differently. But if you want a cohesive look that doesn’t feel chaotic, consider these tips:
- Pick just two or three colors and use them consistently across all pots.
- Repeat simple shapes, like dots or stripes, but vary sizes or placements.
- Plan your design layout before you paint, maybe sketching on paper to see how patterns interact.
It’s okay for some pots to stand out a little, but they should still relate to the group. I once painted a set where one pot had a big tropical leaf, and the others had smaller leaves or matching colors. It pulled the whole collection together without feeling boring. What theme matches your style best? Trying to stick rigidly to a pattern might make your pots less fun — or more so, depending on how you see it.
Recycling and Upcycling Old Pots
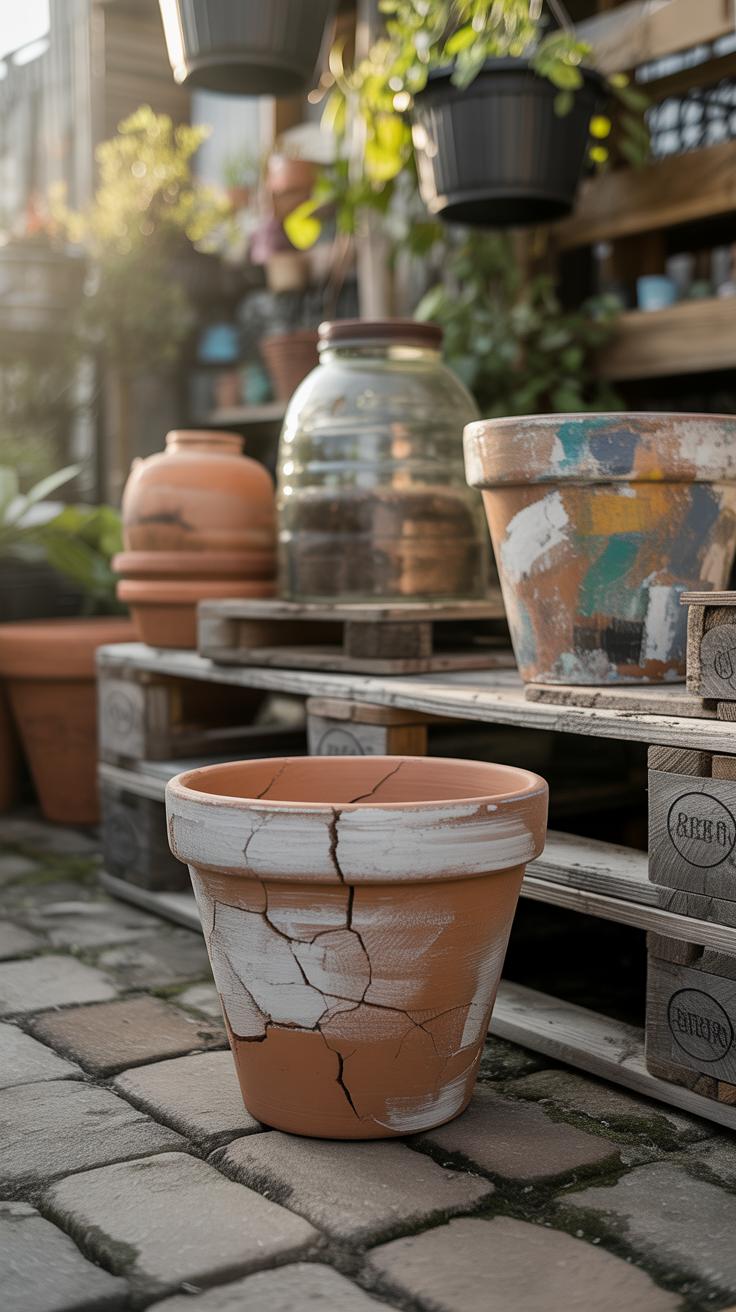
Preparing Old Pots for a New Life

Before you start crafting, your old flower pots need some attention. Cleaning them thoroughly is the first task—scrub away dirt, algae, or any leftover soil. If the pot is ceramic or clay, a soak in warm water with a bit of mild soap usually does the trick. Plastic pots might need a rinse with vinegar to remove any stubborn stains.
Once clean, look over the pot carefully. Cracks or chips aren’t always a dealbreaker, but they can affect how long your refresh will last. Small chips can be smoothed with sandpaper or patched with waterproof glue. Think about whether the pot needs priming before decoration, especially if it’s very porous or rough—it helps the paint or glue stick better.
Preparing the surface might feel like a tedious step, but it really affects the final look. Rushing this part? Probably not worth it. If you’ve got a few minutes, take the time. Your pot will thank you in the long run.
Creative Upcycling Ideas
Give those tired old pots a fresh personality with some hands-on creativity. One approach I’ve tried is using broken ceramic pieces to create a mosaic surface on your pot. Picking contrasting colors from old dishes, tiles, or even thrift shop finds can add texture and color that looks pretty fantastic.
Or, if you’re more into painting, try illustrating simple summer scenes: seashells, sun rays, or abstract waves. Even imperfect brush strokes give a charming, handmade feel. Why stick to the whole pot? Maybe paint just a band around the middle or a quirky design near the rim.

Think also about wrapping pots with natural fibers like jute twine for a rustic look. Don’t hesitate to mix materials—wooden beads glued along the edge or bits of fabric can add unexpected touches. Sometimes these small details bring your pot back to life in ways bigger projects don’t.
Which idea feels right for your space? Upcycling isn’t about perfection but making something old feel new again—while saving a few pots from the trash, of course.
Using OutdoorFriendly Paints and Sealants
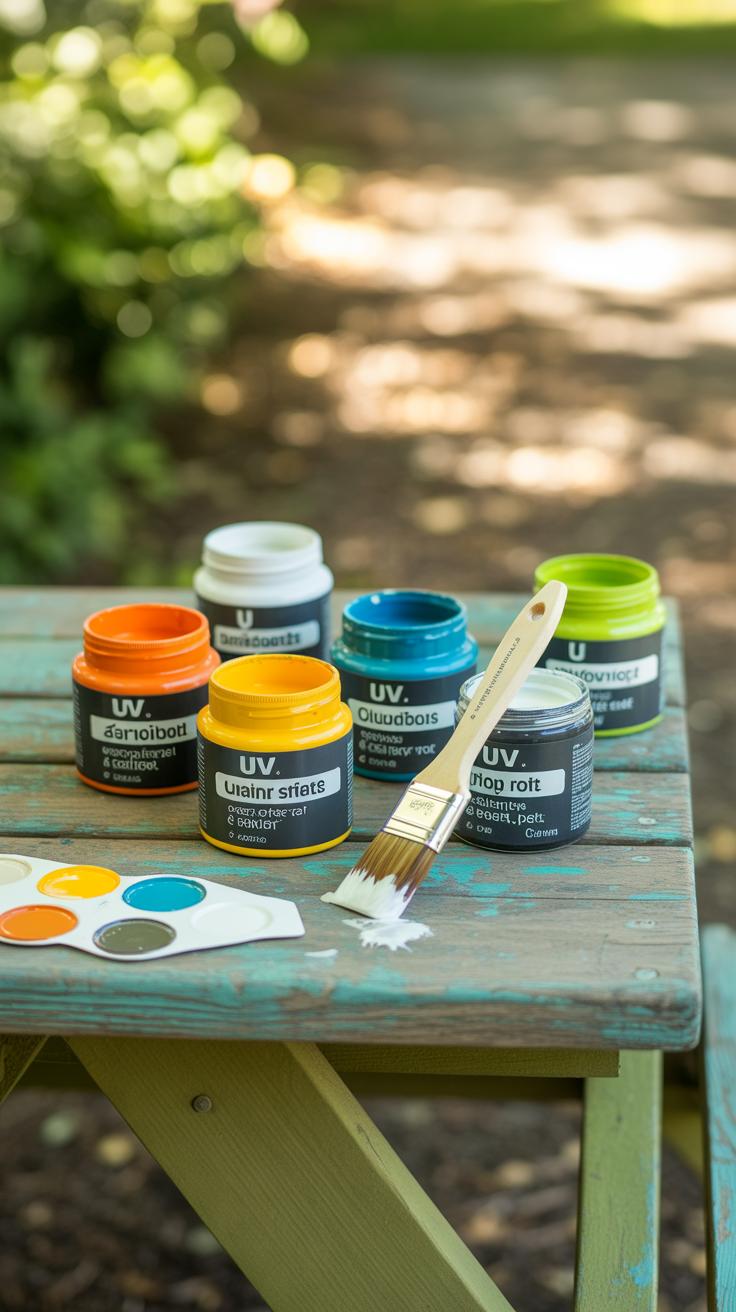
When you’re refreshing your flower pots, choosing the right paints and sealants can make a big difference. Outdoor pots face sun, rain, wind—and sometimes frost—so not every paint will hold up well. You might think any paint is fine if it looks good, but that’s not quite true. Using outdoor-safe paints protects your work from cracking and fading, which can be pretty frustrating after all the effort you’ve put in.
Types of Paints Suitable for Outdoor Pots
Some paints just don’t belong outside—they peel or wash away quickly. So, what works best? Here are a few reliable choices to consider:
- Acrylic paint: This one’s popular—water-based, non-toxic, and pretty tough once dry. It clings well to clay and terracotta, but it does crack without sealing.
- Enamel paint: Oil-based, often glossy, and very durable. It takes longer to dry and can smell strong, but it handles weather better.
- Chalk paint: People love chalk paint’s matte finish, but it’s porous and needs sealing to fend off moisture and sun damage.
- Spray paint for outdoors: Convenient for even coats and quick coverage. Look for spray paints labeled “exterior” or “weather-resistant.”
All these paints should be non-toxic, especially if you grow edible plants in those pots—or if kids and pets are around.
Applying Sealants for Longer Lasting Crafts
Sealants might feel like an extra step, but skipping them can shorten your pot’s new life. They create a protective layer that shields colors and patterns from fading or peeling. I once skipped sealing on a whim; the paint blistered after a sudden downpour—it was disappointing.
To seal properly:
- Make sure your paint is fully dry—sometimes a day or two is best.
- Choose a clear sealant formulated for outdoor use; water-based polyurethane or acrylic sealants are popular choices.
- Apply thin, even coats with a brush or spray. It’s better to do two thin layers than one thick, sticky one.
- Let each coat dry completely before adding another.
- If possible, flip or rotate the pot to seal any hidden spots or edges prone to chipping.
Sealants won’t make pots invincible—but they’ll protect your work against the sun’s harsh rays, rain splatters, and even time’s slow wear.
Adding Personal Touches with Custom Decorations
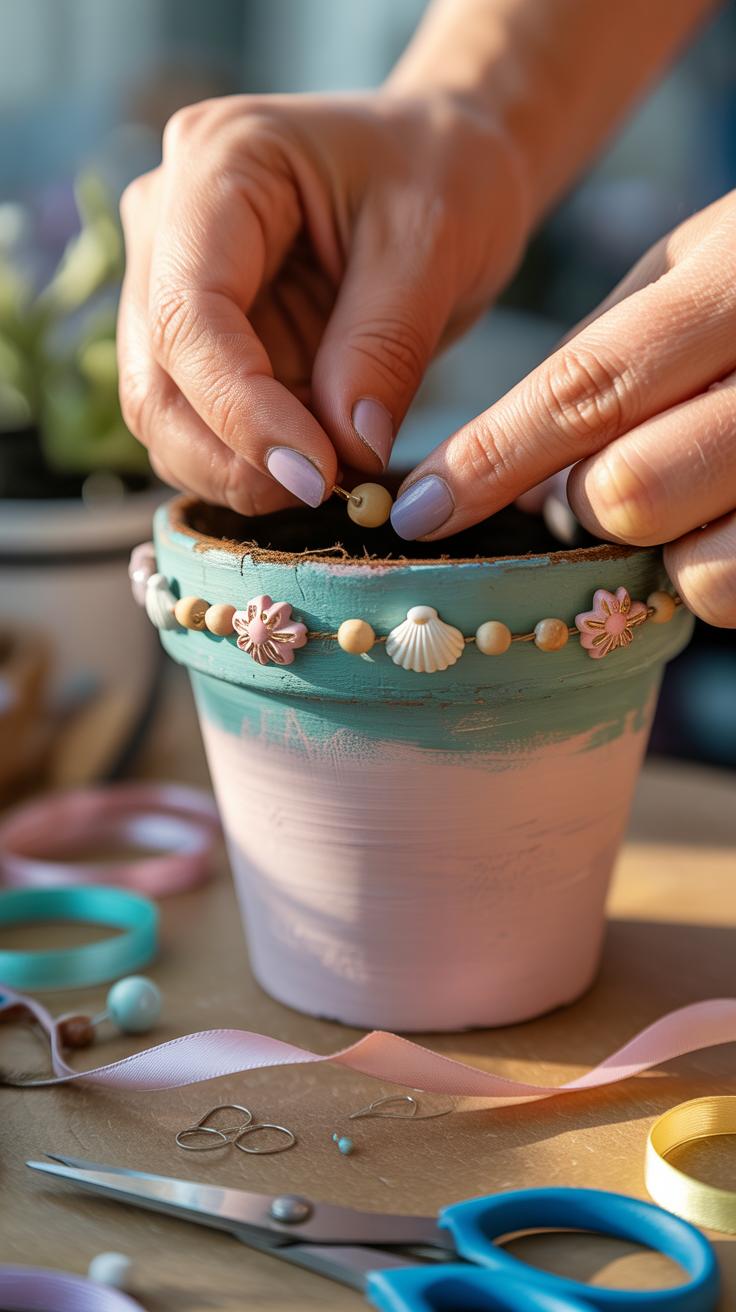
Personalizing your flower pots can turn ordinary containers into something meaningful, even a bit fun. Think about adding names or short quotes that inspire you—maybe a favorite saying or a playful line that makes you smile every time you see it. It doesn’t have to be perfect; the charm often lies in the slight imperfections. Sometimes, a simple handwritten name or a doodle can say more than fancy designs.
Techniques for Writing and Drawing on Pots
Using paint markers is an easy way to write or draw directly on pots. They give you control without messy brushes, and you can correct small mistakes by wiping carefully before it dries. Stencils are another helpful tool if freehand isn’t your style, especially for lettering. Just hold the stencil firmly in place, and dab paint gently.
It might take a couple of tries to get the hang of it—you could find yourself layering colors or experimenting with fonts you didn’t expect to like. There’s something satisfying about that hands-on process, even if the final result isn’t flawless.
Decorations That Tell Your Story
Try including small decorations that feel personal. Charms or tiny trinkets glued around the rim can remind you of special moments, or photos laminated in weatherproof sleeves can add a narrative touch. Symbols like a tiny heart, a star, or a leaf cutout might symbolize something meaningful to you or your garden’s theme.
Sometimes, these details make the pot feel less like a container and more like a little memory box. It’s your space to be creative, and maybe a spot to pause for a moment—what do your pots say about you?
Maintaining Your Crafted Flower Pots Through Summer
Cleaning and Touching Up Your Pots
Summer can be tough on your decorated pots. Dirt, dust, and even water spots tend to build up faster with all the outdoor activity. A gentle wipe with a damp cloth usually does the trick. If paint chips appear, don’t rush to throw out your design just yet. Lightly sanding the rough edges before applying a fresh coat of matching paint can bring things back to life. Sometimes, a small touch-up here and there actually adds character. If your pots have stubborn grime, a soft brush and mild soap help without damaging the craft. Just be patient—rushing the drying might ruin your work.
Protecting Your Crafts from Harsh Weather
Summer storms and blazing sun present a tricky challenge. Ideally, you can move your pots under some kind of shelter during heavy rain or strong wind. If that’s not possible, placing them near a wall or under an overhang can reduce exposure. Sunlight is a double-edged sword; it’s great for plants but can fade paint over time. A clear outdoor sealant can slow this down, though it might need reapplication mid-season. I’ve noticed that some sealants change the pot’s finish a bit, which might or might not suit your style. Still, better faded than ruined, perhaps? At least consider rotating pots regularly to share direct sun evenly.
Conclusions
Creating summer crafts to brighten your outdoor flower pots is an enjoyable way to personalize your garden. With simple materials and a little creativity, you can make your pots stand out. These crafts do not just decorate; they give your garden a fresh look that reflects your style.
Remember, the best part about these projects is how they invite you to spend more time outdoors, caring for your plants and enjoying the warm weather. By updating your flower pots with these ideas, you make your outdoor space more beautiful and inviting for yourself and your guests.