Estimated reading time: 20 minutes
Introduction
In today’s tech-driven world, the enduring charm of ham radio shines bright, offering a unique blend of tradition and innovation. For those enchanted by ham shack ideas, this passion is more than a mere hobby; it’s a deep dive into how electronics can reflect individuality. The increase to over 750,000 licensed amateur radio operators as of 2020, as reported by the American Radio Relay League, signals a growing, enthusiastic community. Within this group, crafting a ham radio shack is not just about setting up a place for worldwide communication but about creating a refuge for innovation, connection, and technical skill.
Constructing a ham shack that meets your personal and technical requirements—whether working with HF frequencies, utilizing portable setups, or incorporating mobile solutions—demands a mix of functionality and passion. Key components like a robust radio transceiver, an adaptable antenna system, and a reliable power supply are crucial for any effective setup. However, it’s the finer points that make a difference: coax cables for reduced signal loss, lightning protection to defend your gear, and effective insulation against RF interference. Additionally, incorporating cost-effective and homemade solutions—such as making narrow drawers for kit storage or fitting AC seals for temperature regulation—can elevate a simple space into a center of creativity and proficiency. From lightning defenses to using pipe for tidy cable management, every decision underscores a dedication to quality and personal touch in the pursuit of ham radio excellence.
Key Takeaways
- Ham radio remains a timeless and engaging hobby, offering a unique sense of accomplishment and a vibrant community that’s continuously growing, evidenced by the rising number of licensed operators.
- The role of ham radio operators in emergencies, such as during Hurricane Katrina, highlights not just the hobby’s fun aspect but its crucial role in providing lifesaving emergency communications.
- Whether you’re a newbie, a hobbyist, or a seasoned pro, there’s a wealth of ham shack ideas to suit every level of interest and expertise, ensuring everyone can create their ideal setup.
- Essential components for any ham shack include a radio transceiver, antenna, and power supply, forming the backbone of a functional and efficient amateur radio station.
- Comfort, accessibility, and aesthetics are as important as the technical setup, with ergonomic furniture and personalized decor transforming the space into a haven for long DXing sessions and creative expression.
- Embracing both DIY and store-bought options allows for a customized ham shack that reflects personal style and operational needs, encouraging a balanced approach to budgeting and design for the ultimate amateur radio experience.
Why Ham Shacks Still Matter in 2023
In 2023, the importance of ham shacks continues to stand strong, serving as a crucial element in the world of amateur radio that enthusiasts hold dear. For those aiming to install a budget-friendly yet effective setup, there’s a wealth of ham radio shack ideas to explore that cater to a diverse array of interests and technical requirements. From employing PVC for antenna frameworks to integrating sophisticated satellite communication features, the options are vast. Ham radio stations have advanced, now featuring linear amplifiers (amp) to boost signals, SWR meters to ensure optimal antenna function, and CW for aficionados of Morse code. Moreover, the rise of touch device users has opened up innovative ways to explore by touch or see more ideas on platforms like Pinterest, where connectors, meter setups, and additional ham station necessities are prominently displayed. This digital exploration fosters a wider sharing of knowledge and inspiration, making the creation of a personalized ham shack more accessible and customized to individual tastes.
Who Can Benefit from This Article?
Anyone and everyone keen on ham radio! Whether you’re a:
- Newbie: Wondering how to set up your first radio shack?
- Hobbyist: Looking to turn a weekend hobby into a dedicated space?
- Seasoned Pro: Interested in fine-tuning your already impressive hut?
We’ve got ham shack ideas to suit all tastes and needs.
What You’ll Gain
- Innovative Ideas: Not just your run-of-the-mill setups, we’re talking about innovations that could make your neighbors green with envy.
- Practical Insights: From must-have equipment to where you can cut corners without compromising quality.
- Real-life Examples: Actual case studies of people who have set up fascinating ham shacks. Learn from their experiences!
My First Ham Shack Ideas Experience
I remember setting up my first ham shack. It was a tiny corner in my basement, sandwiched between old Christmas decorations and a dusty treadmill. The space was cramped, but the excitement was gigantic. I had my primary transceiver, a makeshift antenna, and a sense of adventure. My first contact? A guy from Australia, and we talked about everything from kangaroos to the weather. That little corner became my haven, my escape from the world. It’s not just about the gear; it’s about the experiences you collect and the friends you make along the way.
The Basics – What Makes a Ham Shack?
Before we dive into all those flashy ham shack ideas, let’s get our basics right. Think of your ham shack as a mini radio station. It’s not just a collection of gadgets; it’s your personal space for global interaction. You want it to be functional, yes, but also accessible, comfortable, and visually stimulating. It’s like your cockpit for navigating the radio waves.
Functionality: The Foundation of Your Shack
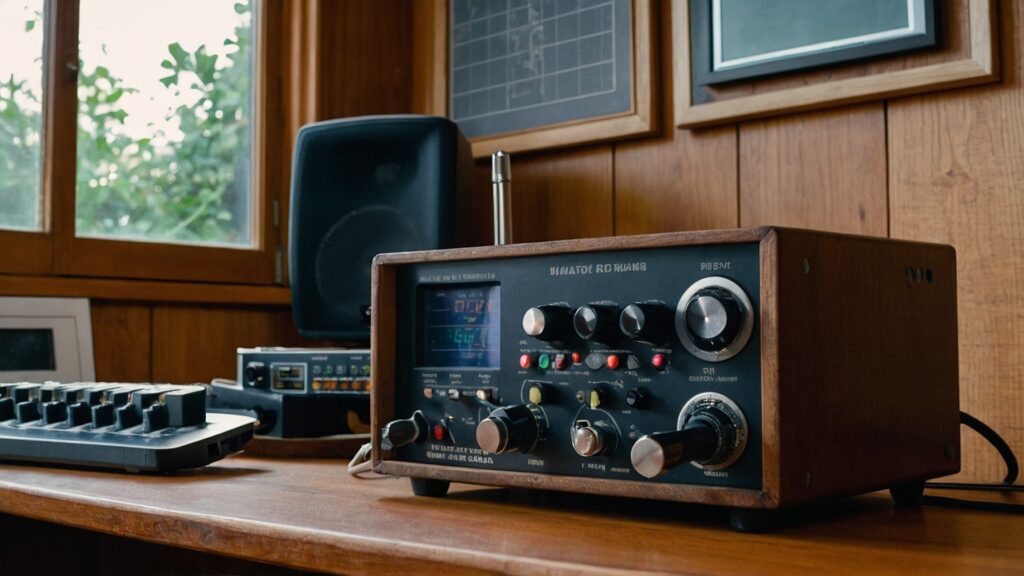
The backbone of any ham shack is its functional elements. Without these, you might as well be setting up a paperweight collection. The trifecta here is the radio, antenna, and power supply. Invest in good quality because this is the starting line for your ham radio journey.
Pro-tip: Watch for used equipment that’s still in good condition. Websites like QRZ or eBay can be gold mines for affordable but solid gear. Remember to scrutinize the specifications and check for reviews before pulling the trigger.
Must-Have Functional Components
- Radio Transceiver: The heart of your shack. The better it is, the farther you’ll reach.
- Antenna: Your window to the world. Different types are suited for various purposes.
- Power Supply: Consistent and reliable power is non-negotiable.
- Tuners & Amplifiers: These aren’t just bells and whistles; they can significantly affect signal quality.
- Coaxial Cables: Don’t underestimate the impact of high-quality cables on your transmission.
Accessibility: Your Shack, Your Command Center
When you’re in the zone—connecting with distant stations or even receiving faint signals—the last thing you want is to leave your chair. We’re talking about designing a shack where everything is accessible.
I remember an intense DX session where I was scrambling to find a pen to jot down an operator’s call sign. Guess what? The cell was across the room, and I missed the chance. Lesson learned.
Essential Items to Keep Within Arm’s Reach:
- Notebook & Pen: For quick jotting of frequencies or call signs.
- Headphones: Because sometimes you need that noise isolation.
- Extra Cables: You never know when you might need a quick swap.
- Coffee Mug: Caffeine is essential to any ham shack.
Comfort: Because Hours Will Fly By
Imagine settling into a marathon DXing session. You don’t want to do this on a folding chair and a makeshift table. Comfort is vital in a ham shack.
Tips for a Comfortable Setup:
- Ergonomic Chair: Your back will thank you later.
- Climate Control: From fans to heaters, make sure the room is at a comfortable temperature.
- Snacks: A mini-fridge stocked with quick bites and beverages can be a game-changer.
Quick Fact: According to a study in the journal Ergonomics, ergonomic furniture can significantly reduce back pain and improve productivity. So, this isn’t just a luxury; it’s an investment in your well-being.
Aesthetics: Your Shack, Your Style
Okay, you’ve got all the gear, and it’s all in reach. But does your shack inspire you? Does it reflect your personality? A pleasing aesthetic isn’t just for show but for your motivation and creativity. Your ham shack should be a space where you want to spend time.
My ham shack got a new lease on life when I added some thematic decor—a vintage world map and some retro radio posters. Believe me; a well-designed space can uplift your mood and make your ham radio experience even more rewarding.
Essentials for a Basic Ham Shack:
- Radio Transceiver: Your gateway to the world.
- Antenna: Your channel to connect with other operators.
- Power Supply: The lifeline of your shack.
- Microphone or Headset: For clear communication.
- Logging Software: Keep track of all your fascinating contacts.
Keep It Organized
| Essential Components | Why It’s Important | Recommended Brands |
|---|---|---|
| Radio Transceiver | The main component | Yaesu, ICOM, Kenwood |
| Antenna | For reaching out | Diamond, Cushcraft |
| Power Supply | Keeps everything running | Astron, TekPower |
| Microphone/Headset | For clear audio | Heil, Sennheiser |
| Logging Software | To record your achievements | N1MM, Log4OM |
Planning Your Space: The Ultimate Guide to Setting Up Your Ham Shack
The thrill of setting up your very own ham shack! It’s like being a kid in a candy store, except the candy is all these high-tech transceivers, antennas, and more. But before diving into the sweet stuff, let’s talk space planning. You wouldn’t build a house without a blueprint, right? The same goes for your ham shack.
Measuring Your Room: More Than Just Square Footage
First things first—grab that tape measure. You’re going to need it. Knowing your room’s dimensions isn’t just a numbers game; it’s about optimizing your space. Now, let me tell you a little story. A buddy of mine, Steve, thought he’d eyeballed his space correctly. Fast forward two weeks, and he’s got an antenna that doesn’t fit. You can bet he never made that mistake again!
Things to Measure
- Wall length and height: Pretty basic, but oh-so-crucial.
- Door and window locations: You must know where these are when planning.
- Electrical outlets: Make sure you’ve got easy access to all your gadgets.
Why It Matters
Understanding your room size helps with the following:
- Furniture Placement: Knowing where to put that cozy operator chair.
- Equipment Layout: No more guessing games on where your transceivers will go.
- Ventilation: Gotta keep those machines cool, right?
Sketching a Layout: The Art of Ham Shack Design
Once the numbers are down, it’s time for doodling. You heard me—grab a piece of paper and a pencil, or go digital with room-planning software like SketchUp. When I set up my first shack, sketching helped me realize I could fit in a second monitor for logging contacts. Game-changer!
Sketching Tips
- Include all elements: Draw in your tables, chairs, and equipment.
- Please keep it to scale: Free templates online can help.
- Iterate: Don’t be afraid to erase and redo. You’re the designer here!
Virtual Planners: The Video Game You Didn’t Know You Needed
Now, for those who like to get fancy, there’s even software out there that lets you see your shack in 3D. Apps like Room Planner are video games for ham radio enthusiasts. How cool is that?
Must-Have Features in Virtual Planners
- Drag-and-drop interface: Easy to use? Check.
- 3D visualization: See it before you build it.
- Cost estimates: Budgeting has never been this fun.
Top 3 Room Planning Software for Ham Shacks
| Software | Features | Cost |
|---|---|---|
| SketchUp | 3D modeling | Free/Paid |
| Room Planner | Drag-and-drop | Free with In-app purchases |
| Sweet Home 3D | Virtual walkthrough | Free/Paid |
Innovative Ham Shack Ideas to Consider: Level Up Your Space with These Tricks
Let’s keep the momentum going. You’ve got the blueprint for your ham shack. Now, how about adding some spice? It’s like when you’ve got the basic chords down on a guitar; it’s time for some juicy riffs.
Multifunctional Furniture: Double the Fun, Half the Space
If there’s one thing I’ve learned about setting up multiple digital workspaces, it’s that multitasking furniture is a game-changer. Think desks with built-in storage or foldable workbenches. Not only does this save precious floor space, but it also keeps everything within arm’s reach. That way, you won’t have to break a sweat—or a conversation—to grab that extra coaxial cable.
Multifunctional Furniture Must-Haves
- Desks with built-in shelves: Perfect for storing manuals and logbooks.
- Foldable workbench: When you need extra space, fold it up!
- Chair with storage: Yes, these exist! Store your handhelds right under your seat.
LED Lighting Ideas: Light Up Your Life (and Your Shack)
You’ll spend a lot of time in your ham shack, so good lighting isn’t just a luxury but a necessity. That’s why LED strip lights, or adjustable desk lamps are not just visual treats. They’re ergonomic choices that can help reduce eye strain during those long DXing sessions.
Why LED?
- Energy Efficient: LED lights consume less electricity than traditional bulbs.
- Long-Lasting: These can last up to 25,000 hours. Talk about value!
- Adjustable Brightness: Perfect for day and night operations.
Wall Art and Posters: More Than Just Decoration
Have you ever had one of those days where you need a pick-me-up? Motivational quotes and inspiring images can do wonders. I had a poster of the lunar landing in my first ham shack. Talk about setting your sights high!
Wall Art Ideas
- World Map: For tracking those DX contacts.
- Vintage Radio Posters: A nod to the roots of amateur radio.
- Motivational Quotes: “Don’t measure yourself by what you have accomplished, but by what you should have accomplished with your ability.” – John Wooden
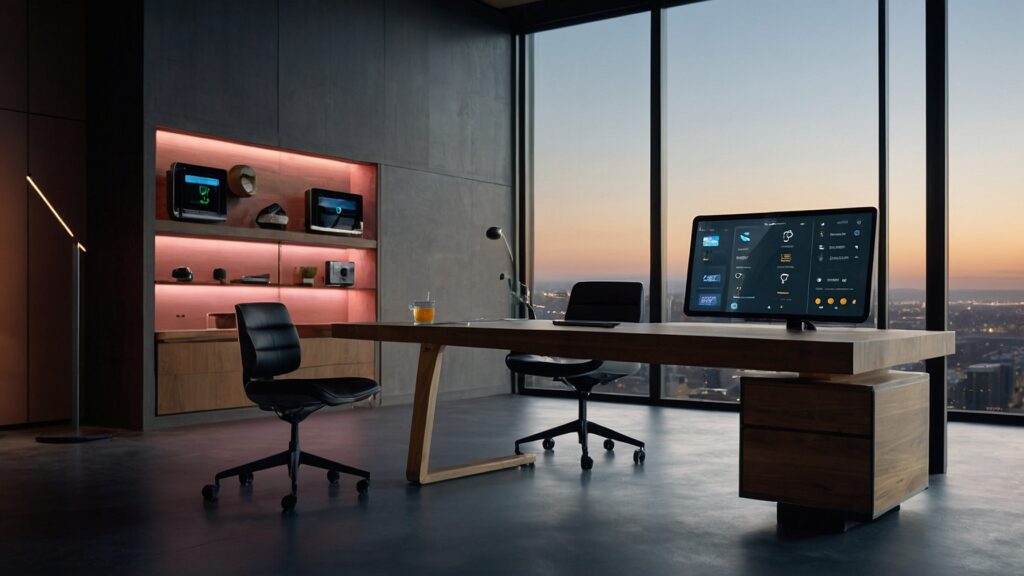
Techy Add-Ons: Your Ham Shack, But Smarter
Let’s venture into the future for a moment. Have you considered making your shack a smart one? Imagine switching bands with a voice command or checking the weather on a digital weather station right from your desk.
Techy Add-Ons to Consider
| Device | Function | Why You Need It |
|---|---|---|
| Amazon Echo or Google Home | Voice controls | Hands-free operation |
| Wi-Fi-enabled power strips | Remote control | Manage devices from anywhere |
| Smart lighting systems | Mood-setting & energy saving | Adapt to your needs |
| Digital weather stations | Accurate forecasts | Plan your radio adventures |
Hobbyist vs Professional Perspectives: Tailoring Your Ham Shack to Fit Your Needs
Let’s get real for a minute. How you approach your ham shack will be significantly influenced by whether you’re dialing in for fun or if this is your professional playground. Like my friend who loves to cook but wouldn’t need a Michelin-starred kitchen, it’s about the right tools for the right job.
For Hobbyists: Getting the Most Bang for Your Buck
You’re probably not looking to break the bank if you’re a hobbyist. The focus here is functionality with a dash of flair. A basic setup can be more than adequate. And hey, that doesn’t mean it can’t look fabulous!
Hobbyist Must-Haves
- Basic Transceiver: A good, affordable radio to start your ham journey.
- Antenna: A simple dipole or vertical antenna will suffice.
- Comfortable Chair: Long hours can be taxing; sitting in something that won’t break your back is best.
Quick Case Study: Jane’s Ham Haven
Jane, a weekend ham radio enthusiast, set up her shack for under $500. She used a primary transceiver, a dipole antenna, and an old desk she repurposed. Jane’s top tip? A splash of paint and some LED lights can transform any old furniture into something that feels brand new.
For Professionals: A Symphony of Sophistication
This is where the big guns come out—top-of-the-line transceivers, acoustic panels, and even multiple radios for different bands. If you’re a pro, you’re not just thinking about equipment; you’re contemplating the whole environment.
Professional Must-Haves
- High-End Transceiver: Something that offers more bandwidth and features.
- Acoustic Panels: To minimize echoes and interference.
- Multiple Radios: Different radios for different needs, like a pro photographer, have various lenses.
According to a study by the ARRL (American Radio Relay League), professional ham radio operators often invest between $3,000 and $6,000 in their shacks. That’s like buying a used car!
The Middle Ground: Flexibility Is Key
You don’t have to be one or the other strictly. Many folks are in a gray area, dabbling in the hobbyist and professional worlds. In such cases, a modular setup can be your best friend. Start basic and leave room for upgrades.
| Aspect | Hobbyist | Professional | Middle Ground |
|---|---|---|---|
| Budget | Low to Medium | High | Medium to High |
| Equipment | Basic | Advanced | Modular |
| Room Aesthetics | Personality-driven | Functional & Stylish | Blend of Both |
DIY vs Store-Bought – What’s Your Style? Making the Right Choice for Your Ham Shack
So, you’re knee-deep in planning your dream ham shack and hit a crossroads. Do you take the DIY path, channeling your inner Bob the Builder, or whip out that credit card faster than a cowboy in a duel? The struggle is real, folks.
Pros and Cons of DIY: A Labor of Love
DIY, or Do-It-Yourself, isn’t just about saving a few bucks—it’s a chance to put a personal touch on your ham shack. Let’s break down the nitty-gritty.
Customizable to the Core
Nothing beats the sheer thrill of building something that’s 100% you. From custom shelving units for your radio gear to unique lighting solutions, the sky’s the limit.
My cousin Steve is no carpenter but created an incredible desk for his ham shack. He included specific compartments just for his transceivers and antennae. It’s like a puzzle, and each piece has its designated place. Beautiful, right?
Cost-Effective
Building your ham shack could save you hundreds, if not thousands, of dollars. Store-bought doesn’t always mean better.
Time-Consuming
The downside? You’ve got to invest time, sometimes a whole lot of it. One weekend might stretch into several.
Skills Required
If your idea of woodworking is assembling IKEA furniture, a DIY project could be challenging. You’ll need basic skills in carpentry, wiring, and possibly some coding if you’re getting fancy with intelligent tech.
Pros and Cons of Store-Bought: Swiping for Convenience
Store-bought is the go-to option for those who’d instead not turn their living room into a construction site. Here’s why.
Quick and Easy
It’s a no-brainer. You buy, they deliver, you set it up. Easy as pie.
Professional Design
These products are designed by pros, meaning they’ve got ergonomics and aesthetics in the bag.
Fact Bomb
A study by Furniture Today suggests that pre-designed furniture usually undergoes 10-20 iterations before hitting the market. So, you’re pretty much assured of a polished final product.
More Expensive
You’re paying for that convenience and design expertise, often a hefty sum.
Less Personalized
Unless you’re into custom orders, what you see is what you get. Personalization is generally limited to where you place the item in the room.
DIY or Store-Bought: Finding Your Sweet Spot
It might not even be a case of either/or. You could opt for a hybrid approach—buy the complicated stuff and DIY the more straightforward pieces.
| Aspect | DIY | Store-Bought | Hybrid |
|---|---|---|---|
| Cost | Low | High | Medium |
| Time | High | Low | Medium |
| Skill Level | Medium to High | Low | Medium |
| Customization | High | Low | Medium |
Tips for Budgeting Your Ham Shack Ideas: Navigating the Dollar Maze
Budgeting isn’t the sexiest topic, but it’s the backbone of every successful project. When setting up your ham shack, a budget isn’t just a list of numbers—it’s a blueprint for your dream space. So, let’s dig in and figure out how to balance those dreams with your wallet.
Creating a Financial Plan: Know Your Limits
The first thing on your budgeting checklist? A financial plan. No, you don’t need a degree in finance for this—just some good ol’ practical thinking.
Set a Ceiling
What’s the most you can afford to spend without taking a hit? Have that number in mind before you go on a shopping spree.
How to Do It
- Income Assessment: What’s your monthly income post-tax?
- Expense Evaluation: List your fixed and variable expenses. Subtract these from your income.
- Disposable Income: This is what you’re left with. Consider using a percentage of this for your ham shack.
Prioritize, Prioritize, Prioritize
Yeah, it’d be awesome to have top-of-the-line everything, but let’s get real. It would be best to decide what’s non-negotiable and what you can compromise on.
I remember diving headfirst into setting up my first ham shack. I spent a fortune on a radio and realized I hadn’t budgeted for the antenna. Ouch! Lesson learned: Plan, then purchase.
Hidden Costs: The Sneaky Suckers
Watch out for these bad boys—they’ll creep up on you. No, really. Little things can add up fast, whether it’s shipping fees or the extension cords you forgot you needed.
Common Hidden Costs
- Shipping and Handling: Especially for bulky items.
- Installation Fees: Unless you’re going DIY.
- Accessories: Think cables, mounts, etc.
- Upgrades: Software or firmware for your gadgets.
Where to Save and Where to Splurge: Striking the Balance
Alright, it’s judgment time. What gets the big bucks, and where can you cut corners?
Save On:
- Decorations: Wall art and knick-knacks add flair but shouldn’t break the bank.
- Furniture: Consider upcycling or DIY-ing some elements.
Splurge On:
- Radio: This is the heart of your setup. Go for quality.
- Antenna: A good antenna can make or break your signal.
- Acoustic Panels: If you’re going pro, these are worth every penny.
| Category | Save | Splurge |
|---|---|---|
| Tech Equipment | Basic cables | High-quality radio |
| Furniture | Second-hand chairs | Ergonomic desk |
| Accessories | Standard mousepad | High-grade antenna |
| Software | Free licenses | Premium subscriptions |
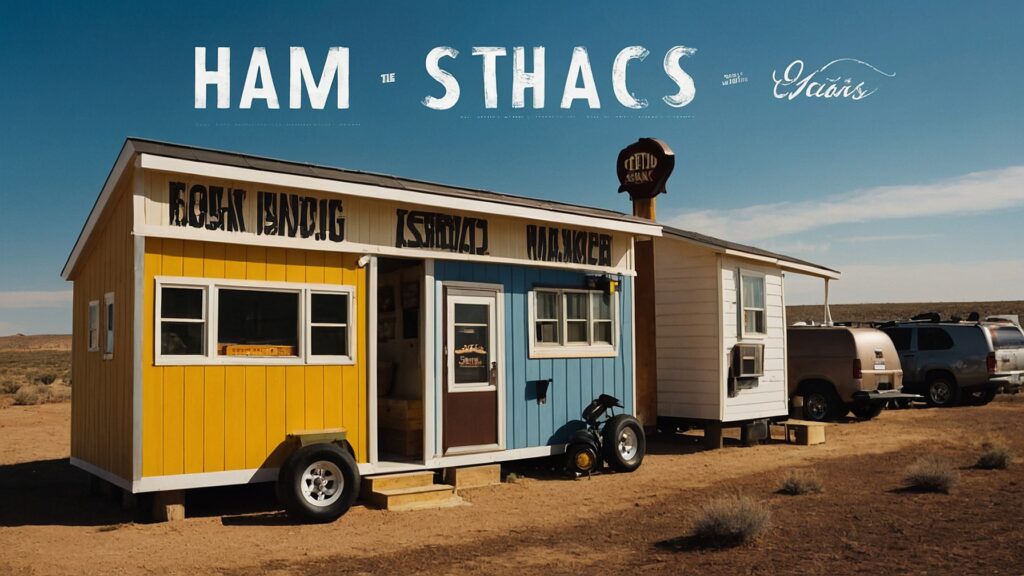
Real-Life Inspirations: A Tour Through Ham Shacks That’ll Make You Go “Wow!”
Are you in search of some ham shack inspiration? You’ve come to the right place! In this section, we’re taking a virtual tour through real-life ham shacks that take the cake. These spaces could be ripped right out of a magazine, from high-tech paradises to cozy corners. Let’s dive in!
Case Study: John’s High-Tech Ham Shack – “Living in the Future”
John’s Ham Shack is a symphony of technology and convenience. It’s like stepping into a tech utopia when you step into his space. Voice-controlled lights, fans, and radios—everything functions at the sound of his voice.
The Setup
Here’s a quick breakdown of his techy landscape:
- Voice Assistant: Amazon Echo Dot for robust voice controls.
- Smart Sockets: To make every gadget controllable.
- LED Lights: Customizable colors to set the mood.
- High-End Radios: John splurged on top-quality radios for the best experience.
The Experience
“It’s like living in the future,” he beams. Imagine changing your lighting, fan speed, and radio frequency—all without lifting a finger. If you’re into smart homes, this is the next logical step.
John’s Budget Breakdown
Wondering how much it costs to live in John’s future? Here’s a budget breakdown:
| Items | Cost |
|---|---|
| Amazon Echo Dot | $50 |
| Smart Sockets | $30 each |
| LED Lights | $100 |
| High-End Radios | $1000 |
| Total | $1210 |
Quick Tips from John
- Please don’t Skimp on the Essentials: Spend money where it matters.
- DIY Can Be Your Friend: He built his radio mount, saving a chunk of change.
- Regular Updates: Keep your software up to date for a smooth experience.
A Side Note on John’s Approach
John’s tale illustrates how you can leverage technology for an efficient, comfortable space. But remember, while John went high-tech, your ham shack can be anything you want it to be.
Other Inspiring Stories
While we’re on the subject of inspiration, plenty of other ham operators have gone all out.
- Sara’s Vintage Vibe: Old-school radios, wooden shelves, and classic posters.
- Mike’s Minimalist Setup: Simplicity at its best—just a radio, antenna, and zero clutter.
Each setup offers a unique experience, showcasing the vast possibilities in ham shack design.
The Ultimate Guide to Building Your Dream Ham Shack
From multifunctional furniture to budgeting to real-life inspirations, we’ve journeyed through a universe of ham shack ideas. Let’s recap and set you on the path to building your dream shack.
The Recipe for Your Dream Ham Shack
Here’s a quick list to remind you of the elements we’ve discussed:
- Furniture: Opt for space-saving, multifunctional pieces.
- Lighting: LED strip lights or adjustable lamps for the right ambiance.
- Wall Art: Personalize with motivational quotes or images.
- Techy Add-ons: Voice-controlled systems, smart sockets, and more.
- Hobbyist vs Professional: Know your needs and plan accordingly.
- DIY or Store-Bought: Choose based on your skill level and budget.
- Budgeting: Factor in all costs, both obvious and hidden.
- Real-life Inspirations: Get ideas from ham shack pros like John.
What’s Next? Your Action Plan
So, what are your next steps? Here’s a handy action plan:
- Set a Budget: Know your spending limit to avoid any nasty surprises.
- Prioritize: Decide what’s essential and what’s not.
- Design Layout: Sketch out your space.
- Purchase: Hit the shops or go the DIY route.
- Assemble: Put it all together.
Ham Shack Budget Sample Table
If budgeting has you stumped, here’s a simple template to get you started:
| Item Category | Estimated Cost | Actual Cost |
|---|---|---|
| Furniture | $300 | |
| Lighting | $100 | |
| Tech Gadgets | $200 | |
| Radios and Antennas | $1000 | |
| Decor | $50 | |
| Total | $1650 |
Conclusion
In wrapping up our exploration of ham shack ideas, it’s clear that creating the perfect amateur radio setup is more than just assembling gear; it’s about infusing your personality and passion into every detail. From the essential trio of a radio transceiver, antenna, and power supply, to the comfort and aesthetics that make your shack uniquely yours, each element plays a pivotal role. These ideas serve not just as a guide but as inspiration for anyone keen to embark on this rewarding journey, whether you’re a newbie or a seasoned pro in the world of amateur radio.
As the ham radio community continues to grow, the evolution of ham shack ideas reminds us of the hobby’s timeless appeal and its significant impact in both daily enjoyment and emergency situations. Embracing both DIY and store-bought solutions allows for a tailored approach, ensuring your shack meets both your operational needs and personal tastes. By prioritizing functionality, accessibility, and personal flair, your ham shack becomes not just a space for global communication but a haven for creativity, learning, and connection.
James Dunnington leads the James Dunnington Collection, featuring five unique blogs: a practical Pet Care Guide, an enlightening Ancient History Blog, a resourceful Home Improvement Guide, a cutting-edge Tech Innovation Guide, and a strategic Online Money Making platform. Each site delivers valuable insights designed to empower and inform. For updates and more tips, visit our Contact Us page to sign up for our newsletter, ensuring you never miss out on the latest content from any of these dynamic fields.