Estimated reading time: 21 minutes
Introduction
Embarking on the journey of replacing a kitchen island can be a daunting yet thrilling task. It’s not just about giving your kitchen a fresh look; it’s about enhancing functionality and making the space work better for your needs. Whether you’re aiming for a kitchen remodel or simply updating the heart of your home, the process requires thoughtful planning and budgeting to ensure success. From choosing the right base cabinets to selecting durable plywood for construction, every detail matters in creating a space that’s both beautiful and practical.
Before you dive into the process of how to remove a kitchen island, it’s vital to consider the cost to replace a kitchen island and explore various kitchen island ideas. For those with a small kitchen, maximizing space with smart island options like a breakfast bar or incorporating storage solutions can transform your kitchen into a more functional and inviting space. Moreover, selecting materials such as tile for flooring or backsplash can add texture and color, bringing your kitchen to life. The aim is to create a kitchen that not only meets your culinary needs but also reflects your personal style, making it the true heart of your home.
Key Takeaways
- Thorough Planning and Budgeting are critical for a successful kitchen island replacement, emphasizing meticulous measurement and financial preparation.
- Professional Assistance is invaluable, particularly for plumbing and electrical work, highlighting the importance of expert advice in the replace kitchen island process.
- Material Selection and Design play key roles in transforming functionality and style, with choices like quartz countertops enhancing the overall appeal.
- Installation Precision requires careful measurement and leveling, ensuring the new island is perfectly aligned and secure.
- Functionality and Personalization make the kitchen island a versatile hub for cooking, socializing, and more, tailored to individual lifestyle needs.
- Anticipating Common Issues helps avoid potential problems such as uneven surfaces and plumbing mishaps, ensuring a smooth kitchen island replacement.
- The Value of Upgrading extends beyond aesthetics, significantly enhancing kitchen functionality and increasing home resale value.
- Timeline and Budget Management are essential, allowing for a realistic approach to planning, execution, and finishing touches, avoiding unnecessary stress and expenses.
How Can You Successfully Replace a Kitchen Island?
In the dynamic world of kitchen renovation, the process of replacing a kitchen island emerges as a pivotal upgrade that significantly boosts both the aesthetic and functional appeal of the heart of the home. This endeavor goes beyond mere visual enhancements, delving into practical improvements in storage solutions and layout optimization. Central to achieving a successful transformation are design trends, countertop selection, and budget planning.
Navigating through the cost estimates and the intricacies of the installation process requires a strategic approach, ensuring the project aligns with financial expectations without compromising on quality or style. By integrating current design trends with functional upgrades, homeowners can craft a kitchen island that not only meets their culinary needs but also stands as a testament to their personal style, making it an essential component of modern kitchen design.
Know What You Want—And Need!
Before you even touch a hammer, take a good, hard look at your current island. What do you like? What do you despise? This is your opportunity to dream big. Think waterfall countertops, extra storage, and maybe even a built-in wine fridge!
Tip: Spend some time browsing through Pinterest or kitchen design websites. The more ideas you have, the better you can visualize your dream island.
Remember when I replaced my kitchen island? I was all about that butcher block countertop. But I didn’t think about maintenance. Long story short: Always consider your lifestyle in your design choices.
The Blueprint: Plan, Plan, Plan
- Determine the Purpose: Decide on the primary function of your kitchen island, such as food preparation or dining, to guide its positioning and features.
- Space Planning: Ensure there’s enough space around the island, recommended between 42 and 48 inches, for comfortable movement.
- Functionality Focus: Consider aspects like counter space usage, desired storage, and how the island fits into the kitchen’s work triangle.
- Design Choices: Explore various kitchen island designs, from those with sinks or stoves to those tailored for dining or featuring unique styles like a waterfall edge or furniture style.
- Color Scheme: Decide whether the island should match the cabinets or if a contrasting color would better serve as a focal point.
Case Study: In a DIY kitchen island makeover case study, a homeowner successfully upgraded their builder-grade kitchen island on a budget. They added custom moulding for a farmhouse look and painted the island in a deep blue, Sherwin Williams Naval. The materials were sourced from Home Depot, and the project was completed under $500, including a butcher block island top costing around $225. This budget-friendly remodel significantly enhanced the kitchen’s aesthetic appeal without breaking the bank
| Component | Budget Range |
|---|---|
| Countertop | $40 – $200/sq ft |
| Cabinetry | $100 – $500/ln ft |
| Labor | $50 – $100/hr |
Fact: The average cost to install a new kitchen island ranges from $3,000 to $7,000. Plan accordingly!
Get the Right Help
Getting the right help is key, especially if you’re not a master of all trades. This becomes crucial when dealing with tasks like plumbing or electrical adjustments, which are pivotal components of the kitchen island removal process. Even if you’re set on a DIY approach to remove your kitchen island, seeking professional advice can prevent costly mistakes, especially when it comes to understanding the cost to replace a kitchen island. When dreaming up inspiring kitchen island ideas, consider everything from the island countertop material to the island base and island cabinets, ensuring they offer ample storage space. For those upgrading or implementing a custom kitchen island, remember to secure the island firmly to the floor and detach the countertop carefully to avoid damage. Whether you’re working with a small kitchen island or deciding on a kitchen island size that best fits how you use your kitchen, incorporating counter stools can transform the side of the island facing away from the island into a social hub, enhancing the overall functionality and appeal of your space.
Case Study: A friend of mine decided to go the DIY route. He did manage to replace his kitchen island. But his attempt at electrical work resulted in a ‘shocking’ experience and an urgent call to an electrician. So, don’t be that guy; get the right help.
Implementation
Finally, we’re at the fun part: making it all happen. You’ll rip out the old and bring in the new, transforming your kitchen from blah to ta-da! But remember, good things take time, and perfection takes a little longer.
“Kitchens should be designed around what’s truly important—fun, food, and life.” – Daniel Boulud
There you have it, folks. Replacing a kitchen island may seem like climbing Mount Everest, but with the proper planning, budget, and help, you’ll find it’s more like a walk in the park. So, what are you waiting for? Let’s turn that dream island into a reality!

Planning and Budgeting: The Roadmap to Your Dream Kitchen Island
Embarking on a kitchen island replacement project requires meticulous planning and budgeting, serving as the cornerstone for transforming your culinary space. It’s crucial to grasp the full scope of costs, from materials to labor, ensuring your renovation aligns with both financial expectations and design aspirations.
Effective budget management, involving research on various materials and labor rates, facilitates a flexible yet structured financial plan. This strategy not only anticipates potential challenges but also uncovers opportunities for cost-saving, leading to a smooth renovation journey that ultimately realizes the kitchen of your dreams, replete with sustainability practices and quartz countertops.
Material Costs for Kitchen Island Upgrade
These costs are for the materials only and do not include installation fees, which can significantly increase the overall expense of your kitchen island upgrade project. When planning your upgrade, consider both the material and installation costs, as well as the durability, maintenance requirements, and aesthetic appeal of each material to ensure you make a choice that aligns with your preferences and budget.
Labor Costs for Kitchen Island Replacement
This table highlights the primary labor costs associated with upgrading a kitchen island. When planning your kitchen island replacement, consider both the direct costs of labor and the potential need for skilled tradespeople to handle plumbing and electrical work, especially if you’re incorporating sinks, appliances, or special features.
Plumbing and Electrical Considerations for Kitchen Island Replacement
It’s crucial to note that the actual costs can vary based on factors such as the size of the kitchen island, the materials chosen, the complexity of the design, and the geographic location.
Design Consultations for Kitchen Island Upgrade
Professional design consultations offer a range of services including creating design plans, establishing a realistic budget, selecting and designing products, finishes and materials, and ensuring the project is properly installed. Kitchen designers can significantly influence the project outcome by optimizing the functionality and aesthetics of your space while adhering to your budget and preferences
Tip: Always add a 10-20% buffer to your budget for unexpected costs. Trust me, they happen!
What’s the Timeline for Replacing a Kitchen Island?
Timeline for Replacing a Kitchen Island
- Planning Stage
- Demolition and Removal
- Installation
- Finishing Touches
It’s important to note that these timelines are estimates and can vary based on the specifics of your project, the efficiency of the contractors, and the availability of materials. Additionally, unexpected delays can occur, so it’s wise to account for some flexibility in your schedule. Planning well and working with reputable contractors can help streamline the process, ensuring a smoother project from start to finish.
Case Study: My buddy John planned to replace his island in a month. He did it, but his haste led to a skewed countertop. He had to redo it, adding another two weeks and going over budget. Speed isn’t everything; planning is.
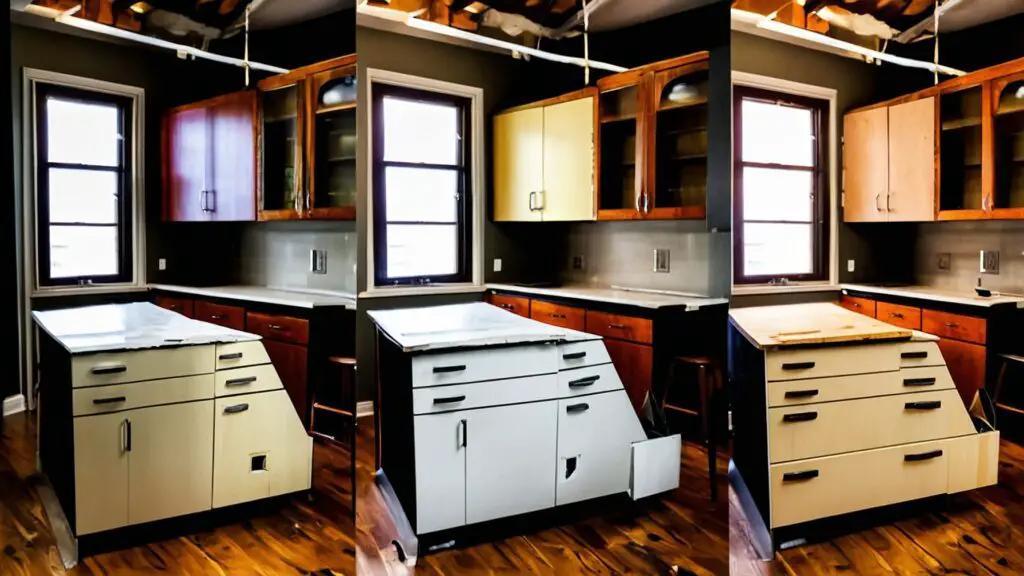
The Replacement Process: From Old and Tired to Fresh and Inspired
Keeping the renovation momentum going means delving into the heart of the matter: the replacement process. How do you transition from an old kitchen setup to one that breathes new life into your space? Here’s the scoop on how to swap out your kitchen island, turning the tired into the inspired. First things first, turn off the power supply and water supply to the kitchen island to safely disconnect electrical and plumbing connections connected to the island. The cost to replace a kitchen island can vary, but every penny spent brings you closer to that perfect island that isn’t just a centerpiece; it’s a cornerstone of your kitchen layout.
Remove any screws or fasteners securing the island to the floor, and carefully detach it from any kitchen cabinets. Considering how you use your island, whether for prepping, dining, or storage, will guide your selection from the best kitchen island ideas. Perhaps a rolling island for versatility or an upgrade in kitchen essentials storage is what your island needs. Every step, from the time to remove the old to installing the new, is a step towards a kitchen that aligns seamlessly within your kitchen, enhancing both function and flair.
How Do You Remove an Old Kitchen Island?
How do you take out an old kitchen island without turning it into a demolition derby? First off, it’s not about swinging hammers wildly. A thoughtless whack could lead you to a busted water line or an electrifying surprise. To avoid turning a simple task into a costly fiasco, it’s essential to approach the removal with a plan. Understanding the cost to replace kitchen island also means considering the expenses you might incur if you rush the removal process without proper care. So, before you start, assess the situation. Are there any hidden connections or parts of the island that need special attention? This careful dismantling is your first step towards creating a new space that meets your needs without unexpected and unnecessary expenses.
Safety First
Before anything, disconnect any electrical or plumbing fixtures. This is non-negotiable.
Tool Time
Get your toolkit ready. Here’s an essential list:
- Hammers
- Wrenches
- Screwdrivers
- Pry bar
- Maybe a saw for stubborn sections
Recruit Help
Let’s face it: unless you’re Thor, you’ll need help lifting countertops and cabinets. So, don’t be a hero; get a buddy to help with the heavy lifting.
My buddy Jim tried doing it solo. What was the result? A dinged-up floor and a bruised ego. Don’t be like Jim.
“Many hands make light work.” – John Heywood
What Plumbing and Electrical Adjustments Are Needed?
Hold your horses! We’re talking water and sparks here, folks. This isn’t DIY territory unless you’re a certified pro.
Plumbing Considerations
If you’re adding a sink or a dishwasher, here’s what you need to consider:
- Additional water lines
- Drainage
- Possibly a water filter or garbage disposal
Electrical Nuances
Want modern luxuries like hidden pop-up outlets for your blender or coffee maker? That’ll require:
- New wiring
- GFCI outlets for safety
- Possible rerouting of existing electrical lines
Fact: The average cost to move plumbing can range from $500 to $1,000; electrical modifications can be up to $300.
Tip: Consult pros for this part. No one wants a flooded kitchen or a small electrical fire as a housewarming gift.
How to Install Your New Kitchen Island?
Ah, the big moment! You’ve ripped out the old, so bringing in the new is time.
Measure Twice, Cut Once
The oldest rule in the book. Always double-check your measurements. A fraction of an inch can make a huge difference.
Align and Assemble
- Place the frame where it needs to go
- Secure it to the floor and walls
- Make sure it’s level—no one likes a wobbly island!
Add Features
- Install sinks and cabinets
- Add any electrical outlets or switches
- Attach the countertop
Case Study: One client of mine opted for a two-tier island—a marble top for cooking and a wooden one for dining. It became the family’s favorite meal spot and cut their dining-out costs by half! Talk about a win-win.
Design Aspects: Give Your Kitchen Island a Makeover with Flair
Ah, the fun part: design! This is where your kitchen island goes from a valuable block to a style statement. So, let’s dive into the artistic side of how to replace a kitchen island, shall we?
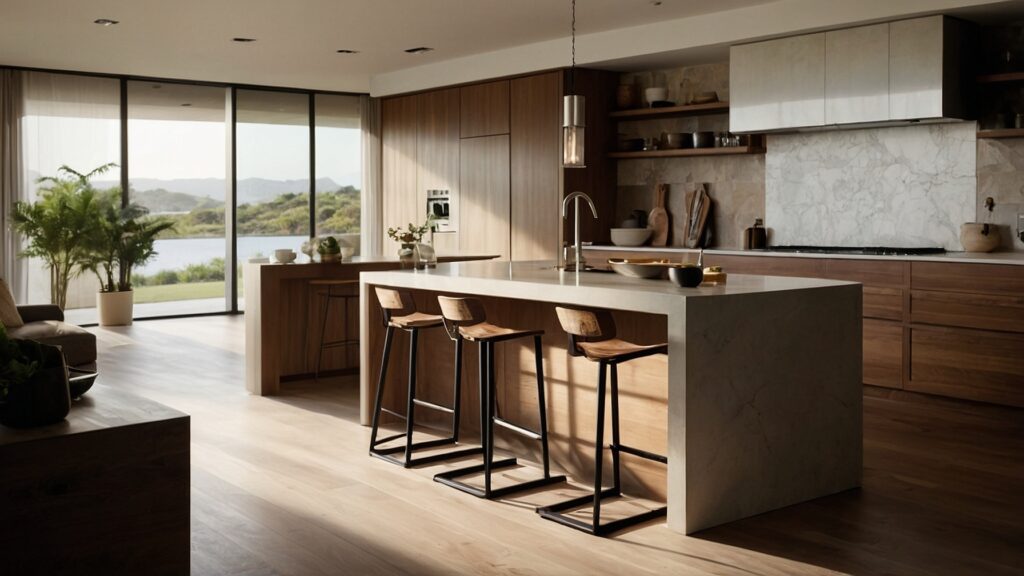
What Are Modern Design Options for a Kitchen Island?
Design is where you can let your personality shine through. Gone are the days when an island was just a rectangle in the middle of the room.
Trendy Materials
Quartz, my friends, is the MVP right now. Not only does it look slick, but it’s also super easy to clean. Other popular choices include:
- Natural Stone
- Concrete
- Reclaimed Wood
Fact: Quartz countertops resist stains and scratches, making them a practical choice.
Color Schemes
Grays, blues, and earth tones are having a moment. These shades bring a calming effect, making your kitchen more inviting.
Features
You can add a lot more than just a countertop and some storage. Consider these cool add-ons:
- Wine fridge
- Hidden trash compartments
- Pull-out cutting boards
Tip: Think long-term while choosing features. A wine fridge might sound fantastic, but ask yourself, “Will I use it?”
How Can You Make Your Kitchen Island Multifunctional?
The island is more than just a cooking space in my house—it’s Homework Central for my kids, a makeshift dining table, and my work-from-home desk on hectic days.
Seating Areas
Consider adding:
- Bar stools for quick breakfasts
- Built-in benches for cozy family dinners
I added bar stools to my island and found my kids were more likely to eat breakfast at home before school. It saved me money on those last-minute McDonald’s runs!
Extra Storage
We all need more storage. Consider these:
- Pull-out drawers for utensils
- Hidden shelves for cookbooks
- Slide-out racks for pots and pans
Case Study: One of my clients added a pull-out dog food drawer at the base of their island. Fido was thrilled, and it kept the bag out of sight!
“The kitchen is the heart of every home, for the most part. It evokes memories of your family history.” – Debi Mazar.
Your Island, Your Rules
Designing a kitchen island isn’t just about following trends; it’s about creating a space that caters to your needs and reflects your lifestyle. From material and color choices to multifunctional features, your options are endless. Now that you know how to replace a kitchen island in style, go ahead and give yours the update it deserves!
Troubleshooting and FAQs: Don’t Let Hiccups Derail Your Kitchen Island Dream
Hey, I get it. No matter how well you plan, sometimes things go sideways. The good news? Most hiccups are solvable. So, let’s talk about the bumps you might hit on the road to your dream kitchen island.
What Common Issues Might You Encounter?
Ah, the inevitable snags. Here are a few issues you should be prepared for.
Uneven Surfaces
Trust me; you don’t want your island turning into the Leaning Tower of Pisa. Make sure the surface is level during installation.
- Quick Tip: Use a carpenter’s level during the installation.
I once ignored this advice and dealt with spilled coffee for weeks. Please don’t make my mistake.
Plumbing Mishaps
No one wants a mini flood in their new kitchen. So, double-check those connections.
- Fact: A single leak can waste up to 10,000 gallons of water annually.
Electrical Problems
It might be tempting to DIY this part but don’t. A qualified electrician can ensure all wiring is up to code.
- Tip: Never, ever skimp on electrical work.
Problem Solved
Every project has challenges, but don’t let that deter you. You’re well-armed to tackle any issues that come your way when replacing your kitchen island. Now, turn that dream island into a reality!
Why Is Replacing a Kitchen Island Worth the Effort?
Ah, the million-dollar question—why even bother? Here’s the deal: upgrading your kitchen island isn’t just about making your space look snazzy (though it does that, too!). It’s about enhancing your kitchen’s functionality and bumping up your home’s resale value. Intrigued? Let’s dive in.
The Trio of Benefits: Aesthetic, Functionality, and Value
Think of your kitchen island as a Swiss Army knife. It’s versatile, practical, and pretty darn cool. Here are the three big reasons to consider a makeover:
Aesthetic Appeal
Your kitchen island is a visual centerpiece. It’s one of the first things people notice. A well-designed island can transform the whole vibe of your kitchen.
- Tip: Pick a timeless yet modern design to ensure it remains a talking point for years.
- Research shows that kitchen upgrades can offer up to 80% ROI.
Functionality Boost
An island isn’t just a pretty face; it has jobs. From cooking prep to storage, a well-designed island makes your kitchen tasks much more accessible.
- Anecdote: My old island lacked a sink, making my meal prep a walking marathon. Once I added a sink, the cooking process got 10 times easier.
Increased Home Value
Don’t overlook the long-term investment factor. A stylish and functional island can up your home’s market value.
“Your home is a long-term investment, so why not make the most of it?” – Me, just now
Case Study: The Island That Sold a Home
I have a friend, let’s call her Sarah. She was having a hard time selling her house. Her agent suggested upgrading the kitchen island. They switched from an old wooden design to a sleek marble one, threw in a wine cooler, and voila! Her home was off the market in less than a month.
ROI on Various Kitchen Upgrades
| Upgrade Type | Average Cost | Average ROI |
|---|---|---|
| Basic Renovation | $15,000 | 60% |
| Island Addition | $4,000 | 70% |
| High-End Overhaul | $50,000 | 50% |
Why Wait?
So, let’s summarize, shall we? Upgrading your kitchen island is more than just a design revamp. It boosts your kitchen’s utility and adds to your home’s worth. With those kinds of perks, why put it off any longer? Make the move and invest in the heart of your home.
Thoughts on Replacing Your Kitchen Island
Alright, you’ve got the playbook in your hands, and it’s game time! From design to demolition and budgeting to building, you’re ready to make that kitchen island the showstopper it deserves. So, why hold back?
Your Kitchen Island Makeover
- Design for Durability and Ease of Maintenance: Choose countertop materials that can withstand the hustle and bustle of kitchen activities. Materials like natural or engineered stone are not only durable but also easy to clean and maintain, ensuring your island remains beautiful and functional for years to come.
- Get the Proportions Right: Proper island proportions are crucial for efficient workspace utilization and maintaining smooth traffic flow in the kitchen. Ensure there’s at least 39 inches of circulation space around the island and consider the heights and widths that best suit your needs and kitchen layout.
- Incorporate Power Outlets and Appliances Thoughtfully: Position power outlets and appliances in a way that they’re accessible yet don’t disrupt the island’s aesthetics. Consider incorporating charging drawers for electronic devices to enhance functionality without compromising the design.
- Plan for Multifunctional Use: If your kitchen island serves as a “mission control” for activities ranging from dining to homework, think about the layout and features that will accommodate these varied uses. This might include an overhanging area for dining or a drop-down section to table height for additional flexibility.
- Mix Materials to Break Down Scale: Large islands can dominate a kitchen space, so using a mix of materials can help to visually break down the scale and add interest. However, it’s important to maintain balance to ensure the island complements the overall kitchen design.
By keeping these considerations in mind, you can create a kitchen island that not only looks stunning but also enhances the functionality and enjoyment of your kitchen space.
What You Stand to Gain
Remember, the benefits are triple-tiered:
- Aesthetic Boost: Your kitchen gets a visual lift.
- Enhanced Functionality: Cooking and family time become more enjoyable.
- Increased Home Value: Future you will thank present you.
“The best time to plant a tree was 20 years ago. The second best time is now.” – Chinese Proverb.
Case Study: I had a client, let’s call him Mark, who barely spent time with his family. They’d all eat at different times, scattered around the house. Mark decided to add a dining extension to his kitchen island. Result? It became their new family hub, changing how they interact and spend time together.
Don’t Forget!
You’ve invested much time and thought into this project, but don’t forget to take pictures before and after. You’ll want to show off that transformation!
- Lockable Bearing Plate Caster Wheels with Brakes
- 360-degree Swivel Casters for Furniture and Workbench Cart
- Set of 4 (Free Screws and a Spanner)

Conclusion
Embarking on how to replace a kitchen island encompasses more than just a straightforward renovation; it’s a transformative journey that enhances both the aesthetic and functional dynamics of your kitchen space. This comprehensive guide has navigated through the essential steps, from meticulous planning and budgeting to the actual replacement process, not forgetting the crucial design aspects that inject flair into your kitchen. Replacing a kitchen island isn’t merely about updating an old piece but reimagining this central hub to elevate your kitchen’s overall functionality and style. It’s a project that demands a blend of creativity, strategic planning, and technical know-how, ensuring that every facet of the island’s replacement contributes positively to the kitchen’s ambiance and usability.
As we conclude, remember that the success of replacing kitchen island hinges on careful consideration of your specific needs and preferences, harmonized with the practicality of the space and budget constraints. The journey from an old and tired island to one that’s fresh and inspired is paved with decisions on materials, design, labor, and unforeseen challenges. However, with a focused approach, informed by thorough research and professional advice, your new kitchen island can become a reality that surpasses expectations. This endeavor not only boosts the aesthetic appeal and functionality of your kitchen but also significantly enhances the value of your home, making it a worthwhile investment. As you embark on this exciting project, let this guide serve as a roadmap to achieving a kitchen island that perfectly embodies your vision of a dream kitchen, blending seamlessly with your lifestyle and enhancing the heart of your home.
James Dunnington leads the James Dunnington Collection, featuring five unique blogs: a practical Pet Care Guide, an enlightening Ancient History Blog, a resourceful Home Improvement Guide, a cutting-edge Tech Innovation Guide, and a strategic Online Money Making platform. Each site delivers valuable insights designed to empower and inform. For updates and more tips, visit our Contact Us page to sign up for our newsletter, ensuring you never miss out on the latest content from any of these dynamic fields.