
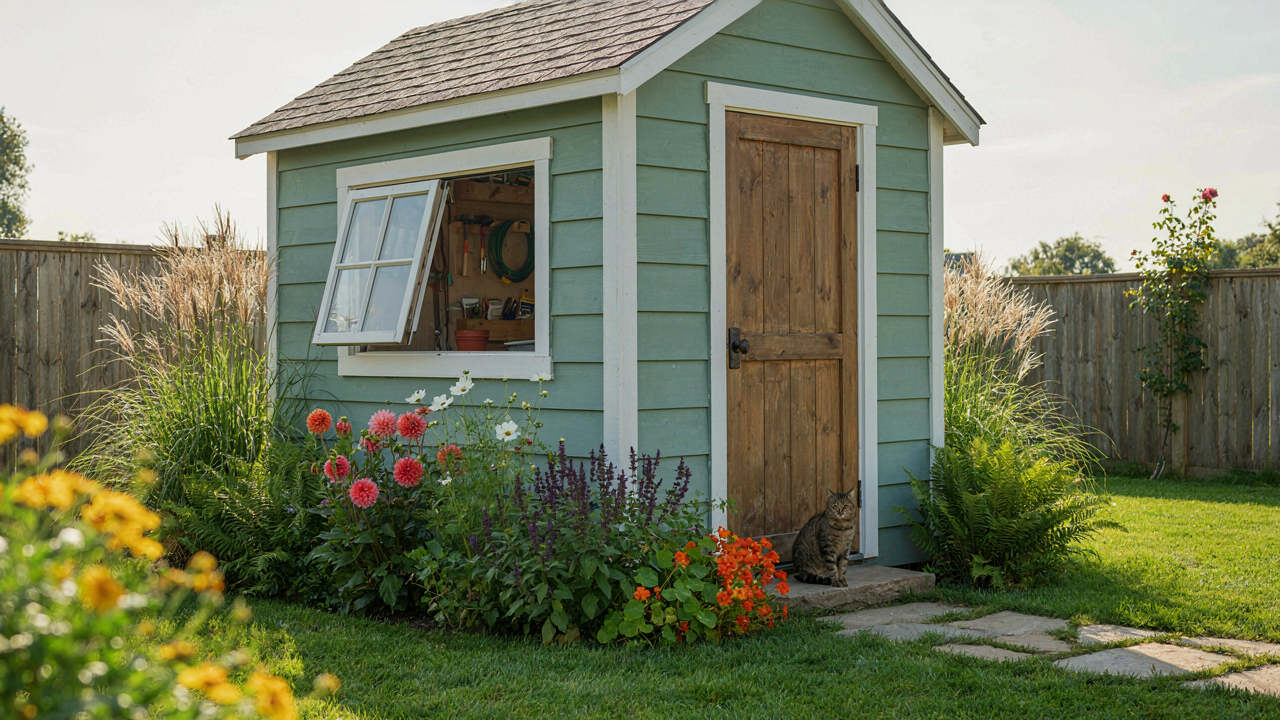
The Minimalist Shed Manifesto: Why Less Clutter Means More Clarity

What Actually Belongs Inside
You want the shed to feel organized so you can tell yourself you’re prepared. That’s not preparation, that’s theater. The mechanism is simple: every tool you don’t use creates decision fatigue when you’re actually trying to work. You stand in front of your shed, scan thirty items, and waste mental energy dismissing twenty-nine of them. Small sheds force you to keep only what you reach for within a season.
Start with this filter: a tool earns its place if you use it for your primary activity in that space. If you garden, your essentials are hand tools, soil amendments, and seasonal gear. If you store bikes, you need wall mounts and a basic workstand. If you do light repairs, you need a socket set and hammer. Everything else is insurance against hypothetical scenarios you’ll never face. Remove it.
Movement Patterns Come Before Shelf Space
Most shed layouts treat storage like a physics problem when it’s actually a workflow problem. Architects call this spatial efficiency, but in a shed it means something harder: placing tools where your body naturally moves when you’re working. If you enter through the door and move right toward daylight, your most-used items go on that path. Your workbench doesn’t sit in a corner because “that’s where it fits.” It sits where your hands are when you need both light and tool access simultaneously.
The real cost of bad flow isn’t inefficiency, it’s abandonment. You skip tasks because walking fifteen feet for a trowel feels unreasonable. You leave tools scattered because there’s no logical place for them. Layout first, then build shelving around it. Measure your actual movement pattern before drawing a single line on the shed plans.
Beyond Big Box: Sourcing Materials That Last (Without Breaking The Bank)

Where Local Lumber Actually Wins
You want the story where buying local makes you feel good about yourself. That’s not the mechanism. The real reason to source local lumber is economics: regional mills price based on local supply, not national distribution markup. A pine 2×4 costs less when it doesn’t travel three states. Your hidden motive is saving money while pretending it’s noble. Cut that noise and focus on what matters: local sawmills and reclaimed yards have material big box stores won’t stock, and their prices reflect zero middleman tax.

Regional lumber varies by species and rot resistance based on climate. Hardwoods from temperate zones (oak, maple, ash) resist moisture better than softwoods in damp environments. Softwoods like pressure-treated pine work fine for shed framing if you source from mills that treat for your specific region’s fungal load. Call mills directly. Ask what they milled last season. Check their inventory for dimensional consistency. A shed frame fails not from wood type but from moisture exposure and poor fastening—lumber sourcing just changes your material baseline.
Salvage With A Structural Lens
Common advice says scavenge old barns for character. That’s cargo cult thinking. What you’re actually doing is applying material science’s concept of proof testing: taking reclaimed wood that survived decades under real environmental stress tells you something new lumber won’t prove for years. A 2×6 joist from a 1970s barn that didn’t rot proved its strain rating under actual conditions, not lab conditions.
Structural salvage works only if you inspect for three failure modes: rot (soft wood that yields to a screwdriver means internal damage), checking (deep cracks perpendicular to grain weaken tension capacity), and previous fastener holes (they become stress concentrators). Old barns give you dimensional lumber—a 2×6 from 1960 is actually 2×6 inches, unlike new lumber milled to 1.5×5.5. For a shed frame, reclaimed joists and beams cost 40-60 percent less than new while holding identical load capacity if you reject anything showing soft spots or deep checks. Source from local deconstruction companies, not antique dealers, because they categorize by structural grade rather than aesthetic value.
The “Lean To” Lie: Maximizing Space With Smart DIY Storage Shed Design

Going Vertical Breaks The Width Trap
You want a shed that doesn’t eat your entire yard. That’s the real question underneath all the planning. The mechanism here borrowed from warehouse logistics: density. Warehouses don’t expand outward when they need more capacity, they stack vertically. Your shed works the same way. A 8×10 footprint with 10-foot walls holds three times what it would at 6-foot clearance, and you didn’t add a single square foot to your lot line.

The lean-to design tricks people into thinking horizontal extension is the only answer. It’s not. Vertical racking, wall-mounted pegboards, and loft platforms transform cubic inches into usable storage. Install 2×4 wall studs 16 inches apart, bolt steel L-brackets every 24 inches of height, and slide 3/4-inch plywood shelves across them. This method lets you anchor directly to structural members instead of relying on drywall fasteners that fail under load.
Access Doors Change The Workflow Math
Most DIY builders put one door on the front and wonder why they waste 40 minutes finding a rake. External access points aren’t decoration. They’re workflow shortcuts. Bifold or Dutch doors on opposite walls reduce the steps needed to grab tools and move materials through the space.
Place your main entry where the most-used tools sit. Install a small window-height opening on the side or rear wall for reaching long-handled tools without moving your body through the full doorway. Frame these openings with doubled headers to carry roof load, and use weatherstripping on the bottom seal to prevent water pooling. This forces intentional spatial planning during the design phase instead of correcting mistakes after framing is complete.
Foundation First: Engineering A Small Shed For Eternity, Not A Season

Soil And Drainage Assessment
You’re building this shed because you don’t want to rebuild it in five years. That fear is rational. The real mechanism at work here is water accumulation. Soil mechanics teaches us about bearing capacity and settlement, and your shed’s bearing capacity depends entirely on how water moves through and under your structure. A shed that settles unevenly cracks walls and jams doors. Water causes settlement.

Before you pour or place anything, dig a test hole eighteen inches deep where the shed will sit. Fill it with water and watch. If it drains in under four hours, your soil handles water reasonably. If it sits there, you have a drainage problem that no foundation can ignore. Dense clay and poor drainage kill more sheds than age does.
Concrete Pad Or Gravel Base
The generic advice says both work. That’s incomplete. Concrete pad works if you pour it correctly with a four-inch depth minimum, slope for drainage, and frost-proof footings if you’re in a freeze-thaw climate. Gravel works only in specific conditions: well-draining soil, no freeze-thaw cycles, and you’re willing to relevevel it every few years.
A concrete slab shifted by frost heave cracks and becomes unusable. A gravel base compacts unevenly and creates low spots where water pools. Your choice depends on climate and soil type, not preference. Measure ground temperature swings in your region before deciding. If winters drop below thirty-two degrees regularly, concrete with proper footings is the only answer that doesn’t require maintenance every season.
The “Garden Shed Lean To” Trap: Reclaiming Lost Space
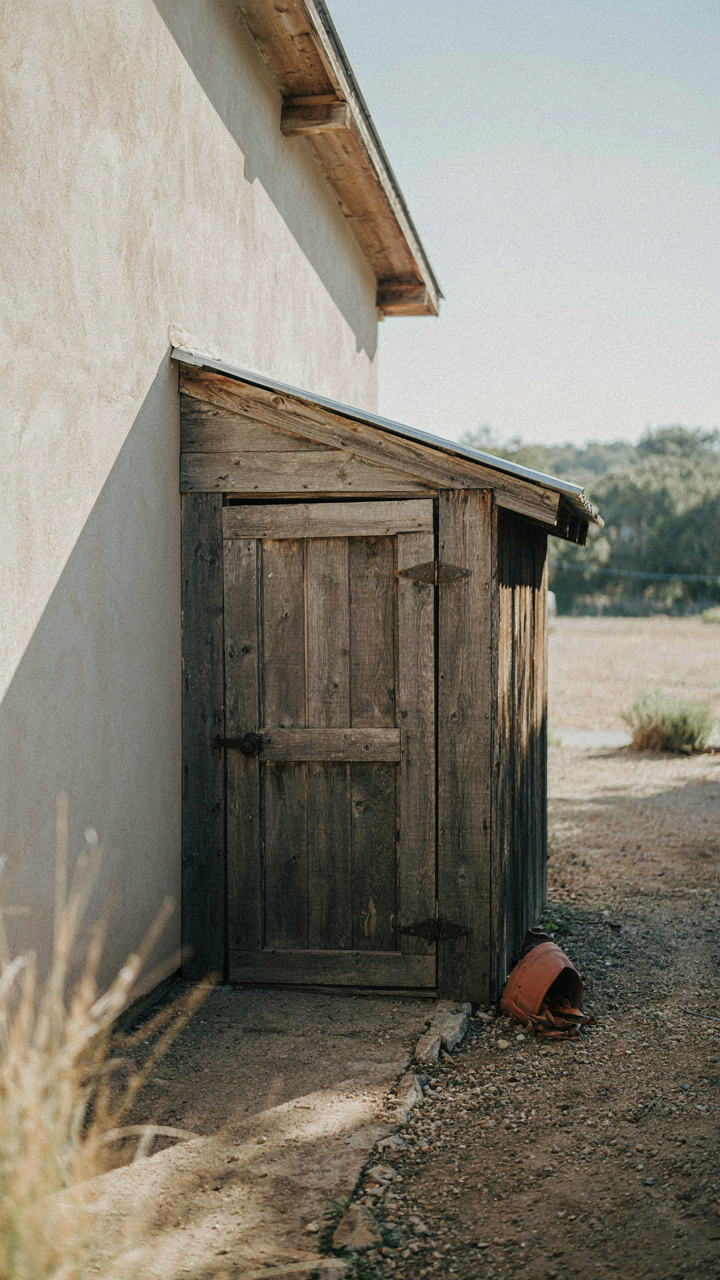
Wall Angles For Maximum Sun Exposure
You want to believe a lean-to works because it saves money and time. The real reason most fail is people ignore basic solar geometry. Think of your shed wall as a solar collector in physics terms. The angle between your wall plane and the sun’s path determines how much light actually hits the structure and the ground beside it. South-facing walls in the Northern Hemisphere capture winter sun lower on the horizon. East-west orientation matters less than the wall’s pitch relative to seasonal sun angles.

Build lean-tos with walls angled between 25 and 35 degrees from vertical in most climates. This slope lets winter sun penetrate deep into the lean-to space while summer sun bounces off the steep angle. Measure the distance from your main shed wall to where shadows fall at noon in December. Your lean-to depth should never exceed this shadow length, or the structure becomes a dark dead zone where nothing grows and moisture pools year-round.
Water Management During Heavy Rain
The conventional wisdom says to just slope your roof and call it done. That misses the actual mechanism: a lean-to amplifies water volume concentration because it funnels runoff from both the roof pitch and the vertical wall surface onto a narrow ground strip. Install a gutterless drip edge along the shed wall junction, then run a French drain or swale parallel to the shed foundation at the lean-to’s inner edge. This intercepts water before it pools against your main structure.
Position a rain barrel or buried cistern at one corner where the lean-to roof peak meets the shed wall. Size it to hold at least 50 gallons for every 100 square feet of lean-to roof area. Run a simple overflow pipe buried three feet downslope. Wet soil against your shed base costs more to fix than building the drainage right the first time, so route collected water away from the structure perimeter during installation.
The “Tool Shed Plans Diy” Illusion: Building For Use, Not Just Storage

Design Custom Tool Holders
You want to feel like a builder, not just someone who bought a storage box. The real mechanism at work here is friction. Most sheds fail because people treat them as afterthoughts, cramming tools into generic wall space. Industrial design calls this “access cost” – the effort required to retrieve what you need. Lower the access cost, and you actually use the space. Raise it, and your shed becomes a junk repository.

The difference between a functional shed and a dead zone comes down to one principle: every tool occupies a fixed location with a clear retrieval path. Not hanging loosely on a pegboard. Not stacked behind other items. Not “somewhere on that shelf.” Custom holders eliminate decision friction.
- Wall-mounted tool racks: Arrange frequently used hand tools at eye level within arm’s reach. Mount them 36 to 48 inches high for natural access without bending or reaching overhead.
- Labeled shadow boards: Cut tool shapes from plywood backing. Paint the negative space bright colors so missing tools are instantly visible. Makes accountability automatic.
- Magnetic strips for metal tools: Mount metal-grade magnetic strips for chisels, screwdrivers, and drill bits. Keeps small items visible and prevents loss in drawers.
- Rolling cart zones: Dedicate floor space for carts holding seasonal or occasional tools. Roll them in when needed, store against walls when not. Keeps daily workspace clear.
- Pegboard with drilled holes for hooks: Standard 1/4-inch pegboard with matching hook sizes. Customizable, reusable, and forces you to commit each tool to one spot.
The moment you build fixed storage, you stop tolerating disorder. You start reorganizing when something doesn’t fit. This feedback loop is what separates a used shed from a storage unit. Build the holders before the roof goes on, not as an afterthought.
Incorporate A Small Workbench
Most weekend builders skip the workbench because they think it requires permanent installation and lost floor space. Wrong on both counts. A proper workbench is the only structural element that makes a shed functional versus just weatherproof. The workbench is where the shed transforms from storage into a production facility.
Build a simple frame bench, 24 inches deep and 48 inches long, that mounts on hinged brackets to one wall. When folded down, it takes zero floor space. When folded up, it creates a work surface at 34 to 36 inches high, which is standard for bench work. Use 2×4 framing and a 3/4-inch plywood top. Add a vise to the underside if space allows. The entire assembly weighs under 40 pounds, so wall fastening into studs is sufficient.
The “Small Garden Shed Plans” Deception: Why Off The Shelf Fails

Where Generic Plans Break
You want to believe a pre-made plan will save you money and time. Here’s what actually happens: most published shed plans are designed for liability protection, not your specific ground. They use load assumptions that apply nowhere. The mechanism is simple—plan creators build toward the legal middle. A plan rated for “average soil” doesn’t account for your clay base, your slope, or your frost line depth. This means you either over-engineer or under-build.

Generic plans also standardize dimensions around lumber availability thirty years ago. A 10×12 footprint made sense when 2×6 joists came in specific lengths. Today you’re paying for stock cuts that don’t match your actual span needs. The real cost isn’t the plan itself—it’s the material waste when you force a generic layout onto an irregular property. You’ll cut lumber wrong, buy overstock, or rebuild sections mid-project because the plan assumed conditions you don’t have.
Site Realities Force Redesign
Building codes exist at the county level, not the internet level. A plan legal in Georgia violates setback rules in Massachusetts. Your shed needs specific foundation depth based on where frost penetrates your ground—this varies by fifty miles. Wind load requirements shift by region. Snow load in zone 4 differs drastically from zone 7. A generic plan ignores all of this, which means either permits get rejected or you build something that fails structurally in year three when weather tests assumptions nobody stated.
The second failure point is drainage and ground composition. Off-the-shelf plans show level ground with standard gravel base. Your site has a slope toward a wet corner. Your soil compacts differently than the red clay the plan assumed. Water doesn’t flow where the plan predicted. Within two seasons you have a soft foundation on the uphill side while the downhill corner settles unevenly. The solution isn’t better plans—it’s measuring your actual site first, then adapting the plan to match what’s actually there.
The “Garden Tool Shed Plans” Protocol: Applying Ergonomics To Your Workspace

Tool Access Height Optimization
You want this section because you’re afraid you’ll build something that feels wrong to use, and you can’t articulate why. Here’s the mechanism: ergonomics is borrowed from biomechanics, the study of how bodies move through space. In shed design, “reach envelope” means the optimal zone where your arms access tools without strain. Most weekend builders ignore this and hang everything at eye level, which wastes the most functional storage real estate.

The waist-to-shoulder band is where you place frequently grabbed tools. Shovels, rakes, and hand tools live here. Seasonal or specialty items go higher or lower. Your forearms operate most efficiently between waist and mid-chest height. Below waist, you bend; above shoulders, you climb or stretch. One measurement drives this: if you build the tool wall in a 48-inch-wide section, your central 24 inches should contain 70 percent of what you actually reach for during a typical work session.
Movement Economy In Tight Spaces
Flow state isn’t mystical. It’s the absence of wasted motion between sequential tasks. Most shed plans ignore task sequencing entirely, treating storage as decoration. The real move: group tools by the work you do, not by tool type. Potting supplies near the potting bench. Hand tools near the door. Fertilizers and soil amendments in one corner where you mix and stage them before planting.
A narrow aisle forces efficiency. If your shed is 8 by 10 feet, you cannot afford dead zones or tools that require two steps to reach. Measure your actual workflow: where do you stand first, second, and third when you enter? Build your layout to minimize direction changes. Your hands should never cross more than 18 inches horizontally to grab what’s next in the sequence.
Weatherproofing Your Investment: Beyond A Basic Roof

Stop Moisture Before It Costs You
You care about this section because you’re afraid your shed will rot in five years and you’ll have wasted the whole build. That fear is rational. The real mechanism is simple: wood fails when moisture stays trapped inside the structure. A roof keeps rain out, but ventilation keeps humidity from accumulating in the cavity where rot actually starts.

Think of your shed like a lung. In respiratory physiology, gas exchange happens through diffusion across membranes. Your shed needs the same principle: air movement that lets moisture vapor exit the wood before it condenses and settles. Without it, you get passive accumulation. The math is brutal. Wood at 20 percent moisture content stays stable. At 25 percent, fungal growth begins. Most sealed sheds hit that threshold within eighteen months in humid climates. You need soffit vents at the low points and ridge or gable vents at the high points. This creates stack effect, the natural convection that pulls moist air up and out.
Seal Properly Or Don’t Seal At All
The common advice on sealants is incomplete garbage. Everyone says caulk your gaps, but nobody explains the difference between stopping liquid water and managing vapor. Polyurethane sealant stops liquid water. It does not stop vapor transmission. Silicone stops both but fails under UV and temperature cycling on exterior wood. Acrylic latex stops neither. This matters because your shed walls will move with seasonal humidity changes, and rigid sealants crack under that movement.
The protocol is specific. Use polyurethane for all joints where liquid water runs. Apply it into the gap at a depth equal to its width. Let it cure fully before exposure. For vapor control on interior surfaces, use a separate vapor barrier during framing, not sealant after the fact. Sealant is maintenance. Barrier is design. Install your barrier before you sheath, then sealant becomes the backup system, not the primary defense.
The “Tool Shed Plans” Fallacy: It’s Not About The Plan, It’s About The System

Build For What You’ll Actually Own, Not What You Think You Should
You’re looking at shed plans because you want proof that the structure itself will solve your storage problem. It won’t. The real issue is that most builders treat the shed as a static container instead of a system that needs to absorb new tools, equipment, and materials over time. Your hidden fear is that you’ll build wrong and waste the effort. That’s legitimate. But the plan isn’t the problem.
Borrow from inventory management: most shed failures happen because builders don’t account for load capacity expansion. You design for what you own now, then add a pressure washer, generator, or lumber storage in year two. Suddenly your wall studs, floor joists, and foundation weren’t engineered for the actual use case. The mechanism is simple: a 12×10 shed planned for hand tools needs different structural specs than a 12×10 shed that will eventually hold a riding mower and 500 pounds of seasonal equipment. Most plans give you neither option.
The solution isn’t picking the “right” plan. It’s designing one tier up from your current needs, then building infrastructure that tolerates growth. Add extra floor support now. Run a 30-amp circuit to the shed instead of 15-amp. Frame walls with 2×6 instead of 2×4, even if you don’t need the depth yet. The cost difference is 8 to 12 percent. The regret cost of rebuilding in three years is 100 percent.
Maintenance Doesn’t Exist Without A Protocol
People talk about maintaining sheds like it’s something that happens through good intentions. It doesn’t. You maintain what you monitor, and you monitor what you’ve decided to measure. Most shed owners have no baseline. They notice rot or pest damage only when it’s expensive.
Build a maintenance protocol into your construction timeline, not as an afterthought. Before you finish the interior, establish a three-month inspection cycle: check for water infiltration around the door frame, verify roof drainage flows away from the foundation, inspect the base for rodent entry points, and examine the interior for moisture. Write these dates into your calendar or shed file now. Assign them to a specific month. January inspection catches winter damage. July inspection catches summer pest activity. The discipline of the schedule is what stops deterioration, not the shed plan itself.
Your Real Problem Isn’t A Lack Of Plans, But A Lack Of Principles

You don’t need another set of shed plans. You need to stop waiting for permission to build. The difference between people who finish projects and people who don’t isn’t blueprint quality, it’s the ability to start with incomplete information. Pick a plan today, not next month. Commit to one weekend. The worst shed you actually build beats the perfect shed that lives in your browser forever.