
The Leverage Principle: Why Most “Cape Cod Dormer Ideas” Fail

What You Think A Dormer Does
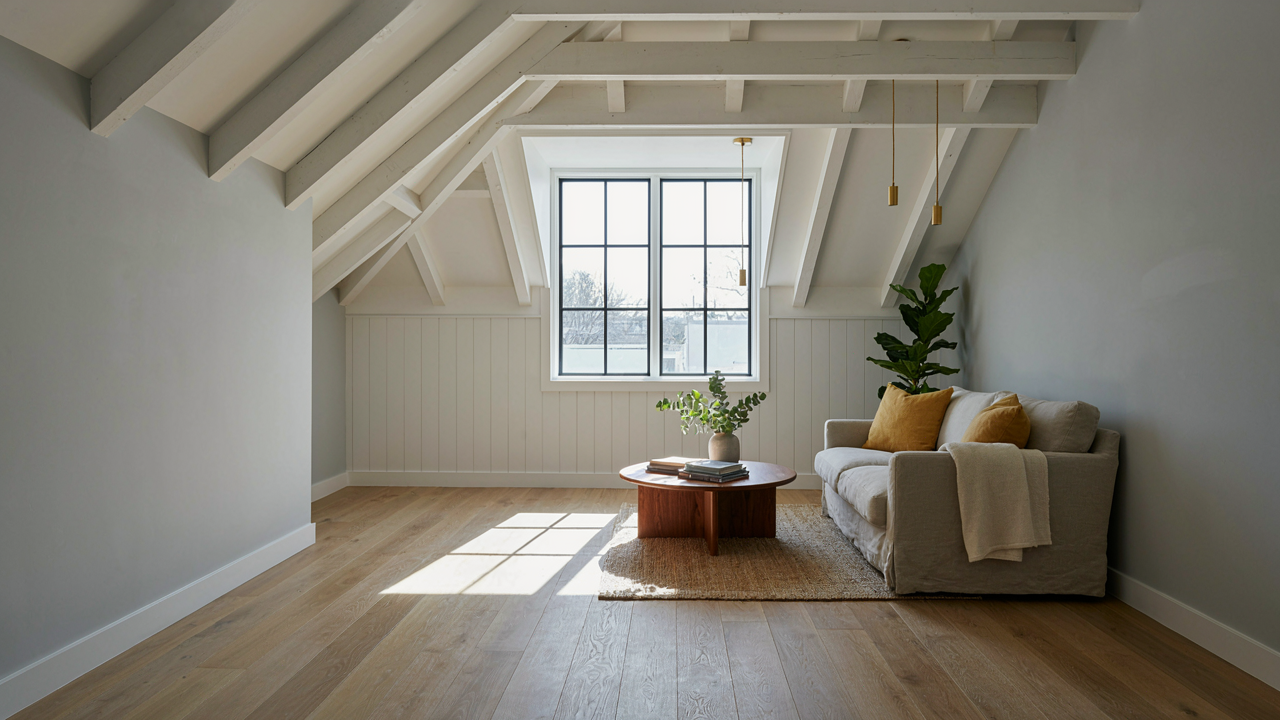
You want the upstairs brighter. That’s the real reason you’re reading this. Most people believe adding a dormer simply means more window area, so naturally more light flows in. Wrong. A dormer is a structural lever, not a light fixture. Its actual impact depends entirely on which wall you attach it to and how you angle it relative to the sun’s path. Orientation beats size every time.
The common advice—slap a dormer on the dark side—ignores solar geometry. A north-facing dormer on a Cape Cod captures almost no direct light in winter, the season when brightness matters most in New England homes. East and west exposures create glare problems you’ll spend years managing. South-facing placement is the only position that delivers consistent, usable light without architectural regret. Most homeowners never calculate this before breaking walls.
Placement Decides The Outcome
Think of dormer placement like leverage in physics: the distance from the fulcrum determines force output. A dormer positioned midway along a sloped roof creates different light dynamics than one pushed toward the ridge or the eave. The closer to the ridge, the smaller the shadow cast by the dormer’s own structure onto the interior space below. Closer to the eave means more roof obstruction above the window, cutting off high-angle winter sun completely.
The actual move is this: measure your room’s depth from the exterior wall inward, then place the dormer so its window sits roughly one-third of that distance from the wall it faces. This positioning captures morning or afternoon light depending on orientation while minimizing the shadow zone that makes upper rooms feel dim even with added glass. Calculate roof pitch, window height, and obstruction angles before you permit anything.
The “Architectural Amplification” Method For Cape Cod Home Additions

What Brightness Actually Means In Your Space
You want a dormer because you’re tired of a dim room, but you’re really afraid of wasting money on a renovation that doesn’t move the needle. Here’s what matters: brightness isn’t about the number of windows. It’s about light hitting surfaces that reflect it back into the room’s depth. A poorly placed dormer with undersized glazing adds zero value. The mechanism is straightforward. South-facing dormers capture direct solar gain. East-facing dormers grab morning light when rooms sit unused. North-facing dormers produce flat, non-directional light that reads as perpetually dim. Window size relative to roof pitch determines how much light actually penetrates below the roofline into the room’s core.

Common advice treats dormers as simple light sources. They’re not. A Cape Cod dormer functions as a reflection multiplier. The vertical wall inside the dormer acts as a secondary light bounce surface before rays hit your floor and furniture. Sizing the dormer’s interior width and depth, then choosing matte or semi-gloss finishes on those interior walls, controls how aggressively light scatters back into the room. Dormers installed without attention to interior finish create bright spots near the window but dark zones ten feet away. The real work happens after framing is complete.
How Dormers Amplify Your Usable Square Footage
Borrowing from systems architecture, think of a dormer as an interrupt in the roof plane that redirects energy instead of dispersing it. When you cut a dormer into a Cape Cod’s low-slope roof, you’re not just adding light. You’re creating a structural multiplier that transforms dead attic space into usable square footage. The dormer’s sidewalls and knee walls effectively extend your wall height in a zone that was previously too cramped for furniture or occupancy. This is the hidden mechanism: dormers solve a geometry problem, not just a light problem.
Installation protocol dictates where multiplier effect actually occurs. A single dormer six feet wide with two-foot-six-inch knee walls gains roughly forty to fifty square feet of accessible floor space at full height. Multiple dormers stacked or aligned create cumulative gains that push total usable attic area past what a cathedral ceiling conversion alone would yield. The dormer’s structural framing must tie into the existing rafter system correctly or the amplification collapses into code violations and moisture damage. Hire a builder who verifies rafter tie connections before cutting anything.
Deconstructing The “Aesthetic First” Trap In Cape Cod Exterior Remodels
The Function Problem You’re Avoiding
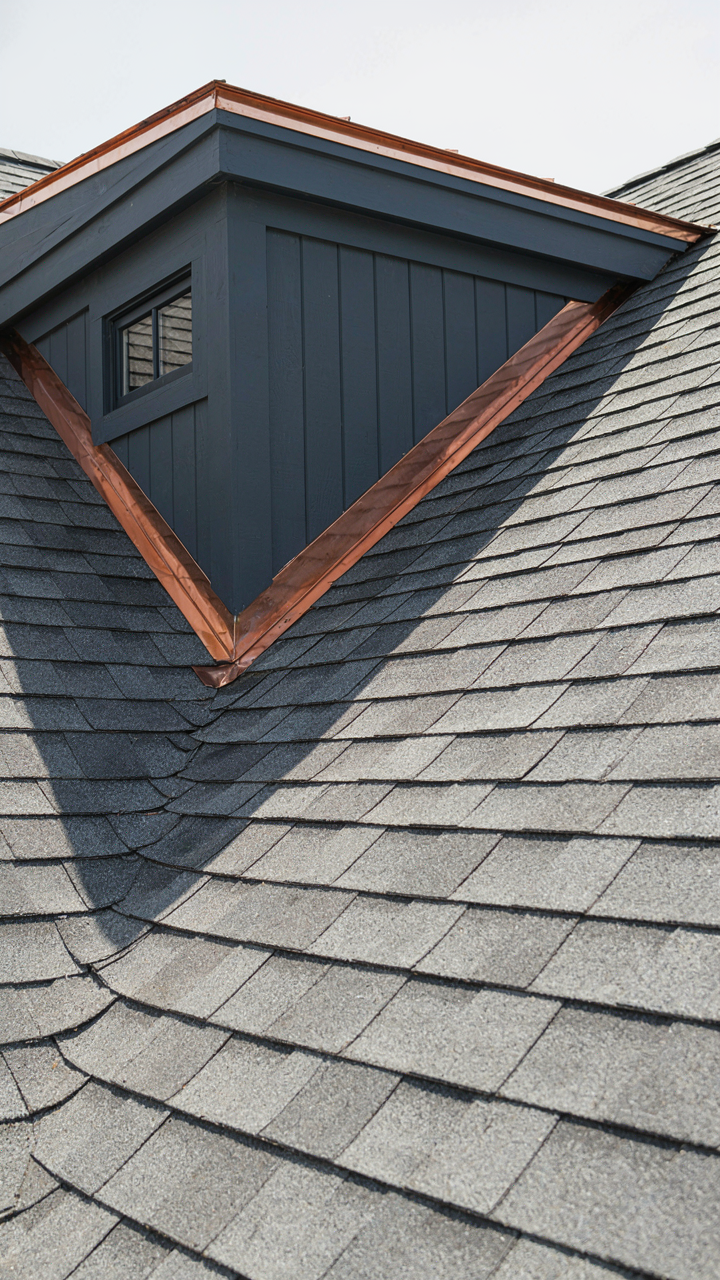
You want your dormer to look like it belongs on a magazine cover because you’re afraid a purely practical design will cheapen the house’s value. Here’s what nobody says plainly: a dormer that doesn’t shed water or manage heat becomes expensive damage wrapped in good intentions. The mechanism is simple. Dormers fail when homeowners reverse-engineer from “what should it look like” instead of “what load does it actually carry.” A Cape Cod dormer handles three forces simultaneously: roof pitch stress, water runoff direction, and interior ceiling height demands. Start with these constraints, not Pinterest.

The common advice says “match the existing roofline.” That’s incomplete. Your dormer’s slope, width, and flashing detail must solve a structural problem first, then look appropriate second. Most contractors let aesthetics drive the engineering decision, which means water pools where it shouldn’t or rafters carry loads they weren’t designed for. The dormer’s profile emerges from how you’re actually going to frame it and weather-seal it, not from what style guide you’re following.
Form Follows Failure Patterns, Not Philosophy
Architecture borrowed “form follows function” from industrial design, but dormer builders ignore it entirely. Think of your dormer like load-bearing engineering: the form must accommodate the stress distribution, or everything downstream fails. A shed dormer on a Cape Cod works because its low pitch sheds water toward the main roof without creating a collection point. A gable dormer creates an interior valley where water stalls unless you’ve sized the valley metal and slope correctly. The shape isn’t decorative. It’s a solution to a drainage problem.
Every dormer detail serves a mechanism. The flashing where the dormer meets the main roof either channels water away or traps it. The interior wall height either allows functional room usage or wastes framing materials. The window placement either gives you natural light where you need it or just looks good from the street. Stop treating the exterior profile as separate from how the interior functions. Design the interior layout first, then determine the minimum dormer dimensions that support it, then flashing detail follows from those dimensions.
The Dormer Dynamics Protocol: A Physics Based Approach To Adding Dormers To A House

How Light Enters A Room Through Geometry
You want dormers because you’re tired of dark upstairs spaces that feel like attics. The real mechanism is wave mechanics: light travels in straight lines until it hits a surface, and the angle of that surface determines whether light bounces deeper into your room or reflects back out. A Cape Cod dormer works because it repositions your window plane perpendicular to the roof slope instead of parallel to it, capturing light that would otherwise miss your interior entirely.

Most people assume bigger windows fix darkness. They don’t. The window size matters less than its angle relative to the sun’s path and your room’s depth. A south-facing dormer on a Cape Cod captures direct solar radiation for five to seven hours in winter when you need it most. The dormer’s vertical wall forces light to travel horizontally into the room rather than glancing off the roof at an oblique angle. You calculate the optimal dormer width by measuring your room’s depth and working backward to find where light rays stop penetrating.
Thermal Flow And Pressure Differentials
Fluid dynamics treats air movement like water through a channel. Your Cape Cod’s attic is a pressure zone. Dormers create a second pressure zone above the roofline. The temperature difference between these zones drives convection: warm air wants to rise from your living space, hit the dormer’s vertical wall, and escape through the dormer’s soffit vents. This is why dormers without proper ventilation strategy create heat loss in winter and cooling loss in summer. The mechanism is forced circulation, not passive air exchange.
Building codes require ventilation space in most climates: one square foot of vent area per 150 square feet of attic space, split equally between intake and exhaust. Your dormer’s soffit becomes an exhaust point if you don’t block it deliberately. The thermal solution is adding insulation to the dormer’s knee wall, sealing the transition where the dormer meets the roof plane, and installing baffles that force air to move down and out rather than up and around. This stops the pressure differential from bleeding your heating and cooling into a vented void.
Beyond The Blueprint: Modern Cape Cod Exterior And Long Term Value
Dormers As Future Investment
You’re thinking about resale value because you want proof that this isn’t frivolous spending. Here’s the mechanism: dormers create usable square footage that appraisers and buyers count as livable space, which directly moves the needle on property value in ways cosmetic upgrades don’t. A properly executed dormer addition on a Cape Cod can add 100 to 200 square feet of finished space at a fraction of the cost per square foot of a full addition, and the market recognizes this.

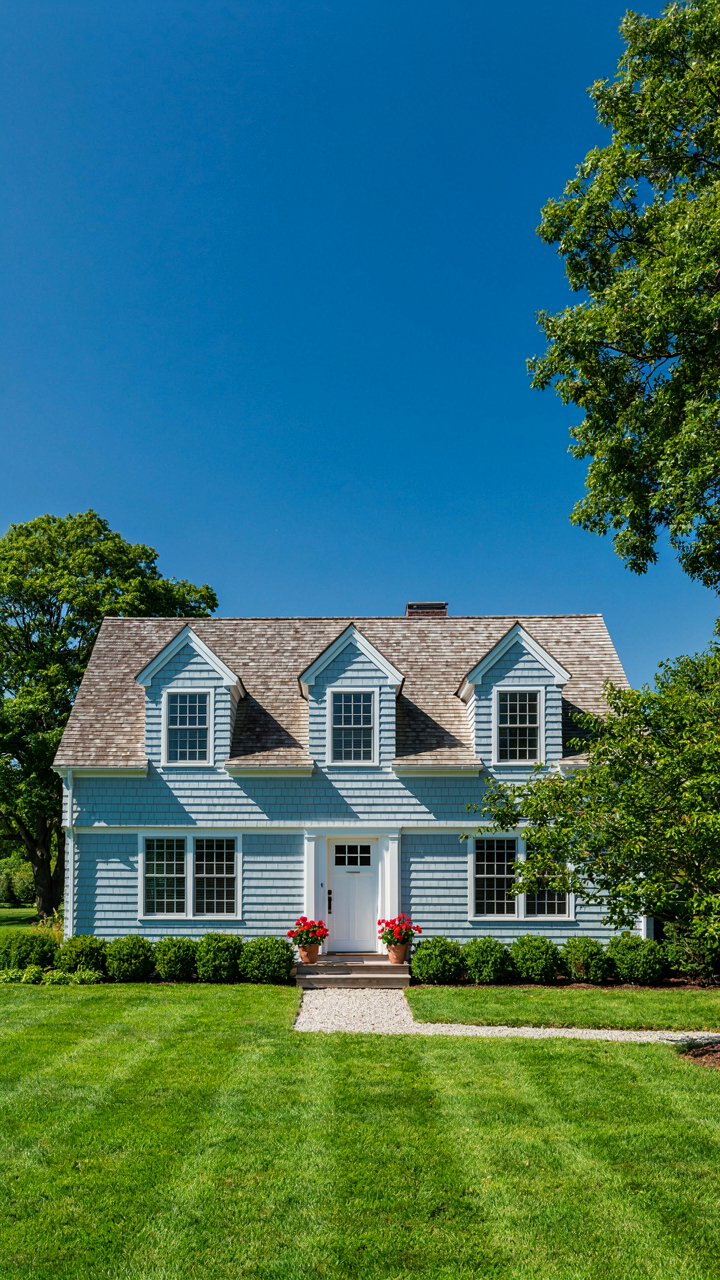
The catch is execution matters more than most people admit. A dormer that breaks the roofline awkwardly or uses mismatched materials reads as an afterthought, not an intentional upgrade. Buyers familiar with Cape Cod architecture see the difference immediately. Dormers built to period standards using consistent roof pitch, proportionate window sizing, and matching siding create the appearance of original design, which preserves the home’s architectural integrity and commands higher resale premiums than visibly tacked-on additions.
The Upgrade Trap Nobody Discusses
Most people assume bigger dormers are better dormers. They’re wrong. Oversized dormers create visual imbalance on a Cape Cod’s compact footprint and signal poor design judgment to knowledgeable buyers. The real mistake is treating the dormer as a standalone feature instead of a proportional element in the home’s overall composition.
The protocol is simple: measure the existing roofline and gable proportions first, then size your dormer to occupy no more than one-third to one-half of the roof face it occupies. Mismatched materials, oversized windows, or dormers spaced inconsistently across the roofline will haunt resale value more than the cost of the addition itself. Dormers built cheap look cheap. Dormers built thoughtfully look inevitable.
The “Strategic Infill” Model For Cape Cod House Renovation

Where Your Attic Space Actually Lives
You want permission to spend money on your house without feeling like you’re throwing it away. That’s what this is really about. Most Cape Cod owners stare at dead attic space and assume it’s worthless because the roof pitch makes it tight. The real mechanism is simpler: you’re looking for cubic footage that already has structural support and envelope access. You don’t build from nothing. You build inside what’s already there.

Cape Cod dormers work on the same principle as load-bearing walls in architecture: they redistribute weight and constraint into usable area. The dormer isn’t creating space. It’s converting unusable space into inhabitable space by transferring the roof load from a sloped plane into vertical walls. Your attic exists. You’re not adding volume out of thin air. You’re redirecting what’s already above your head.
Start by measuring the span between your collar ties or ceiling joists. Most Cape Cods run 24 to 32 feet at their widest point. Measure the roof pitch (typically 6 to 8 on 12 in these homes). Mark where sunlight actually reaches the floor at midday. That tells you which sections stay permanently dim and which ones could work.
- Knee wall clearance: Space between floor and rafter where you can stand upright varies by roof pitch. Map it room by room. Six feet headroom is the threshold for livable space in most jurisdictions.
- Existing structural ties: Collar ties, ridge boards, and rafters determine where you can cut into the roof plane. Removing structural members requires engineering and sister rafters. Know what’s there first.
- Moisture zones: Attics trap condensation at eaves and ridges. Thermal imaging or a moisture meter shows you where the air is stagnant. Those zones don’t make good dormer locations yet.
- Window wall orientation: South and west exposures get heat gain. North and east stay cooler. Consider which direction your dormer faces. This affects heating load and glass type needed.
- Plumbing and electrical runs: Most old Cape Cods run drain lines and wiring through the attic floor. Rerouting these adds cost fast. Trace them before you commit to a dormer location.
The attic audit takes a weekend and costs nothing. You’re looking for the section that has the most headroom, the fewest obstructions, and the best solar exposure. That’s your target zone. Everything else is compromise.
Dormer Proportions Aren’t Guesswork
You’ll hear that dormers should be “about one-third the width of the wall” or some other vague ratio. That’s advice that avoids the actual calculation. Stop listening to that. A dormer’s footprint is driven by three hard numbers: the depth you need inside, the roof pitch, and the structural grid of your existing framing.
A standard bedroom needs roughly 9 to 10 feet of usable depth on the floor (measured from the dormer’s front wall to the existing knee wall). That means the dormer box itself must be 10 to 11 feet deep to account for the exterior wall thickness and roof structure. Your roof pitch determines how much height that depth gives you. On a 6:12 pitch, 10 feet of depth gains you roughly 5 feet of vertical clearance at the front of the dormer. On an 8:12 pitch, you get closer to 7 feet. The math is simple: rise divided by run times your depth.

Width depends on your rafter spacing. If you have 16-inch on-center rafters, a dormer that spans three or four rafter bays (48 to 64 inches wide) uses the existing structural grid without creating new weak points. A dormer that cuts across random framing requires header beams and engineering. Wider dormers need thicker headers, which eat into your interior space. Stay aligned with your existing rafters whenever possible. When you can’t, the dormer costs more and delivers less. Calculate your exact footprint by laying out the dormer width on your floor plan to match rafter spacing, then work backward from your depth requirement to confirm you’ll hit code headroom minimums before you talk to a contractor.
Avoiding The “Generic Box” Syndrome: True Cape Cod House Extension
When A Dormer Honors The Original Line
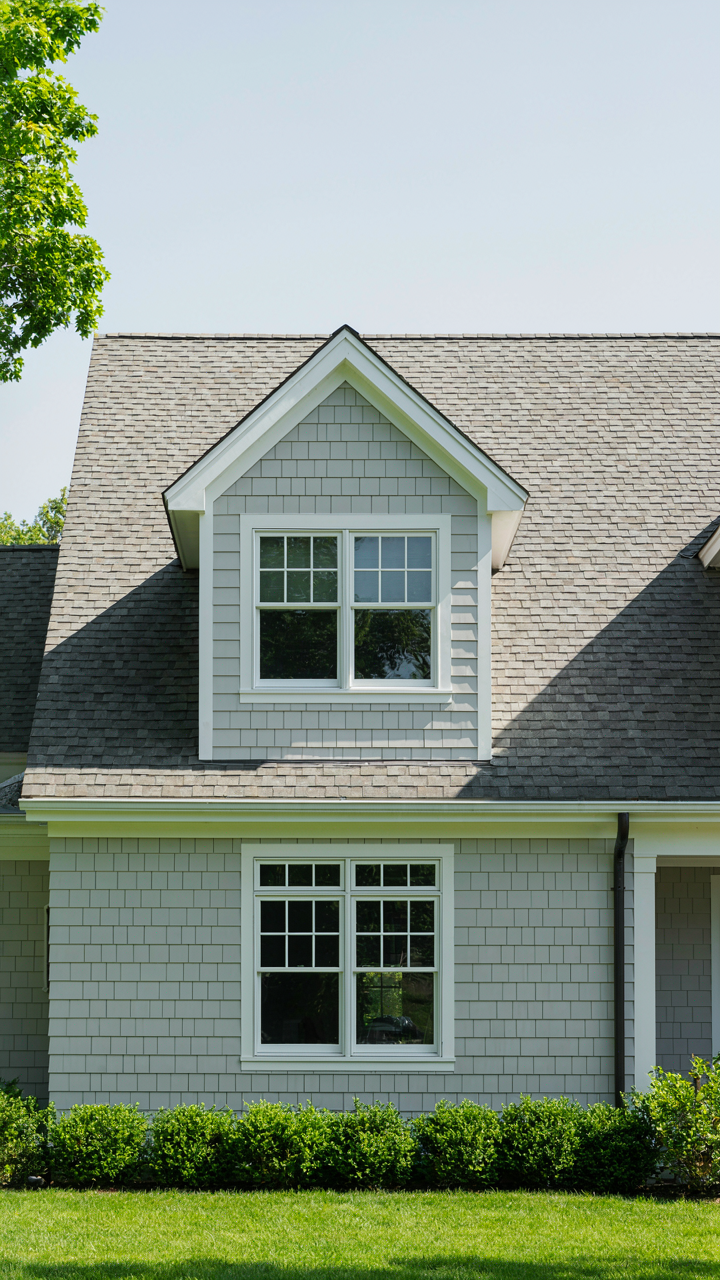
You want your dormer to look intentional, not like something bolted on by a contractor who didn’t care. This is really about avoiding the visual signal that screams “cheap addition” to anyone who knows architecture. In structural terms, think of your Cape Cod’s roofline as a load-bearing narrative: a dormer either extends that story or breaks it. Authentic Cape Cod dormers sit within the existing roof slope logic, not against it. They align with the house’s original proportions and the rhythm of its fenestration below.
The real mechanism is constraint. Original Cape Cods were built with specific dormer placements tied to interior room divisions and the foundational wall layout underneath. When you add a dormer, you’re either working inside those original conditions or you’re ignoring them. Dormers centered on existing chimneys or aligned with load-bearing walls feel integrated because they solve actual structural problems the original builders faced. Random placement or oversized boxes violate that logic and announce themselves as retrofits instantly.
The Difference Between Expansion And Graft
Most advice tells you to “match the existing style,” which is vague nonsense that leaves you stuck. Here’s what matters: an authentic expansion uses materials and joinery that align with what the original structure demanded, not just what looks similar. A cheap graft uses inferior framing methods, mismatched roofing stock, or dormer proportions that ignore the original wall-to-roof relationship. Examine the dormer’s relationship to the fascia line, the depth of the overhang, and whether the siding plane reads as continuous with the main wall or sits awkwardly proud of it.

Check three things before permitting: one, does the dormer’s height sit proportional to the original roof pitch and ridge height? Two, does the dormer’s width respect the spacing of existing structural bays below? Three, is the roofing material the same grade and profile as the original, or is it a cheaper substitute that will weather differently? A true extension answers all three. A graft fails at least one. The dormer becomes part of the house’s structural and visual narrative only when it solves a real constraint the original builders faced.
The Unseen Costs: Why Your “Bright Room” Costs More Than Light

The Load Bearing Reality
You’re imagining the finished room and ignoring what holds it up. The truth: a dormer isn’t decoration. It’s structural surgery on your roof. When you cut through rafters to frame a dormer opening, you eliminate the wood that transfers roof load down to the walls. The roof doesn’t stop pushing. That weight now concentrates on the dormer’s frame and requires headers, doubled rafters, and new support posts that often run down through the walls below, sometimes all the way to the foundation.
Most contractors frame dormers like they’re adding a porch. They’re not. The dormer becomes a load-bearing element competing with the original roof structure. If the original roof was designed for specific rafter spacing and tie-beam placement, the dormer disrupts that system. You need a structural engineer to calculate the new load path. Skipping this creates creep, sagging, and cracking that won’t show for two years. That’s when you pay again to fix it.
The Maintenance Trap That Never Ends
Long-term cost is where bright rooms become expensive regrets. A dormer adds roughly 40 linear feet of new flashing, seams, and roof-to-wall transitions compared to a standard gable roof. Each seam is a vulnerability. Water doesn’t care how beautiful your room is. It finds seams.

Flashing requires inspection and resealing every five to seven years in northern climates. Dormer valleys collect leaves and ice. Snow loads concentrate on dormer walls differently than the main roof, accelerating shingle failure. Energy efficiency takes a hit too. A dormer roof has more surface area exposed to weather. If insulation isn’t installed perfectly around the frame, condensation settles in cavities, rotting wood from the inside out. You won’t see it until you’re replacing studs and trim at $4000 to $8000 per side. The initial build cost is only the first payment.
The True Obstacle: Your Unwillingness To Strategize Beyond Surface-Level Aesthetics

Most homeowners treat cape cod dormers like decoration instead of infrastructure. They pick a style, hire a contractor, and wonder why their room still feels cramped and dark. The real work happens before any nail gets driven. You need to map your room’s light patterns, measure your existing roof pitch, and decide if you’re solving a brightness problem or just chasing Instagram aesthetics. Call a structural engineer today, not a designer. Your dormer won’t save a poorly planned space, but a well-planned one transforms everything.