Introduction
Taking charge of your home’s upkeep can save you money and give you peace of mind. Handling common repairs yourself empowers you to address issues quickly before they escalate. Many home repairs range from simple fixes like changing a light bulb or tightening a loose faucet to more involved tasks like patching drywall or replacing electrical switches. This article explores essential DIY home repair techniques that every homeowner should know, helping you protect your investment and enjoy your living space more fully.
Understanding home maintenance and repair allows you to spot problems early and decide when to fix them yourself or call a professional. You will learn practical tips for emergency repairs, routine maintenance, and improving your home’s safety and comfort. Whether you are a novice or have some experience, mastering these DIY skills builds confidence and prepares you to tackle common household challenges effectively and safely.
Understanding Common Home Repair Issues

Home repairs often fall into three main categories: worn parts, broken fixtures, and emergency needs. You might notice a faucet dripping because of a worn washer or hear a strange noise from an appliance needing attention. Emergencies include sudden water leaks or electrical shorts that require immediate action.

Repair, maintenance, and renovation have different meanings. Repair fixes something broken, maintenance helps prevent problems by routine care, and renovation improves or updates an area. Knowing which approach fits your situation helps you save time and money.
For example, tightening a loose door hinge is a repair, cleaning your gutters is maintenance, and remodeling a kitchen counts as renovation. Recognizing these differences guides your decisions and keeps your home in better shape. What area of your home needs your attention today?
Worn and Consumable Components
Many small parts wear out regularly in a home. Light bulbs burn out. Batteries lose power. Faucet washers crack after use. These may seem minor, but replacing them prevents bigger problems.
Changing a burnt-out bulb keeps your space well-lit and safe. Swapping old batteries in smoke detectors ensures they work when needed. Replacing a faulty faucet washer stops leaks that waste water and cause damage.
These tasks don’t require expert skills but need attention. How often do you check for worn parts around your home? Setting a routine can save you from costly repairs later.
Broken or Damaged Fixtures

Fixtures like windows, switches, or pipes sometimes break or fail. A cracked window lets cold air in and raises energy bills. A broken light switch can be dangerous if not handled properly. Leaky pipes cause water damage or mold.
Identifying the issue starts with careful inspection. Look for water stains, listen for dripping sounds, or test electrical parts while keeping safety in mind.
You can replace a cracked window pane or fix a leaky pipe by following clear, step-by-step guides. If unsure, consult a professional, especially with electrical repairs. How confident do you feel diagnosing these problems in your home?
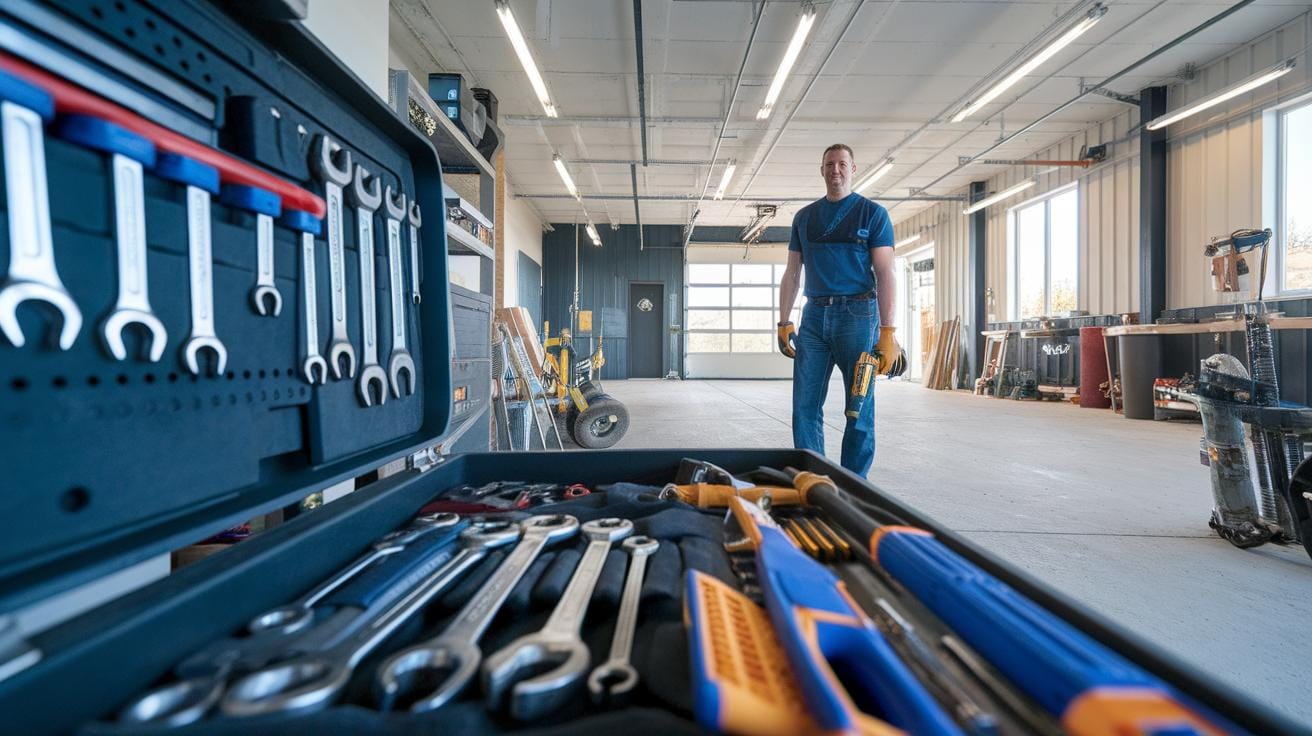
Basic Tools Every Homeowner Should Have
Keeping a set of basic tools ready helps you handle most home repairs quickly and confidently. Essential tools include screwdrivers, pliers, wrenches, hammers, a tape measure, a utility knife, and a level. Each serves a unique purpose—screwdrivers tighten loose screws, pliers grip small objects, wrenches loosen nuts, and hammers fix nails or remove them.

When selecting tools, focus on durability. Look for solid steel construction and comfortable grips. Tools with rust-resistant coatings last longer. Investing in a few quality pieces saves you frustration and money over time. Think about how often you’ll use each tool before buying one.
Organize your tools in a toolbox or on a pegboard in a consistent spot. That way, you won’t waste time searching during an urgent repair. Can you imagine not finding the right screwdriver just when a loose cabinet door needs fixing? Accessibility makes DIY repairs easier and faster.
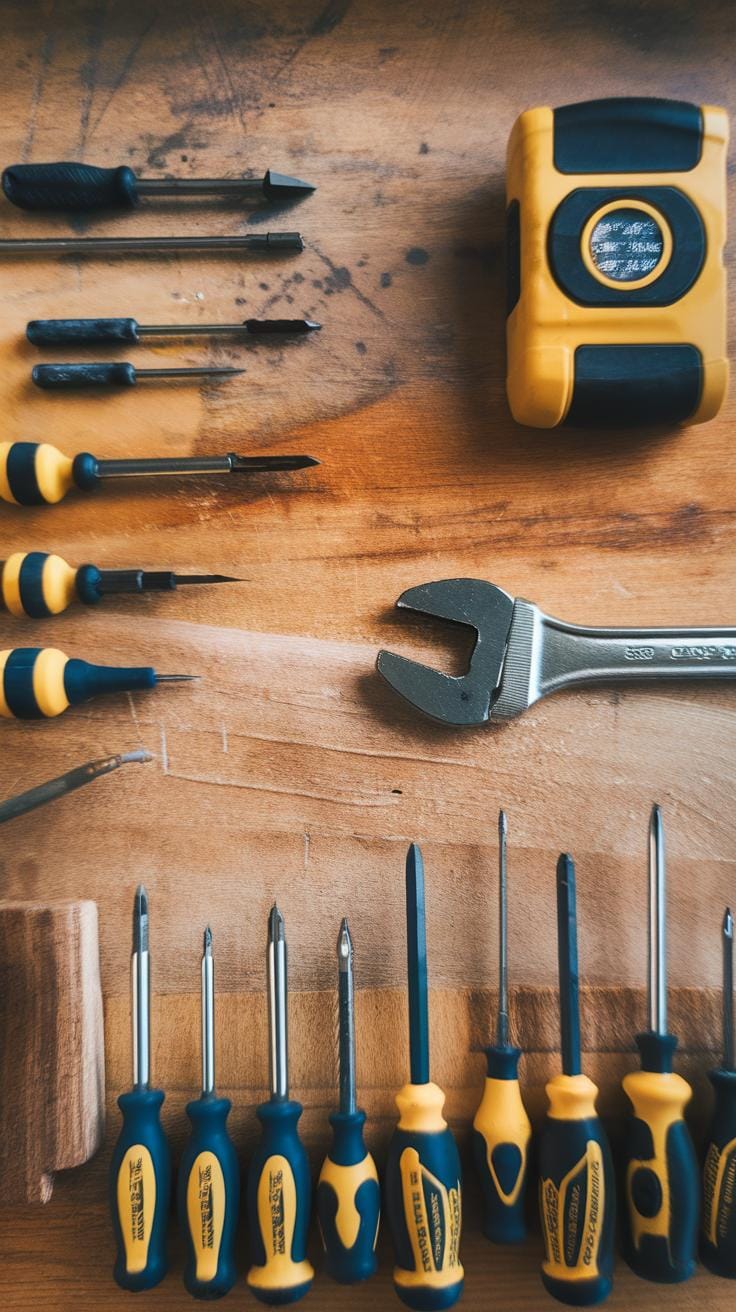
Hand Tools for Simple Repairs
Screwdrivers come in different heads—flat, Phillips, and Torx. Choose a set covering these types to handle most screws in your home. Keep the tips clean and avoid using them as pry bars to prevent damage.
Pliers grip, twist, or cut wires and small parts. Needle-nose pliers reach tight spots, while slip-joint pliers adjust to different sizes. Wrenches like adjustable and socket wrenches work on bolts and nuts. Regularly oil their joints to keep smooth movement.
Hammers do more than drive nails. A claw hammer removes nails or lifts small objects. Maintain the handle by checking for cracks and replacing loose heads. Using the right tool for each simple task reduces repair time and effort.
Power Tools for More Advanced Tasks
Power tools like cordless drills and orbital sanders speed up tougher jobs. A drill handles drilling holes and driving screws quickly. Sanding smooths wood or paint surfaces for finishing. Use power tools when hand tools prolong the task or require excessive force.
Always wear safety glasses and gloves when using power tools. Keep work areas clear and unplug tools when changing bits. Avoid loose clothing or jewelry that might get caught in moving parts.
Starting slowly with a power tool helps you control it better. Ask yourself: Is this task worth using a power tool, or can I finish it safely faster with hand tools? Using the right tool improves results and prevents accidents.
Fixing Leaks and Water Issues
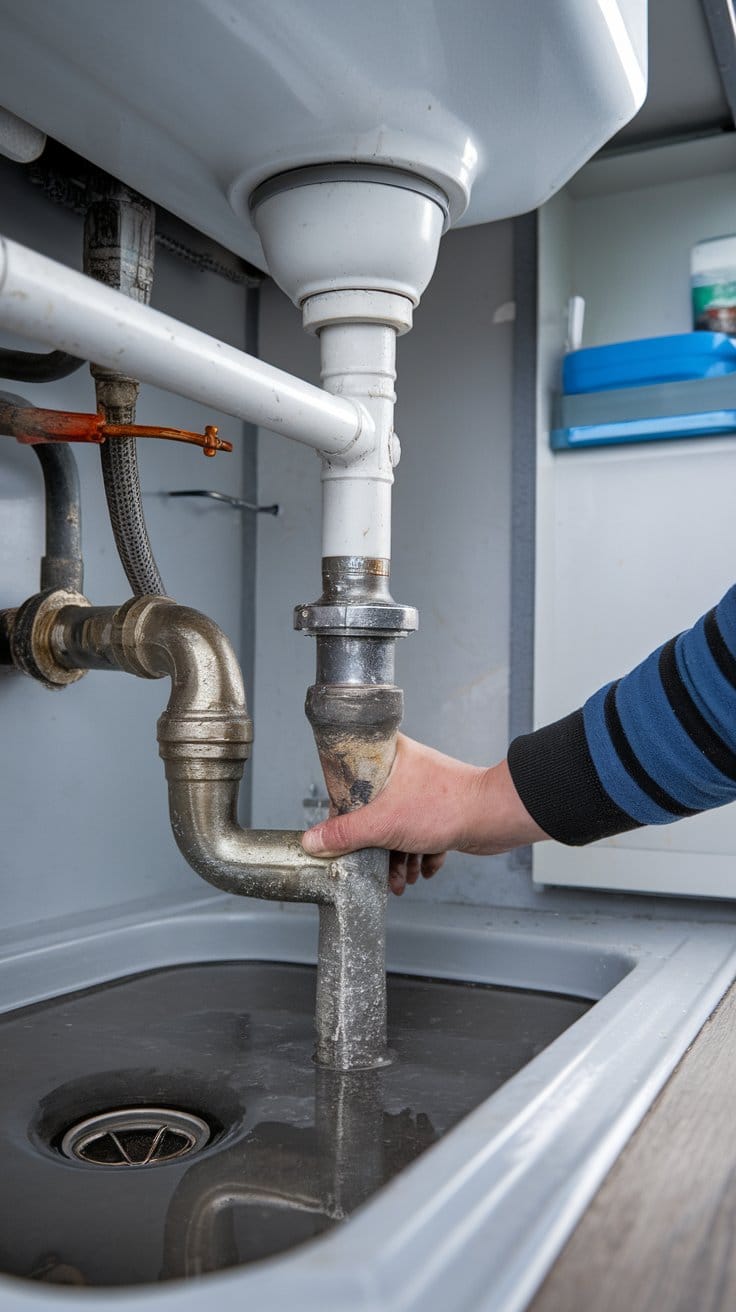
Water leaks cause waste and can damage your home if left untreated. Common problems include dripping faucets, running toilets, and small pipe leaks. Each issue has a simple fix you can try yourself.
Dripping faucets often result from worn-out washers or faulty cartridges. Toilets that run continuously usually have a broken flapper or valve. Minor pipe leaks might stem from loose fittings or small cracks.
Start by turning off the water supply before you make any repairs. Use a wrench and screwdriver from your basic toolkit to replace damaged parts. Watch for corrosion or build-up which may require cleaning before installing new pieces.
If leaks continue after your attempts, or if pipes burst, call a plumber. Persistent leaks can harm walls, floors, and your water bill. Early repairs help you avoid costly damage and keep your home safe.
Repairing Dripping Faucets
To fix a dripping faucet, first turn off the water supply under the sink. Remove the handle using a screwdriver and inspect the washer or cartridge inside. These parts often wear out and cause leaks.
Replace the damaged washer or cartridge with a new one from a hardware store. Make sure it fits your faucet model. Reassemble the handle tightly to prevent leaks.
Fixing drips saves money on water bills and conserves water daily. Even slow drips can waste gallons over time. You might notice quieter pipes and fewer stains around your sink after repair.
Does your faucet drip only when hot or cold water runs? That detail can help you select the correct replacement part faster and avoid unnecessary purchases.
Clearing Clogs and Drain Maintenance
Clogged drains back up water slowly or stop it completely. Hair, grease, and soap build-up often cause these blockages. You can clear clogs using a plunger or a drain snake.
Start with the plunger pressed firmly over the drain and pump several times to dislodge the blockage. If that fails, insert a drain snake and rotate it to break up debris inside the pipe.
Pour boiling water down your drains weekly to prevent grease and soap scum build-up. Avoid chemical drain cleaners, as they can damage your pipes over time.
Maintaining the plumbing traps under sinks also prevents odors and backups. Clean the traps by removing them and clearing any trapped debris. Have you checked your traps lately?
Emergency Repairs You Can Handle
Sudden problems like broken windows, frozen pipes, or clogged toilets demand quick action. Acting fast can reduce damage and stress. When a window cracks from a storm, cover it with plastic sheeting or a tarp to keep rain and wind out. Use strong tape to hold the plastic firmly in place. This helps protect your home until a glass professional can fix it properly.
If your roof leaks, grab a tarp and spread it over the damaged area. Secure it with nails or heavy objects around the edges to shield your home from rain. Check inside for water stains or dripping that could cause mold or structural damage.
Clogged toilets can overflow if unnoticed. Shut off the water supply valve behind the toilet immediately. Use a plunger to clear the clog. If that fails, a drain snake can often break up stubborn blockages. Stopping the flow quickly prevents water damage to your floors.
Do you know where your main water shutoff valve is? Locating it before an emergency can save your home from flooding. Handling these fixes yourself doesn’t mean you replace professionals but gives you control to limit damage while waiting for help.
Temporary Window and Roof Repairs
Patching small window cracks protects your home from bad weather and keeps energy loss down. Clear the cracked area and cut a piece of plastic sheeting larger than the damage. Secure the plastic with waterproof tape around the edges. Smooth out wrinkles for a snug fit.
For roof leaks, tarp use is simple but effective. Lay a heavy-duty tarp over the leak area, extending well past it on all sides. Fasten the edges with roofing nails or weights like bricks. Check the tarp often during storms to make sure it stays in place and doesn’t let water through.
These temporary repairs shield your home but are not permanent solutions. Plan to get proper repairs soon to avoid bigger problems. Have you ever used a tarp or plastic for quick home fixes? What worked best for you?
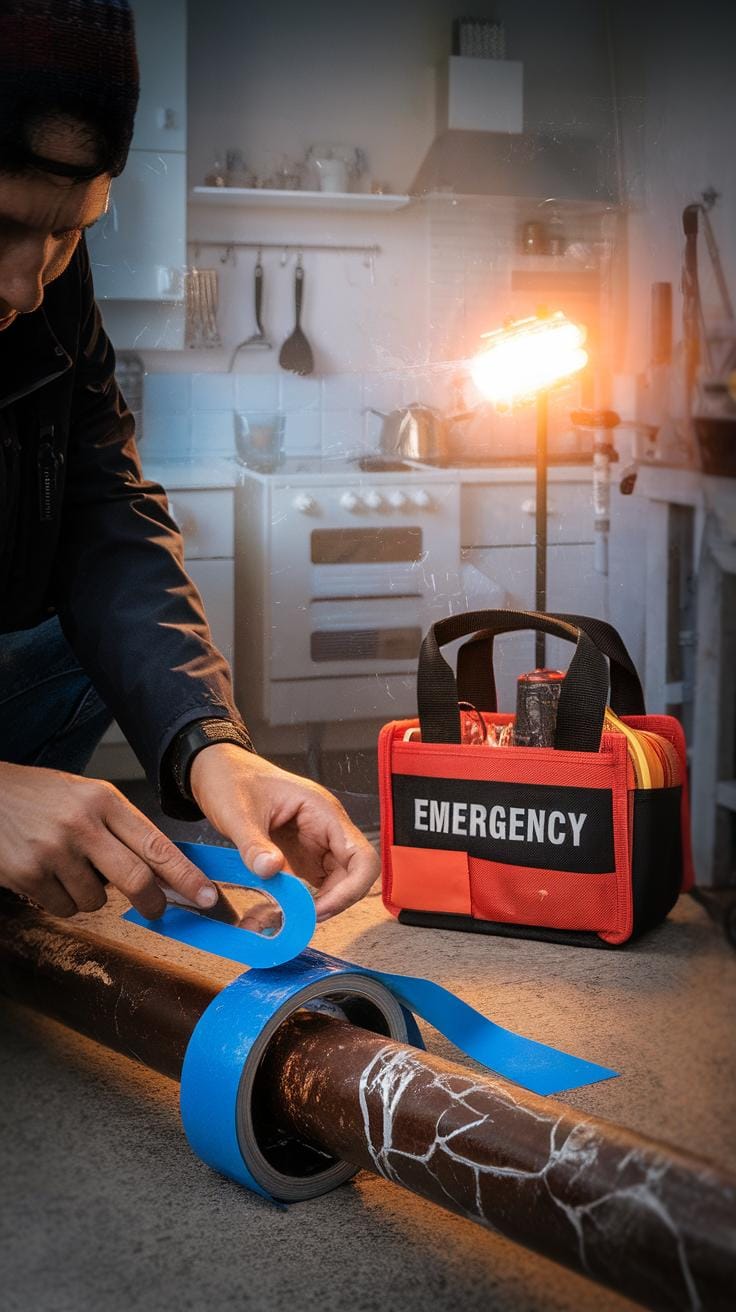
Thawing and Repairing Frozen Pipes
Frozen pipes can burst and cause flooding. Start by turning off the water supply to the frozen pipe area. Next, gently warm the pipe using a hairdryer or a heating pad. Never use an open flame, as it is unsafe. Move the heat source slowly along the pipe until water starts flowing again.
Watch for signs of pipe damage like bulging sections or cracks during thawing. If you spot these, shut off your water immediately and call a plumber. Letting a pipe leak worsen can flood your home quickly.
Open faucets connected to the frozen pipe to relieve pressure and help water flow once thawed. Keep the area warm afterward by insulating pipes with foam sleeves or wrapping them with heat tape.
Have you checked your pipes before winter? Taking simple steps now can stop expensive repairs later. What methods have you used to prevent or fix frozen pipes in your home?
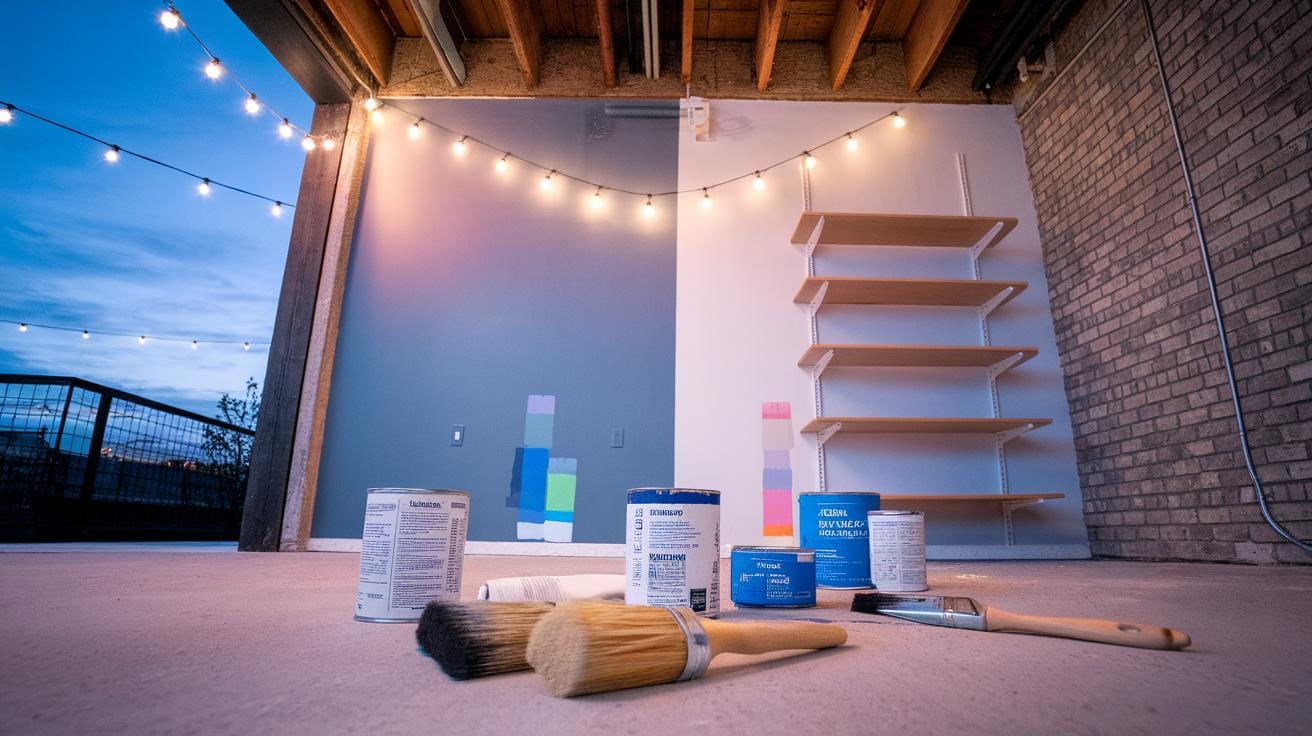
Drywall and Surface Repairs Made Simple
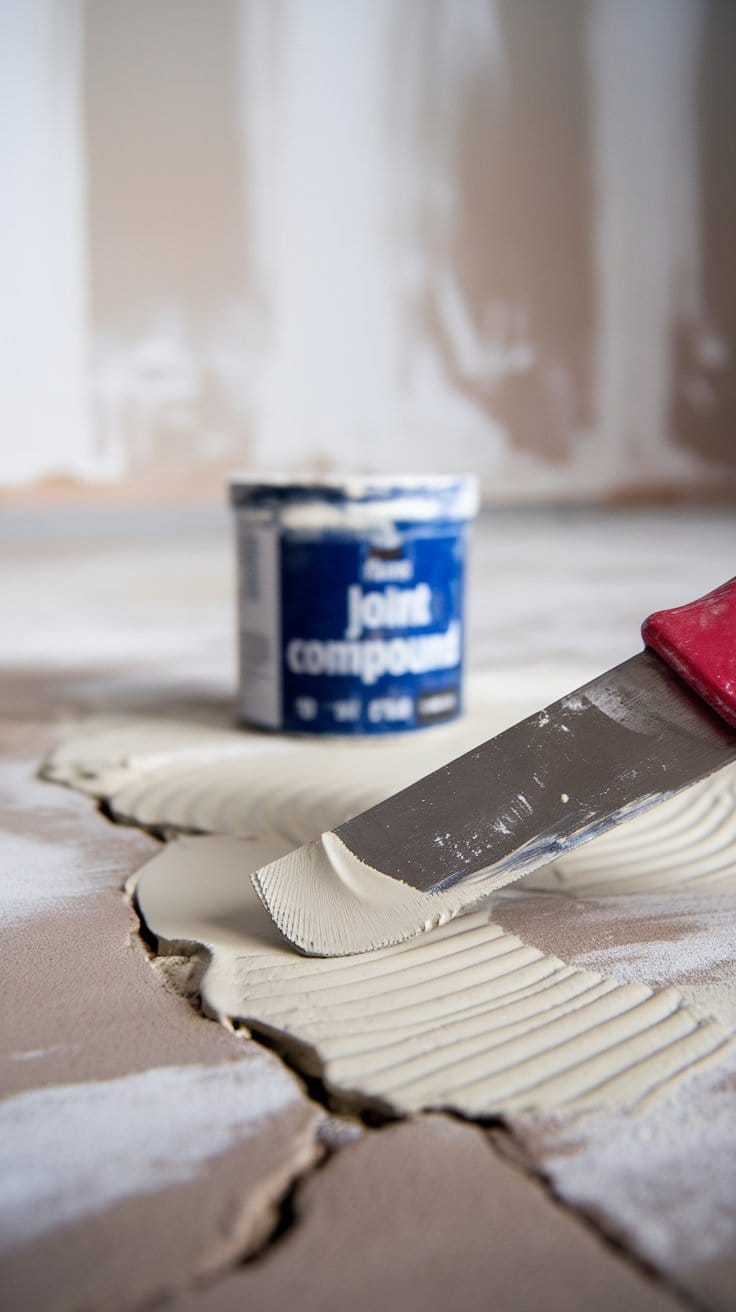
Small holes and cracks are common in walls and ceilings. Fixing them keeps your home looking neat and prevents bigger issues. Start by cleaning the damaged area to remove dust and loose debris. For larger holes, cut a drywall patch slightly bigger than the hole, then attach it securely with drywall tape or adhesive.
Use joint compound to cover patches and cracks. Apply it smoothly with a putty knife, feathering out the edges to blend with the wall. Let it dry completely, then sand gently until the surface feels flush and smooth. Proper preparation is key. Rough or dirty surfaces stop paint from sticking well.
Before painting, prime the repaired area to seal the surface and ensure even color. Choose paint that matches your existing wall for a seamless finish. Moving step-by-step helps you save time and prevents unsightly repairs from standing out.
Patching Small Holes and Cracks
To patch small nail holes, start by cleaning the surface. Apply spackle directly into the hole with a putty knife, pressing firmly. For cracks, widen the crack slightly with a utility knife to help the spackle hold better, then fill it in completely.
Once dry, sand the area gently with fine-grit sandpaper until smooth. Check if you can hardly see the repair when running your hand over it. If it feels uneven, add a thin second layer of spackle, then sand again after drying. A flawless patch blends into the wall, ready for a fresh coat of paint.
Do you notice spots on your walls where nail holes or small cracks distract from the room’s look? Taking a few minutes to fix these spots can improve your home’s overall feel.
Dealing with Water Stains and Damage
Water stains often appear as yellow or brown marks on ceilings and walls after leaks. To remove stains, start by cleaning the surface with mild soap and water. Allow it to dry fully before applying a stain-blocking primer. This step prevents stains from bleeding through your paint.
If drywall has softened or crumbled due to water damage, cut out the damaged section carefully, then replace it with new drywall. Secure, tape, and cover the new section with joint compound. Sand smooth once dry. This approach helps avoid mold growth by removing wet, damaged materials.
Have you ever ignored a water stain thinking it was just cosmetic? Consider that untreated water damage could lead to expensive repairs later. Fixing water issues early keeps your walls safe and healthy.
Electrical Repairs You Can Safely Do
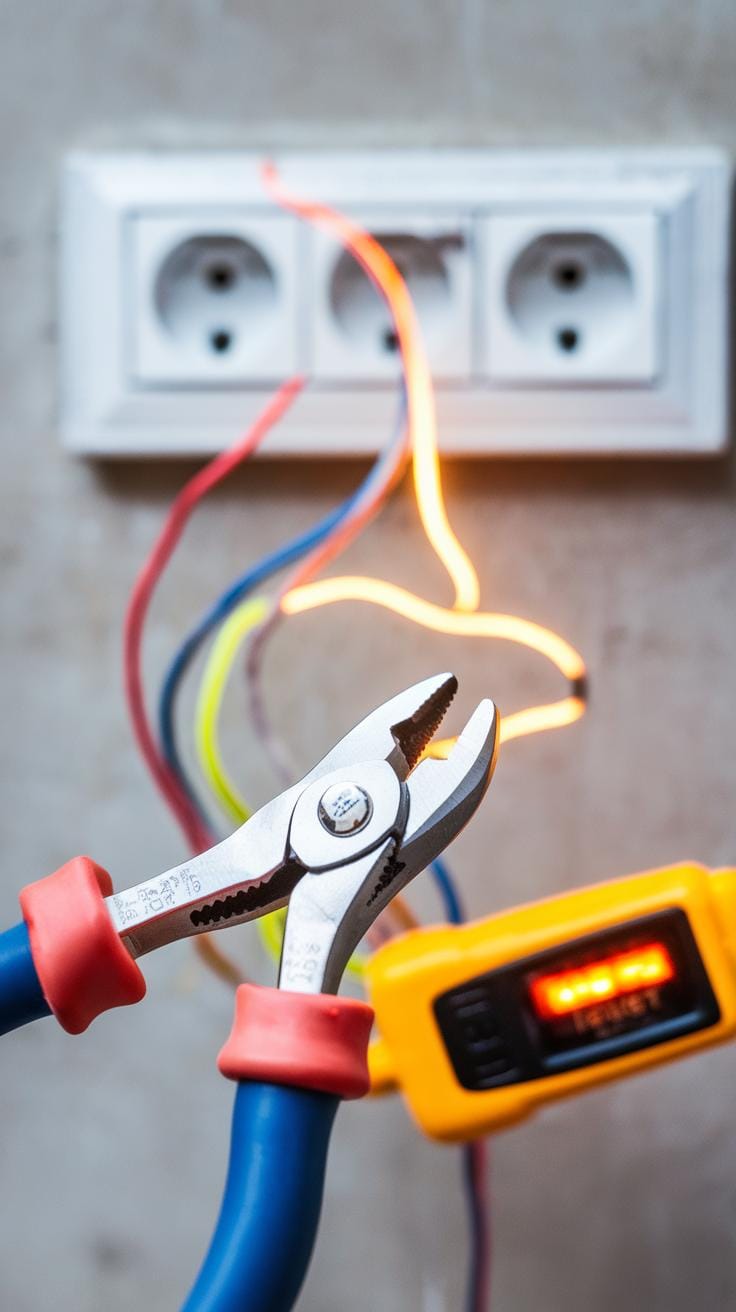
Handling basic electrical repairs can save you money and give you confidence in maintaining your home. Tasks such as changing switches, outlets, and lighting fixtures are within reach for most homeowners who follow safety steps. Always ensure you turn off the power at the breaker box before starting any work. Use a voltage tester to confirm no electricity flows to the area you plan to work on.
Having the right tools makes a big difference. Use insulated screwdrivers and wire strippers made for electrical work. Keep wires organized and secure connections tightly to prevent future hazards.
Not every electrical job is simple or safe for DIY. If you face complex wiring or signs of outdated electrical systems, hiring a licensed electrician is a smart choice. Are you confident in your skills to take on such repairs without risking injury or damage? Knowing your limits protects you and your home.
Replacing Outlets and Switches
Always switch off the circuit breaker before touching outlets or switches. Double-check the power is off using a voltage tester. Remove the cover plate with a screwdriver, then unscrew and gently pull the outlet or switch from the wall box.
Take note of how wires are connected before disconnecting them. Typically, black or red wires attach to brass screws, white wires to silver screws, and green or bare wires connect to the ground. Attach the new outlet or switch keeping the wires on the correct terminals. Push everything carefully back inside the box and screw it in place.
Finish by replacing the cover plate. After restoring power at the breaker, test the outlet or switch to confirm it works properly. This simple process refreshes old fixtures and improves safety.
Installing Basic Lighting Fixtures
Begin by turning off power to the fixture at the circuit breaker. Remove the old fixture carefully, unscrewing the mounting bracket and disconnecting wires. Use a voltage tester again to be sure power is off.
Connect the new fixture’s wires to the matching house wires: black to black, white to white, and ground wires together. Twist wire connectors tightly and tuck the wires safely into the electrical box. Secure the fixture to the mount according to the instructions.
Restore power and test the light. If it doesn’t work, check your connections again and ensure the bulb is proper for the fixture. Installing a new light fixture brightens your space and gives you a sense of accomplishment while keeping safety the top priority.
Routine Maintenance for LongTerm Home Care
Keeping your home in good shape means doing regular tasks that stop small problems from growing. Scheduling seasonal checks can save you money and stress later on. For example, inspecting your roof before winter helps catch loose shingles that could leak during storms. Cleaning around your home exterior prevents dirt and mold buildup. Also, keep an eye on windows and doors; sealing cracks keeps energy costs down and keeps pests out.
Ask yourself if you’ve checked these areas in the last few months. Regular cleaning and inspections stop damage before it becomes serious. Simple tasks like washing your siding or testing smoke alarms can extend your home’s life and protect your family. What small action could you take today to keep your home working well for years?
Inspecting and Cleaning Gutters
Gutters guide rainwater away from your home. When they clog, water spills over and harms your roof and foundation. Clearing gutters can prevent leaks inside your home and costly repairs. Start by removing leaves and debris with a sturdy ladder and gloves.
Work in sections, flushing gutters with a hose to check for clogs in the downspouts. Make sure water flows freely away from your home’s base. If you spot damage, like cracks or sagging, fix or replace parts right away. Doing this twice a year, especially after fall and spring, helps avoid water damage and keeps your foundation solid.
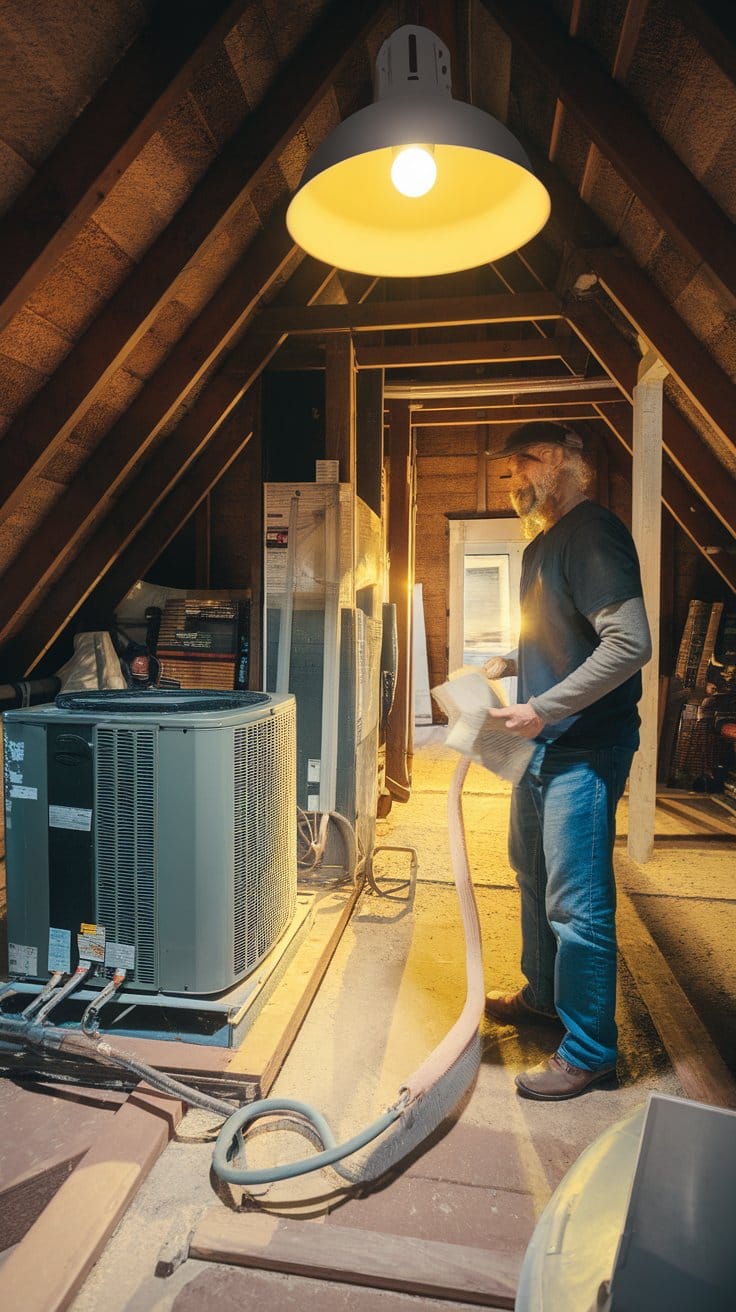
Checking HVAC and Plumbing Systems
Your heating, cooling, and plumbing need simple upkeep to run smoothly. Replace HVAC air filters every three months or sooner if you have pets. Clean filters improve air flow and lower energy costs. Also, look for leaks under sinks and around toilets. Small drips can waste water and cause hidden damage.
Inspect visible pipes for corrosion or wear. Drain your water heater annually to remove sediment that reduces efficiency. If you notice unusual sounds or drops in water pressure, these signs may mean repairs are needed. Which of these checks will you add to your next home maintenance routine?
Improving Home Safety and Security

Keeping your home safe requires more than just locking the front door. Simple steps can protect your household from hazards and intruders.
Start by installing smoke detectors on every level of your home. Test them monthly and replace batteries yearly. This small effort can save lives by providing early warning in case of fire.
Think about escape routes. Plan at least two ways out of every room in case of emergency. Practice this plan with your family so everyone knows what to do if fire strikes.
Secure windows and doors to make forced entry harder. Deadbolt locks on exterior doors add a strong layer of defense. Window locks and security bars help protect accessible windows, especially on the ground floor.
Applying shatterproof films to glass can resist break-ins and keep glass pieces from scattering if broken.
How often do you check that your doors and windows fully lock? A small check can reveal weaknesses before they become problems.
Creating a safer home does not require advanced tools or skills—just attention to details you can handle yourself. What safety upgrades can you add this weekend to protect your family better?
Fire Safety Measures to Implement
Smoke alarms are your first line of defense against fire. Install them in hallways, bedrooms, and living areas. Avoid placing alarms near kitchens or bathrooms to reduce false alarms.
Test every alarm once a month by pressing the test button. Replace batteries every year or if alarms start to beep.
Draft a fire escape plan with your household. Identify two exits from each room and a meeting place outside the home. Practice this plan at least twice a year to build confidence and smooth coordination.
Consider getting a fire extinguisher for your kitchen or workshop. Know how to use it properly and check the expiration date regularly.
Strengthening Doors and Windows
Doors often attract forced entry attempts. Upgrade your locks to solid deadbolts that bolt at least one inch into the frame. Reinforce door frames with metal strike plates to prevent kick-ins.
Windows can be vulnerable points. Adding locks to sliding windows keeps them from being lifted out. Security bars offer a visible barrier on basement or first-floor windows.
Security film applied to glass prevents shattering and slows down intruders. This film is clear and easy to install with minimal tools.
Have you checked your locks and window security recently? Simple improvements can make your home less appealing to burglars, giving you peace of mind each time you turn the key.
Deciding When to Call a Professional

You want to save money and feel proud fixing things yourself. But some repairs need expert help. Knowing when to call a professional keeps you safe and avoids costly mistakes.
If a problem involves complex wiring, major plumbing, or structural damage, it’s time to stop and think. Ask yourself: Am I fully confident and equipped to handle this safely? Can a small error cause bigger damage or harm?
Trying to fix a major leak without experience could flood your home. Handling electrical issues incorrectly might cause shocks or fires. Repairing a cracked foundation without the right tools or knowledge can worsen the problem.
Trust your instincts. If a repair feels overwhelming or risky, hiring a pro can save you time, money, and stress. What parts of your home would you rather leave to experts?
Recognizing Complex Plumbing or Electrical Issues
Your DIY skills cover simple leaks and light fixtures. But certain signs show when a plumber or electrician must step in.
If water pressure drops suddenly or water backs up into sinks, it could be a serious plumbing blockage or pipe damage. Smelly drains or visible leaks behind walls also signal trouble.
Electrical problems include frequent circuit breaker trips, flickering lights, outlets that don’t work, or unusual buzzing sounds from switches. Dark scorch marks or burned smells near outlets warn of fire risk.
Ignoring these signs can lead to costly damage or dangerous accidents. Only licensed professionals have the training to safely diagnose and fix these issues.
Handling Structural or Major Renovation Work
You may want to tackle remodeling or fixing roofing and foundation yourself. But major structural tasks require experience and permits.
Detecting cracks that grow in your foundation or sagging roof beams means hire a contractor immediately. These problems affect your home’s stability and safety.
Large renovations that change layouts or walls also need professionals. They ensure work follows building codes and prevents future hazards.
Hiring experts helps avoid costly delays. It protects your investment and keeps everyone safe while improving your home’s value. When does the size of a project make you call for help?
Conclusions
Learning to perform key DIY home repairs improves your ability to maintain your home and avoid costly damage. By practicing basic fixes like repairing leaks or unclogging drains, you reduce reliance on outside help. Regular upkeep prevents small issues from becoming emergencies, so creating a maintenance routine keeps your home in good condition. The skills you develop not only enhance your property but also build your confidence as a responsible homeowner.
Taking on home repairs raises important questions: Which projects can you handle safely? When does it make sense to hire a specialist? By weighing these factors carefully, you make better choices that protect your home’s value and your personal safety. Mastering these practical DIY repair tips sets a foundation for long-term home care, making your living environment more reliable and comfortable for you and your family.


