Introduction
When it comes to home improvement projects as we gear up for 2024, knowing how to fix a dip in a bathtub stands out as a critical skill for both the seasoned DIYer and those considering professional help. The choice between dedicating a full day to DIY repairs, including a 24-hour cure period before your bathtub or shower is back in action, and opting for professional refinishing services that can wrap up in just 3-5 hours, requires a good grasp of your project’s demands and personal skill level. DIY kits from Bathworks or Rustoleum are perfect for those who aren’t afraid to get their hands dirty, while Miracle Method and Permaglaze stand ready to offer quick, efficient fixes. The initial step of cleaning the area and applying glue with precision ensures that your efforts seamlessly integrate with your bathroom’s tile and toilet, maintaining the space’s overall aesthetic.
After addressing the dip, focusing on prevention and ongoing maintenance becomes crucial for ensuring the longevity of your bathtub. This could include regular plumbing inspections to identify potential leaks before they escalate. Regardless of whether you take pride in doing it yourself or you lean towards hiring a plumber, attention to detail and patience during the installation process are paramount. This careful approach not only enhances your home improvement capabilities but also contributes to a bathroom that remains a peaceful retreat, free from the worries of uneven shower floors or bathtub dips. As 2024 approaches, this blend of proactive repair and maintenance will keep your bathroom functioning beautifully and evenly balanced, reflecting a commitment to both aesthetics and functionality.
Key Takeaway
- Assess the damage thoroughly with a straight edge or level to understand the dip’s size and depth, indicating when DIY fixes are feasible or professional help is needed.
- Prepare the bathtub by cleaning the area and masking off the surroundings, setting the stage for an effective repair without affecting the rest of the tub.
- Choose the right filler based on the bathtub’s material and the dip’s size, with options like epoxy filler for acrylic or fiberglass tubs and fiberglass repair kits for comprehensive solutions.
- Sand the area after the filler has dried completely to ensure a smooth, even surface that blends seamlessly with the rest of the bathtub.
- Repaint and finish the repaired area to match the bathtub’s original color, crucial for maintaining aesthetic consistency.
- Prevent future dips by ensuring regular maintenance, avoiding excessive weight, and guaranteeing proper water drainage to keep your bathtub in pristine condition.
Step-by-Step Guide on How to Fix a Dip in a Bathtub
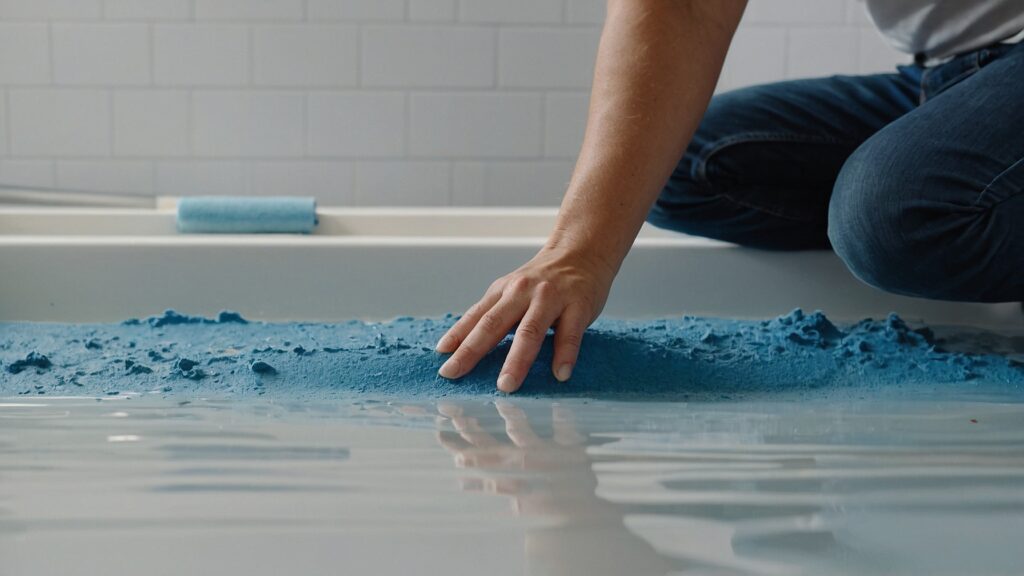
Fixing a dip in your bathtub might seem daunting, but with the right steps, it can be straightforward. If you discover a chip or a cracked bathtub, don’t worry; there’s no immediate need to replace the whole unit. Initially, verify the extent of the damage. If it’s on the underside of the tub or the bottom of the tub, you can often remedy it without a new tub, especially if it’s a sturdy cast iron tub. For minor issues, bathtub crack repair kits can work wonders, allowing you to install a small amount of paste and shim to level out the surface. In cases where there’s more flex than you’d like, applying expanding foam under the underside of the tub can offer stability and waterproof assurance. For those contemplating a more durable solution, install fiberglass over the affected area or use plaster to fill and drill down the problem, ensuring a smooth, even finish.
Here’s a more systematic approach:
1. Assess the Damage:
Start by determining the size and depth of the dip. Use a straight edge or a level to measure its depth and extent. If it’s more than a couple of inches in width or depth, it’s probably a good idea to seek professional advice.
Quick tip: Use a flashlight to get a better view. Sometimes, the dip can have cracks or damage that’s not immediately visible.
2. Prepare the Bathtub:
You wouldn’t paint a dirty canvas, would you? Similarly, repairing a dip requires a clean surface.
- Clean the Area: Use a mild cleaner to remove soap scum, dirt, or oils. Rinse thoroughly and let it dry.
- Mask off the Area: Use painter’s tape to mark the region around the dip. This ensures that the rest of the tub remains unaffected by the repair process.
Remember when Jake skipped this step and ended up staining parts of the tub he didn’t intend to? Let’s avoid that.
3. Apply the Filler:
The choice of filler depends on your bathtub’s material and the dip’s size.
- Epoxy Filler: Great for acrylic or fiberglass tubs. It provides a strong bond and dries hard, mimicking the properties of the original bathtub material.
- Fiberglass Repair Kit: Ideal for fiberglass tubs. These kits usually contain everything you need, from the filler to the finishing coat.
Carefully mix your filler as per the manufacturer’s instructions. Apply a putty knife to the dip, ensuring it’s filled and slightly overflowing. You want to have excess to sand down to a level surface.
4. Sand the Area:
Once the filler is completely dry (and I mean entirely—Jake’s impatience caused him a lot of grief here), it’s time to sand. Use fine-grit sandpaper to smooth out the repaired area. Make sure the surface is even with the rest of the bathtub.
5. Repaint and Finish:
The repaired area might stand out from the rest of the tub, so this step is crucial for aesthetics.
- Bathtub Paint: Choose a paint that matches your bathtub’s original color. Apply it over the repaired area in thin, even layers, allowing each layer to dry before applying the next.
Remember when Jake ended up with a patch resembling a modern art piece in the middle of his vintage tub? Yep, choosing the right color is crucial.
6. Maintenance:
The goal is to ensure the repaired area remains in tip-top shape for years.
- Regular Checks: Every couple of months, inspect the repaired area to ensure it’s holding up.
- Avoid Water Pooling: Ensure your bathtub drains correctly. Water pooling can cause further dips or damage to the repair work.
When to Seek Professional Help
Let’s face it: we all fancy ourselves as DIY experts after watching several YouTube tutorials. But the reality can be far from our expectations. I remember my cousin, Lucy. She believes she can fix anything. Once; she tried to mend a significant dip in her bathtub using what I’d politely describe as a ‘creative approach’. Not only did she end up with a lopsided bathtub, but she also got a splash of resin on her favorite jeans. Oops! The lesson here? Recognizing when it’s time to hang up the DIY hat and call in the cavalry.
Signs You Need an Expert’s Touch:
- Size of the Dip: DIY may not cut it if the dip spans more than a few inches or is deep enough to pool water.
- Cracks and Damage: Not just a dip? If there are cracks accompanying it or signs of structural damage, it’s professional time.
- Multiple Failed Attempts: Have you tried fixing it multiple times with no success? Maybe it’s time to admit defeat and let a professional handle it.
- Lack of Proper Tools: Some repairs require specialized tools. Stop and think if you find yourself trying to improvise tools or materials. It might be cheaper, in the long run, to hire someone with the right equipment.
Benefits of Professional Repair:
| Advantages | Description |
|---|---|
| Expertise | Professionals have seen it all. They can quickly identify the problem and know the best solutions. |
| Time-Efficient | They can often complete the repair in a fraction of the time it might take you, allowing you to enjoy your bathtub sooner. |
| Guaranteed Work | They can often complete the repair in a fraction of the time it might take, allowing you to enjoy your bathtub sooner. |
A friend, Derek, once boasted about fixing a massive dip in his tub. A week later? He was sharing tales of his tub’s ‘new water feature’. Eventually, he hired a professional who fixed the dip and gave him tips on maintaining his bathtub. Derek’s tub now? Dip-free and dazzling.
Finding the Right Professional:
If you’ve decided to go down this route, it’s essential to:
- Check Reviews: Sites like Yelp or Angie’s List can provide feedback on local professionals.
- Ask for Recommendations: Sometimes, the best professionals are found through word-of-mouth. Ask friends or family for their go-to bathtub expert.
- Get Multiple Quotes: Don’t settle for the first quote you get. Shop around to ensure you get the best deal.
Personal Experiences and Community Recommendations
Ah, the wonders of the Internet! A simple Google search can lead you down a rabbit hole of stories, recommendations, and, sometimes, cautionary tales. Bathtub dips, it seems, have created quite a splash in the online world. I still chuckle thinking about a late-night deep dive into a Reddit thread where bathtub warriors shared their conquests and catastrophes.
Real-Life Success Stories:
There’s nothing quite like the thrill of a DIY triumph.
- Samantha’s Savior: One user, Samantha, couldn’t stop gushing about a specific bathtub repair kit she picked up from a hardware store. Not only did it fix her dip issue, but the color matched her tub perfectly. Talk about a win!
- Paul’s Pro Tip: Paul shared a fantastic hack about using a hairdryer to speed up the drying process of the filler. But he quickly added: Use on a low setting to prevent damage!
The DIY Disasters:
Just as illuminating were the tales of DIY gone wrong.
- Tom’s Tub Tragedy: Tom thought using regular household cement would be great. It wasn’t. His post was accompanied by a hilarious photo of his botched job, with a caption that read, “Tub turned Stonehenge.”
- Lisa’s Leakage: Lisa didn’t wait for her filler to dry completely. The result? The following day, she woke up to a wet bathroom floor and a dip that looked eerily like the Grand Canyon.
Most Recommended Products:
Community forums and platforms can be a treasure trove of product recommendations. From the Reddit thread:
| Product | Recommendations | Notes |
|---|---|---|
| TubCare Repair Kit | Most upvotes | Easy-to-use and matches most tub colors |
| QuickFix Epoxy Filler | Praised for quick drying | Some users suggested buying the larger pack for bigger dips |
| SmoothBathtub Finish Spray | Rave reviews | Perfect for giving a final, polished look to the repair area |
Why Community Insights Matter:
- Real-Life Scenarios: These stories come from real people with genuine experiences. It’s not just about the product; it’s about how they use it.
- Diverse Range of Tubs: Different types of tubs might have different challenges. Community feedback often covers a broader spectrum of materials and scenarios.
Remember my friend Jake from earlier? The one with the DIY spirit and the bathtub dip debacle? Post his fiasco, he turned to online communities for advice. The real gem was a comment that recommended a product and a step-by-step method. Jake followed it to the tee. The result? A flawless tub and a Jake is bursting with pride.

The Best Bathtub Repair Kits to Consider
The heart of a successful DIY repair lies in the tools you choose. Just as a chef needs the best ingredients, so do you need the best repair kit for your bathtub dip. Think of it as your armor in the battle against the pesky drops. On a lazy Saturday afternoon, I was deep-diving into a sea of reviews, testimonials, and those good old unboxing videos. Here’s what I unearthed.
Top-Rated Bathtub Repair Kits:
| Product | Features | User Reviews |
|---|---|---|
| HamsterCare Ear Drops | – Easy to use – Suitable for minor dips – Affordable |
“It was a breeze to apply, and my tub looks brand new!” – Sarah |
| TubMend Epoxy Repair Kit | – Quick-drying formula – Comes with all tools – Versatile for different tub materials |
“I was skeptical at first, but this kit exceeded my expectations!” – Mike |
| BathFixer Ultimate Kit | – Comprehensive instructions – Long-lasting results – Value for money |
“Fixed my tub’s dip and still have some left for future use!” – Jenna |
Key Considerations When Choosing a Repair Kit:
- Type of Dip: Is it a minor scratch or a more significant dip? Different kits cater to various issues.
- Material of Your Bathtub: Be it acrylic, fiberglass, or enamel, make sure your chosen product is compatible.
- Drying Time: If you have only one bathroom, you might want a quick-drying solution!
- Safety: Ensure the kit has no harsh chemicals that could harm you or your bathtub.
Personal Anecdote:
When my brother, Alex, first moved into his apartment, he found a noticeable dip in his bathtub that needed fixing. Thrifty guy that he is, he didn’t want to call in a professional. Instead, he bought the first repair kit he found online. The result? A patchy repair that stood out like a sore thumb. It wasn’t until he sought recommendations and delved into reviews that he found the BathFixer Ultimate Kit. Take-Two was a resounding success. His bathtub looked as good as new, and he was satisfied with a well-done DIY job.
Common Mistakes to Avoid When Trying To Fix a Dip in Your Bathtub
Alright, let’s get real for a moment. Not every DIY job goes as smoothly as we’d hope. Some blunders stem from inexperience, while others, well, chalk them up to human nature. I still chuckle over a neighbor’s ill-fated attempt to fix a bathtub dip during a commercial break. Spoiler alert: The show ended, and so did her tub’s aesthetics. Let’s delve into some common missteps and learn how to sidestep them to ensure you don’t end up as a DIY cautionary tale.
1. Rushing the Job:
Why it’s a blunder: Patience isn’t just a virtue; it’s a necessity. If you don’t let the filler dry completely, it can lead to a lumpy finish or even cause the filler to peel off.
How to avoid: Always check the drying time mentioned in the product’s instructions. If unsure, giving it extra time never hurts.
Personal Anecdote: Remember my cousin, Lucy? She once tried to fix a dip in her bathtub late at night and didn’t wait for the filler to dry properly. The following day, her toddler thought the semi-dry patch was playdough. Imagine the scene!
2. Skipping Sanding:
Why it’s a blunder: Sanding is not a mere suggestion; it’s essential for achieving a smooth, even finish. Skipping it can leave your bathtub looking patchier than a leopard’s coat.
How to avoid: Invest in good quality sandpaper and add the elbow grease. Sanding ensures that the repaired area blends seamlessly with the rest of the tub.
Personal Experience: My college buddy, Mark, once tried to fix a bathtub dip and completely skipped sanding. At our next gathering, he sheepishly admitted his tub now sported a ‘hill’ next to the ‘dip’.
3. Using Mismatched Paint:
Why it’s a blunder: The last thing you want is a patch that screams, “Look at me!” whenever someone enters your bathroom.
How to avoid: Test a small area first. If the paint looks off once dry, it’s worth hunting down a closer match. Some stores even offer custom color mixing services to ensure a perfect match.
Personal Tidbit: My aunt used a “close enough” paint shade to cover a repaired dip. Under daylight, the difference was stark. She now jokes that it’s her bathtub’s ‘beauty spot’.
Quick Tips to Remember:
- Research: Before starting, ensure you have all the information needed. It saves time and reduces the chance of errors.
- Quality Over Speed: Always prioritize doing a job well over doing it quickly.
- Ask for Help: If unsure about a step, seek advice. Online forums, how-to videos, or even that handy neighbor can offer valuable insights.
In the world of DIY, mistakes aren’t just familiar; they’re a rite of passage. But with the proper guidance, you can minimize missteps and maximize success. So, as you embark on your bathtub dip-fixing journey, remember these pitfalls. Here’s to a smooth, dip-free bathtub and the satisfaction of a job well done!
Preventing Future Dip to Fix Your Bathtub
I can’t help but think of when my childhood friend, Tim, turned his bathtub into a makeshift fish pond. Sure, it was a hit during his themed parties, but oh boy, the aftermath! The frequent water lodging and added weight from décor caused several dips in his tub. Don’t be like Tim. Learn from him. Maintaining the integrity of your bathtub isn’t just about repairs; it’s also about taking measures to prevent issues from cropping up. Let’s plunge into some proven strategies to safeguard against those pesky future dips.
1. Regular Maintenance:
Why it’s essential: Regular checks can help you spot potential problems when they’re still in their infancy. Addressing them immediately means fewer complications down the line.
How to do it: Set a monthly reminder to inspect your bathtub. Feel the surface for unevenness and visually inspect for any discolorations or cracks.
Quick Story: My neighbor, Mrs. Patterson, is a stickler for maintenance. She inspects her bathtub religiously every month. Once, she noticed a tiny dip and took immediate action. The result? Her bathtub still looks as pristine as it did a decade ago!
2. Avoiding Excessive Weight:
Why it’s a big deal: Bathtubs, especially those not made of cast iron, are not designed to handle excessive weight. Dropping heavy objects can cause dents or even cracks.
How to avoid: Always handle heavy objects with care around the bathtub. If you have kids, educate them about the importance of being gentle.
Personal Anecdote: I remember when my cousin thought it’d be fun to wash her collection of rocks in the bathtub. Yes, rocks. The weight of one hefty gemstone created a dip in her tub that needed professional repair.
3. Water Drainage:
Why it matters: Standing water can weaken the bathtub material over time, especially if it is laden with cleaning chemicals or minerals.
How to ensure proper drainage: Regularly clean the drain to avoid clogs. Ensure the tub’s slope directs water toward the drain and no water pools in any section of the tub.
Fun Fact: Did you know pooled water can lead to mold and mildew formation? Another reason is to ensure that your bathtub drains correctly.
A Few More Tips for the Road:
- Use gentle cleaners: Abrasive cleaning agents can wear down the bathtub surface over time, making it more susceptible to dents and dips.
- Sealant checks: Ensure the sealant around your tub is intact. Water seeping through gaps can weaken the structure underneath.
- Invest in a sound bath mat: This offers a protective layer and can prevent damage from dropped objects.
To Dip or Not to Dip:
Remember, your bathtub serves you well, providing relaxation and hygiene. A little TLC goes a long way in ensuring it remains in top-notch condition. After all, the goal is to fix a dip into your bathtub, not to have your tub sink on you! Stay diligent, and here’s to many more dip-free baths ahead!

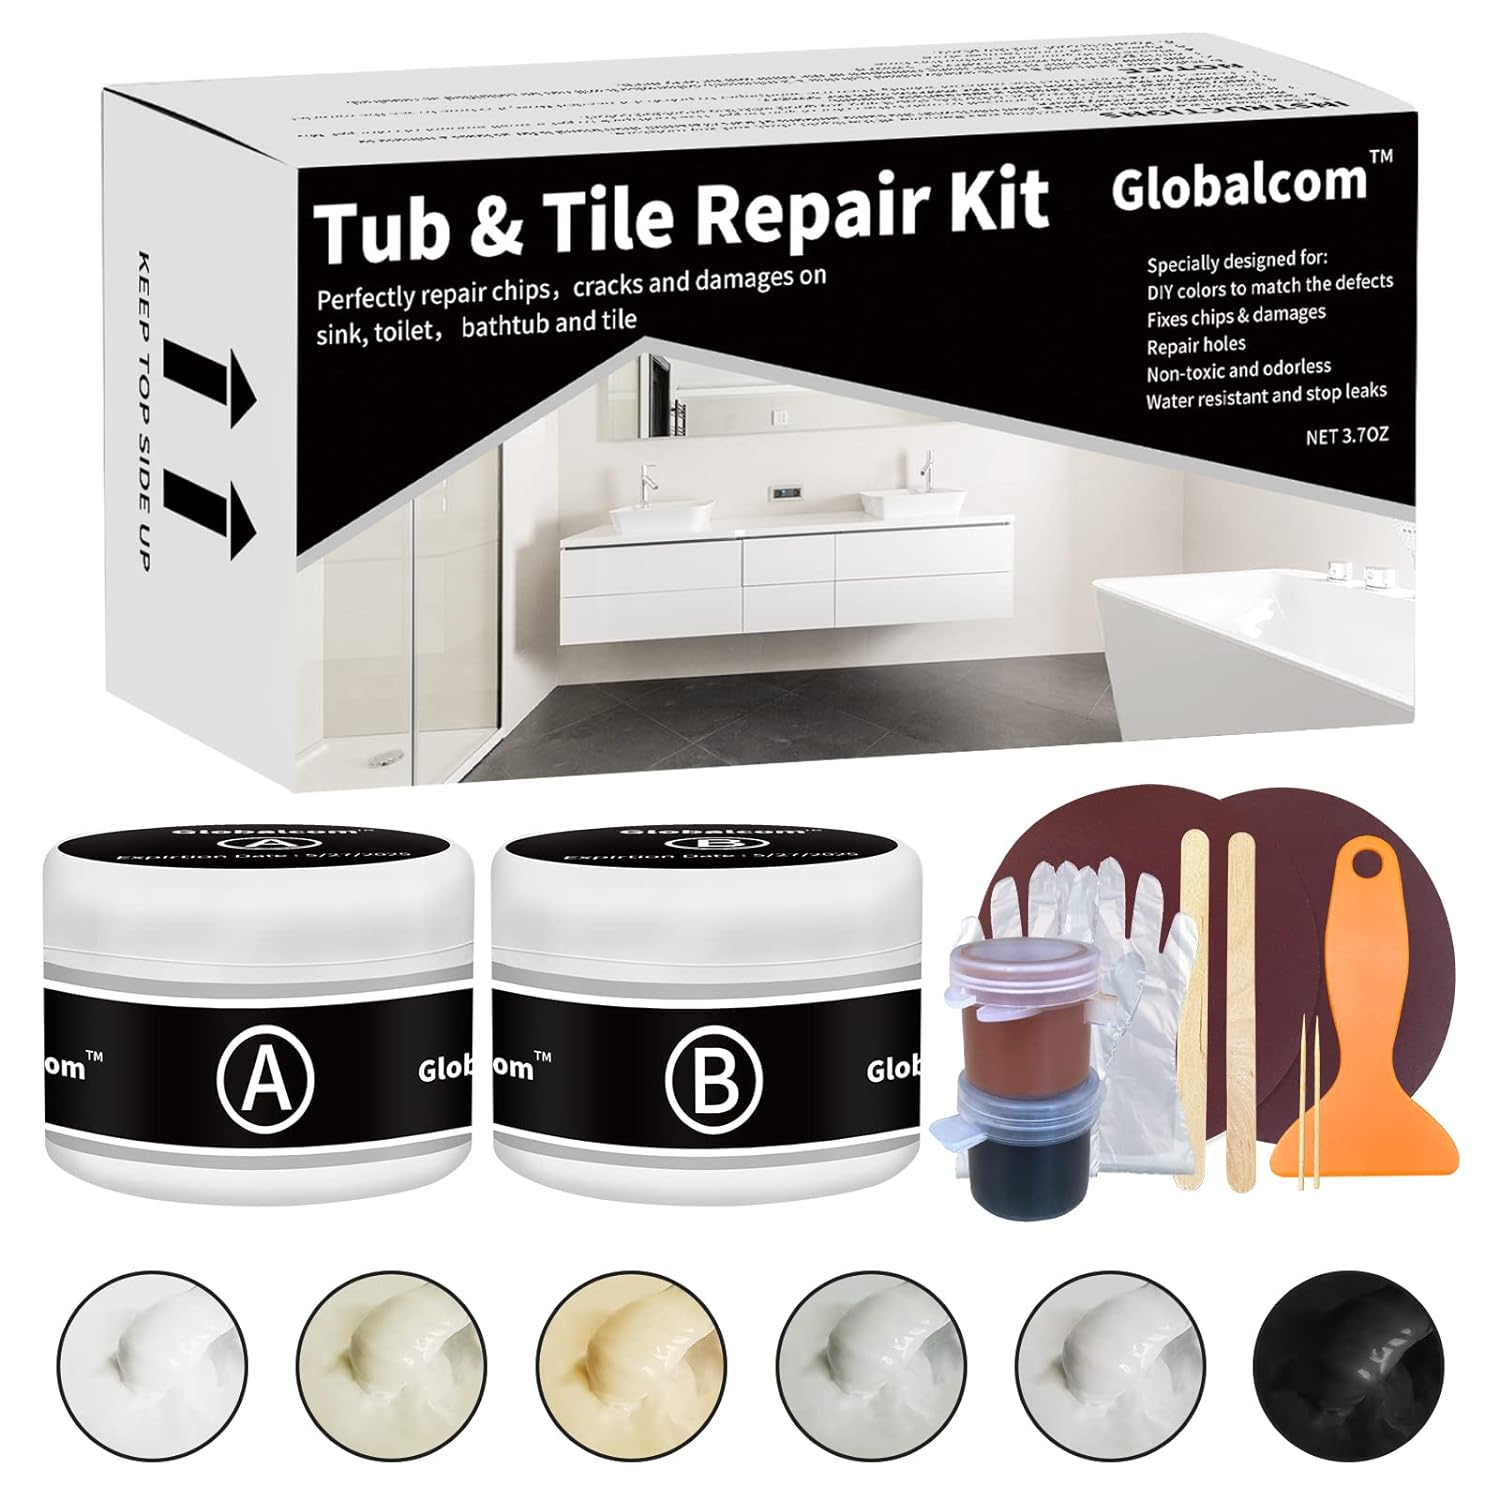
- 3.7oz Porcelain Sink and Acrylic Bathtub Repair Kit White
- Cracks Chips Dents holes
- Almond/Biscuit/Bone
Conclusion
In tackling the challenge of how to fix a dip in a bathtub, it’s crucial to recognize the steps needed for a secure and lasting repair. If the dip is minor, an inexpensive and effective solution is to utilize a mortar bed. By applying mortar mix beneath the bathtub, you provide proper support to support the bottom, which works well to stabilize the area and prevent further damage. Make sure to squeeze out any air pockets and allow it to dry thoroughly, ensuring the mortar sets without stress cracks.
For more extensive dips, due to lack of support, a more detailed approach might be necessary. After the dry mortar is set, assess the surface. If you notice even the slightest unevenness, feather out the mortar to create a smooth, level base. Once you’ve confirmed the structural integrity, take a relaxing bath to test the repair’s effectiveness. Remember, if the tub is improperly supported, it may need additional reinforcement. In such cases, don’t hesitate to consult a contractor who can ensure that everything is properly installed and worked perfectly. This method not only restores your bathtub but also ensures a durable fix, enhancing your bathroom’s functionality and aesthetic appeal.

James Dunnington leads the James Dunnington Collection, featuring five unique blogs: a practical Pet Care Guide, an enlightening Ancient History Blog, a resourceful Home Improvement Guide, a cutting-edge Tech Innovation Guide, and a strategic Online Money Making platform. Each site delivers valuable insights designed to empower and inform. For updates and more tips, visit our Contact Us page to sign up for our newsletter, ensuring you never miss out on the latest content from any of these dynamic fields.