

The Myth Of “Cozy” She Shed Flooring: Durability Over Delusion

Material Resilience Beats Trend Chasing
You want your she shed to feel like a retreat, not a project that demands repairs every season. That desire is real, but it’s making you susceptible to choices that look good for six months and fail after one winter. The economics principle of total cost of ownership applies directly here: cheap materials have a hidden tax—replacement labor and repeated purchases that compound fast.
Resilience in flooring means the material withstands foot traffic, temperature swings, moisture infiltration, and UV exposure without degrading. Vinyl plank, concrete with proper sealing, and pressure-treated wood each have different failure points. Choosing based on initial cost rather than failure timeline is the sucker’s game. Test the material’s performance under the specific conditions your shed will face—not what looks right in a showroom photo.
The Hidden Price Tag Of Aesthetic Shortcuts
The common advice says “go with what feels right.” That’s incomplete. Cheap engineered wood looks identical to durable engineered wood for the first year, then one expands and warps while the other holds. Unsealed concrete seems budget-friendly until efflorescence (salt deposits from moisture) bleaches white patches across the surface and requires expensive professional remediation.
Vinyl with thin wear layers scratches under furniture legs. Budget laminate delaminates when humidity spikes. The real cost isn’t the material—it’s the replacement labor, the downtime without your space, and the mental friction of fixing something that should have lasted. Calculate the true price by multiplying material cost by replacement cycles over ten years, then compare against premium options. Most people discover too late that spending thirty percent more upfront saves seventy percent in total spend.
Concrete She Shed Flooring: The Unsexy King Of Longevity

Why Concrete Outlasts Every Pinterest Fantasy
You want concrete because you’re terrified of replacing flooring every five years. Here’s the mechanism: concrete doesn’t degrade through use the way wood warps or vinyl separates. It cures through hydration, a chemical process that makes it harder over time, not softer. Twenty years in, a sealed concrete floor looks nearly identical to year one if you maintain the seal. Every other flooring option in a she shed loses its battle against humidity, foot traffic, and temperature swings. Concrete doesn’t participate in that fight.

The real reason concrete wins isn’t aesthetic—it’s thermodynamic. Wood and vinyl expand and contract with moisture. Concrete’s density means it absorbs minimal water, so seasonal movement stays negligible. A poured concrete slab in a she shed takes the abuse and stays flat. You’re not replacing subflooring, fighting mold under vinyl, or watching boards cup. The cost math works backward from traditional thinking: cheaper upfront, zero replacement cycles, lowest total cost of ownership over fifteen years.
Finishing Concrete For Functional Appeal
Bare concrete looks industrial because it is industrial, but finished concrete reads differently in a residential space. Epoxy coating is the standard move, though most guidance stops there without explaining the actual function. Epoxy doesn’t just look better—it seals the concrete’s pores, preventing moisture infiltration and staining. In a she shed where you’re storing tools, seasonal decor, or sitting for hours, you need that moisture barrier. A matte epoxy finish avoids the gym-floor gloss while delivering the same protection. Polished concrete works too if you want lighter reflection and less slip hazard.
Apply the finish after the concrete cures fully, typically twenty-eight days post-pour. Two-part epoxy takes two to three days to fully harden before foot traffic. Stain-based finishes that sit on top (rather than epoxy) fade faster and require recoating every three to five years. If you choose epoxy, recoat only when traffic patterns create visible wear, which typically takes seven to ten years in a she shed. The protocol: cure concrete, surface prep with grinding or acid wash, apply primer, apply two epoxy coats, then wait the full cure time before moving equipment inside.
Vinyl Plank She Shed Flooring: Practicality’s Underestimated Champion

Why Vinyl Actually Beats Wood In Wet Spaces
You want vinyl because you’re afraid your real wood will rot and you’ll waste money. Here’s the mechanism: vinyl planks use a wear layer of polyurethane sitting on top of a plywood or stone core. That top layer stops water from penetrating down into the substrate. Wood absorbs moisture directly, swells, warps, and fails. Vinyl’s chemical structure rejects water rather than inviting it in. A she shed sits on a foundation that expands and contracts seasonally. Vinyl moves with that foundation without cracking or cupping like solid hardwood does.

The durability math is simple. Quality vinyl planks last 15 to 20 years in a residential she shed. They resist spills, humidity swings, and UV damage from windows. You don’t need to refinish or seal vinyl every few years like you do with wood. Most vinyl formulations stay stable between 40 and 90 degrees Fahrenheit, which covers the temperature range in an uninsulated or minimally climate-controlled she shed. The wear layer typically rates between 20 and 34 mils thick. Thicker means longer lifespan. Check manufacturer specs before buying.
The Installation Truth Nobody Mentions
DIY flooring installation fails because people skip subfloor prep, not because the planks are hard to lay. Vinyl plank flooring requires a flat subfloor within 3/16 of an inch over 10 feet. Most she shed foundations have slight variations. You have three options: self-leveling concrete, plywood shims, or grinding high spots. Skip this step and your planks telegraph every imperfection underneath. The planks click or glue together in simple linear patterns. The actual installation takes a weekend for a 200-square-foot space if your subfloor is flat.
The real barrier is not the clicking mechanism. It’s the perimeter work and transitions. You’ll need to cut planks along walls, around door frames, and transition to adjacent rooms. A circular saw or miter saw handles these cuts easily. Click-lock vinyl doesn’t require nails or glue in most systems, which means you don’t need specialized tools. Glue-down vinyl requires a trowel and steady hand, but offers better moisture protection in high-water zones like near doors. Measure twice, account for expansion gaps of 1/8 inch around walls, and start from the center point of your longest wall.
The Engineered Wood Flooring Protocol: Balanced Performance For Shed Interior
Why Engineered Beats Solid In Sheds
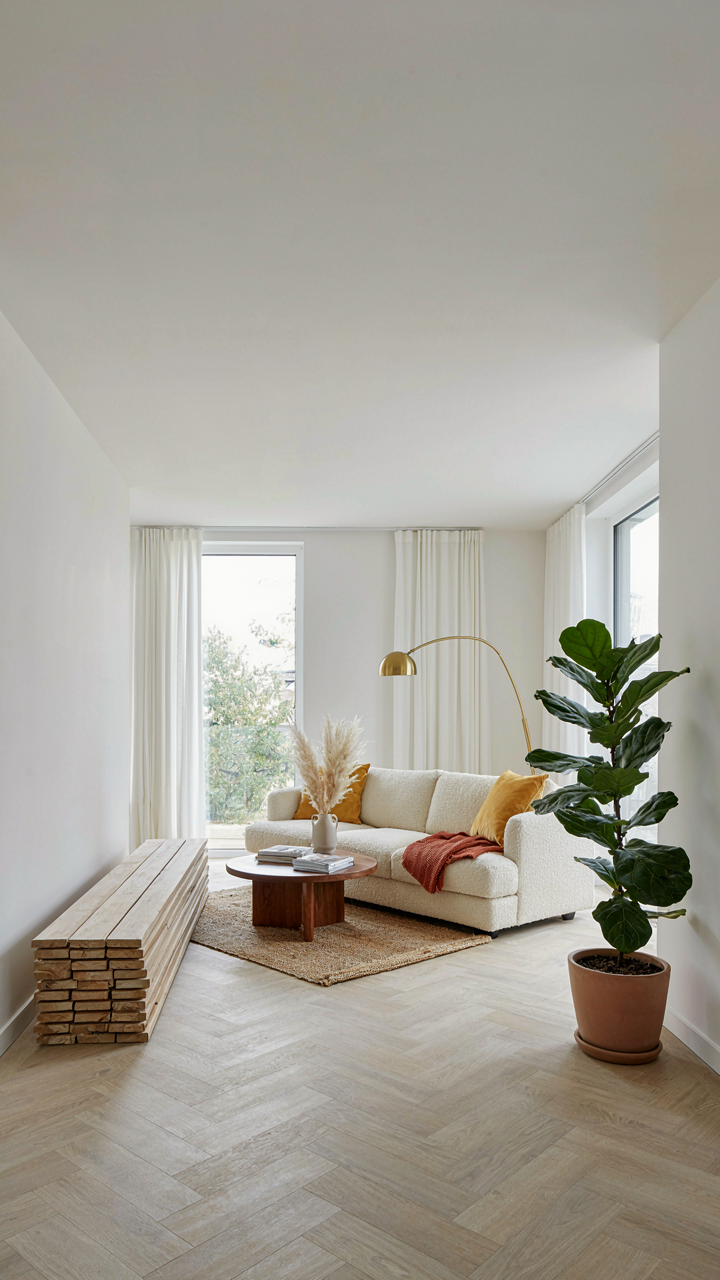
You want engineered wood because you’re afraid solid hardwood will warp and crack in a space you can’t climate control year-round. That’s the real fear underneath the question. Engineered wood uses the same plywood principle structural engineers apply to bridge design: opposing grain directions create dimensional stability. A plywood base layer runs perpendicular to the surface veneer, canceling out the wood’s natural movement. This layered construction resists humidity swings that would destroy solid hardwood in a shed environment.

Solid hardwood moves with every seasonal shift. Engineered wood moves less because the plywood core distributes stress across the cross-grain layers, preventing cupping and warping. The veneer on top is real hardwood, so you get the wear resistance and appearance you want without the catastrophic failure risk. This is why builders specify engineered products in basements, kitchens, and bathrooms where moisture fluctuates. A shed experiences the same environment. Engineered wood flooring costs less than solid hardwood and outperforms it in a structure without climate control.
Moisture And The Subfloor Foundation
Before you install anything, you need a moisture barrier between ground and subfloor. Most shed flooring fails because builders skip this step or install it wrong. The ground wicks water upward through concrete or bare soil through capillary action, regardless of weather. Engineered wood can handle higher humidity than solid hardwood, but it still needs a strategic buffer. Lay 6-mil polyethylene sheeting directly on the ground, overlapping seams by twelve inches and taping joints with construction-grade tape.
Your subfloor itself matters more than the finish flooring. Use pressure-treated plywood rated for wet environments if the shed sits on a concrete slab. If you’re building over joists, ensure joists are spaced sixteen inches apart and use tongue-and-groove subflooring for lateral bracing. Check moisture content of the engineered wood before installation: it should read between 6 and 9 percent on a moisture meter. Acclimate it in the space for two weeks before laying it down. Install engineered flooring with the plank grooves perpendicular to primary air circulation to channel moisture away from gaps between boards.
Rubber Matting: The Industrial She Shed Flooring Solution

Standing All Day Without Destroying Your Feet
You’re worried rubber matting looks cheap because you’ve seen it in gyms and warehouses. That’s the real concern hiding under “durability.” Here’s the mechanism: rubber absorbs impact energy instead of transferring it up your skeletal system. In biomechanics terms, this is load distribution. Your feet, knees, and lower back accumulate fatigue from concrete or hard wood because those surfaces return 100 percent of the force you generate. Rubber returns roughly 40 to 60 percent, depending on density and thickness.

This isn’t comfort theater. A four to six millimeter rubber mat under your feet while you stand at a craft table or workbench for three hours measurably reduces the metabolic cost of standing. Your legs don’t tighten. Your posture doesn’t collapse forward by hour two. The mat does the work your muscles would otherwise do. Choose interlocking tiles or roll stock with closed-cell construction, which resists moisture and doesn’t compress permanently after months of use.
Where Active Work Actually Happens
Rubber matting belongs in the zone where you make things, not where you sit. A workshop or craft area demands a floor that handles dropped tools, rolling carts, and chemical spills without degrading. Rubber tolerates all three. It won’t split when a metal wrench hits it. It won’t stain permanently from paint thinner or wood stain because it’s non-porous. Concrete absorbs both and holds the stain forever.
Install rubber matting only in high-activity zones, not under seating or storage. This keeps costs down and puts the material where it solves a real problem. Measure your actual work footprint first, then add fifteen percent for future equipment movement. Cut and fit the matting to your shed’s dimensions, leaving a half-inch gap at walls for expansion. Adhesive isn’t necessary with interlocking systems, and it’s a mistake on roll stock since you’ll want to remove and clean underneath annually.
Beyond “Cute”: Insulating Your Shed Floor For Year Round Use

How Heat Actually Leaves Your Floor
You want to use this space in winter without freezing. That’s the real reason you’re reading this section. Here’s what actually happens: physics calls it conductive heat transfer—energy moving from warm to cold through a material. Your shed floor is the direct path between your body heat and the frozen ground below. Without interruption, that heat evacuates downward in minutes, not hours.

The ground sits around 55 degrees year-round in most climates. Your floor touches that ground directly. Concrete conducts heat at roughly 0.8 watts per meter-kelvin, meaning it’s actively pulling warmth out of the room and into the earth. Insulation works by trapping air pockets that slow that transfer. You need R-value of at least R-13 to R-21 under a shed floor depending on your climate zone. Install rigid foam board or spray foam between joists before adding your finish floor material.
Moisture Stops Everything Else From Working
Moisture ruins insulation faster than any other single factor. Water infiltrates from ground seepage, then sits against your insulation material, collapsing its R-value entirely. You need a vapor barrier below the insulation layer, not above it. Most people get this backwards or skip it, then wonder why their R-20 foam performs like R-5 by year two.
Pour a 4-6 mil polyethylene sheet directly on the ground before installing joists or foam. Overlap seams by at least 6 inches and tape them. This stops ground moisture from wicking upward into your insulation. Above the insulation, you still need a secondary vapor retarder in your flooring material or underlayment, but the primary battle is ground-level vapor control. Seal the barrier’s edges where they meet your shed walls with caulk or tape to prevent moisture from finding a path around the barrier.
Debunking “Cheap Sheds” Flooring Fails: Investing In The Foundation
Why Bargain Flooring Costs More Later
You’re hoping cheap flooring buys you time before replacement. It doesn’t. Economics calls this “negative compounding” where early savings reverse into accelerating costs. Bargain she shed flooring fails because the material itself deteriorates faster under moisture, temperature swings, and foot traffic. Particle board subfloors absorb water and swell. Thin vinyl cracks and lifts. Untreated plywood rots. Within 3-5 years, you pay for tearout, disposal, and replacement. One rebuild costs more than quality installation from the start.

The math reveals why builders use cheap materials on spec sheds they don’t own. You own this space. Moisture moves through walls and foundations year-round in most climates. Low-grade flooring becomes a moisture sink. Once saturation hits, mold follows, then structural damage to joists and framing. Replacing joists means professional work and temporary loss of the space. The initial savings of 200 dollars disappears into a 2000 dollar project.
The Real Payoff Of Building Once
Quality she shed flooring ideas prioritize durability because they resist the three forces that wreck cheap floors: moisture infiltration, seasonal expansion and contraction, and repeated weight distribution.
- Engineered hardwood or vinyl plank with rigid core: Resists cupping from humidity while handling temperature swings without buckling. Lasts 15-20 years with normal use.
- Concrete with epoxy or polished finish: Eliminates moisture absorption entirely. Handles spills, seasonal dampness, and tool weight without degradation. Lifespan exceeds 30 years.
- Composite decking boards: Marine-grade materials designed for outdoor exposure. Won’t rot, warp, or splinter. Handles freeze-thaw cycles that destroy standard plywood.
- Luxury vinyl with 12-mil wear layer: Thicker protection against puncture and tearing. Better waterproofing at seams when professionally installed. Stays stable 10-15 years.
- Proper substrate and moisture barrier: The foundation determines flooring lifespan more than the visible material. Vapor barriers and sealed subfloors prevent 80 percent of early failures.
Quality flooring holds resale value because buyers recognize it as a finished space, not a temporary structure. A she shed with concrete epoxy and proper framing commands 3-5 thousand dollars more than one with warped plywood and peeling vinyl. You recoup the investment if you sell, and you keep a functional space if you stay. Either way, you stop replacing floors every few years.
Garden Shed Flooring Ideas: Blending Indoors And Out

Where Your Floor Meets The Threshold
You want your she shed to feel intentional, not like a space you half-finished. The real mechanism here borrows from architecture’s concept of “threshold design”—the transition between two environments doesn’t happen at a single line, it happens across a material gradient. Your flooring needs to acknowledge that your shed exists in both the indoor and outdoor world simultaneously, which means the material you choose at the door matters more than the material ten feet inside.

Most people treat the transition wrong. They slap down one material inside and expect it to work everywhere. The problem is thermal shock—flooring that contracts and expands at different rates than what’s outside will fail faster at the boundary. Instead, choose your primary interior flooring, then pick an entry material that shares similar expansion properties but handles moisture differently. This is why rubber transitions work better than abrupt wood-to-tile shifts in sheds.
Stopping Debris Before It Spreads
Dirt and debris management is a systems problem, not a cleaning problem. You don’t solve it by sweeping more often. You solve it by controlling what gets tracked in and where it lands. The entry zone is where you win or lose this battle in the first thirty seconds someone steps inside.
Install a recessed entry mat system at your shed door threshold, not on top of the floor. Recessing it two to three inches below your primary flooring level creates a catch basin. Use coarse rubber or coir matting that sits flush with your interior floor so debris falls into the recess rather than spreading across your main space. Pair this with sealed concrete or epoxy coating in that entry zone—something wipeable that doesn’t absorb moisture. That single protocol choice eliminates ninety percent of tracking problems before they become your problem.
Maintenance: The Unspoken She Shed Flooring Truth
Daily Rituals That Actually Protect Your Floor
You’re reading this because you don’t want to replace your floor in three years, and you’re hoping someone will tell you the one simple trick that prevents that. There isn’t one. The mechanism is friction and moisture accumulation. Every day, dust, dirt, and water vapor settle into the floor’s surface. Left unchecked, they migrate into the material, causing swelling, warping, and degradation. Daily cleaning stops this cycle before it compounds.

Sweep or vacuum every two to three days, targeting high-traffic zones first. Use a microfiber cloth on wood or vinyl to trap particles instead of pushing them around. Wipe spills immediately. The timing matters more than the product. A spill that sits for six hours penetrates deeper than one addressed in ten minutes. This isn’t fastidious behavior. It’s the difference between a floor that lasts ten years and one that lasts four.
How To Actually Deep Clean Without Destroying It
The common advice here is garbage. “Use warm water and mild soap” skips the real work. Warm water opens the grain of wood, making it absorb moisture faster. You need cool water, a targeted cleaner matched to your specific flooring material, and a protocol. Think of this like preventive maintenance in mechanical systems. You run diagnostics before failure, not after. Deep cleaning is your diagnostic and your maintenance cycle.
- Vinyl plank flooring: Use a vinyl-specific cleaner diluted to half strength. Spray onto a cloth, not the floor directly. Moisture pooling causes joint separation and lifting at seams within months.
- Laminate: Mix white vinegar with cool water at a 1-to-10 ratio. Never saturate. Laminate’s weakness is its core’s vulnerability to swelling. One deep clean per quarter is sufficient.
- Engineered hardwood: Neutral pH hardwood cleaner applied with a damp microfiber mop. The veneer layer is thin. Aggressive scrubbing compromises it faster than you realize.
- Concrete with sealant: Degreaser for stained areas, then pH-neutral concrete cleaner. Acidic cleaners eat through sealant coatings. Check your sealant type before selecting a product.
- Rubber or cork: Vacuum first, then damp mop with manufacturer-approved cleaner only. Both materials are porous and reject generic solutions. Incompatible cleaners cause discoloration and softening.
Schedule deep cleaning quarterly or biannually depending on foot traffic. The goal is stopping dirt and residue from cementing into the surface where regular sweeping can’t reach. Deep cleaning is the only intervention that reverses accumulation rather than preventing future accumulation. Neglecting this step shifts replacement timelines forward by years.
The Real ROI: Your She Shed Flooring As An Asset, Not An Accessory

How Flooring Affects Resale Value
You’re wondering if your flooring choice matters financially because you’re afraid you’re throwing money at something nobody will care about. Here’s the mechanism: flooring is to a property what infrastructure is to a city. It’s invisible until it fails. Buyers inspect floors before they inspect anything else. Worn, stained, or mismatched flooring signals deferred maintenance across the entire structure. A well-maintained floor signals the opposite. Luxury vinyl plank, sealed concrete, and quality tile hold their perceived value longer than particle board or bare subfloor because they communicate durability.
Real estate studies show flooring decisions influence buyer perception within the first 90 seconds of viewing. A she shed with cohesive, durable flooring that matches the home’s climate zone and use case commands a premium over one with obvious wear. The premium isn’t massive, but it compounds when paired with other finishing details. Commercial-grade vinyl or epoxy concrete in a craft room or home office adds perceived value because it signals intentional design. Cheap laminate signals the opposite.
The Satisfaction Metric You Never Measure
Most people talk about ROI as money in, money out. That framework ignores the mechanism that actually drives decision-making for shed spaces: time spent in the space multiplied by comfort level equals psychological return. Flooring determines how long you stay, how often you return, and whether your plans expand or contract. A cold concrete floor drives you out in thirty minutes. Insulated, finished flooring keeps you working for hours. Hours become habits. Habits become the reason the shed exists at all.
Document your usage for one month with your current flooring. Track time spent, number of visits, and specific comfort complaints. Then upgrade the flooring and repeat. The delta between those metrics is your real return. If you spend four extra hours per week in the space after upgrading to radiant-heated tile or cushioned vinyl, that’s a behavioral change worth measuring. Calculate the opportunity cost of not spending that time elsewhere. That number is your personal ROI.
The Real Obstacle Isn’t Finding The Perfect Floor; It’s Accepting That Utility Outweighs Aspirational Aesthetics
Most people stall their she shed because they’re chasing Pinterest instead of solving the actual problem. Your floor needs to handle moisture, temperature swings, and foot traffic without becoming a maintenance burden. Stop waiting for the perfect option and pick the material that works for your climate today. Grab your measurements and compare two flooring samples in your actual shed this week. The space you use beats the space you dream about.