Introduction
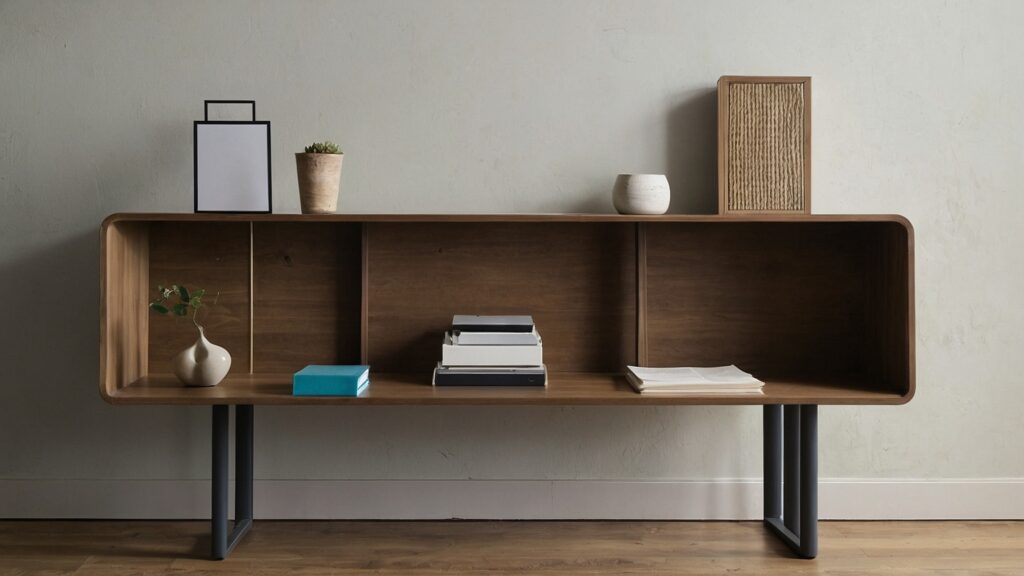
When tackling the everyday challenge of a gap filler between desk and wall, many overlook the blend of practicality and aesthetics this small addition can bring to their workspace. Safety leaps to the forefront of concerns, with a well-placed gap filler significantly cutting down the risk of small items, which can be potential hazards, slipping into the abyss. The transformation it brings isn’t just functional; it significantly boosts the aesthetics of your area, making it more inviting and cohesive. From the simple DIY options to the sleek ready-to-buy products from Amazon.com, there’s an array of choices to suit every preference, underlining the personal touch you can infuse into your workspace customization.
Diving deeper into the materials and installation, choosing the right one—be it foam, wood, or fabric—becomes crucial, not just for the gap’s functionality but for how it complements your space. Countertops, desks, or even the area underneath your kitchen stove, where silicone stove counter gap covers from Amazon.com, available in 2 pcs sets, become handy, are pivotal zones for this subtle yet significant addition. Whether caulking the gap or opting for a slide-in range rear filler kit, the essence is to make the desk look seamlessly integrated with the gap between the wall, marrying practicality with design in every aspect of your space personalization.
Key Takeaways
- Safety is paramount: Utilizing a gap filler between desk and wall significantly reduces the risk of losing small, potentially hazardous items, ensuring a safer workspace.
- Enhance aesthetics effortlessly: A well-chosen gap filler not only solves a practical issue but also elevates the visual appeal of your workspace, making it more inviting and cohesive.
- DIY vs. ready-to-buy: Whether you opt for a DIY solution or a commercial product, there’s a gap filler option to suit every skill level, preference, and need, emphasizing the importance of personal choice in workspace customization.
- Material matters: Selecting the right material for your gap filler—be it foam, wood, or fabric—is crucial for both functionality and aesthetics, underscoring the need for a thoughtful approach to material compatibility.
- Installation is key: Proper measurement and installation are critical to ensuring that the gap filler serves its purpose without becoming a nuisance, highlighting the importance of the “measure twice, cut once” principle.
- Personalize your space: Gap fillers offer an unexpected opportunity to personalize and style your workspace, turning a functional fix into a feature that reflects your personality and design sensibilities.
- Child and pet safety: Beyond aesthetics and practicality, gap fillers can also serve as an essential safety feature for households with children or pets, preventing small objects from becoming choking hazards.
- Practicality meets design: The ultimate guide to gap fillers illustrates that practical solutions like these are essential for maintaining a clutter-free, efficient, and aesthetically pleasing workspace, proving that functionality and design can go hand in hand.
Is Filling the Gap Between Your Desk and Wall Necessary?
Whether you’re a seasoned DIY fan or just starting to ponder the mysteries of home improvement, you might have noticed that sneaky space between your office desk and the wall. It’s like a tiny void, mocking us with its presence. So, let’s dive in: is this gap just a minor nuisance, or should we consider fixing it for good? Think about it: this gap could be a lost opportunity for privacy, or a sneaky dust collector. Why not consider custom solutions like trim to bridge this space? Or maybe, attaching a slim cabinet or countertop piece could seamlessly connect your desk to the wall, utilizing hardware from places like Amazon. For those with uneven walls or floors, adjustable hardware could ensure a snug fit, turning that awkward gap into valuable, usable space. Whether it’s for a sleek home office look, or just to stop losing pens down the void, closing that gap might just be the upgrade you need.
Why Is a Gap Filler Between a Desk and a Wall Necessary?
Sure, you might think a small gap isn’t a big deal. But here’s the real talk: it’s not just a space; it’s a void that can cause several issues.
Safety Concerns: Beware of the Rogue Items!
First off, let’s chat about safety, your top priority. Have you ever dropped a paperclip, only for it to magically vanish into the gap? Worse, have you ever stepped on a rogue LEGO that made its escape? I’ve done it, and it’s like stepping on a bed of nails.
Fact: Stepping on a LEGO can exert up to 4,000 Newtons of force per square inch. Trust me, it hurts!
Aesthetic Quirks: Your Desk, Your Space
Next up, let’s talk aesthetics. Have you ever taken a photo of your workspace only to notice that gap staring back at you? Yeah, it’s not the best look for your Instagram or Pinterest board. A gap filler can turn that eyesore into an eye-catcher.
Tip: Choose a gap filler that complements your room’s color scheme. Consider a wooden strip that matches the shade if your desk is wood.
“Your environment influences your experience. Make it a positive one.” – Someone really wise about interior design.
Practicality: No More Narnia for Your Items
In today’s high-paced work environments, maintaining workspace efficiency is paramount. The momentary lapse of losing a thumb drive or those elusive pens can seem minor but symbolizes a larger challenge in digital and physical asset management. Such interruptions not only stall productivity but also contribute to workspace clutter, diluting our focus and efficiency. This narrative transcends mere inconvenience, spotlighting the crucial role of organization in safeguarding both digital files and writing instruments against the abyss of workplace chaos.
Elevating workspace productivity demands a holistic approach to asset management. Incorporating strategies for both digital asset management and physical organization ensures a streamlined workflow, where essential tools like thumb drives and pens are readily accessible, not lost in the void. By addressing the micro challenges of workspace clutter, we fortify our broader goals of efficiency and productivity, crafting an environment where every tool is in its place, and every moment spent contributes to our success. This approach not only enhances our workday fluidity but also anchors our focus in a sea of potential distractions, proving that the key to peak productivity lies in mastering the art of organization.
Case Study: Simplifying Workspace with Innovative Gap Filling
In a common scenario that plagues many, Lisa, a graphic designer, constantly found herself grappling with the disappearance of her digital stylus into the notorious gap between her desk and the wall. This not only interrupted her workflow but also led to unnecessary expenses as she had to replace her stylus multiple times. The solution came from an unexpected quarter: a simple yet effective DIY foam gap filler.
Lisa decided to tackle this issue head-on by employing a lightweight, adaptable foam strip, easily customizable to fit the exact dimensions of the gap. She measured the space carefully, cut the foam to size, and secured it snugly into the void. This immediate intervention transformed her workspace by eliminating the gap that had been the cause of much frustration.
The impact was twofold. Practically, it safeguarded small, essential items like her stylus from getting lost. Aesthetically, it provided a seamless look to her workspace, enhancing the overall feel and organization of her creative zone. Lisa’s approach exemplifies how a straightforward, creative solution can solve common yet overlooked problems, highlighting the significance of gap fillers not just in improving the functionality of a workspace but also in contributing to its visual appeal.
This case study underscores the importance of considering both practical needs and aesthetic values when selecting a gap filler, encouraging readers to view gap filling not just as a utility fix but as an opportunity to enhance their workspace’s efficiency and style.
Pro Tip: Got kids or pets? A gap filler isn’t just for you. It’s also a blockade to keep curious toddlers or pets from knocking things into hard-to-reach places.
Added Bonus: Toddler and Pet-Proofing Your Space
Regarding toddlers and pets, here’s a bonus reason to consider a gap filler: child and pet safety. Little explorers love small spaces, and that gap might as well have a “Welcome” sign.
To Fill or Not to Fill?
So, is a gap filler between your desk and wall necessary? In short, it makes your life easier, safer, and maybe even prettier. Whether about safety, aesthetics, or just good old practicality, filling that gap is like fixing a missing puzzle piece in your room.
Sometimes, minor changes make the most significant difference. So why not take care of that gap and make your space complete?
So, are you ready to take the plunge and close the gap? Stay tuned for DIY tips and ready-made solutions!

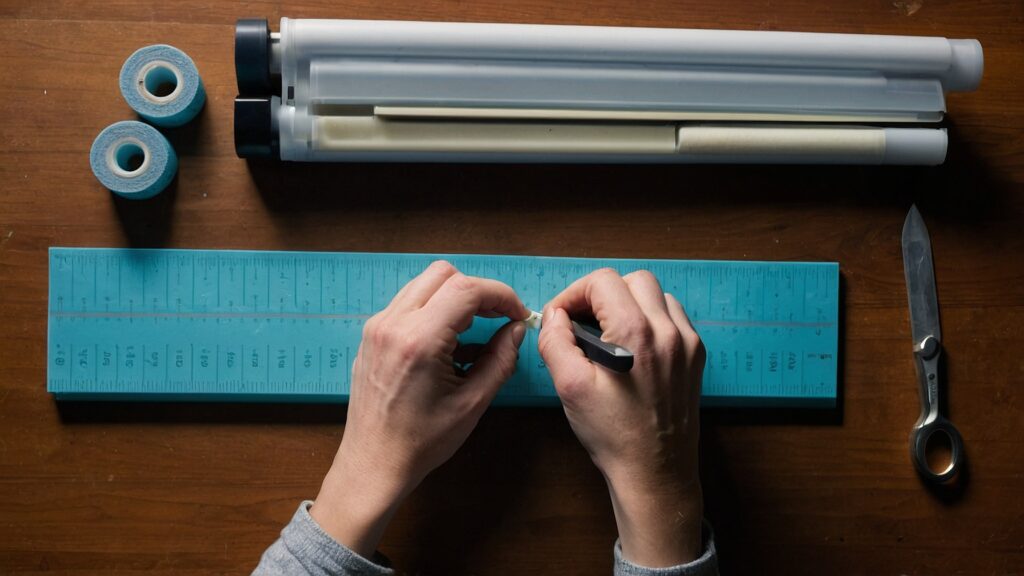
DIY Solutions to the Gap Filler Between Desk and Wall
Diving into DIY solutions for that largest gap between your desk and wall? How about a hack that uses materials you might use for your kitchen stove counter gap cover? For instance, spray foam or foam insulation, commonly employed in sealing gaps around a refrigerator or counter top, can be repurposed here. Imagine taking the concept of a stove gap filler or those stove gap guards designed to snugly fit between your stainless steel stove and counter, and applying it to your workspace. Just as these solutions provide a seamless look in the kitchen, applying caulking to fill the crack or using a 2 pack of kitchen silicone stove counter gap material can ensure your desk drawers and workspace are enough to cover the gap without the mess of wall putty. It’s a creative twist on gap management, blending kitchen ingenuity with home office functionality.
Foam and Felt Gap Fillers: The Soft Touch
Foam and felt are go-to materials for a quick and easy solution. Here’s the rundown:
- Cut to Size: First things first, measure that gap! Then, slice your foam or felt to match.
- Secure It: No one wants a flimsy filler. Lock it in place with double-sided tape or some strong glue.
- Blending In: Make it a part of the room. Paint it or wrap it in fabric that matches your décor.
Pro Tip: Use a utility knife for precise cuts. Believe me, it makes life easier!
Fact: Foam is an excellent insulator, so not only are you filling a gap, but you’re also keeping out drafts. Two birds, one stone!
Using Wood Strips: Strong and Stylish
Wood strips are your best friend if you’re looking for something a bit more solid.
- Measure: Got your tape measure? Make sure your wood strip will snugly fit the gap.
- Cut and Sand: Use a saw to cut the strip, then sand down any rough edges.
- Stain or Paint: Unleash your inner artist. Stain it naturally, or paint it to add some flair.
“Wood is universally beautiful to man. It is the most humanly intimate of all materials.” – Frank Lloyd Wright
Fabric-Based Solutions: Recycle and Reuse
Do some old shirts or curtains gather dust? Turn them into a practical piece of home décor!
- Cut and Sew: Think of it as making a mini bedspread for your gap. Cut the fabric to size and sew the edges to prevent fraying.
- Add Velcro: Slap some strips of Velcro on the ends for easy removal and cleaning.
Case Study: My buddy Steve had an old bandana lying around. He used it as a fabric-based gap filler. Now, whenever someone walks into his room, it becomes a conversation starter. “Hey, is that a bandana?”
| Material | Pros | Cons |
|---|---|---|
| Foam/Felt | Easy to install, inexpensive | Less durable |
| Wood | Durable, stylish | Requires tools |
| Fabric | Reusable, easy to clean | Less sturdy |
A DIY for Every Gap
Whether you choose foam, wood, or fabric, remember that you’re not just filling a gap but adding a functional piece of décor to your room. Safety, aesthetics, practicality—it’s all in the bag!
So there you go! That’s your crash course in DIY gap-filling. Have you got more questions or ideas? Stick around because we’re just scratching the surface of this topic!
Ready-to-Buy Products for Quick Fixes: The Instant Solution Route
Looking for a ready-to-buy solution that tackles those gaps without the hassle? Consider a stove gap cover or a counter gap filler, especially if you’re dealing with a long gap filler need between furniture or appliances. Many of these products, like a set of 2 silicone gap covers available online, offer easy clean, heat-resistant features, perfect for areas near stove tops or between a washer and dryer. They’re designed not just for kitchens but can seamlessly blend with siding or stainless steel gaps in other parts of your home. Plus, with a warranty provided by some third-party sellers, you can retain peace of mind knowing that these gap fillers for stove areas and beyond help seals spills and guard between stove and counter. Opting for these fill strips means relying on related professionals’ recommendations for a quick, effective solution to prevent spills between counter spaces.
Silicone Gap Covers: The Future is Flexible
These babies are a game-changer. Here’s why:
- Flexible and Durable: They bend to fit any gap. Just slide it in, and you’re good to go.
- Easy to Clean: No hassle. Wipe them down or throw them in the dishwasher.
Fact: Silicone is heat-resistant up to 600°F. So if you’re placing a hot laptop on your desk, you’re in the clear.
Slide-in Gap Fillers: Zero Tools Required
Looking for a one-stop solution? Meet the slide-in gap filler.
- One and Done: Seriously, you slide it in. No drills, no screws.
- Variety: Whether you like rustic wood or sleek metal, there’s a style for you.
Pro Tip: Make sure to measure your gap before buying a slide-in filler. You don’t want to end up with something too short or too long!
Case Study: My sister Sarah opted for a slide-in gap filler with a marble finish. Now, her workspace looks like something out of a luxury magazine.
Magnetic and Adhesive Options: Stick it and Forget it
Maybe you want the freedom to switch things up. If that’s you, consider these:
- No Mess: Magnetic or adhesive, these gap fillers stick on with zero fuss.
- Removable: Want to change the look? Just peel it off and start fresh.
“Simplicity is the ultimate sophistication.” – Leonardo da Vinci
| Type | Pros | Cons |
|---|---|---|
| Silicone Gap Covers | Easy to clean, flexible | Limited styles |
| Slide-in Fillers | It may require precise measuring | It may not hold up to heavy items |
| Magnetic/Adhesive | Easy to install and remove | May not hold up to heavy items |
Let’s get real: gaps between desks and walls are more than annoying—they’re an opportunity. An opportunity to improve your space, keep things clean, and maybe even add a dash of style. So whether you’re a DIY champ or a ready-to-buy enthusiast, there’s a gap filler for you.
That’s a wrap on store-bought gap fillers. But hang tight if you have more questions or want more details. We’ve got a lot more ground to cover!
Step-By-Step Tutorial on Filler Between Desk and Wall: A Roadmap to a Gap-Free Life
Alright, folks! It’s time to get our hands a little dirty. Whether you’re into the DIY scene or prefer the no-hassle commercial products, this section is your ultimate guide for gap filling between the desk and wall. I’ve tried everything from crafting in my garage to perfecting my office space.
Measuring the Gap: Size Matters, People!
First thing first: How big is that gap? No judgment here; we’ve all got issues, even if they’re just a few inches wide. What you’ll need:
- A Tape Measure: Accuracy is critical.
- A Friend: Because two eyes are better than one.
Pro Tip: Measure twice, cut once! This old carpentry saying isn’t just a cliche—it saves you time and materials. Trust me, it’s better to be over-prepared.
Tools You’ll Need: The Essentials
Depending on your chosen route, here’s your toolkit:
For DIY Fans
- Scissors: For cutting fabric or foam.
- Glue or Tape: To make sure your gap filler stays put.
- Paint: Optional, but a way to add flair.
For Commercial Products
- Your Hands: Most times, that’s all you need.
- Maybe a Screwdriver For the few requiring assembly.
Tools for Different Gap Filling Solutions
| Approach | Essential Tools | Optional Tools |
|---|---|---|
| DIY | Scissors, Glue or Tape | Paint |
| Commercial | Your Hands | Screwdriver |
Installation Process: The Home Stretch
Now that you have your tools and measurements, let’s dive into the action.
- Clean the Area: No one wants dust bunnies hiding under their fancy new gap filler. Wipe it down!
- Fit the Filler: This is the moment of truth. Slide or stick your chosen filler into the gap.
- Secure It: Some gap fillers come with extra fasteners or adhesives. If yours does, use them.
“Measure twice, cut once.” – A timeless saying that teaches us to double-check our work, saving both time and resources in the long run.
Case Study: Remember I mentioned I’ve tried all kinds of gap fillers? Well, so has my Aunt Lucy. She went for a sliding gap filler but forgot to clean the area first. Big mistake. It kept sliding out! Once she cleaned the surface, it stuck like a dream. What is the moral of the story? Don’t skip the cleaning step!
Victory Over The Abyss
You should have conquered the abyss between your desk and the wall by now. Whether you went DIY or store-bought, you’ve made your workspace safer, neater, and maybe even snazzier.
Feel ready to take on the gap-filling world? If you’ve got more questions or need additional tips, stay tuned; we’ve got more coming your way!
Aesthetic Considerations for Gap Filler: More Than Just a Space-Filler Between the Desk and Wall
Let’s be honest; nobody wants their workspace to look like it was thrown together at the last minute. Your gap filler can be both functional and stylish. Let’s dive into how you can add a dash of elegance while keeping those pesky gaps covered.
Matching Colors and Materials: The Art of Blending In
When you’re shopping or DIY-ing your gap filler, consider these:
- Room Color Scheme: Look around. Is your space more of a minimalist white or a rustic wood?
- Desk Material: Whether it’s wood, glass, or metal, your desk material sets the tone for the type of filler you should use.
Tip: Think of your gap filler as an extension of your desk. It should complement, not clash.
Material Compatibility
| Desk Material | Recommended Filler Material |
|---|---|
| Wood | Foam, Felt, Wood Strips |
| Glass | Silicone, Transparent Fillers |
| Metal | Magnetic, Adhesive Options |
Adding Design Elements: Make Your Gap Filler a Masterpiece
Let’s make your gap filler more than just functional. Add some personal touches!
- Stickers: Got a favorite band or show? Slap a sticker on!
- Paint: If you’re artsy, hand-paint a small design or pattern. I once painted mine to look like a miniature mural, and it was a total hit!
- Fancy Fabric: How about a luxurious velvet or a patterned cloth?
“Design is not just what it looks like and feels like. Design is how it works.” – Steve Jobs. Your gap filler should work well and look great!
Case Study: Meet Emily. A hardcore DIYer, she used a plain foam strip and transformed it into a work of art using only paint and a stencil. The best part? It matched her desk and room décor perfectly, attracting hundreds of likes on her social media.
Make Your Gap Filler a Star
It’s all about the details. A well-matched, creatively-designed gap filler can elevate your workspace from ‘Meh’ to ‘Wow.’ Remember, you’re not just filling a gap; you’re completing your room’s look.
Have you got more ideas or questions about turning your gap filler into a work of art? Feel free to share. We’re always here to inspire and help!

Seal the Deal on That Gap
Alright, you’ve journeyed through the landscape of gap-filling, and by now, you should be pretty well-versed. The possibilities are endless, whether crafting your solution or opting for a ready-made gap filler. It’s time to stop losing pens, thumb drives, or your patience to that sneaky space between your desk and wall.
The Benefits Are Clear
- Safety First: No more stepping on random, sharp objects.
- Aesthetically Pleasing: Turn an eyesore into a design element.
- Practicality: You won’t have to play treasure hunter in your room.
“Details make perfection, and perfection is not a detail.” – Leonardo da Vinci
Let Your Personality Shine
Case Study: My friend Sarah used her gap to showcase her love for comics. She filled it with foam and covered it with cut-outs from her favorite comic books. Now, her workspace is uniquely hers, and she’s not losing stuff anymore.
Tips and Takeaways
- Measure twice: The gap size determines the material you’ll need.
- Your chosen gap filler can serve multiple purposes—functionality and aesthetics don’t have to be mutually exclusive.
- Cleaning the gap area before installing your filler is a must. A clean surface ensures better adhesion.
- Screws Black Heavy Duty Z Table Top Connectors
- Table Clips/Table Top Brackets
- Set of 50 Packs (Include 50 Clips and 50 Screws) 50-Black
Conclusion
In the grand scheme of creating a functional and aesthetically pleasing workspace, the role of a gap filler between desk and wall cannot be overstated. This comprehensive guide has traversed the spectrum from the necessity of gap filling for safety and aesthetic reasons to the myriad of DIY solutions and ready-to-buy products available to address this common issue. The journey through selecting the appropriate materials, understanding the installation process, and considering the aesthetic impact illustrates a clear path towards achieving a gap-free life. Moreover, the emphasis on personalization and practicality reflects the dual benefit of gap fillers: not only do they solve a functional problem, but they also offer an opportunity to enhance the workspace’s visual appeal. This guide serves as a testament to the idea that attention to even the smallest details can significantly improve our living and working environments, making the choice of the right gap filler a crucial decision for anyone looking to elevate their workspace.
As we conclude, it’s evident that the gap filler between desk and wall is more than just a quick fix; it’s a step towards creating a more organized, safe, and personalized workspace. Whether you opt for a DIY approach or select a ready-made solution, the key is to choose a product that aligns with your safety requirements, complements your design aesthetic, and meets your practical needs. This guide not only equips you with the knowledge to make an informed decision but also encourages a mindset of proactive improvement and customization. By addressing this seemingly minor issue, you can achieve a significant positive impact on your daily life, proving that sometimes, the smallest changes are the ones that make the biggest difference. Let this be your inspiration to take that next step towards perfecting your workspace, ensuring it reflects both your needs and your style, all while keeping functionality at the forefront.
James Dunnington leads the James Dunnington Collection, featuring five unique blogs: a practical Pet Care Guide, an enlightening Ancient History Blog, a resourceful Home Improvement Guide, a cutting-edge Tech Innovation Guide, and a strategic Online Money Making platform. Each site delivers valuable insights designed to empower and inform. For updates and more tips, visit our Contact Us page to sign up for our newsletter, ensuring you never miss out on the latest content from any of these dynamic fields.