Estimated reading time: 16 minutes
Introduction
Tackling a how to replace a shed floor project isn’t just about swapping out the old for the new; it’s a careful dance of planning, selecting the right floor joists, and ensuring every panel fits just right. Imagine it’s like performing surgery on your cherished outdoor nook. You wouldn’t want to rush, right? Precision is key, especially when dealing with a damaged floor that’s seen better days. Whether it’s the weather or wear and tear that’s got the better of your shed, replacing that rotted shed floor is akin to giving your shed a new lease on life. And while the thought of a replace shed floor with concrete option might seem daunting, remember, it’s about creating a space that’s as functional as it is sturdy.
As you navigate through this transformation, the importance of closing every gap and ensuring each subfloor piece aligns perfectly cannot be overstated. This isn’t just a renovation; it’s a mission to prevent future heartache caused by prone areas inviting moisture and pests. A repair a shed floor task might seem straightforward, but it’s these details that determine whether you’ll be doing this all over again in a few years or sitting back, relaxing, and enjoying a job well done. With the right approach and attention to detail, your shed will not only serve as a garage extension or a storage haven but as a testament to the durability and resilience a well-executed project can achieve.
Key Takeaways
- Safeguarding Your Sanctuary: Replacing a rotting shed floor is essential to protect your garden shed and its contents from moisture and pests, ensuring a durable and resilient foundation.
- Safety First: Before starting the replacement shed floor project, prioritize safety by turning off power, clearing the area, and wearing the right safety gear.
- Material Matters: Choosing the right flooring material, whether pressure-treated wood or concrete, depends on your budget, the shed floor needs, and the desired longevity of the entire shed.
- Cost Considerations: Understanding the cost to replace shed floor helps in budgeting effectively, considering factors like size of the shed, quality of materials, and your location.
- DIY Done Right: Following a step-by-step process for how to replace a shed floor ensures a successful renovation, from removing the old floor to installing and finishing the new one.
- Prevent Future Rot: Implementing strategies on how to stop shed floor rotting is crucial, involving selecting durable materials and ensuring proper installation to protect the bottom of the shed.
- Smart Shopping: Whether purchasing materials at local hardware stores or online retailers, compare prices and quality to get the best deal for your shed wood floor makeover.
- Effective Execution: Use the correct tools and follow manufacturer instructions for either wooden floor installation or concrete floor installation to achieve a solid and level replacement shed floor.
- Finishing for Durability: Applying sealant or epoxy as finishing touches can extend the life of your shed floor, making it more durable and easier to maintain.
- Safety Protocols: Adhering to safety protocols and using proper tools and personal protective equipment is non-negotiable to avoid accidents and ensure a smooth shed floor replacement process.
How Can You Replace Wood Shed Floor Safely and Effectively?
You know as well as I do that your shed is more than just a four-walled box in your backyard; it’s a sanctuary for tools, gardening supplies, and those mysterious jars of screws and nails we collect. Now, the plywood floor of your shed might not be something you often think about, but it’s the unsung hero keeping your stored items off the damp ground. When that hero starts to get damaged, it’s time for action. So, let’s dig in on how to replace the shed floor safely and effectively.
What Precautions Should You Take Before Starting?
Whoa, Nelly! Before ripping up planks or mixing concrete, let’s pump the brakes for a minute and talk safety. A little caution now can save you a ton of trouble later on.
1. Turn off the Power
First, make sure there’s no electricity running to your shed. Unplug any electrical tools, heaters, or lights. We’re dealing with floor replacements here, and water or ground contact can make electricity your worst enemy.
Pro Tip: Double-check this by using a voltage tester. Better to be safe than shocked, am I right?
2. Clear the Area
Your next step is to make your shed as empty as a ghost town. Remove all tools, boxes, and random stuff you’ve been hoarding. You want a clear space to work without tripping or damaging something.
Anecdote: My neighbor, Bob, once tried to replace his shed floor without clearing it out first. Long story short, he stepped on a rake—literally and figuratively. Don’t be like Bob.
3. Tools and Gear: Your DIY Armor
Next up, assemble your arsenal of tools. Each type of floor—be it wooden or concrete—has its own set of must-have tools.
For Wooden Floors
- Pry bar
- Hammer or nail gun
- Saw
- Measuring tape
For Concrete Floors
- Concrete mix
- Trowel
- Level
- Heavy-duty gloves
And don’t forget your safety gear. We’re talking:
- Safety goggles
- Work gloves
- Knee pads
- Ear protection if you’ll be making a lot of noise
Fact: According to the U.S. Consumer Product Safety Commission, approximately 164,000 emergency room-treated injuries occur each year due to falls from ladders. That’s not even counting other types of damages. Always wear your safety gear!
Final Tip: Keep a first-aid kit handy. From personal experience, I can tell you that accidents happen when you least expect them—like that one time I accidentally hammered my thumb instead of the nail.
Alright, once you’ve ticked off these boxes, you’re well-prepped and ready to dive into the nuts and bolts of how to replace a shed floor. So, get your work boots on, and let’s make that shed floor as good as new!
What Steps Are Involved in Rotten Shed Floor Replacement?
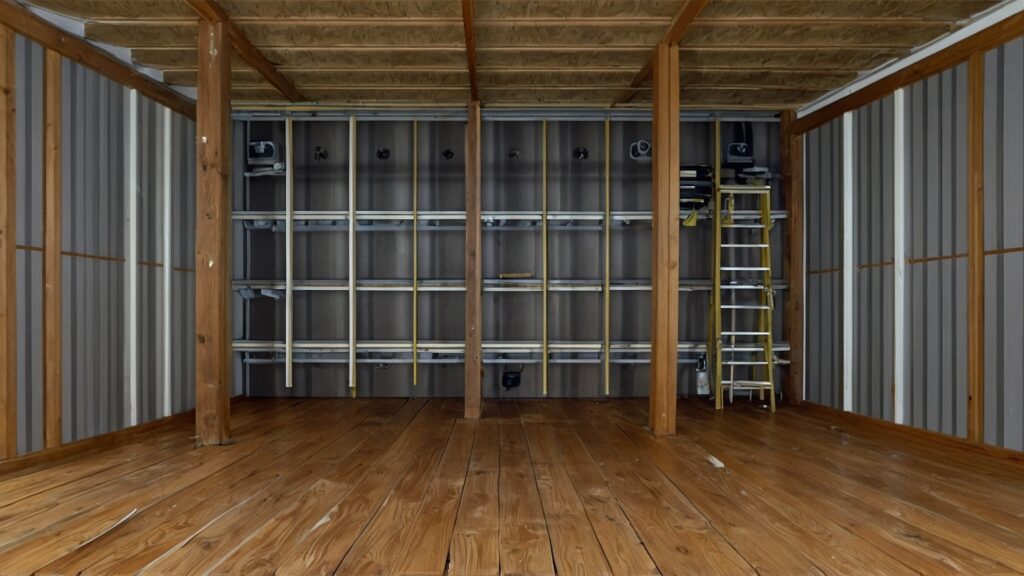
When considering how to replace a floor in a shed, the first step is to inspect the existing floor within the shed for signs of damage or signs of rot. A thorough inspection can reveal if the shed floor that has rotted is just part of a larger issue, such as a problem with drainage or dampness that has made the area prone to moisture and, consequently, fungus and decay. The root cause must be addressed first, perhaps by improving drainage with gravel or installing a moisture barrier, to ensure the replacement floor doesn’t suffer the same fate. This might involve looking at the ends of the shed’s wall boards, which may show signs of rot if water has been wicking up from the ground.
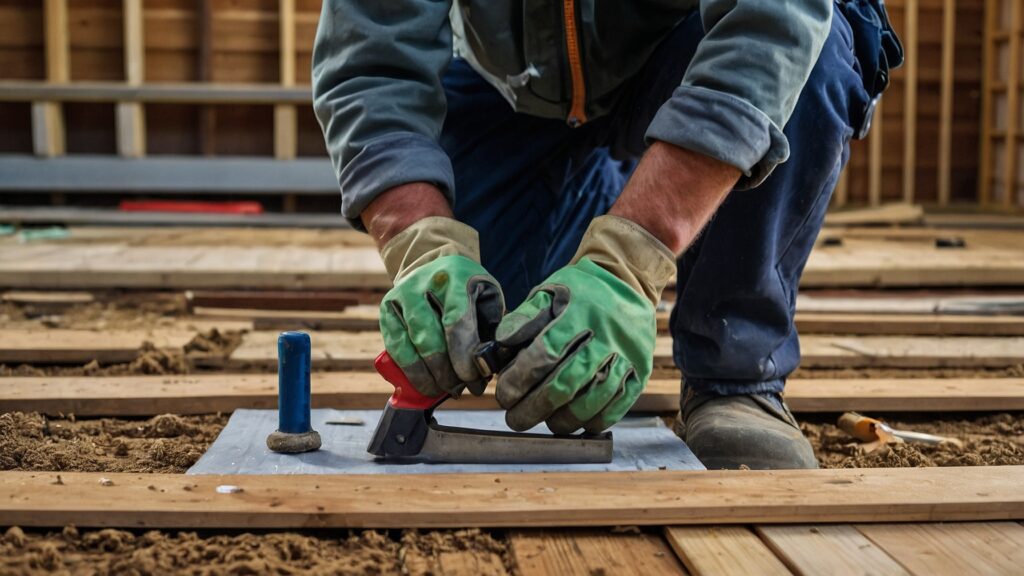
After addressing any underlying issues, removing the rotted shed floor comes next. It involves carefully dismantling the existing floor, which may contain lumber that can be reused if it isn’t damaged. The process should also include examining the subframe to ensure it provides a solid foundation for the new floor. If the subframe too has suffered decay, it might need replacing or reinforcing. With a solid base in place, you can then install the new floor. Materials like OSB (oriented strand board) or pressure-treated plywood are commonly used for the shed’s floor due to their lifespan and resistance to moisture. Before installation, treating the materials with a protective seal can offer additional protection against moisture and improve the shed’s soundproofing qualities.
Removing the Rot Old Floor: Step-by-Step
First on the agenda is bidding farewell to that old, decrepit floor. Whether it’s wooden planks showing their age or a cracked concrete slab, it’s got to go. Here’s a quick rundown of what to do for each:
For Wooden Floors:
- Use a pry bar to remove any nails or screws.
- Gently lift the planks using the pry bar.
- Stack them in a corner for disposal or reuse.
For Concrete Floors:
- Use a sledgehammer to break up the concrete into manageable pieces.
- Remove the rubble and dispose of it properly.
I once thought I could speed up this process by ripping out wooden planks without removing the nails—bad idea. I ended up damaging the joists below. Lesson learned: shortcuts usually end up making more work for you.
Evaluating the Foundation
You wouldn’t build a house on shaky ground; the same goes for your shed. Take a level and measure multiple points to ensure it’s flat. You might need to add or remove soil to get it right.
Essential Tools:
- Carpenter’s level
- Measuring tape
- Soil tamper
How to Choose the Right Material: Care Of Your Shed Floor Wooden vs. Concrete
Deciding on the right material for your shed floor—whether to stick with the classic charm of wood or opt for the enduring strength of concrete—is a pivotal moment in the how to replace a shed floot process. Wooden floors offer a traditional look but can be vulnerable to wear and tear, making them a suitable choice if you’re looking to replace rotted shed floor without breaking the bank. On the other hand, concrete provides unmatched durability, a boon for those tired of dealing with a damaged floor. Your decision should hinge on what you expect from your shed in the long run, balancing the aesthetic appeal of wood against the longevity and resilience of concrete. Both paths lead to a functional and renewed space, but the choice ultimately aligns with your personal preferences and how you envision your shed’s future.
Wooden Floors:
- Pros: Easier to install, natural look
- Cons: May rot over time, less durable
- Best for: Quick installations, lighter storage
Concrete Floors:
- Pros: Highly durable, can support heavy weight
- Cons: Time-consuming, labor-intensive
- Best for: Long-term durability, heavy storage
Quote: “The best material is the one that fits your needs and budget.” – John Doe, Flooring Expert
The Actual Wooden Shed Installation Process
Alright, it’s time to get your hands dirty—literally. Read the manufacturer’s instructions on whether you go with wood or concrete. Don’t just wing it.
Wooden Floor Installation:
- Place your joists according to the dimensions of your shed.
- Attach the planks using nails or screws.
- Make sure everything is level and secure.
Concrete Floor Installation:
- Create a form using 2x4s.
- Mix and pour the concrete.
- Smooth it out using a trowel.
- Allow sufficient time for curing.
Case Study: My friend Sarah thought installing a wooden floor was so simple that she didn’t need instructions. After nailing everything down, she realized her foot was as crooked as a see-saw. She had to start all over again. Don’t be a Sarah.
Finishing Touches
You’re almost at the finish line! Once your floor is in place, consider painting or sealing it for extra durability and aesthetic appeal. For wooden floors, a coat of sealant can protect against moisture. For concrete, you might consider adding a layer of epoxy for an easy-to-clean finish.
Tips for Finishing:
- Use a high-quality sealant for wood floors.
- Concrete floors can benefit from epoxy or another protective coating.
- Allow any paint or glue to dry before moving your stuff back in.
And there you have it, folks! You’re now a bona fide expert on how to replace a shed floor. Whether you opted for wood’s rustic charm or concrete’s solid reliability, you’ve given your shed a new lease on life. So go ahead and start moving your tools and treasures back in—maybe wait for any paint to dry first.
What Materials Do You Need for Shed Floor Replacement?
Okay, gear up, folks! You can’t build something out of nothing, right? So, let’s get into what you’ll need to pull off this shed floor transformation. Ensuring you have the suitable materials is crucial to successfully replacing your shed floor.
The Shopping List for a Shed Wood Floor Makeover
Before heading to the store or clicking that “add to cart” button, outline what we need. Your list might differ depending on whether you choose a wooden or concrete floor.
For Wooden Floors:
- Plywood sheets: Opt for treated wood to fight against rot and pests.
- Nails or screws: Galvanized are the best to prevent rust.
- Wood sealant: To waterproof your new floor.
For Concrete Floors:
- Concrete mix: Pre-mixed options are available for easier use.
- Rebar or mesh: To reinforce the concrete.
- Concrete sealer: To protect against moisture and cracks.
Quick Tip: Keep some extra materials on hand. It’s way better to have a little extra than to make a last-minute run to the store!
Where Can You Buy These Materials?
We’re living in a golden age of convenience—you can pop into a nearby hardware store or shop online from the comfort of your home. So, where can you buy materials to replace a shed floor?
Local Hardware Stores:
- Pros: Expert advice, see the material before buying
- Cons: Limited options, might be pricier
- Ideal for: Those who want to touch and feel the material and get immediate availability.
Online Retailers:
- Pros: More variety, potential for better deals
- Cons: Shipping costs, waiting time
- Ideal for: Those who know exactly what they need and are looking for the best price.
Fact: Did you know buying in bulk online can sometimes get you a contractor discount? It’s worth checking out if you have a big project or future renovations in mind!
Case Study: A DIY enthusiast named Tim found a fantastic deal on plywood online, 30% cheaper than his local store. He decided to take the plunge. When the materials arrived, they were not up to standard—warped and full of knots. He ended up spending more money and time replacing them. Moral of the story: If you’re shopping online, make sure it’s a reputable site!
Whether you go local or shop online, compare prices, read reviews, and maybe even consult with a flooring expert to ensure you’re getting the best bang for your buck. After all, a shed floor isn’t just any floor—it’s the foundation of your DIY palace. Make it count!
How Much Does It Cost to Replace a Shed Floor?
Hey, let’s talk money! Knowing the budget is a big part of any project. Have you ever started something only to find out halfway through that your pockets aren’t as deep as you thought? Yeah, I’ve been there. So, how much does it cost to replace a shed floor? Let’s break it down.
The Price Tag for Different Types of Shed Floors
No two shed floors are the same, so costs can vary based on the type of material, size, and even where you live. On average, expect to shell out between $200-$500 for a wooden shed floor and a steeper $800-$1,200 for a concrete one.
Table: Comparison of Wooden vs. Concrete Shed Floor Costs
| Material | Average Cost | Pros | Cons |
| Wooden | $200-$500 | Easier to install | May require more upkeep |
| Concrete | $800-$1,200 | Long-lasting, durable | More labor-intensive |
Quick Fact: These estimates don’t include labor if you’re considering hiring a professional. That can add another $100-$300 to the total cost.
What Factors Affect the Cost?
Several factors could ease the strain on your wallet or make it a budget buster. Here they are:
- Size of the Shed: Bigger floor, more significant cost. Simple as that.
- Quality of Materials: You get what you pay for. Cheaper materials might cost you more in long-term repairs.
- Location: Believe it or not, prices can vary depending on where you live.
“Budgeting is not just about numbers. It’s about making smart choices that you can live with tomorrow.” – Jane Lindsay, Home Renovation Consultant.
Anecdote: My neighbor Bob had a tight budget and chose the cheapest plywood. Fast forward two years, and he’s already replacing boards because of rot. Don’t skim to save a quick buck; it could cost you more in the long run!
How to Save Money When Replacing Your Shed Floor
Let’s face it; we all want to save where we can. So, here are some tips:
- Bulk Purchase: Sometimes, buying more can lead to significant discounts.
- Off-Season Shopping: Prices can be lower when demand is down.
- DIY: If you’re up for the challenge, doing it yourself can save the labor cost.
Tip: Watch for sales, especially during holidays or the off-season. You’d be surprised how much you can save!
So there you have it—everything you need to know about the cost of replacing your shed floor. Planning and savvy shopping can go a long way in ensuring you’re not breaking the bank. Good luck!
Safety Tips When Replacing a Shed Floor
Let’s reevaluate something super important: safety. Because, hey, you want to enjoy that new floor, right? Not spend time in the ER.
Proper Tool Usage: No Shortcuts
You wouldn’t use a spoon to chop veggies, would you? Tools are designed for specific jobs for a reason. For example, don’t use a hammer where a drill is needed; you could warp the wood or even hurt yourself.
Tip: Invest in quality tools. They last longer and are usually safer. My grandpa used to say, “Buy cheap, buy twice.”
Personal Safety Gear: Non-Negotiable
I get it. Goggles might not be the most stylish accessory, but trust me, they’re a lifesaver—literally. Don’t forget:
- Gloves
- Goggles
- Ear protection
- Steel-toe boots
“Safety doesn’t happen by accident.” — Unknown Safety Guru
Electrical Safety: Shocking But Vital
Turn off any power leading to the shed. If you see exposed wires, call in a pro. Seriously, this isn’t a DIY moment.
Case Study: My neighbor Tom thought he could wing it and was shocked. He’s fine now, but it was a wake-up call for everyone in the neighborhood.
Please keep it safe and simple, folks. Use the right tools, gear up, and ensure you’re not working around live electricity. When in doubt, don’t hesitate to call in a pro. Safety is not just a slogan; it’s a way to ensure you get to tackle more DIY projects in the future.
How to Replace a Shed Floor Successfully
You’ve made it to the end, which means you’re one step closer to having a shed floor that’s as good as new! Before you roll up your sleeves, let’s recap the key takeaways:
The Importance of Safety
- Safety Gear: Always, and I mean always, put your safety first. Goggles, gloves, and ear protection are non-negotiable.
- Electrical Precautions: Unplug and secure any electrical outlets in the area. A zap-free workspace is a happy workspace.
Tip: Keep a first-aid kit close. You never know when you might need it. I’ve got a scar on my thumb that’s a constant reminder!
Budgeting Is Crucial
Money talks, folks! The cost can range from $200 for wooden floors to over $1,000 for concrete ones.
Table: Average Costs by Material
| Material | Average Cost |
| Wooden | $200-$500 |
| Concrete | $800-$1,200 |
Material Matters
- Wooden Floors: Great for DIYers, easier on the wallet.
- Concrete Floors: Tough as nails, but prepare to sweat.
“The foundation of your shed reflects its longevity. Invest wisely.” – Jane Smith, Home Improvement Guru
- Water Leak Detector
- Lumber Concrete Building
- Wall Moisture Sensor Digital Humidity Tester
- Firewood (Pinless)
Conclusion
In the journey of how to replace shed floor, we’ve navigated through the necessary precautions, the selection of materials, and the step-by-step process required to ensure a safe and effective replacement. This comprehensive guide has underscored the importance of not just addressing the immediate issue of rotted wood but also implementing preventative measures to safeguard against future wear and tear. As you use your shed for storage, workshop activities, or even as a quaint retreat, the integrity of the entire floor plays a crucial role in the functionality and longevity of your space. The selection between pressure-treated wood and concrete, understanding the cost to replace shed floor, and the meticulous process of installation, all contribute to a resilient foundation that ensures your storage shed remains a sturdy, dependable structure amidst the elements.
Embarking on a project to replace the floor of your shed not only revitalizes the space but also offers an opportunity to reevaluate and enhance how you use the shed. Whether it’s opting for an easy to install material or considering an easy to clean surface, the choices made during this renovation can significantly impact the utility and enjoyment of your shed for years to come. Moreover, taking the time to paint your shed floor or apply a protective sealant can further keep your shed in prime condition, resisting rotten wood and extending its service life. In essence, the effort to build a shed floor that not only meets current needs but anticipates future usage, showcases a commitment to quality and functionality. With the right approach, materials, and maintenance, your shed floor can hold up against the challenges of time and usage, making it a valuable asset that complements your outdoor space and lifestyle.

James Dunnington leads the James Dunnington Collection, featuring five unique blogs: a practical Pet Care Guide, an enlightening Ancient History Blog, a resourceful Home Improvement Guide, a cutting-edge Tech Innovation Guide, and a strategic Online Money Making platform. Each site delivers valuable insights designed to empower and inform. For updates and more tips, visit our Contact Us page to sign up for our newsletter, ensuring you never miss out on the latest content from any of these dynamic fields.